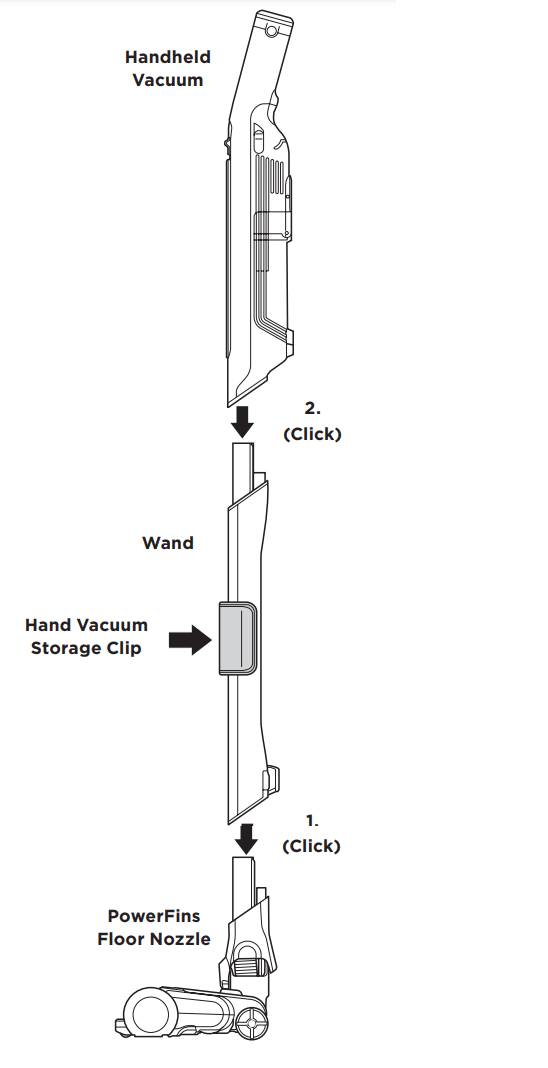
Slide the Wand onto the neck of the PowerFins Floor Nozzle until it clicks into place.
Align the Hand Vacuum nozzle opening with the top of the wand and slide it on until it clicks into place.
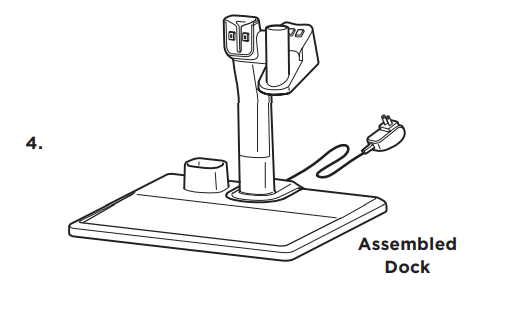
Make sure the Dock Plate is facing upright. Slide the Charging Post into the slot on back of dock until it clicks.
Place the dock on the floor near a wall outlet. Plug the Wall Charger into the outlet, then connect the cord to the port on the back of the charging post.
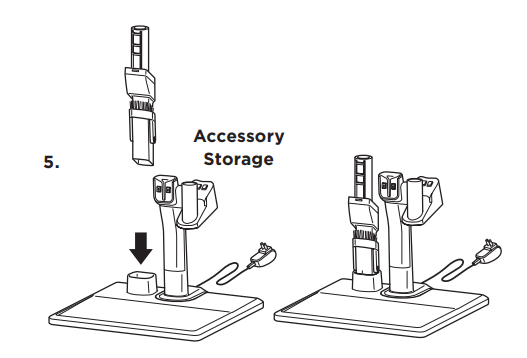
Store cleaning accessories on the mount on the dock plate.
For proper operation, ensure all components are completely connected and clicked into place.
LI-ION BATTERY
Prior to first use, charge the battery completely. A full charge takes approximately 3.5 hours.
RUNTIMES PER FULLY-CHARGED BATTERY Visit sharkclean/support online.
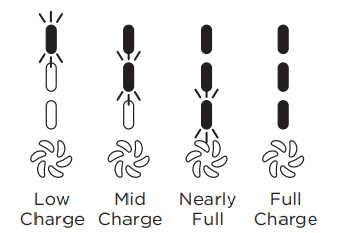
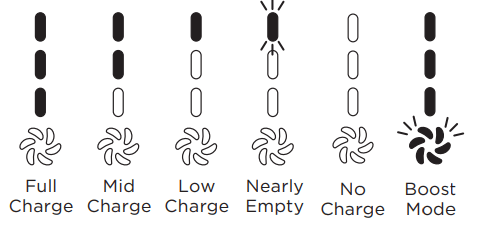
LED BATTERY POWER AND CHARGING INDICATORS
Charging
NOTE: Full charge takes approximately 3.5 hours per battery. LEDs will shut off 5 minutes after achieving full charge.
In Use
RECYCLING THE LI-ION BATTERY
When your Shark Li-Ion battery needs to be replaced, dispose of it or recycle it in accordance with local ordinances or regulations. In some areas, it is illegal to place spent lithium-ion batteries in the trash or in a municipal solid waste stream. Return spent batteries to an authorized recycling center or to the retailer for recycling. Contact your local recycling center for information on where to drop off the spent battery.
NOTE: The Shark battery, like all lithium-ion batteries, will naturally decrease in capacity over time from the 100% capacity of NOTE: Once the charging post is installed, it can’t be removed. a new battery
CHARGING
CHARGING WHILE IN STORAGE MODE
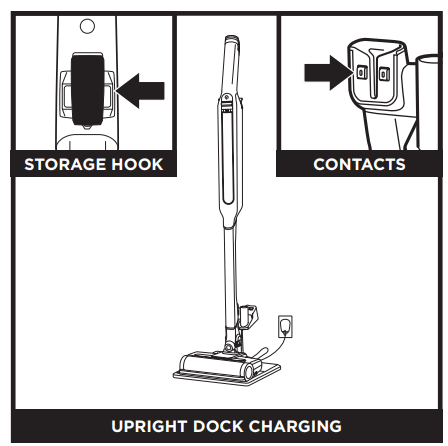
UPRIGHT DOCK CHARGING
Charge the unit in upright mode by placing it on the dock plate, with the hook on the back of the wand over the charging post. Make sure the contacts on the wand are aligned with the contacts on the charging post.
When charging is complete and you need to use the unit again, lift it off the dock plate.
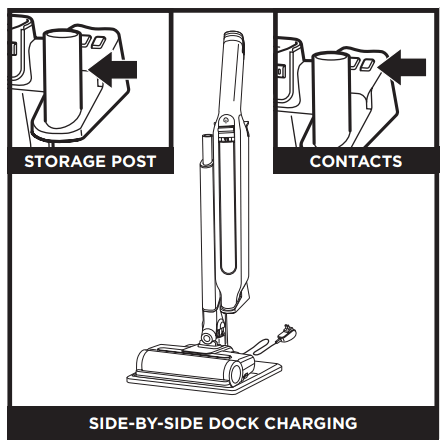
SIDE-BY-SIDE DOCK CHARGING
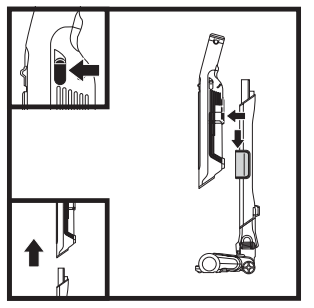
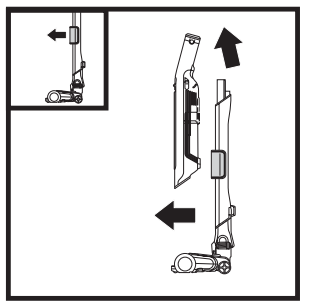
You can charge the hand vacuum while it is stored beside the wand. First, detach the hand vacuum, then slide the nozzle opening over the storage post. Make sure the contacts on the hand vacuum are aligned with the contacts on the storage arm. When charging is complete and you need to use the unit again, reattach the hand vacuum and use it to lift the wand and nozzle off the dock plate.
NOTE: When docked properly, the charging lights on the hand vacuum will blink, indicating that charging has begun. When charging is complete, all three indicator lights will remain on for 5 minutes, then shut off.
NOTE: The main unit comes with a partial charge.
For maximum runtime, charge fully before first use (approximately 3.5 hours). Leaving the unit plugged in will not damage battery life.
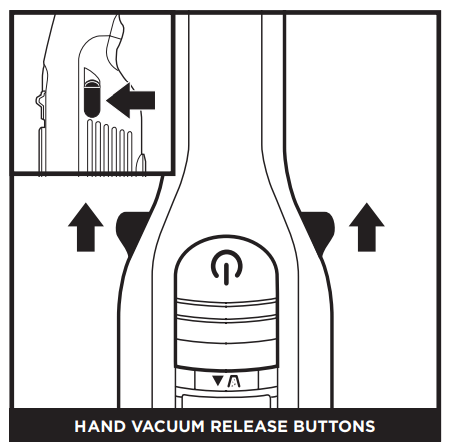
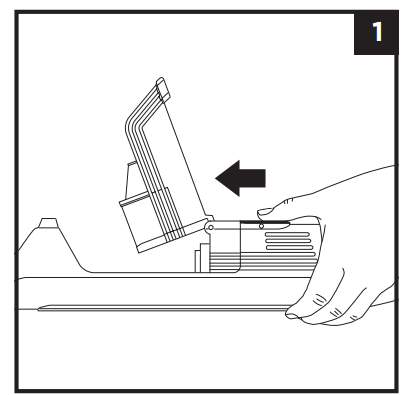
HAND VACUUM RELEASE BUTTONS
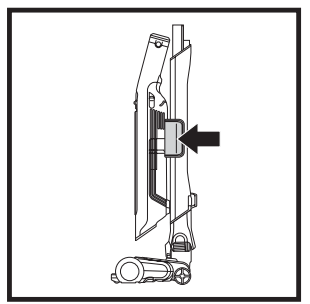
To detach the hand vacuum from the wand, pull the release buttons on both sides of thehandle, then lift the hand vacuum.
To reattach the hand vacuum to the wand, align the nozzle opening over the top of the wand and slide it on until it clicks into place.
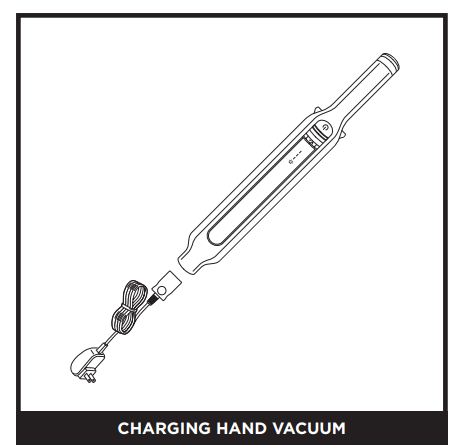
CHARGING THE HAND VACUUM
CHARGING HAND VACUUM
To charge the hand vacuum without the dock, unplug the charger cord from the dock and connect it directly to the port on the hand vacuum, near the nozzle opening. To detach the hand vacuum, press the release buttons on both sides of the handle and lift it off the wand. (See previous page.)
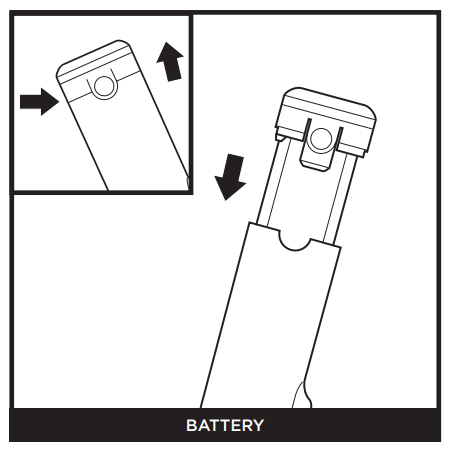
REMOVING THE BATTERY
To remove the battery from the hand vacuum, press the release tabs on the battery cap and slide out the battery. To reinstall, slide the battery into the compartment in the handle until it clicks into place.
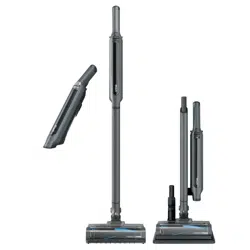
STORAGE ON THE GO
For quick and easy short-term storage, attach the hand vacuum to the wand by placing it onto the pre-assembled wand storage clip.
First, lock the nozzle and wand in the upright position, and detach the hand vacuum (see previous page). Hang the hand vacuum from the wand storage clip, with the filter removal latch sitting inside the clip.
To remove, slide the hand vacuum up and out. To remove the storage clip, pull it off the wand.
USING YOUR VACUUM
CONTROLS
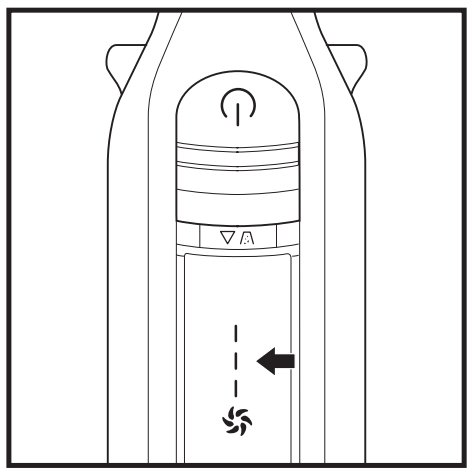
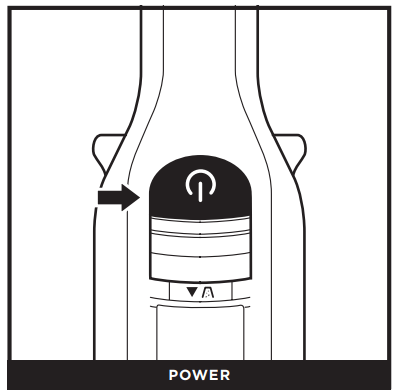
POWER
Press the On/Off button on the handle to turn on power. To turn off power, press the button again.
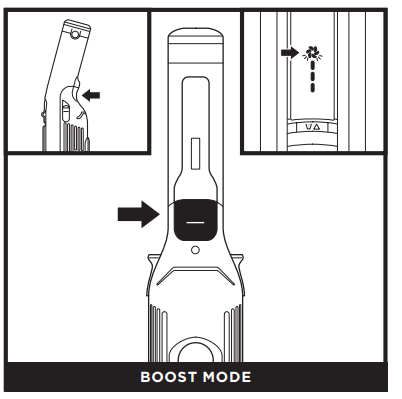
BOOST MODE
For an added boost of power, push and hold the Boost button on the underside of the handle. The Boost icon will blink white in this mode. Release the button to return to standard power.
CLEANING MODES
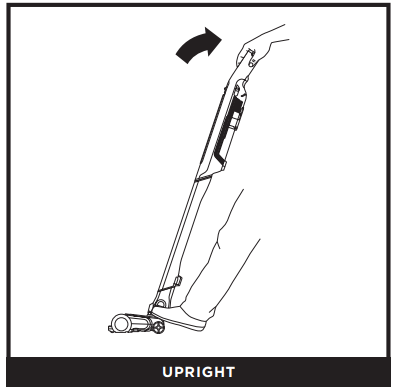
UPRIGHT
Use the PowerFins floor nozzle for powerful cleaning on both bare floors and carpets. The brushroll is activated when the hand vacuum is connected and powered on, and the handle is tilted back
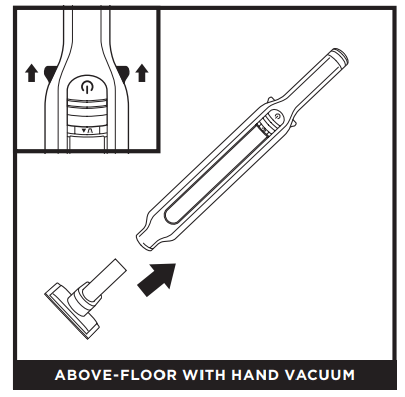
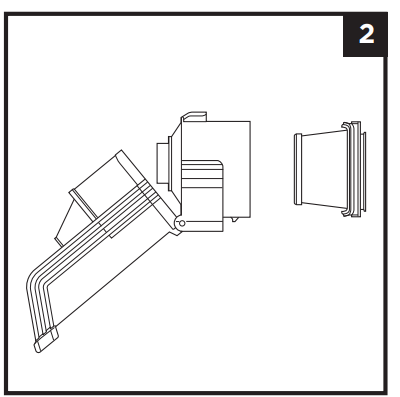
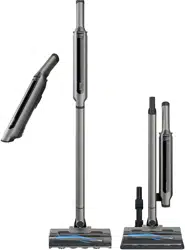
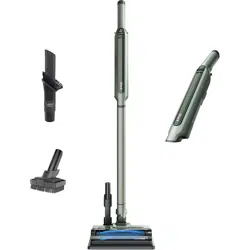
ABOVE-FLOOR WITH HAND VACUUM
Detach the hand vacuum to clean above-floor areas. Pull the release buttons on both sides of the handle, and lift the hand vacuum off the wand. To attach an accessory to the hand vacuum, slide it into the opening in the nozzle. To remove, press the release buttons on both sides of the handle and slide out the accessory.
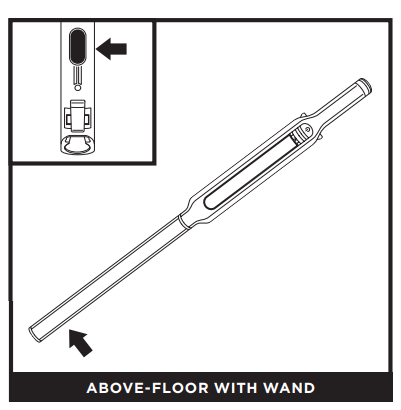
ABOVE-FLOOR WITH WAND
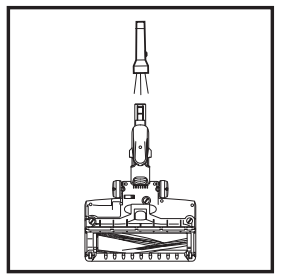
To detach the floor nozzle from the wand, step on the nozzle while pressing the nozzle release button at the bottom of the wand. Lift the wand to remove it. To reattach the wand, align it over the neck of the floor nozzle, then slide it on until it clicks into place.
NOTE: All accessories are compatible with both the wand and the hand vacuum.
MAINTAINING YOUR VACUUM
EMPTYING THE DUST CUP
1. With the power off, slide the release button forward, and the dust cup will swing open. Tap the filter screen lightly to knock off dust and debris.
2. Wipe the screen inside the dust cup lightly with a dry cloth to remove dust and dirt.
CLEANING THE DUST CUP AND FILTER
1.With the dust cup open and the power off, press the filter release latch below the handle and pull out the filter housing.
2.Press the tabs on both sides of the filter housing and pull out the filter. To clean the filter, handwash only with water and let air-dry for 24 hours before reinstalling. To reinstall, slide it back into the filter housing and press into place.
3.To deep clean the dust cup, open the dust cup 90 degrees (you will hear a “click”) and lift the Cyclone Filter out using the wire handle on the frame. Rinse the dust cup with water, and wipe clean with a damp cloth. Allow to air dry completely (approximately 24 hours).
4.When the dust cup is completely dry, slide the cyclone filter back into place. Tuck the wire handle away, then reinstall the dust cup.
NOZZLE MAINTENANCE
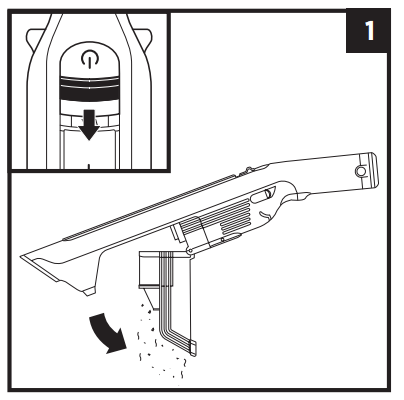
1. Turn off the vacuum.
2. Press the nozzle release button to detach the nozzle from the wand.
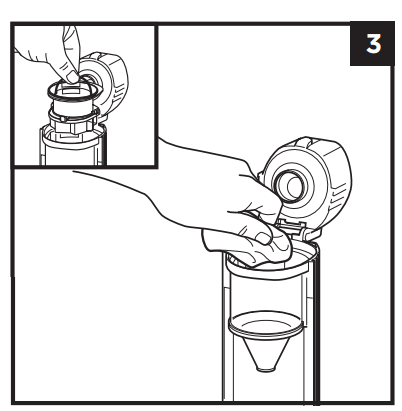
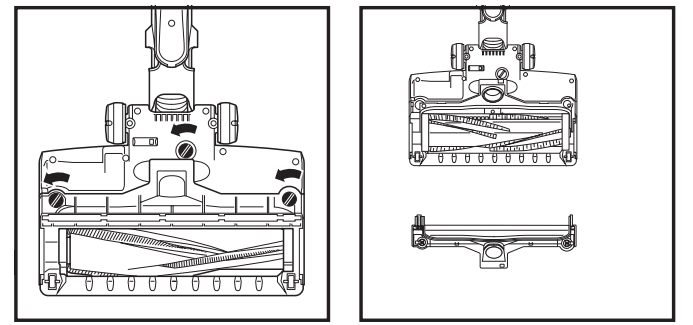
3. Using a coin, turn the 3 locks counterclockwise to open, then lift off the cover and tilt back the neck of the nozzle,
4. Clear any blockages and remove any debris from the brushroi! and floor nozzle.
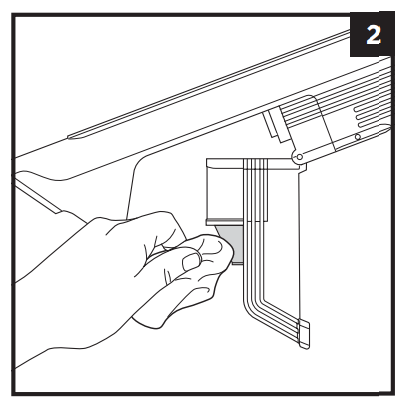
5. With the cover removed, wipe the brushroll clean with a dry towel.
6. Replace the cover by sliding the tabs into the slots, Press down firmly on ail sides. Turn locks clockwise to close, until they click into place.
CHECKING FOR BLOCKAGES
If you run over a hard or sharp object or notice a noise change while vacuuming, check for blockages or objects caught in the brushroll.
Checking for Blockages in the Hand vacuum:
Turn off vacuum.
Remove the handheld vacuum from the wand.
Check all intake openings to the dust cup and remove any debris or blockage.
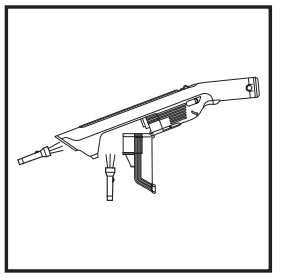
Checking for Blockages in the Wand:
Turn off vacuum
Detach the hand vacuum and floor nozzle from the wand
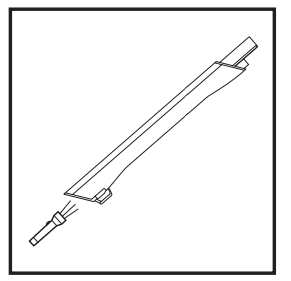
Check both ends of the wand for blockages and debris.
Clear away debris and blockages
Checking for Blockages in the Floor Nozzle:
Turn off vacuum
Detach the wand
Using a coin, turn the 3 locks on the bottom of the nozzle counterclockwise to open
Lift off the nozzle cover and tilt back the neck of the nozzle
Check the opening and remove any debris or blockages
Replace the cover by sliding the tabs into the slots. Press down firmly on all sides. Turn the locks clockwise to close.
TROUBLESHOOTING
WARNING: To reduce the risk of shock and unintended operation, turn off power and remove the battery before servicing.
Vacuum is not picking up debris. No suction or light suction. Third indicator light on hand vacuum is solid yellow
(Refer to Checking for Blockages section for more information.)
Dust cup may be full; empty dust cup.
Check floor nozzle for blockages; clear blockages if required.
Remove any string, carpet fibers, or hair that may be wrapped around the brushroii.
Check connection between hand vacuum and wand for blockages; clear blockages if required.
Check filters to see if they need cleaning. Follow instructions for rinsing and completely air-drying the filters before reinstalling them,
Vacuum lifts area rugs.
Make sure you are not engaging Boost mode. Take care when vacuuming area rugs or rugs with delicately sewn edges,
Turn off the unit to disengage from the carpet, then restart,
My vacuum has a PowerFins nozzle but the brushroii doesn’t spin.
Immediately turn off the vacuum, Remove any blockages before turning the vacuum back on. Make sure the hand vacuum is tilted back far enough for the brushroii to engage while in use,
If the floor nozzle has headlights and they are not illuminated, there is a connection issue between the hand vacuum, wand, and nozzle. Try detaching the parts, then reconnecting them.
Vacuum turns off on its own.
There are several possible reasons for the vacuum turning off on its own, including blockages, battery issues, and overheating. If vacuum turns off on its own, perform the following steps:
Turn on the vacuum and check the battery indicator lights on the hand vacuum. If recharging is needed, make sure vacuum power is off before plugging in the charger.
Empty dust cup and clean filters (See the Cleaning the Dust Cup and Filter section).
Check wand, accessories, and inlet openings and remove any blockages,
Allow unit and battery to cool for at least 45 minutes, until they return to room temperature,
Press the On/Off switch to restart the vacuum.
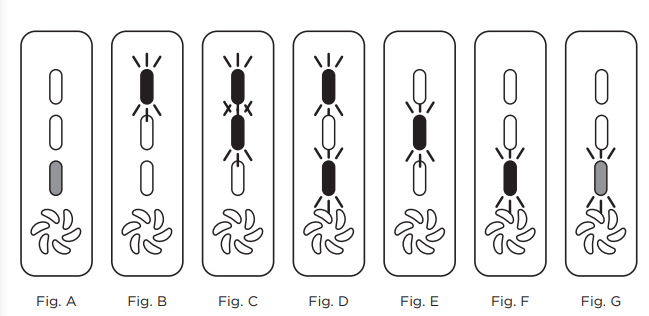
Battery Indicator Lights on hand vacuum are flashing.
Bottom LED is solid yellow (Fig. A): Nozzle clog. (See the Maintaining Your Vacuum section,)
Top LED is flashing (Fig. B): Battery needs to be charged,
Contact Customer Service at 1-800-798-7398 or sharkclean if you experience any of the indications listed below:
Top two LEDs are flashing (Fig. C): Overcurrent or short.
Top and bottom LEDs are flashing (Fig. D): Motor is overheating.
Middle LED is flashing (Fig. E): Overspeed.
Bottom LED is flashing (Fig. F): Communication.
Bottom LED blinking yellow (Fig. G): There may be an electrical problem with the nozzle.
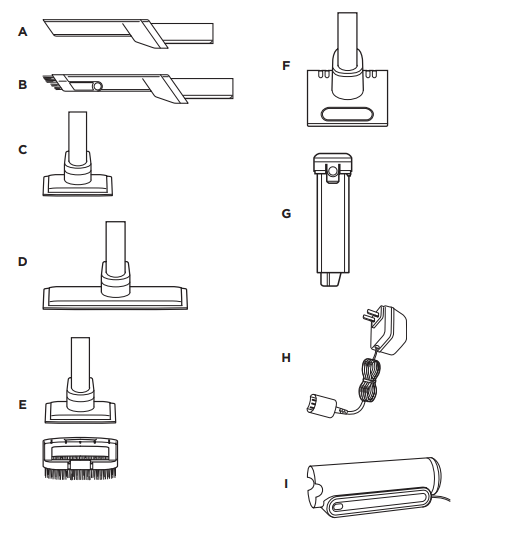
ADDITIONAL ACCESSORIES AVAILABLE ON SHARKACCESSORIES