Loading ...
Loading ...
Loading ...
13
Downdraft Use
Use the high suction speed in cases of concentrated kitchen vapours.
It is recommended that the cooker hood suction is switched on for 5
minutes prior to cooking and to leave in operation during cooking and
for another 15 minutes approximately after terminating cooking.
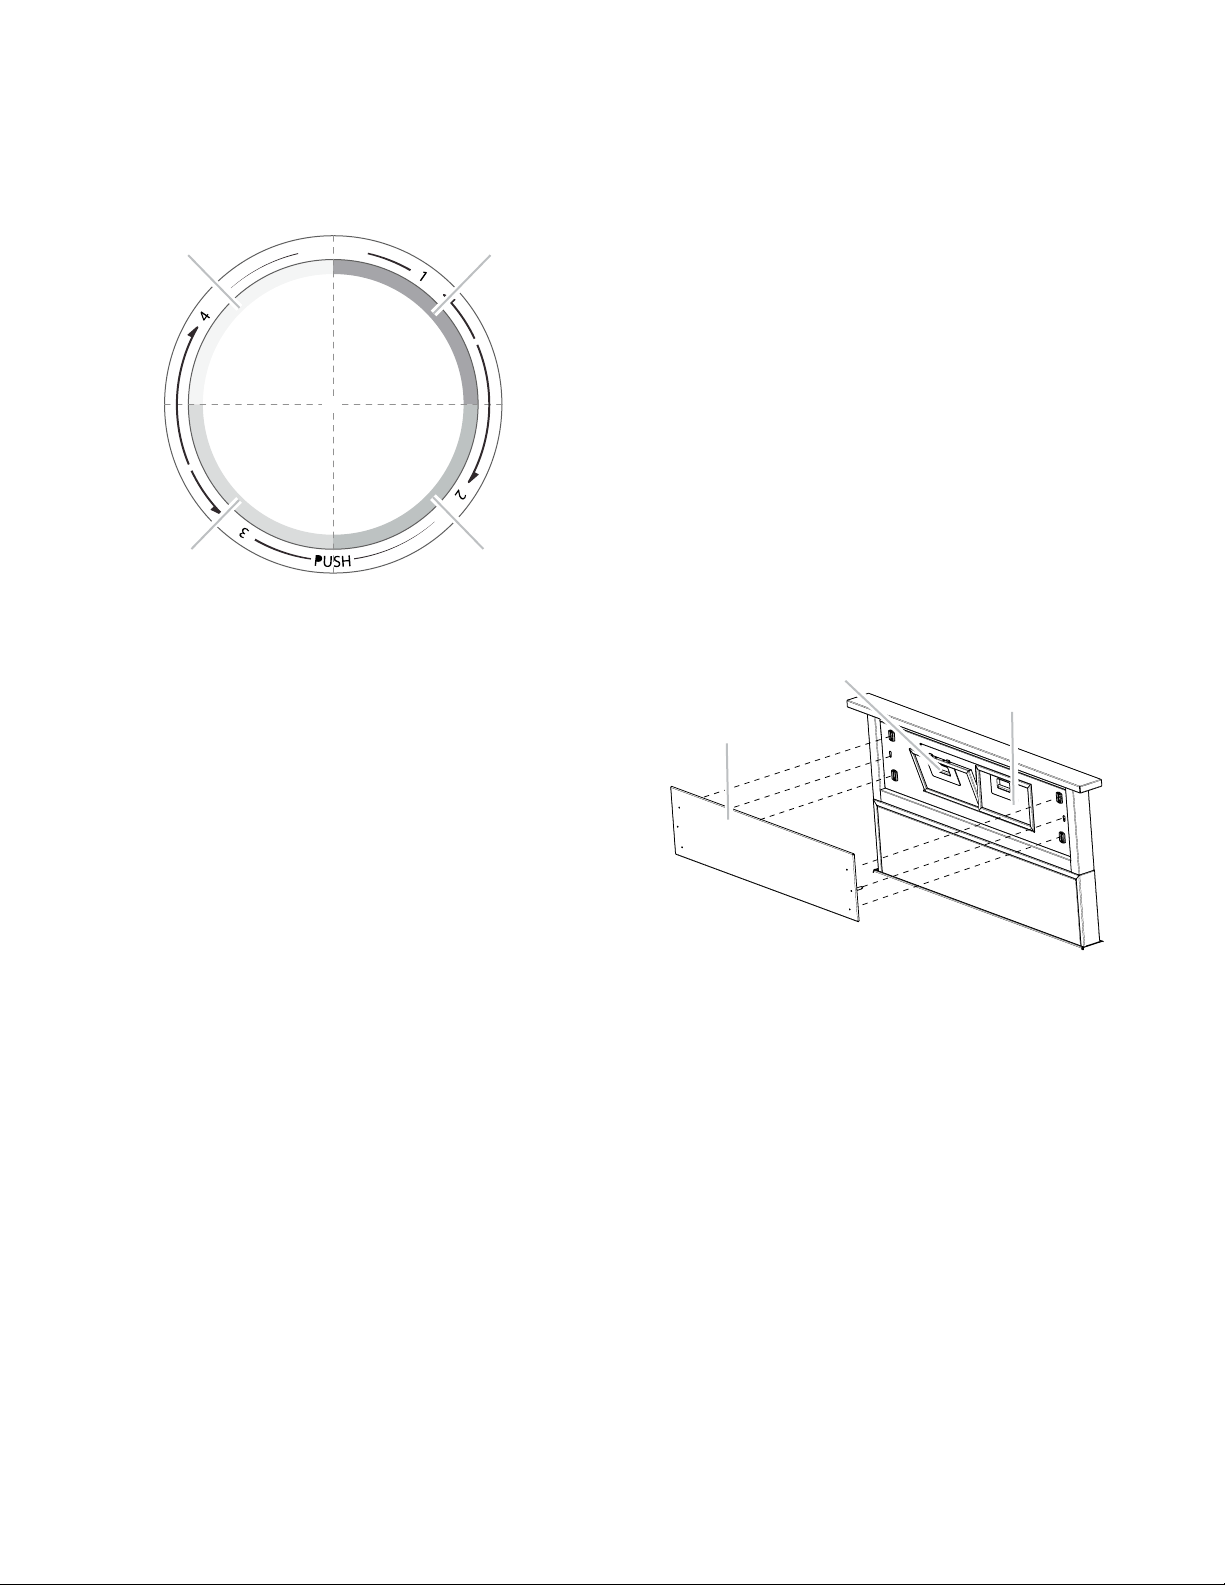
The control panel consists of a backlit rotating disk.
A
B
C
D
E
To raise the downdraft vent system:
Press on the disk (E) aprox 2 seconds to raise the downdraft vent
system.
Press on the disk (E) aprox 2 seconds to hide the downdraft vent
system.
NOTE: If you press the disk to hide the downdraft system while it is
working, the appliance will automatically turn off.
To select the available suction speeds:
Turn the disk (E) clockwise to turn on and increase the suction speed
and counter-clockwise to decrease it, and to turn off the hood.
The crown lights to indicate the selected suction speed:
A lit
speed 1 (minimum).
A + B lit
speed 2 (medium).
A + B + C lit
Speed 3 (maximum).
A + B + C + D lit
Speed 4 (intensive), lasting for 5 minutes, then the hood is placed
automatically at speed 2.
A off:
Suction motor off.
A + B + C + D lit in ashing mode
The light crown will ash after 40 hrs. of work. This indicates that the
grease lters must be removed and cleaned.
This function must be reset by pressing the button for 5 seconds.
Vent System Care
Surface of Downdraft Vent
To avoid damaging the nish, clean downdraft vent with soap
and water. Do not use scouring powder or abrasive solutions.
Exterior Surfaces:
To avoid damage to the exterior surface, do not use steel wool or
soap-lled scouring pads.
Always wipe dry to avoid water marks.
Cleaning Method:
• Liquid detergent soap and water, or all-purpose cleanser
Wipe with damp soft cloth or nonabrasive sponge, then rinse with
clean water and wipe dry.
To Clean:
1. Remove the aspiration plate and the lter(s) and clean them in a
dishwasher or in a hot detergent solution. The downdraft vent will
not operate when the lters are not in place.
2. Dry the clean lter(s) and reinstall, making sure that they lock into
place.
To Replace Filters:
1. Place lters into the retractable section of the downdraft vent.
2. Place ngertips into the embossment at the top of the lters and
push down and back to allow the top tabs to snap in place.
A
B
C
A. Aspiration plate
B. Grease lter handle
B. Grease lters
NOTE: Downdraft vent will not operate if the aspiration plate are not
in its proper position. If the aspiration plates’ top tabs are not locked
behind the top ange, the vent may retract but not raise back up. If
retractable downdraft vent does not operate after clean aspiration
plate have been installed:
Push the aspiration plate in as far as it will go. When the plate is
removed, the microswitch behind the lter is inactivated. This feature
will not allow the vent system to operate until the aspiration plate is
properly installed.
Loading ...
Loading ...
Loading ...