OWNER’S GUIDE for Robot Vacuum
GETTING TO KNOW YOUR SHARK IQ ROBOT®


BASE SETUP

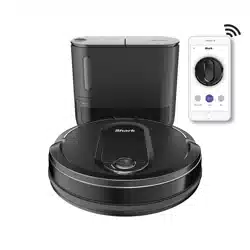
The Self-Empty Base charges your robot and holds dirt and debris from up to 15 days' worth of cleaning. Select a permanent location for the base, because every time you relocate it, your robot will be required to completely re-map your house.
Choose a level surface in a central area. Remove any objects that are closer than 3 feet from either side of the base, or closer than 5 feet from the from the front. Place the base with its back against the wall in an area with a good Wi-Fi signal. Set up the base on bare floor, or on the SharkMat. Plug in the Charging Cord, and turn on the power switch on the back of the base. The base must be plugged in continuously for the robot to find it. The Indicator Light will illuminate green when the base has power.
NOTE: For best results, set up on bare floor or thin carpet with the SharkMat.
NOTE: Do not place base against heating elements or baseboards, or in direct sunlight.
NOTE: The robot will make a loud noise when it empties its debris into the base. This is normal and not a cause for concern.
INSTALLING THE SIDE BRUSHES

Snap the 2 included Side Brushes located in the red packaging, onto the square pegs on the bottom of the robot.
CHARGING
IMPORTANT: The Shark iQ Robot™ has a pre-installed rechargeable battery. Battery should be fully charged before using. It may take up to 6 hours to fully charge.

To charge, the Power button on the side of the robot must be switched ON (I) (by pressing "I"). The robot will beep when charging begins.

When the cleaning cycle is complete, or if the battery is running low, the robot will search for the base. If your robot doesn’t return to the base, its charge may have run out.

If the robot has no charge and cannot return to the base, manually place it on the base. The base indicator light will flash blue and the robot will beep when charging begins.
NOTE: When manually placing the robot on the base, make sure the Charging Contacts on the bottom of the robot are touching the ones on the base and the robot's dust bin is touching the debris intake on the base. While the robot is charging, both blue LED lights will flash. When charging is complete, both blue lights will illuminate steadily.
NOTE: When picking up the robot be careful not to place fingers between the bumper and the base of the robot.
CHARGE INDICATOR LIGHTS

In Use. 
While Charging (Blue)
No Charge or Off. 
The blue indicator lights on the robot show how much charge is remaining.
While the robot is charging, both blue LED lights will flash. When charging is complete, both blue lights will illuminate steadily. It may take up to 6 hours to fully charge your robot.
NOTE: If the low charge light is blinking red, there is not enough charge for the robot to return to the base. Manually place the robot on the base.

CHARGE INDICATOR LIGHTS

Display the amount of charge remaining in the battery.
“!” ERROR INDICATOR

See Troubleshooting section for full list of error codes.
WI-FI INDICATOR

Blue light: connected to Wi-Fi.
Red light: not connected.
Flashing blue: setup mode.
No light: not set up yet.
NAVIGATION MODULE

Please keep clear and do not cover.
Upward-facing sensor aids advanced navigation.
DOCK BUTTON

Press to stop cleaning and send robot back to the charging base.
EVACUATE & RESUME
Press and hold the DOCK button for 15 seconds to turn Evacuate & Resume ON or OFF.
Turn ON Evacuate & Resume for homes with pets. Your robot will return to the base to empty the dust bin after 30 minutes, then resume cleaning where it left off.
CLEAN BUTTON

Press to begin a cleaning session. Press again to stop.
RECHARGE & RESUME
Press and hold the CLEAN button for 15 seconds to turn Recharge & Resume ON or OFF.
The Recharge & Resume function is turned OFF by default. Turn ON Recharge & Resume for complete coverage if your home's floor plan is bigger than 1800 sq. ft. Your robot will return to the base, recharge, and can pick up cleaning where it left off.
NOTE: If your floor plan is smaller than 1000 sq. ft., we recommend that you DO NOT use the Evacuate & Resume function.
PREP YOUR HOME
Your robot uses an array of sensors to navigate around walls, furniture legs, and other obstacles while it cleans. To prevent the robot from bumping into objects or navigating to areas you don't want it to, use the included BotBoundary® strips. For best results, prepare your home as indicated below, and schedule a daily cleaning to ensure all floor areas are regularly maintained.
NOTE: Scheduling is one of many features that are only available in the app.
|

OBSTRUCTIONS
Clear cords and small objects from floors and open interior doors to ensure a complete map of your home.
|

SCHEDULING
For a constant state of clean, set up a whole-home cleaning schedule in the app.
|
|

THRESHOLDS
Your robot may have trouble clearing thresholds higher than an inch. Block off high thresholds with the included BotBoundary strips.
|

AVOID MOVING THE ROBOT OR BASE
While your robot is cleaning, do not pick it up and move it, or move the charging basethis will impact the robot’s ability to map your home.
|
|

STAIRS
Your robot's cliff sensors will prevent it from falling off ledges. For the cliff sensors to work properly, all runners, rugs, or carpets must be at least 8 inches from any stairs (or extend over the edge of the stairs.)
|

CHECK BASE FILL LEVEL
During the first few weeks, your robot will empty more debris than usual. Check the fill level regularly. The dust bin is designed to hold up to 15 days’ worth of debris, but home environments vary, and the bin may fill up quicker in some homes.
|
BOTBOUNDARY STRIPS
USAGE INSTRUCTIONS
1. You can cut BotBoundary strips to shorten them as needed. (18-inch minimum) If cutting a strip, make sure it’s still long enough to cover the entire area you need to block off. Gaps may cause BotBoundary strips to malfunction.
2. Make sure each BotBoundary strip lies completely flat against the floor, with no overlapping. NOTE: DO NOT place BotBoundary strips on top of one another.
3. For best results, place the strips between fixed objects like furniture legs or door frames, or make a closed loop around an obstacle.

PREPPING YOUR HOME USING BOTBOUNDARY STRIPS
Use the BotBoundary strips to quickly and easily create no-go zones to keep your robot out of the areas you would like it to avoid. These may include:
• Near power cords
• In front of thresholds higher than an inch

MAPPING AND NAVIGATION

As it cleans, your robot will create a map of your home. It may take several cleanings for the robot to finish its mapping. Once mapping is complete, an Interactive Map of your floor plan will be available on the app.

The interactive map in the app allows you to name rooms, then select which rooms to clean, and send the robot to immediately clean specific locations.
As cleanings continue, the robot will update and refine its path to provide optimized cleaning coverage. After each use, a cleaning report will be available in the app.
MANUAL CLEANING MODE
To manually start a cleaning cycle, press the Clean button robot before it finishes cleaning and automatically returns on the robot or on the mobile app. To stop the to the base, press the Dock button.
NOTE: Be sure to charge the robot completely before its first cleaning so that it can explore, map, and clean as much of your home as possible. It may take up to 6 hours to fully charge the robot.
NOTE: Avoid picking up and moving the robot or base. If either are relocated, the robot may not be able to follow its intelligent cleaning path, or find its way back to the base. If the robot is picked up or moved for any reason, it should be returned to within 6 inches of its last location.
USING THE SHARK IQ ROBOT®
USING THE SHARKCLEAN™ APP AND VOICE CONTROLS
Get the most out of your Shark iQ Robot® with these app features:

• Interactive Map : Your robot knows where it is in your home. Identify rooms for Room Select.
• Room Select : Immediately send your robot directly to any room on that floor.
• Recharge and Resume : Use Recharge and Resume to help ensure complete, multi-room coverage in your home.

• Scheduling Set whole home cleanings for any time, any day.
• Control From Anywhere Wherever you are, you’re in control of your robot.
• Cleaning Reports Each time your robot cleans, your app will generate a cleaning report.
• Volume Control You can adjust the volume level of your robot's audio notifications.
Search for SharkClean in the app store and download the app to your iPhone TM or AndroidTM .

SETTING UP VOICE CONTROL WITH THE GOOGLE ASSISTANT OR AMAZON ALEXA
Visit sharkclean/app for setup instructions which include how to enable Shark Skill for Amazon Alexa and using with Google Assistant.
Google Assistant:
“OK Google, tell Shark to start cleaning.”
“OK Google, tell Shark to pause my robot.”
“OK Google, tell Shark to send my robot to the dock.”
Amazon Alexa:
“Alexa, tell Shark to start cleaning.”
“Alexa, tell Shark to pause my robot.”
“Alexa, tell Shark to send my robot to the dock.”
WI-FI TROUBLESHOOTING
• To use the app, your phone must be connected to a 2.4 GHz network. The app will only work on a 2.4 GHz network.
• Typical home Wi-Fi networks support both 2.4 GHz and 5 GHz.
• Do not use a VPN or a proxy server.
• Make sure Wi-Fi isolation is turned off on the router.
• If you cannot connect, call 1-888-228-5531.
STILL CAN'T CONNECT?
Restart your phone
Reboot your robot
• Make sure the power switch on the back of the BASE is in the ON position.
• Press the power button on the side of the ROBOT to the OFF position for 10 seconds, then press it again to turn power back ON.
Reboot your router
• Unplug the router power cable for 30 seconds, then plug it back in. Allow several minutes for your router to reboot completely.
|
ERROR CODE
|
PROBLEM |
|
! (RED) + Wi-Fi indicator (RED Flashing)
|
Wrong password for Wi-Fi
|
|
! (Flashing red) + Wi-Fi (RED)
|
SSID cannot be found, try connecting again
|
|
! + Wi-Fi (Flashing RED alternately)
|
Wrong user name or password for your Shark account
|
|
! + Wi-Fi (Flashing RED at the same time)
|
Cannot connect to Wi-Fi
|
MAINTENANCE

CAUTION: Turn off power before performing any maintenance.
EMPTYING THE ROBOT DUST BIN

Press the Dust Bin Release Tabs and slide out the dust bin.

To avoid spills, be sure to hold the dust bin in an upright position. Pinch and lift to open the lid.

Empty debris and dust into trash.

Look between the filter and plastic shield and make sure there is no debris buildup.
Remove and clean any debris build-up as needed with a dry cloth or soft brush.
EMPTYING THE BASE DUST BIN

The Base Dust Bin holds up to 15 days' worth of dust and debris. Empty the bin when the debris level approaches the max fill line.
To detach the bin, press and hold the Release button on the top and slide out the bin.

To empty the bin, hold it over the trash, then press the release button with the trash can icon on the bottom of the bin. The bin lid will open, releasing dust and debris. Lightly tap the dust bin against the inside of the trash receptacle to knock off any remaining debris. Reinstall the bin by sliding it into the slot in the base until it clicks into place.
CLEANING AND REPLACING THE ROBOT FILTER
For best results, regularly clean and replace the filter in the robot. See sharkaccessories.com for replacement filters.
IMPORTANT: DO NOT use water to clean the robot filter.

Remove and empty the robot dust bin. Clean any hair or debris off the Anti-Tangle Comb on the back of the dust bin.

Pull filter out of the dust bin by the tabs.

Lightly tap the filter to remove dust and debris.

Reinsert the filter into the robot dust bin, then slide the dust bin back into the robot.
NOTE: Make sure to insert the dust bin completely, until it clicks into place.
CLEANING AND REPLACING THE BASE FILTERS
For best results, regularly clean and replace the filters in the base.
To clean filters, rinse with cold water ONLY to prevent damage from cleaning chemicals. Allow all filters to air-dry for at least 24 hours before reinstalling them to prevent liquid from being drawn into electric parts.
IMPORTANT: DO NOT use soap when cleaning the filters.

CLEAN PRE-MOTOR FILTERS ONCE A MONTH
To open the filter housing lid, hold the top right edge of the base and pull up on the lid. With the lid open, remove the foam filter by the top handle, then lift out the felt filter underneath. Tap the filters clean over the trash, then rinse them with cold water ONLY, as soap may damage them. Allow filters to air-dry completely before reinstalling them.
The filters must be installed correctly for the base to work properly. Reinsert the felt filter first, then the foam filter.

CLEAN POST-MOTOR FILTER EVERY YEAR
Press the button at the top of the Filter Door, then tilt the door and lift it off. Remove the Post-Motor Filter from the base. To reinstall the post-motor filter, insert it into the base and replace the filter door.
NOTE: The pre-motor foam and felt filters should be replaced every 2.5 years. The post-motor filter should be replaced every 3 years.
NOTE: Clean the mesh filter inside the dust bin with a small brush once a month.
SELF-CLEANING BRUSHROLL
The Self-Cleaning Brushroll removes debris over time as it cleans. If some debris remains wrapped around the brushroll, continue cleaning to allow the brushroll to remove it.
If some debris remains on the brushroll after continued cleaning, follow the steps below to remove it.

To access the brushroll, push up on the tabs on the brushroll access door, then lift off the door.

Lift out the brushroll, and clean off any debris. Reinstall the brushroll, inserting the flat end first. Close the brushroll access door and press down until both sides click into place.
NOTE: When cutting away debris, be sure not to cut the brushroll.
NOTE: Replace brushroll every 6 to 12 months, or when visibly worn. See sharkaccessories.com for replacement parts.
CLEANING SENSORS AND CHARGING PADS
CLEAN SENSORS AND CHARGING PADS AS NEEDED. With a dry cloth, gently dust off the sensors and pads located on the bottom of the robot and on the base.


IMPORTANT: The robot uses cliff sensors to avoid stairs and other steep drops. Sensors may work less effectively when they are dirty. For best results, clean sensors regularly.
CLEANING SIDE BRUSHES
CLEAN SIDE BRUSHES AS NEEDED.

Carefully unwind and remove any string or hair wrapped around brushes.
Gently wipe brushes with a dry cloth. To reinstall, snap the brushes over the pegs. Spin the brushes manually to make sure they are installed correctly.
NOTE: Remove and replace any side brushes that are bent or damaged. To remove a brush, lift it off its peg.
CLEANING THE WHEELS
REMOVE AND CLEAN THE FRONT CASTER WHEEL AS NEEDED. See sharkaccessories for replacement parts.

Pull the Front Caster Wheel from its housing and remove any debris buildup.

Clean the wheel housing, then reinsert the caster wheel.
NOTE: Tools may be required to pry off front caster wheel.
NOTE: Brush not included.

Periodically clean the drive wheels and the housing around them. To clean, rotate each drive wheel while dusting.
TROUBLESHOOTING
If any error lights are illuminated or flashing on your Shark iQ Robot®, see the error code chart below:
| ERROR CODE |
ERROR NUMBER |
SOLUTION |
| CLEAN (RED) flashing |
10 |
Robot may be stuck on an obstacle. Move robot to a new location on a level surface |
| DOCK (RED) flashing |
6 |
Front bumper may be jammed. Clean the bumper and make sure it moves in and out freely. |
| CLEAN (BLUE) + DOCK (RED) solid |
14 |
BotBoundary® error. Move your robot to a flat surface away from the magnetic boundary strip and try cleaning again. |
| CLEAN (RED) + DOCK (BLUE) flashing |
7 |
Cliff sensor error. Move your robot to a new location and clean its cliff sensors. |
| CLEAN (RED) + DOCK (RED) flashing |
9 |
Robot dust bin needs to be reinstalled. Insert the dust bin until it clicks in place. |
| DOCK (RED) + ! (RED) flashing |
2 |
Side brush is stuck. Remove any debris from around the side brushes so they move freely. |
| CLEAN (RED) + DOCK (RED) + ! (RED) flashing |
2 |
A drive wheel is stuck. Clean the wheels and remove any debris wrapped around the axles so they can move freely. |
| CLEAN (RED) + DOCK (BLUE) alternating |
16 |
Robot is stuck. Move your robot to a new location and make sure the front bumper moves in and out freely. |
| CLEAN (BLUE) + ! (RED) flashing |
2 |
Blockage in brushroll. Remove any debris from around the brushroll so that it can spin freely. |
| CLEAN (RED) + DOCK (BLUE) + ! (RED) flashing |
21 |
Robot has encountered an error while booting. Please turn the power off and back on. |
| CLEAN (BLUE) + DOCK (RED) flashing |
23 |
Make sure your base indicator light turns blue to confirm your robot is placed on the base correctly. |
| BATTERY ICON (RED) flashing |
24 |
Battery is critically low and needs recharging. Please pick up your robot and place it on the base. Make sure the base indicator light turns blue to confirm your robot is placed on the base correctly. |
| CLEAN (RED) + ! (RED) alternating |
2 |
Blockage in brushroll. Remove any debris from around the brushroll so that it can spin freely. |
| DOCK (RED) FLASHING + ! (RED) solid |
26 |
Blockage in dust bin. Check base and robot dust bin for clogs. Clear any debris and reinstall the dust bin, ensuring that it clicks into place. |
| DOCK (BLUE) + ! (RED) flashing |
24 |
Robot has encountered an error while charging. Please make sure you are using the correct power cord for the base. |
| CLEAN (RED) + ! (RED) flashing |
3 |
Suction motor failure. Remove and empty the dust bin, clean the filters, and remove blockages |
| CLEAN (BLUE) + DOCK (RED) + ! (RED) flashing |
2 |
Wheel motor encoder failure. Please contact Shark Customer Service at 1-888-228-5531. |