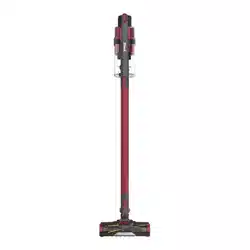
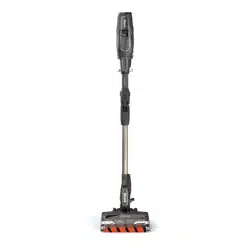
Your vacuum comes equipped with either a standard wand or a MultiFLEX® wand and either a standard floor nozzle or a Dirt Engage™ floor nozzle. All versions assemble the same way
Insert Wand into Floor Nozzle.
Insert Handheld Vacuum into wand.
For proper operation, ensure all components are completely connected and clicked into place.
LI-ION BATTERY
Prior to first use, charge completely. A full charge takes approximately 3 hours..
RUNTIMES PER FULLY-CHARGED BATTERY
Visit to review the included Quick Start Guide.
LED BATTERY POWER AND CHARGING INDICATORS
Charging
NOTE: Full charge takes approximately 3 hours.
In Use
RECYCLING THE LI-ION BATTERY
When the Shark Li-Ion battery needs to be replaced, dispose of it or recycle it in accordance with local ordinances or regulations. In some areas, it is illegal to place spent lithium-ion batteries in the trash or in a municipal solid waste stream. Return spent batteries to an authorized recycling center or to the retailer for recycling. Contact your local recycling center for information on where to drop off the spent battery.
CHARGING THE BATTERY
Plug the Li-Ion Charger into a wall outlet.
Remove the handheld vacuum from the wand by pressing the Wand Release button and pulling up. Plug the charger into the charging port on the handheld vacuum.
To put the vacuum in storage mode, press the MultiFLEX Wand Unlock Latch while folding the handheld vacuum forward until the wand clicks and locks. Plug the charger into the charging port on the handheld vacuum.
NOTE: MultiFLEX wand is not included with all configurations. See enclosed Quick Start Guide for your unit’s configuration.
NOTE: Battery can only be charged in the vacuum.
POWER SETTINGS
Slide switch to the top to turn off power. To begin vacuuming in Standard Mode, slide switch to the desired setting.
Bare Floor/Small Area Rugs Use this setting to clean bare floors and small area rugs.
Carpet Use this setting to pick up debris below the surface of your carpets.
For an added boost in power, pull the Trigger on the handheld vacuum. Release it to return to standard power.
CLEANING MODES
To clean floors, step on floor nozzle and tilt handheld vacuum back.
NOTE: Brushroll will only engage when the handheld vacuum and wand are tilted back.
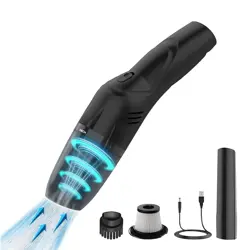
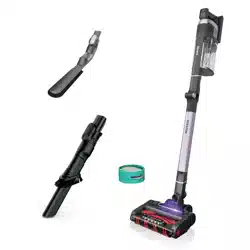
Press the wand release button and lift the handheld vacuum off the wand. Attach an accessory for great cleaning on stairs, furniture, and other above-floor areas.
Stand the vacuum upright and press the nozzle release button located at the bottom of the wand, above the nozzle. Lift wand to detach.
Great for cleaning baseboards, ceiling fans, window sills, and other hard-to-access areas.
NOTE: All accessories are compatible with both the wand and the handheld vacuum.
USING THE MULTIFLEX® WAND
MULTIFLEX REACH
Press the unlock latch on the back of the wand, then adjust the angle.
Adjust the wand to a lower angle to easily clean under furniture.
MULTIFLEX STORAGE
To put the vacuum in storage mode, press the unlock latch while folding the handheld vacuum forward until the wand clicks and locks.
To take the vacuum out of storage mode, lift up the handheld vacuum until the wand clicks and locks in place.
NOTE: Not all units come with the MultiFLEX wand. See enclosed Quick Start Guide for your unit’s configuration.
MAINTAINING YOUR VACUUM
EMPTYING THE DUST CUP
Press the wand release button to disconnect the handheld vacuum from the wand.
To empty the Dust Cup while it is attached to the handheld vacuum, position the dust cup over a trash receptacle and slide the CleanTouch™ Lid Release slider forward.
REMOVING AND CLEANING THE DUST CUP
To remove the dust cup from the handheld vacuum, press the Dust Cup Release button near the handheld vacuum nozzle. Tilt the dust cup and lift off to remove. To empty dust and debris, hold the dust cup over the trash, then slide the Lid Release slider forward.
To clean the interior of the dust cup, rinse it with water. Place it on its side to air-dry for at least 24 hours before reinstalling.
CLEANING THE FILTERS
To clean filters, rinse them with water only. Allow all filters to air-dry completely for at least 24 hours before reinstalling to prevent liquid from being drawn into electric parts. Clean the pre-motor filters at least once a month and post-motor filter at least once a year. Tap off loose dirt between washes when needed. More frequent cleaning may sometimes be necessary with heavy use. Cleaning the filters regularly helps maintain your vacuum’s cleaning performance.
IMPORTANT: DO NOT use soap when cleaning the filters. Use water only
Press the dust cup release button and remove the dust cup. Pull the foam and felt filters out of the back of the dust cup.
Remove the dust cup. Pull the post-motor filter out of the handheld vacuum.
NOTE: Not all units come with a HEPA filter. See the enclosed Quick Start Guide for your unit’s configuration.
FLOOR NOZZLE
If you run over a hard or sharp object or notice a noise change while vacuuming, check for blockages or objects caught in the brushroll.
Turn off the vacuum.
Using a coin, turn locks counterclockwise to open, then lift off cover to access brushroll.
Clear airway of blockages.
Replace cover by sliding inserts into slots, then pressing down firmly on all sides before turning locks clockwise to close. There will be an audible click once the locks are secured.
CLEANING STANDARD BRUSHROLL
CLEANING DIRT ENGAGE BRUSHROLL
Remove any string, carpet fibers, or hair that may be wrapped around the brushroll by using scissors to help loosen debris.
If any hair is wrapped around the brushroll, continue cleaning, using the Carpet setting on a bare floor surface, a low-pile carpet, or a small area rug. If some fibers remain wrapped around the brushroll after continued use, carefully remove them from the brushroll.
CHECKING FOR BLOCKAGES
Checking for Blockages in the Handheld Vacuum:
Turn off vacuum.
Remove the handheld vacuum from the wand.
Check all intake openings to the dust cup and remove any debris or blockage.
Checking for Blockages in the Wand:
Standard Wand:
Turn off vacuum
Remove the handheld vacuum and floor nozzle
Check intake openings for blockages and debris
Clear away debris and blockages
MultiFLEX® Wand:
Turn off vacuum
Remove the handheld vacuum and floor nozzle from the wand
Check the Clog Access on the MultiFLEX portion of the wand by pinching the tabs on both sides of the hose and lifting the hose out.
Clear any debris and blockages.
Checking for Blockages in the Floor Nozzle:
Turn off vacuum
Detach the wand
Use the edge of a coin to open the three locks on the bottom of the floor nozzle
Remove the cover and tilt back the neck of the floor nozzle
Check the opening and remove any debris or blockages
Replace cover by firmly pressing down on all sides and turning the locks clockwise to close
TROUBLESHOOTING
WARNING: To reduce the risk of shock and unintended operation, turn off power and remove the battery before servicing.
Vacuum is not picking up debris. No suction or light suction. Nozzle light is red.
(Refer to Checking for Blockages section for more information.)
Dust cup may be full; empty dust cup.
Check floor nozzle for blockages; clear blockages if required.
Remove any string, carpet fibers, or hair that may be wrapped around the brushroll.
Check connection between handheld vacuum and wand for blockages; clear blockages if required.
Check clog access in wand for any blockages and clear any debris.
Check filters to see if they need cleaning. Follow instructions for rinsing and completely air-drying the filters before reinserting in the vacuum.
Vacuum lifts area rugs.
Make sure you are not engaging boost mode. Take care when vacuuming area rugs or rugs with delicately sewn edges.
Turn off the unit to disengage the brushroll and restart with the power/selector switch.
Brushroll does not spin.
Immediately turn off the vacuum. Remove any blockages before turning the vacuum back on. Make sure the handheld vacuum is tilted back far enough for the brushroll to engage while in use.
If the floor nozzle has headlights and they are not illuminated, there is a connection issue between the handheld vacuum, wand, and nozzle. Try disconnecting and reattaching the pieces.
Vacuum turns off on its own.
There are several possible reasons for the vacuum turning off on its own, including blockages, battery issues, and overheating. If vacuum turns off on its own, perform the following steps:
Turn on the vacuum and check the battery indicator lights located on the handheld portion of the vacuum. If recharging is needed, plug in while vacuum is in the off position.
Empty dust cup and clean filters (See Emptying the Dust Cup and Cleaning the Filters sections).
Check wand, accessories, and inlet openings and remove any blockages.
Allow unit and battery to cool for at least 45 minutes, until they return to room temperature.
Restart with power/selector switch.
NOTE: If vacuum still does not operate properly, contact Customer Service.
Battery Indicator Lights on handheld vacuum are flashing.
Bottom LED light is flashing (Fig. A): Battery needs to be charged.
Top and bottom LED lights are flashing (Fig. B): Battery temperature is not optimal, so charging is temporarily paused. Leave battery plugged in and charging will resume soon.
If top 2 or bottom 2 LED lights are flashing (Fig. C, Fig. D), call Customer Service.
ADDITIONAL ACCESSORIES AVAILABLE ON SHARKACCESSORIES.COM