Loading ...
Loading ...
Loading ...
84
DCR-PC1000 2-591-678-11(1)
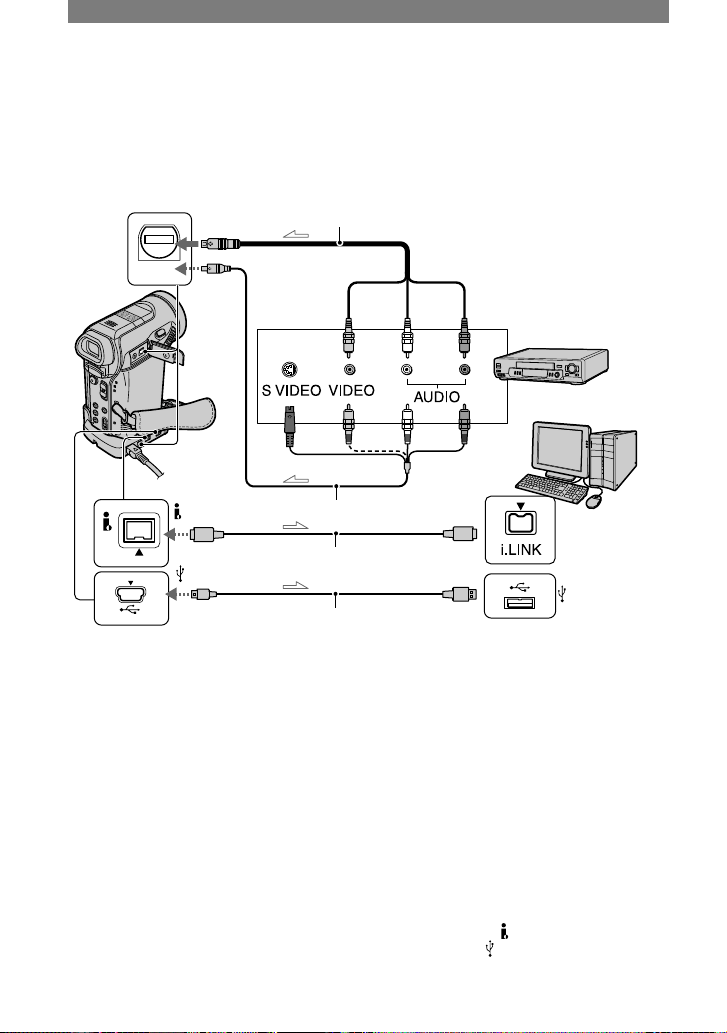
Connecting an analog VCR to the computer via your
camcorder (Signal convert function)
Using the A/V connecting cable and an i.LINK cable (optional) or a USB cable (supplied),
you can convert an analog signal output from an analog device such as a VCR to a digital
signal and transfer it to a digital device, such as a computer, via your camcorder.
Software that can record the video signal must be installed on your computer beforehand.
2
1
A/V
DV
3
4
A/V jack*
VCRs
Computer
i.LINK
(IEEE 1394) jack
To i.LINK (IEEE
1394) jack
DV Interface (i.LINK)
To S VIDEO jack
(Yellow) (White) (Red)
*The A/V jacks are equipped on the
Handycam Station and the camcorder
itself respectively. Connect the
A/V connecting cable either to your
camcorder or to the Handycam Station.
A/V connecting cable (supplied)
Connect the A/V connecting cable to your
camcorder or the Handycam Station. The A/V
jack accepts analog signals.
A/V connecting cable with S
VIDEO (optional)
When connecting to another device via the
S VIDEO jack, by using the A/V connecting
cable with an S VIDEO cable (optional),
pictures can be reproduced more faithfully
than with the supplied A/V cable connection.
Connect the white and red plugs (left/right
audio) and S VIDEO plug (S VIDEO
channel) of an A/V connecting cable
(optional). In this case, the yellow (standard
video) plug connection is not necessary. S
VIDEO connection only will not output
audio.
i.LINK cable (optional)
Use an i.LINK cable (optional) to connect
your camcorder to another device. The video
and audio signals are transmitted digitally,
producing high quality pictures. Note that
you cannot output the picture and sound
separately.
USB cable (supplied)
You can connect your camcorder and your
computer with a USB cable (supplied).
• You can use a USB cable (supplied) only
for Windows XP Service Pack1 (SP1)
or Windows XP Service Pack2 (SP2)
supporting High-Speed USB (USB 2.0)
device.
• You cannot convert an analog signal to
digital via the DV Interface (i.LINK)
and via the (USB) jack at the same time.
Be sure not to connect an i.LINK cable
(optional) and a USB cable (supplied) at the
same time.
(USB) jack
(USB) jack
Loading ...
Loading ...
Loading ...