
Loading ...
Loading ...
Loading ...
6
Physical Installation
This device operates on either a Wi-Fi connection or direct connection to your network with an Ethernet
cable. This is not a power over ethernet (PoE) device and will require a 5V, 2.0A USB power connection
to function. Please use only applicable voltage when po
damage the integrity of the camera. It is highly recommended to use the included power cable and
adapter to power the camera.
The camera is waterproof and has a IP65 weatherproof rating which makes it suitable for outdoor installa-
tion. If you are using a microSD card for local storage, please ensure the microSD card is properly
installed before physically installing your camera. Before you begin, ensure the installation surface can
refer to the information below.
Provided with your camera is an installation/mounting plate which allows you to install the camera onto a
• Mounting Screws
• Wall Anchors
• Installation Mounting Bracket
• Installation Map Sticker
The physical installation of your camera will involve the following items.
SCREWDRIVER - A Phillips head screwdriver will be needed to mount your camera.
DRILL - A drill may be required if installing the camera on concrete, stucco, or a brick mounting surface.
INSTALLATION POSITION MAP -
physical installation of your camera.
WALL ANCHORS - Used to secure the mounting screws into the mounting surface.
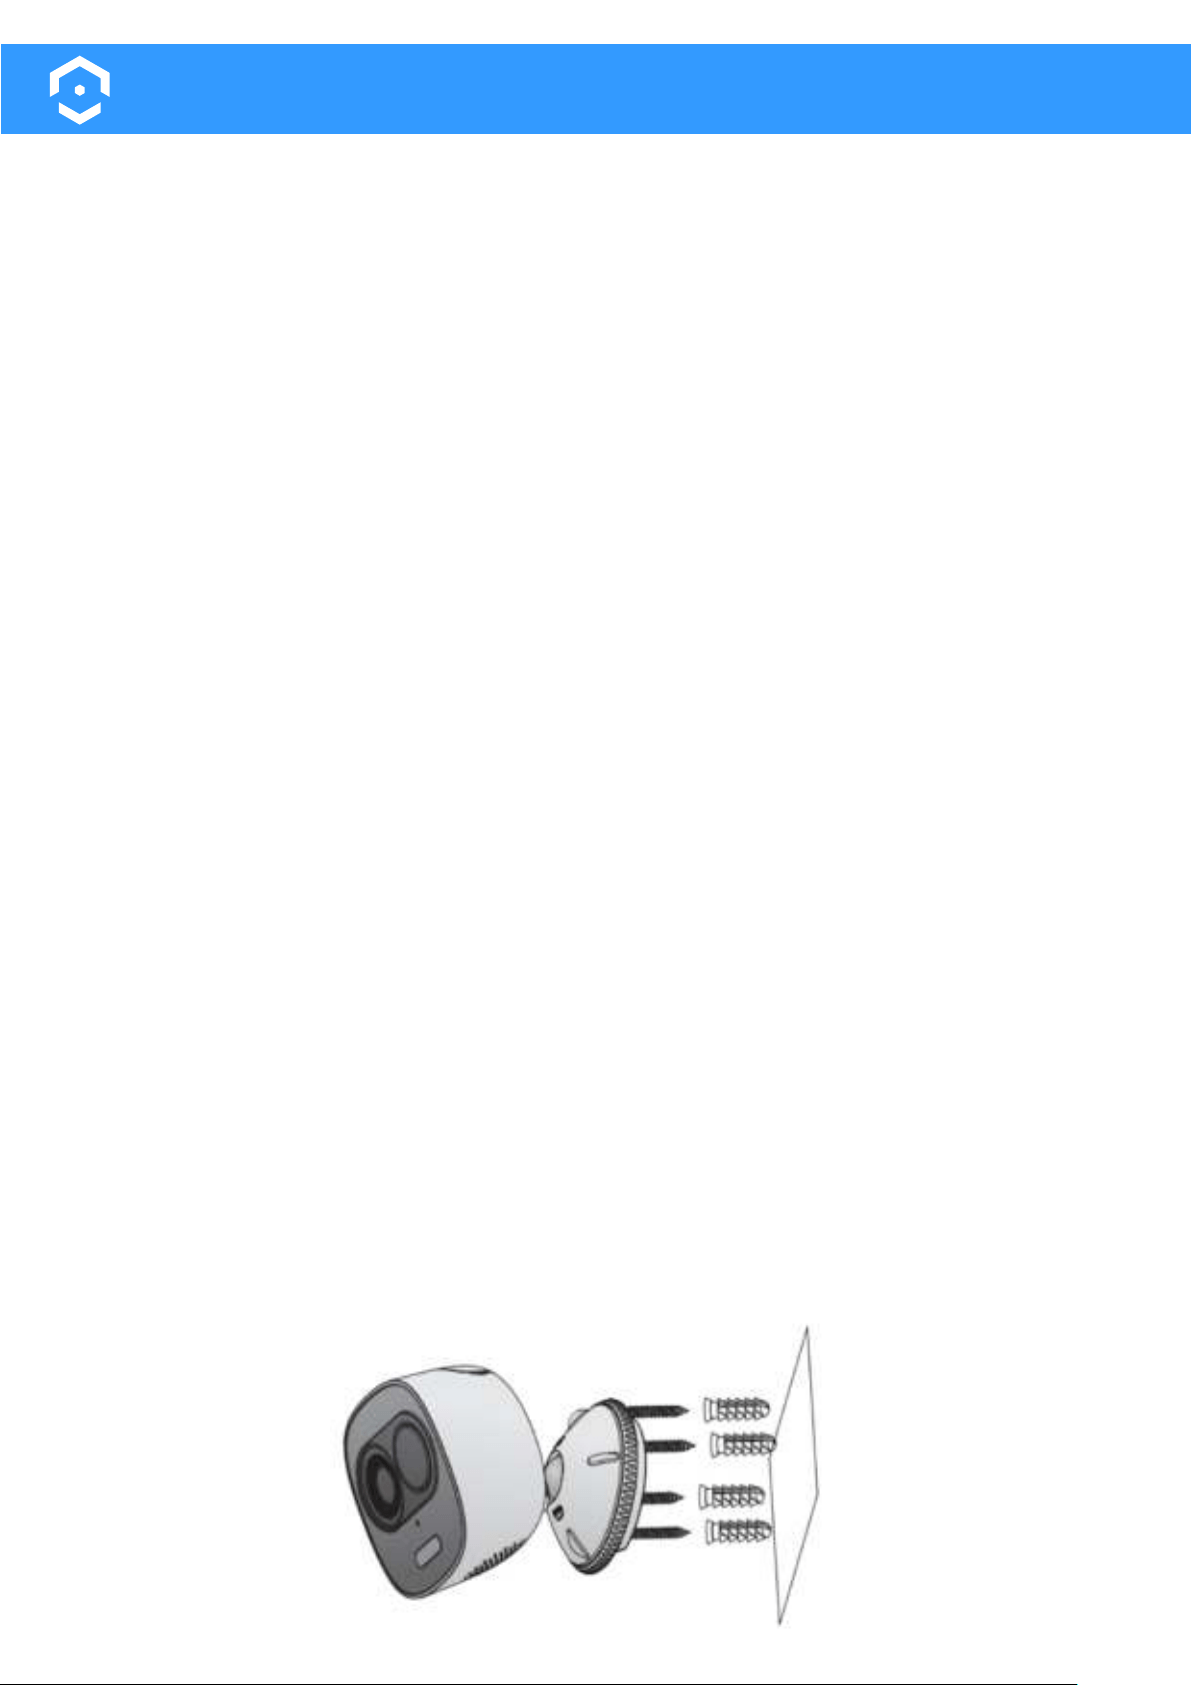
MOUNTING SCREWS - Used to mount the camera to the mounting surface.
Note: A 15/64’s drill bit may be required to drill the holes for the wall anchors.
Installation Instructions
Place the installation position map onto the mounting surface and using a drill, drill the marked holes.
remove it from the camera. Then, remove the bottom bracket from the top bracket by twisting in a
counterclockwise motion.
Place the bottom bracket onto the installation map aligning the holes to the wall anchors. Secure the
bracket using a Phillips head screw driver and mounting screws. Place the camera back onto the securi-
ty screw of the top mounting bracket and turn in a clockwise motion to secure it to the camera. Place
the top bracket back onto the bottom bracket and turn in a clockwise motion to tighten and secure the
camera to the mounting surface.
Loading ...
Loading ...
Loading ...