User Guide for Doorbell
Unpacking
Getting Started
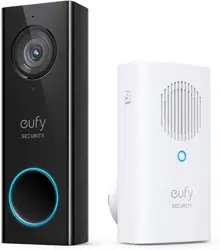
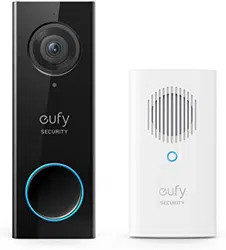
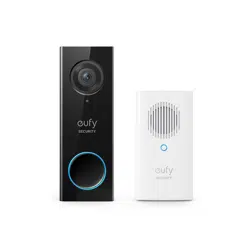
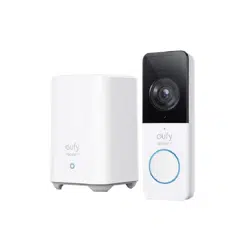
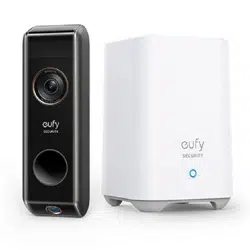
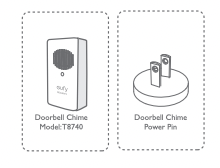
A eufy Security Doorbell is required for the installation and setting to the Chime. The Doorbell Chime is an exclusive accessory to the eufy Security Video Doorbell. You can pair up to 4 Chimes to your eufy Doorbell to notify anyone inside of activity at the front door, from anywhere in your home.
Installation and Settings
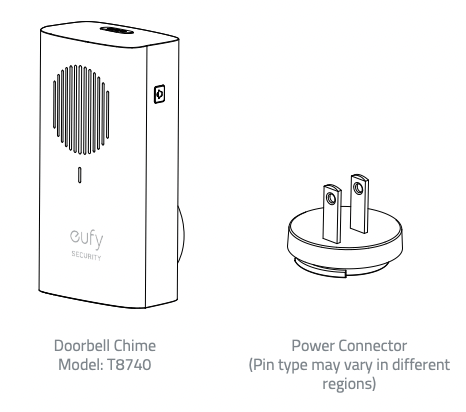
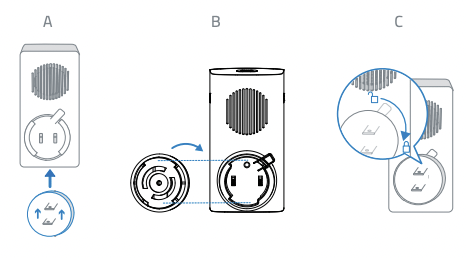
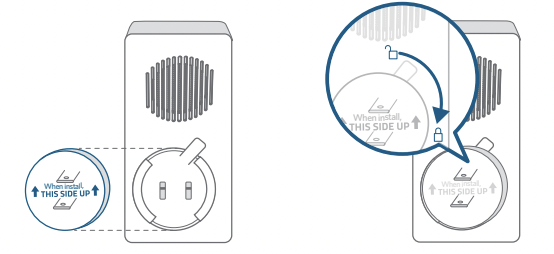
Step 1. Fix the Power Connector to the Doorbell Chime:
A. Place the Power Connector over the Chime in the direction the arrows indicate.
B. Align the raised slots of the Power Connector with the notch on the base of the Doorbell Chime.
C. Rotate clockwise to lock the Power Connector in place.
Step 2. Plug the Doorbell Chime into an AC power supply at your desired location.
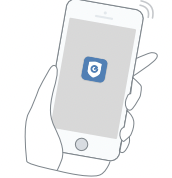
Step 3. In the EufySecurity App, go to Doorbell Settings - Indoor Chime.
Follow the onscreen instruction to add the Chime to your existing Video Doorbell.
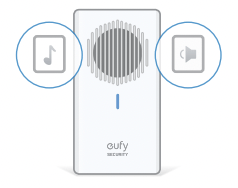
Step 4. You can select the ringtone (up to 8 ringtones) and adjust the volume level (3 volume leves) by using the Music and Volume buttons located on the sides of the Doorbell Chime. Each Chime can play a different ringtone according to your setting.
Replacing the Power Connector (If necessary)
You may need to replace the power connector given the region you are in. Follow the instructions provided below to replace the Power Connector.
Step 1. Press the Lock button and twist the Power Connector counterclockwise at the same time to remove it from the Doorbell Chime base.

Step 2. Install the new Power Connector onto the Doorbell Chime following the same installation procedure mentioned at the start of the guide.
HOW THE SYSTEM WORKS
How the System Works
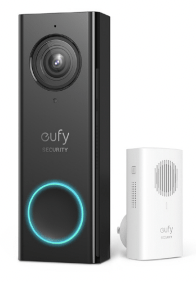
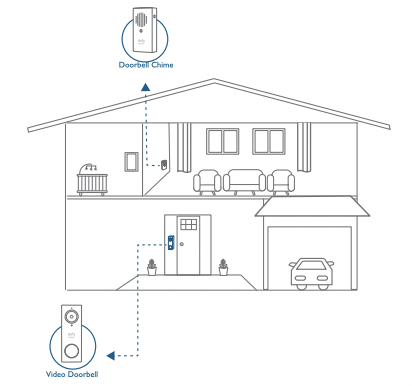
The video doorbell system includes 2 parts. One is the video doorbell at your porch. The other is the electronic chime plugged into an indoor power socket. The video doorbell is powered by the provided indoor power adapter, which requires the user to drill a hole in the external wall to run the power cord from indoors to outdoors.
The video doorbell doesn’t work with the existing doorbell chime. Use the provided electronic chime instead. When someone rings the doorbell, people in the house will be notified.
Tips:
- To make the doorbell system work, running wires through the wall is required. You may need to hire a qualified electrician at your expense.
- The existing doorbell system is not compatible. If you have an existing doorbell button, remove it to avoid confusing visitors.
STEP 1 GETTING STARTED
Prepare the Video Doorbell for Installation
1. Slide in the plug to the switching adapter until you hear a click.
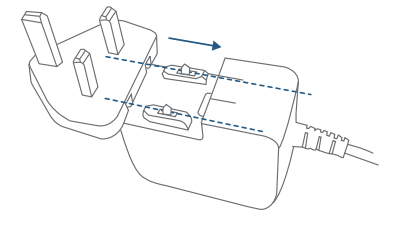
2. Connect the power adapter to the video doorbell.

3. Connect the provided power adapter to a power outlet preferably near the door. Wait for the video doorbell to power on.
4. Align the doorbell chime power connector with the doorbell chime pin, and turn it clockwise until it locks in place.
STEP 2 SETTING UP THE SYSTEM
Set up the System
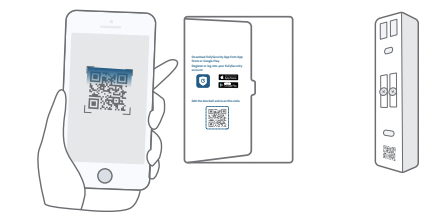
1. Download the Eufy Security App from the App Store or Google Play Store and install the App on your phone.

2. Log into the Eufy Security App. Add your video doorbell (Wired) and scan the QR code for later installation process. QR code can be found on the back of the video doorbell and at the rear of the documentation box.
3. Follow the on-screen instructions to connect the video doorbell to your home Wi-Fi, and complete the setup of the video doorbell. Then you can view live streams on the Eufy Security app. When you press the doorbell button, the provided electrical chime will sound a ringtone.
Note: If you want to share your video doorbell to your family members and let them operate the video doorbell via the Eufy Security App, go to Family & Guest from the App’s side menu and follow the on-screen instructions to share your video doorbell.
STEP 3 FINDING A SPOT FOR MOUNTING
Select Location and Height
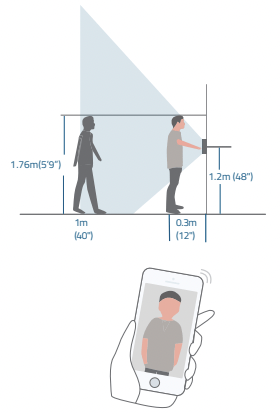
- Take the video doorbell outdoors with the power cord connected to it. It is safe to carry it around as the output is low voltage(19V DC).
- Try to find a location at your front door where you can get an ideal field of view on live stream. This is the location where you will mount the video doorbell. The recommended height for mounting is 48” (1.2 m) from the ground.
If you want to place the doorbell close to a side wall, make sure the wall doesn't show up in the field of view. Installing the doorbell too close to a side wall will reflect IR light and make night vision blurry
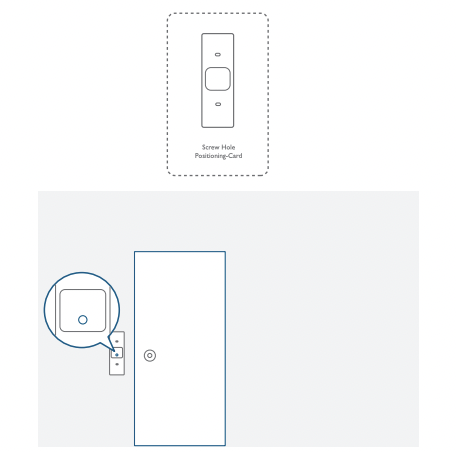
3. Place the Screw Hole Positioning Card against the wall to mark the location for the power cord to run through the wall. Position the hole for the power cord to line up with the bottom half of the Positioning Card’s square hole. Make sure this is where the wire will come out of.
What is required: Screw Hole Positioning Card
4. Unplug the power adapter and detach the power adapter from the video doorbell.
Drill Holes
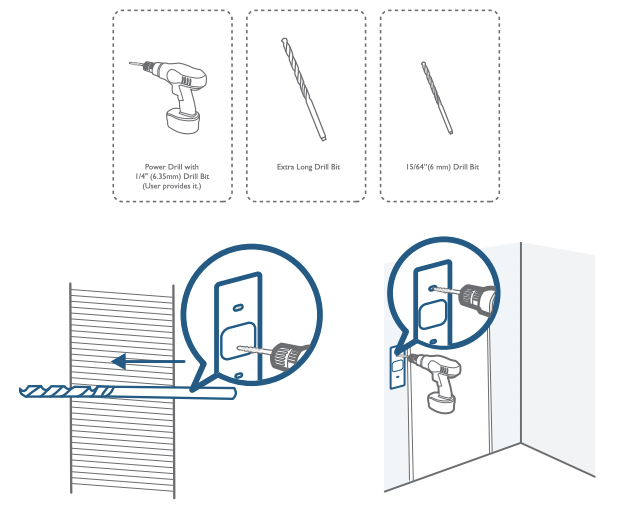
- Drill a hole for the power cord to run through. Use a drill bit that is long enough to fully drill through the exterior wall.
- Drill 2 holes to mount the mounting bracket
- If you are installing the mounting bracket on a wooden wall or board, DO NOT drill holes. You can screw in the wood directly.
- Anchors are needed if you are installing the mounting bracket on a wall that is made out of hard materials such as stucco, brick, or concrete.
- Drill on the screw hole positioning card with a 15/64” (6 mm) drill bit.
What is required: Power Drill with 15/64” (6 mm) Drill Bit / Extra Long Drill Bit
Note:
- If you have problems with drilling holes yourself, have a qualified electrician do it. Make sure that you keep away from wires or pipes within the wall while drilling holes.
- If you have an existing doorbell button at the front door, remove it along with the wires to avoid confusing visitors by having 2 doorbells.
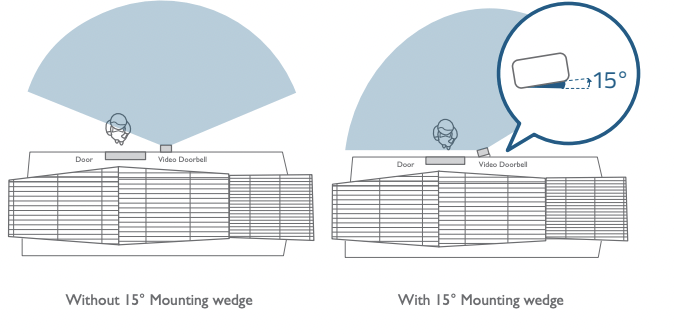
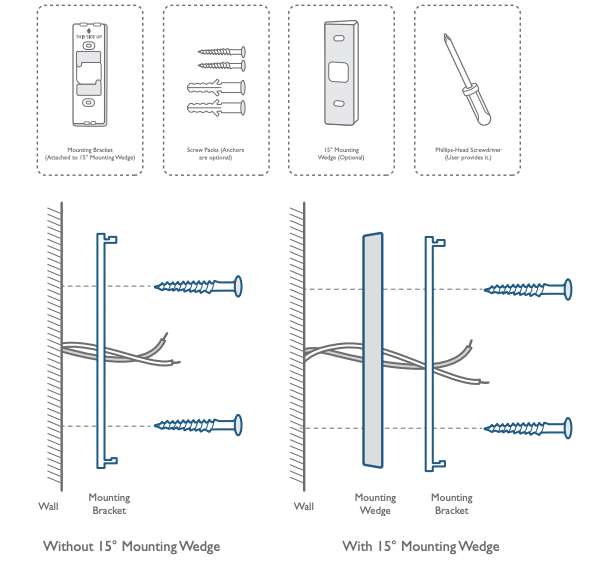
Use the 15° Mounting Wedge (Optional)
Use the 15° mounting wedge as a supplementary mounting bracket if you wish to see more on a specific side.
STEP 4 INSTALLING THE MOUNTING BRACKET
- Insert the two screws provided through the screw holes or through the 15° mounting wedge (Install the mounting bracket to the 15° mounting wedge in prior, using long screws).
- Fasten the screws into the wall tightly.
What is required: Mounting Bracket / Screw Packs / 15° Mounting Wedge (Optional) / Philips-Head Screwdriver
STEP 5 RUNNING WIRES THROUGH THE WALL
Run Wires through the Wall
- Unplug the power adapter before running wires.
- Unscrew the terminals on the back of the doorbell to detach the power cord.
3. Slip down the grommet over the adapter wires.
4. Run the power cord through the hole and carefully extend them outside.


- Make sure you have a qualified electrician run the wires if you are not comfortable with dealing with wires.
- Use the rubber plug or glue to fill the drill holes.
- Use the provided grommet to hold the wires into place. Make sure the wires are tucked neatly.
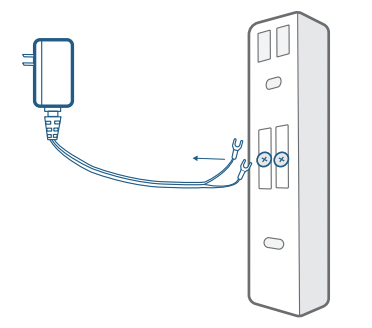
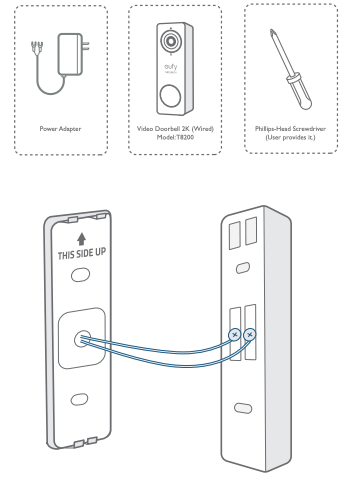
STEP 6 CONNECTING THE WIRES
Connect the Wires
Connect the wires to the two terminals at the back of the doorbell, then tighten the terminal screws. Wire can connect to any terminal.
To prevent short-circuit, make sure the wires are not touching each other or crossing after connecting them to the terminals.
What is required: Power Adapter / Video doorbell / Philips-Head Screwdriver
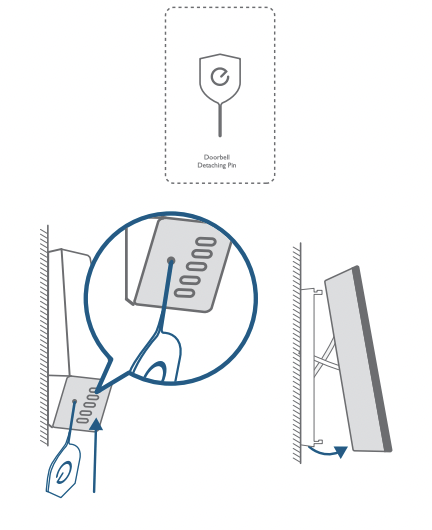
STEP 7 HOOKING / DETACHING THE DOORBELL
Hook the Doorbell on the Mounting Bracket
There are 2 thermal conductive pads on the mounting bracket. They're used to conduct heat from the video doorbell to the metal bracket.
- Remove the films on the thermal conductive pads before you mount the doorbell.
- Hook the doorbell on top of the mounting bracket.
- Snap the doorbell bottom to the bracket and press it down until it clicks into place.
If the doorbell doesn’t fit well, or you want to replace the doorbell, you can detach the doorbell.
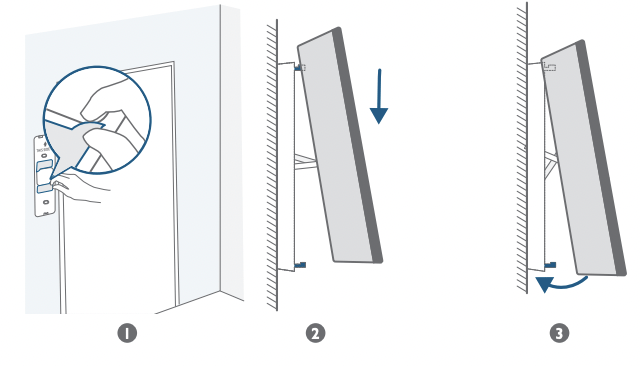
Detach the Doorbell
- Use the doorbell detaching pin provided if you wish to detach the doorbell from the mounting bracket.
- Press and hold the hole on the bottom of the doorbell and then lift its bottom to take it off.
What is required: Doorbell detaching pin
STEP 8 POWERING ON THE VIDEO DOORBELL
- Plug the power adapter into the wall outlet indoors.
2. Wait for the video doorbell to power up. The doorbell ring turns cyan. You can view the live stream shot from the video doorbell on the Eufy Security App.
For troubleshooting, check Help on the Eufy Security App.