Loading ...
Loading ...
Loading ...
setting up _09
01 SETTING UP
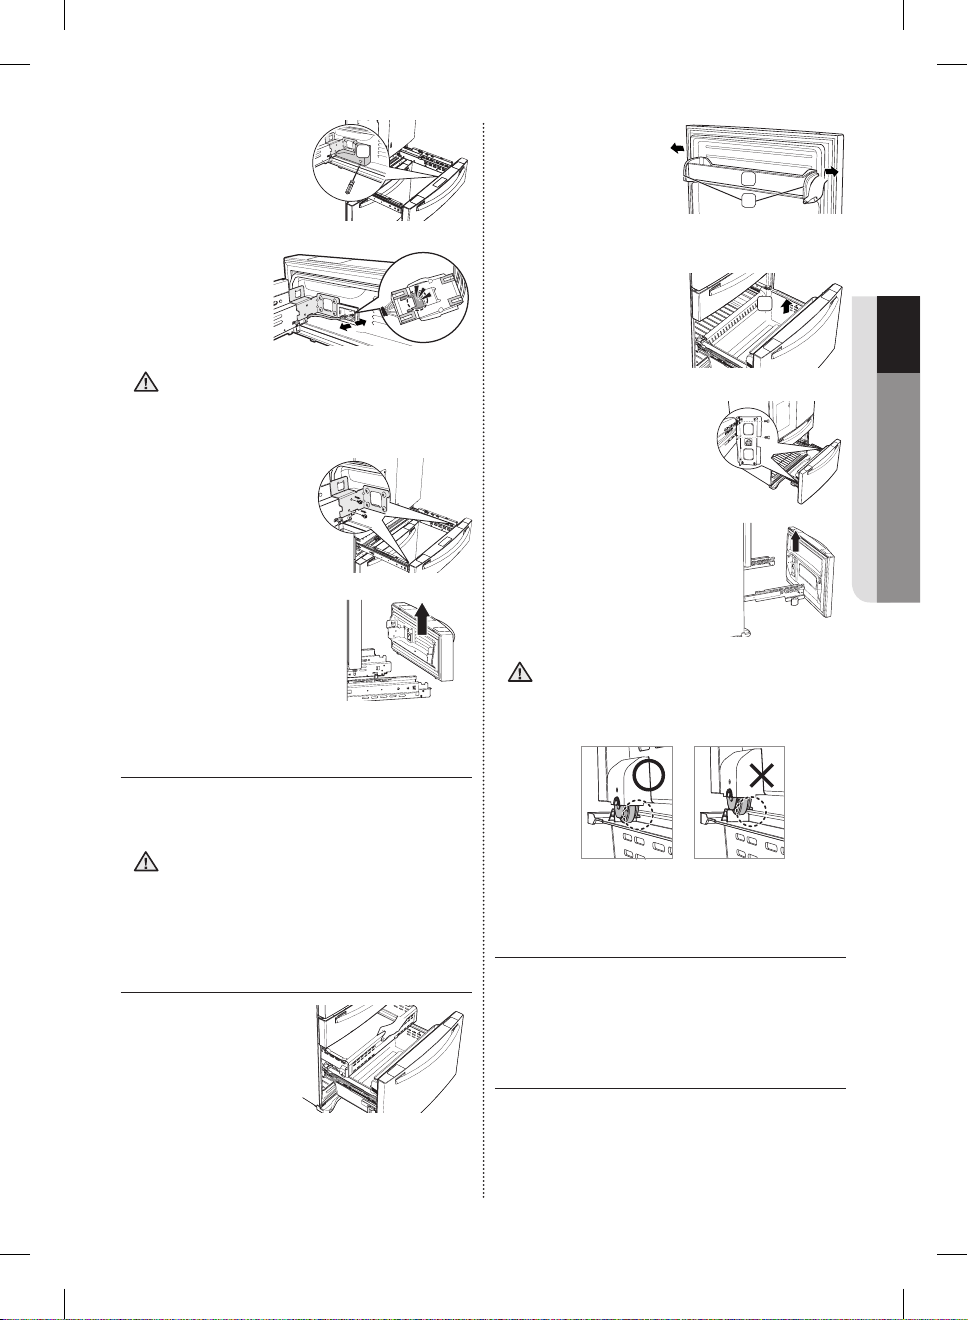
2. Take off the cover (2)
w/harness with a flat-
blade screwdriver (-).
3. Press the
locking tab and
separate the Wire
Connector.
When reassembling it, be sure to connect
the wire harness. If it is not connected, the
Flex Room does not work.
4. Remove 2 hex head
bolts from the sides
with a socket wrench
(10mm).
5. Lift up the Flex door from
the rails.
ASSEMBLE THE FLEX DOOR
To reattach the flex door after you have moved the
fridge to its final location, assemble parts in reverse
order.
Be sure to connect the Flex Door Wire
Connector. If it is not connected, the Flex
Room does not work.
DISASSEMBLE THE FREEZER
DRAWER
1. Take out the upper
drawer by lifting it up.
2. Remove the tilting
pocket (1) by
pulling both support
guards (2) aside.
And take out both
support guards by
pulling them aside.
3. Take out the lower
basket (3) by lifting the
basket up from the rail
system.
4. Remove 4 hex head bolts
from both sides with a
socket wrench (10mm).
5. Lift up the freezer door
from the rails.
Putting too much food into the freezer
drawers can prevent the freezer from
closing completely and can cause frost
build-up.
ASSEMBLE THE FREEZER
DRAWER
To reattach the drawer after you have moved the
fridge to its final location, assemble parts in reverse
order.
LEVELING THE REFRIGERATOR
Make sure the refrigerator is level so that you can
make final adjustments.
Use a level to test if the refigerator is level both side
to side and back to front.
CAUTION
2
CAUTION
1
2
3
CAUTION
DA68-02520A-13.indb 9 2013. 12. 2. �� 5:08
Loading ...
Loading ...
Loading ...