Loading ...
Loading ...
Loading ...
08_ setting up
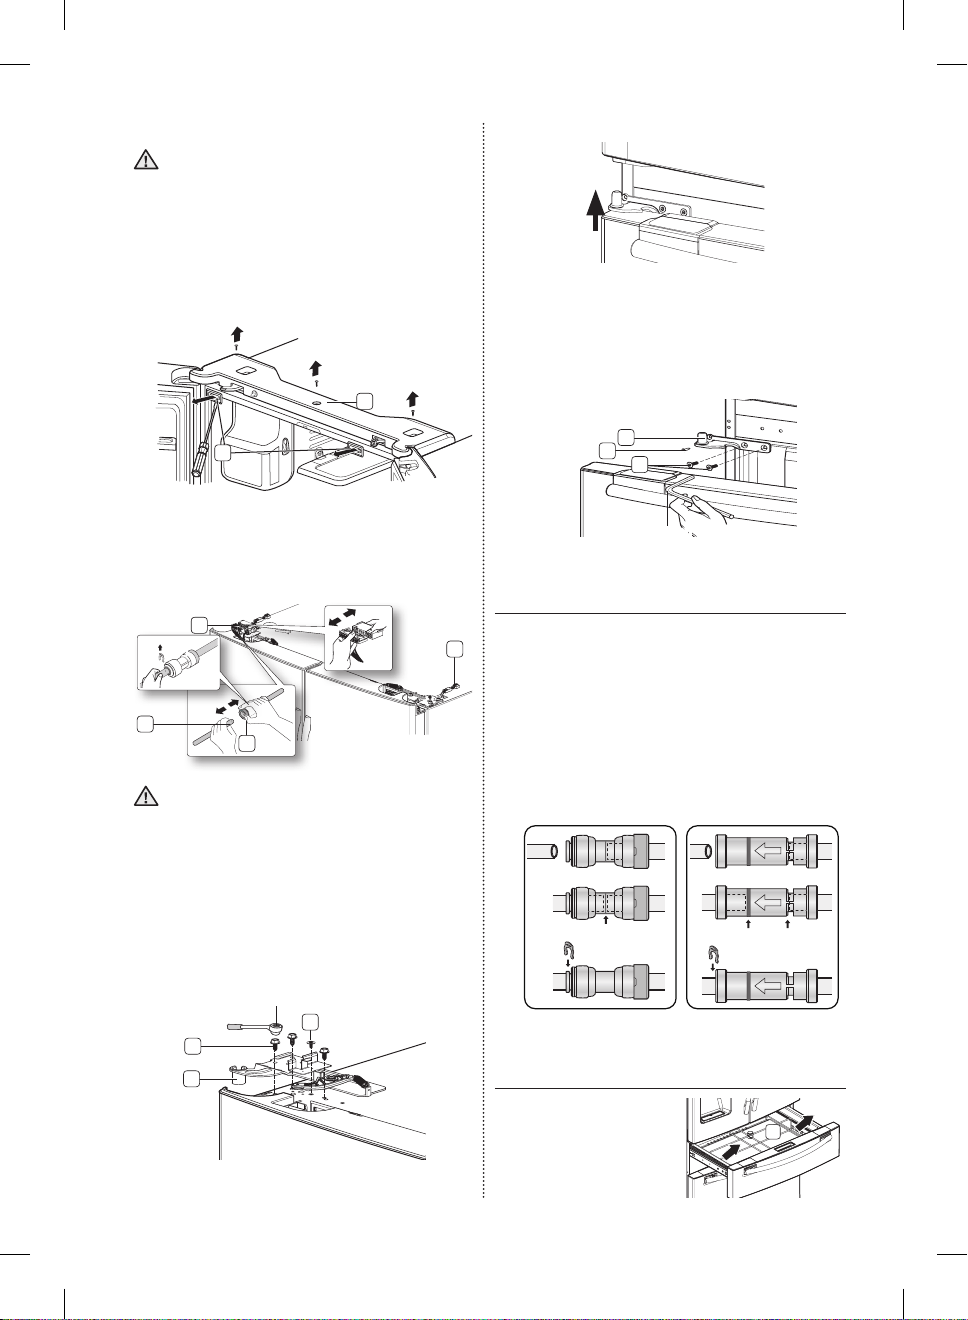
Disassemble the refrigerator doors
Be careful not to drop and scratch the
doors while removing the doors.
1. With the door opened, remove the cap top
table (1) with a flat-blade screwdriver(-), and
then close the door.
Remove the 3 screws holding down the
top table (2) and turn it with several wires
connected.
2. Disconnect one connector (3) on the right side
door and one connector (4) on the left side
door. Remove the water line (5) while pressing
the dark gray part (6) of the water line coupler.
If a red clip is on the coupler, it must be
removed before removing the tube.
3. Remove the 3 hex head bolts (7) attached
to the upper left and right door hinges with a
socket wrench (10mm).
Remove the ground screw (8) attached to the
upper left and right door hinges with a philips
screwdriver(+). Remove the upper left and right
door hinges (9).
4. Lift the door straight up to remove.
5. Remove the screw (10) attached to the
lower left and right door hinges with a philips
screwdriver(+). Remove the 2 hex head bolts
(11) attached to the lower left and right door
hinges with an allen wrench (3/16”). Remove
the lower left and right door hinges (12).
REATTACHING THE
REFRIGERATOR DOORS
To reattach the fridge doors after you have moved
the fridge to its final location, assemble parts in
reverse order.
1. The Water Line must be fully inserted to the
center of transparent coupler (Type A) or the
Guide Lines (Type B) to prevent water leakage
from the dispenser.
2. Insert the clip in the install pack and check that
it holds the line firmly.
DISASSEMBLE THE FLEX DOOR
1. Take out the Flex Zone
(1) by lifting it up.
Allen wrench
12
10
11
1
WARNING
1
2
4
5
6
3
Red Clip
(1/4")
CAUTION
Socket wrench
7
8
9
Center of Transparent coupler
The Guide Lines
Dispenser
clip A (1/4”)
(6.35mm)
clip A (1/4”)
(6.35mm)
Type A Type B
DA68-02520A-13.indb 8 2013. 12. 2. �� 5:08
Loading ...
Loading ...
Loading ...