Loading ...
Loading ...
Loading ...
Subframe
38 Servicing Your Honda
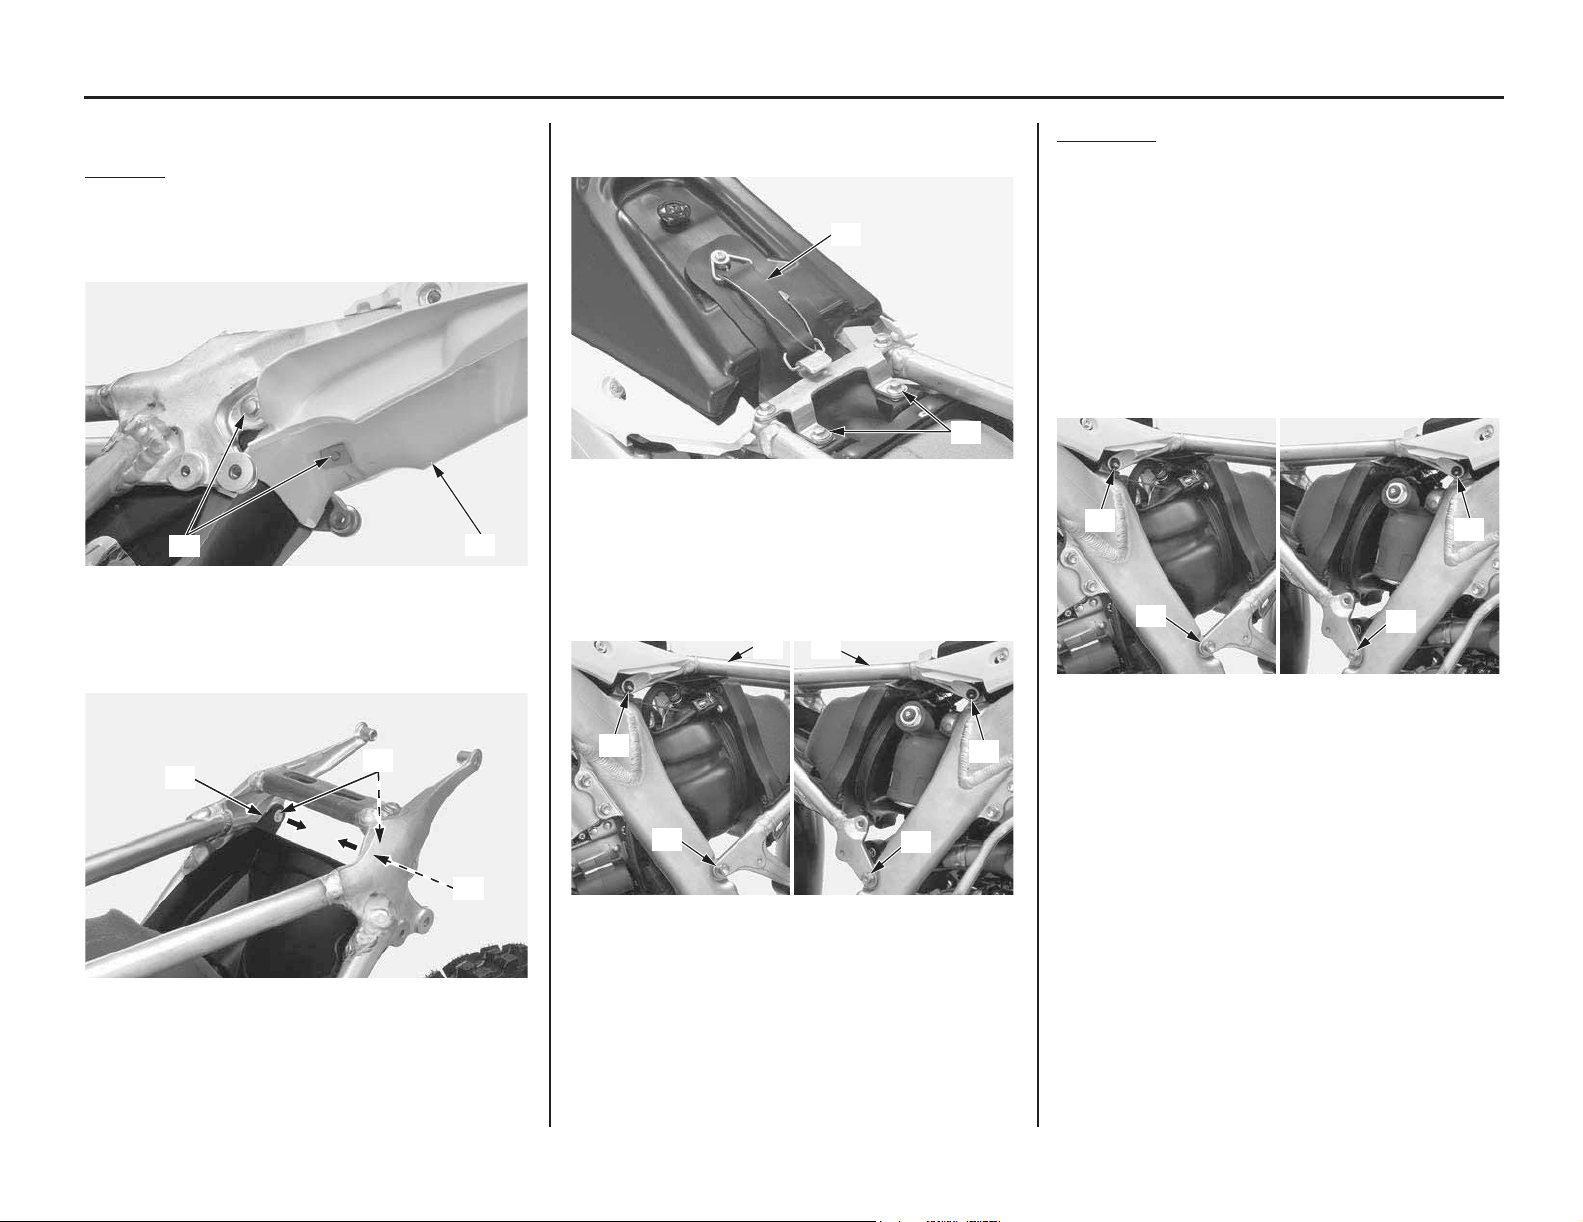
Subframe
Refer to Important Safety Precautions on page 23.
Removal
1. Remove the seat (page 34).
2. Remove the right and left mufflers (page 121).
3. Remove the rear fender mounting bolts, nuts
(1) and rear fender (2) backward.
4. Remove the air cleaner case (3) from the
bosses (4) of the subframe.
5. Remove the air cleaner mounting bolts (5) and
unhook the fuel tank band (6).
6. Remove the subframe lower bolts (7) and
subframe upper bolts (8).
Remove the subframe (9).
Installation
1. Loosely attach the upper and lower ends of the
subframe to the main frame and loosely install
all subframe bolts.
2. Tighten the subframe upper bolts (1) and
subframe lower bolts (2) to the specified
torque:
subframe upper bolts:
24 lbf·ft (32 N·m, 3.3 kgf·m)
subframe lower bolts:
36 lbf·ft (49 N·m, 5.0 kgf·m)
(1) rear fender mounting bolts and nuts
(2) rear fender
(3) air cleaner case (4) subframe bosses
(1)
(2)
(3)
(3)
(4)
(5) air cleaner mounting bolts
(6) fuel tank band
(7) subframe lower bolts
(8) subframe upper bolts
(9) subframe
(6)
(5)
Left side:
(8)
(7)
(9) (9)
(8)
(7)
Right side:
(1) subframe upper bolts
(2) subframe lower bolts
(1)
(2)
(2)
(1)
Left side: Right side:
Loading ...
Loading ...
Loading ...