Documents: Go to download!
User Manual
- User Manual - (English)
- Robinhood Easyiron Ironing Centre IC1300WH Specifications Guide - (English)
- Spec Sheet (web) - (English)
- Robinhood Easyiron Ironing Centre IC1300WH Parts and Service - (English)
- Overview
- Pre-installation
- Mounting the Ironing Centre
- Connecting the Ironing Centre to Electric Power
- Door Assembly Handle Instructions
- Door Assembly Instructions
- Operating Instructions
- Board rotation
- Lamp Replacement
- Ironing Centre Features
- Important safety information
Table of contents
Installation and Operating Instructions ROBINHOOD IRONING CENTRE
Overview

Contents of packaging:
1 x Robinhood Ironing Centre
1 x Handle
1 x Installation kit (incl screws, magnetic catch. etc.)
1 x Ironing Board Cover
1 x Door
Pre-installation
Important:
- Please read the entire instructions before installing the Ironing Centre.
- Robinhood Ironing Centre can be mounted in two ways: Recessed Mount and Surface Mount. For Surface Mount the addition of a decorative surface mounting collar is recommended (Product Code ICSMK).
- Remove the Packing Stops with the small flat screwdriver from the Ironing Board assembly.
- Ascertain from the user the DESIRED HEIGHT of the Ironing Board when in the open position.
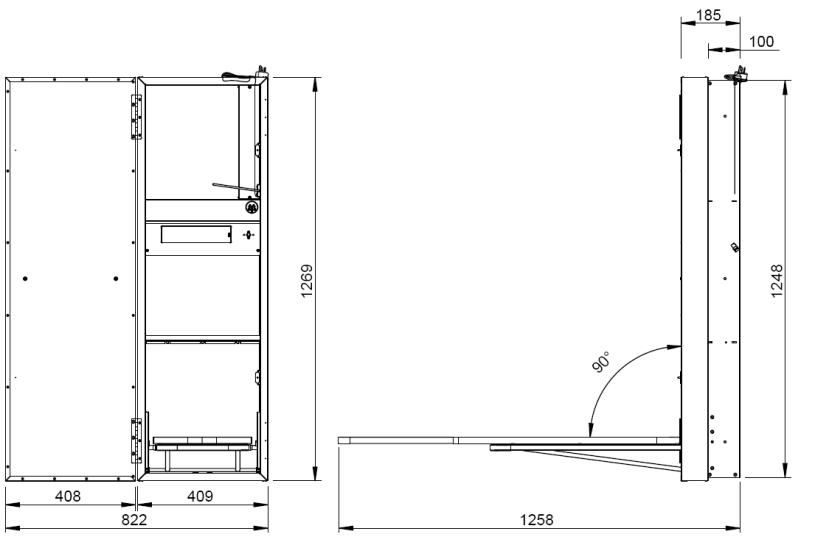
- We recommend an ironing surface height of 830mm above the floor for an average adult. To obtain this surface height, the height of the unit (see diagram below) must be 680mm above the floor.
- 830mm is based on the second or middle position of the ironing board

Mounting the Ironing Centre
SURFACE MOUNT OPTION
- Make sure sold timber studs or mounting points are in suitable position for the mounting of the ironing centre.
- Due to many different installation possibilities no holes have been provided for these screws, Robinhood suggest making 6 holes of suitable diameter for fixing to the customers preferred location. (it may be necessary to purchase different length screws and/or wall anchors for correct fitting).
NOTE: Surface mounting Kit (Product Code ICSMK) is also available.
RECESS MOUNT OPTION

SIZE OF WALL OPENING
1. The Ironing Centre is designed to fit between 362mm studs. Take out a section of the wall and insert two timber studs vertically at 362mm apart.
ATTACH BRACE
2. Attach horizontal brace (noggin) between the studs at the desired heights above and below the unit. Ensure that the braces are level and the top brace is cut to allow the electrical plug and wire to pass through.
MOUNT CABINET
3. Lift cabinet into place, rest the cabinet on horizontal brace, plumb and shim cabinet to fit, and attach to studs using the supplied six screws. Mounting hole position are indicated by the arrows. Remove the electrical wire cover to access mounting hole on the right hand side.
Note - Be sure to allow for wall covering thickness behind cabinet face frame.
Connecting the Ironing Centre to Electric Power
- For recessed mount, an external ON/OFF (safety) switch for the Ironing Centre must be installed near the unit. An additional power socket can be installed inside the wall between the switch and power plug.
- Alternatively the unit can be hard wired directly to the switch by an electrician.
- For surface mount, the Ironing Centres’ plug and lead can be easily plugged into a nearby wall socket, or can be hard wired by an electrician. (The electrical safety standard requires the following “Switches shall be directly connected to the supply terminals and shall have a contact separation in all poles, providing full disconnection under overvoltage category III conditions”).
Door Assembly Handle Instructions
Mounting the handle to Cabinet Door
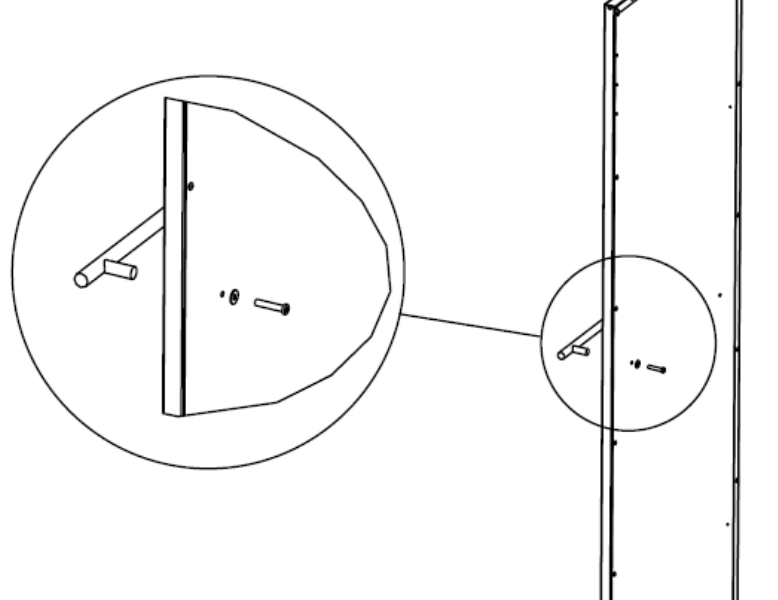
4. To fix handles to the drawer, firstly clear the existing holes from the front using the screws supplied. Insert screw & washer from the inside (back of the draw front) of the drawer, place handle on the outside of the drawer front and secure in two locations. Be careful not to scratch the drawer fronts whilst installing the handles.

Door Assembly Instructions

Mounting the Cabinet Door
5. Door may be hinged from either side of the cabinet (illustration is shown for left side hinging). Both sides of the cabinet have pre-punched holes.
6. Use the two hinges already fix to the door.
7. Attach the hinges to the cabinet using the screws supplied at the top and bottom section of the cabinet.
8. Use the decorative plugs supplied to cover the unused pre-punched holes.
Fixing Magnetic Catch
9. Magnetic catch is fixed opposite to the hinge.
10. Fixing position is located on the top section of the cabinet and the door.
Operating Instructions

To open the Ironing Board, lift board retainer and lower the board. To store Ironing Board, follow the steps in reverse order.
The Ironing Board can swivel 180 degrees and has three working heights, to adjust the board:
- With the board in the horizontal position hold the board with one hand near the base (NOT BY THE NOSE) and support the pivot rod with the other hand.
- Adjust the Ironing board to the desired position by lifting the board (NOT BY THE NOSE) and moving it to the path of height adjust bracket.

NOTE: In order to store the Ironing board, it must be on its lowest position.
Board rotation

3. Make sure the door is clear if the board is to be rotated.
4. With the board in the horizontal position hold the board with both hands (NOT BY THE NOSE) and rotate around the centre pivot the unit will click into the required position.
NOTE: In order to store the Ironing board, it must be on its lowest position and rotated back.
Lamp Replacement

- Disconnect Ironing Centre from power supply. Ensure the power is switched off.
- Insert small screwdriver or slim knife as shown, ease catch to side and slip out diffuser.
- Replace lamp (40 watt max.)
- Slide diffuser back into aperture and “click” into place. Turn power back on.
Ironing Centre Features

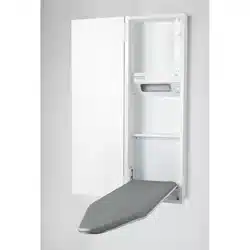
The Robinhood Ironing Centre has the following features:
- Surface or recess mountable
- Heat resistant shelf for iron storage
- Integrated cotton coated cover
- Right / left hand or no door options
- Magnetic door catch opening door
- Round corners board
- Built in 230-240 volt power outlet
- 40 watt light
- Utility shelf for spray bottle storage
- Auto timer
- 3 level height adjustable
- Board Swivels a full 180°
YOUR IRONING CENTRE BOARD IS FITTED WITH A HEAT RESISTANT COVER.
Important safety information
- The appliance is supplied with an approved power cable which must not be changed. If the supplied cord of this equipment is damaged, it must only be replaced by the manufacturer, its service agent or similarly qualified person in order to avoid hazard.
- Upon installation, ensure that the socket outlet (for Surface Mount) or ON/OFF switch (for RECESSED MOUNT) remains easily accessible after installation.
- This appliance is not intended for use by persons (including children) with reduced physical, sensory or mental capabilities, or lack of experience and knowledge, unless they have been given supervision or instruction concerning use of the appliance by a person responsible for their safety.
- Young children should be supervised to ensure that they do not play with the appliance.
- Should you be fitting a door to the enclosure holding this product, please be mindful of the position of all door furniture (hinges, handles etc). Specifically ensure the board will operate without obstruction.
- You must read the details concerning the method of cleaning.
- Do not remove the board retainer.
- Do not place EXCESSIVE WEIGHT (weight should not exceed 15kg) on the ironing board when opened, as it is designed to only accept normal ironing use only.
- Allow iron to cool down before storing in the cabinet.
- Iron not to exceed 2260 Watt.
- Empty water reservoir and turn off steam action prior to storing iron.
- Turn power off when not in use.
- PLEASE DO NOT WASH THE COVER The laminated surface of the unit may be wiped clean with non abrasive household cleaner.
See other models: RSA2CL6SS HED604FKG RWC3CL6SS HGA604FKSS HGA604FKSSPACK

