Loading ...
Loading ...
Loading ...
82
Setup mode
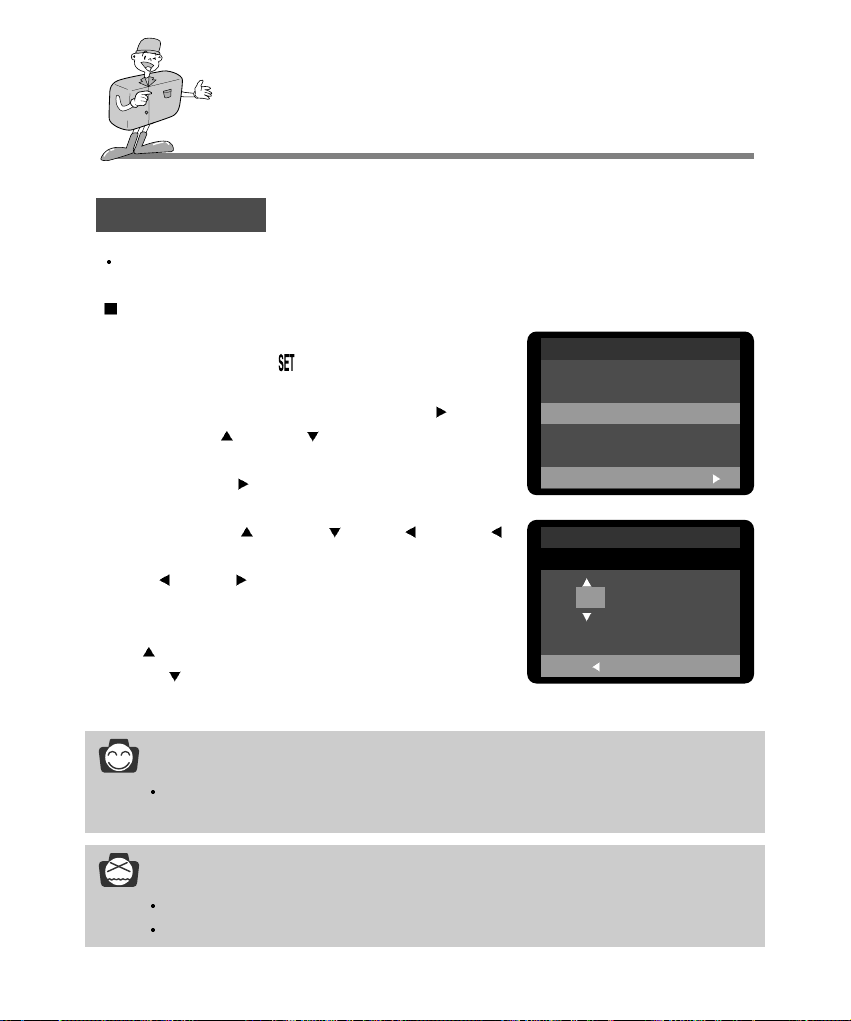
DATE SETUP
Changing the date/time
1. Turn the camera power on.
2. Select the SETUP mode( ) by rotating the mode dial.
3. [SETUP 1/3] menu will display.
4. Select [SETUP 2/3] menu by pressing the RIGHT( ) button.
5. Press the UP( )/ DOWN( ) button and select [DATE
SETUP].
6. Press the RIGHT( ) button and the sub menu will display.
You can change the date/time on the LCD monitor display by
pressing the UP( )/ DOWN( )/ LEFT( )/ RIGHT( )
button.
LEFT( )/ RIGHT( ) button : you can select year/month/day,
hour/minute by pressing these
buttons.
UP( ) button : Increases the number of items
DOWN( ) button : Decreases the number of items
7. Press the OK button to confirm the setting.
You can change the imprinted date/time
SETUP 2/3
DATE IMPRINT ON
DATE TYPE Y/M/D
DATE SETUP
VIDEO OUT NTSC
CHANGE:
SETUP 2/3
DATE SETUP
2003 /09 / 01
00:11
BACK:
SET:OK
INFORMATION
The selection range for date/time setup covers from 2000~2058.
(It is automatically programmed to allow for a leap year/ month)
NOTICE
If the batteries or AC adapter are removed, it is necessary to reset the time /date.
Recording date displays on the LCD monitor in the PLAY mode.(DATE IMPRINT : ON)
Loading ...
Loading ...
Loading ...