Loading ...
Loading ...
Loading ...
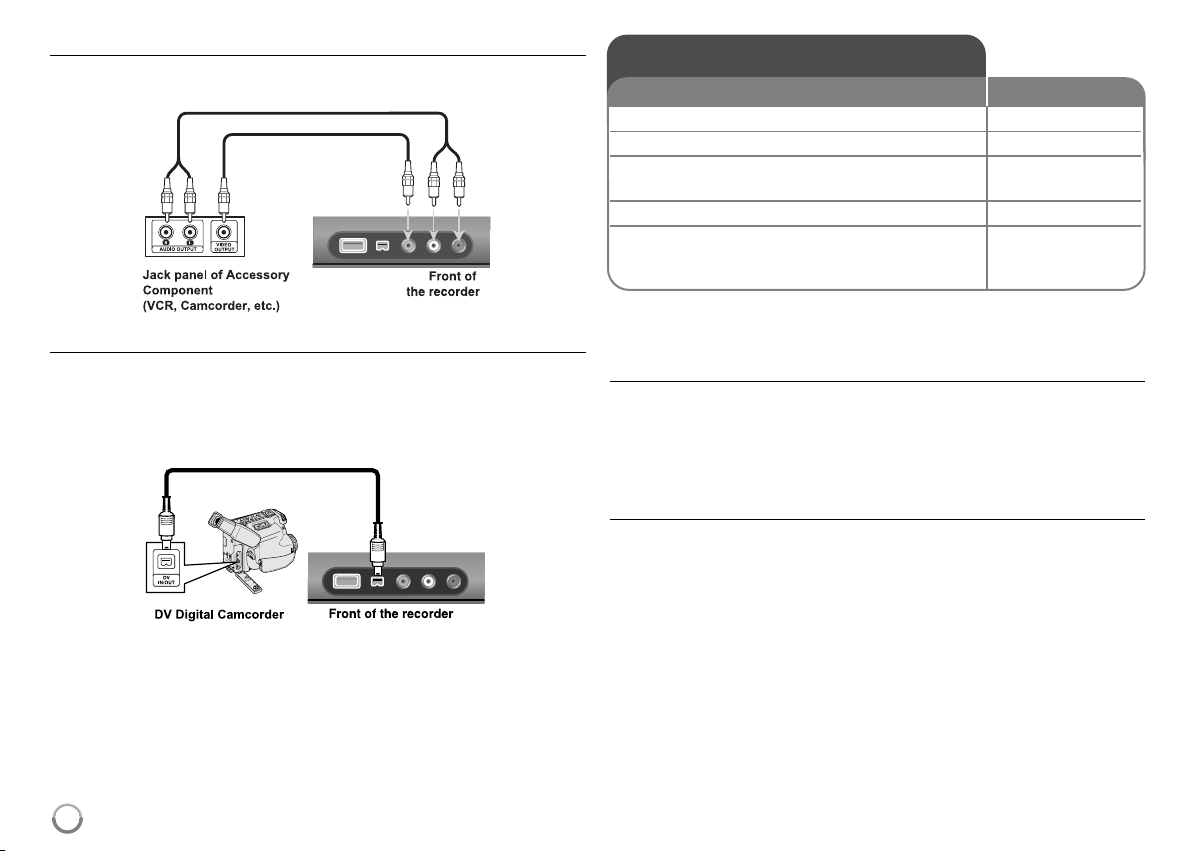
Connecting to the AV IN 2 Jacks
Connect the input jacks (AV IN 2) on the unit to the audio/video out jacks on
your accessory component using audio/video cables.
Connecting a Digital Camcorder
Using the front panel DV IN jack, it is possible to connect a DV digital
camcorder and digitally transfer DV tapes to DVD.
Use a DV cable (not supplied) to connect the DV in/out jack of your DV cam-
corder to the front panel DV IN jack of this unit.
The DV IN jack is for connection to DV digital camcorder only. It is not compati-
ble with digital satellite tuners or D-TAPE video decks. Disconnecting the DV
cable while recording a contents of the connected digital camcorder may result
in malfunction.
Using USB Flash Drive
Using an USB Flash Drive
This unit can play the MP3/WMA/JPEG/DivX files contained in the USB Flash
Drive.
Inserting the USB Flash Drive – Insert straight-in until it fits into place.
Removing the USB Flash Drive – Withdraw the USB Flash Drive carefully
when the connected USB Flash Drive is not operating.
Notes on USB Flash Drive
The contents on the disc cannot be moved or copied to USB Flash Drive.
Keep the USB Flash Drive out of reach of children. If swallowed, seek med-
ical advice immediately.
This unit supports only USB Flash Drive with FAT16 or FAT32 format.
The USB Flash Drives which require additional program installation when
you have connected it to a computer are not supported.
This unit is compatible with the Flash type USB device that supports USB
1.1.
This unit may not support some USB Flash Drives.
Do not extract the USB Flash Drive while operating (play, etc.).
It may cause a malfunction on this unit
.
12
Operating USB Flash Drive
1. Insert an USB Flash Drive to the USB port: –
2 Displays the HOME menu: HOME
3 Select a main option:
bb BB
[MUSIC], [PHOTO] or [MOVIE] option
4 Select the [USB] option:
vv VV
5 Displays corresponding menu list: ENTER
For details of operations on each files, refer to
relevant pages.
ON REMOTE
Loading ...
Loading ...
Loading ...