Loading ...
Loading ...
Loading ...

chamber locking device to unlock the mist chamber (see illustration above). Lift the
mist chamber off the Base. Locate the absorption sleeve attached to the heating
element under the mist chamber. Be sure the sleeve is tightly attached to the heating
element. A loosely attached absorption sleeve may produce less humidity and
cause malfunctions.
Replace the mist chamber. Turn the locking device to secure the mist chamber to the
base. Replace the tank(s).
CAUTION: Never attempt to use this humidifier without the absorption sleeve
attached.
SET-UP
Remove the tank(s), turn the tank(s) upside down and remove the fill cap by turning it
counter-clockwise.
Fill the tank(s) with cool water. For best results, use distilled or filtered water. Do not
use hot water or any chemical additives. Replace the fill cap by turning it clockwise.
Be sure not to over tighten it. Turn the tank(s) upright and position the tank(s) back
onto the base. Be sure the tank(s) is seated properly on the base and the valve(s) is
open. Water will begin flow into the base.
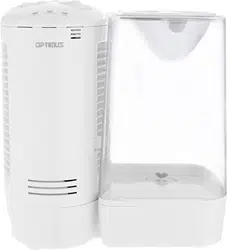
NOTE: The SAFETY SWITCH is located approximately 3/4 down the right side of the
mist chamber. When the tank (right tank only on 3.5 gallon model) is removed, the
SAFETY SWITCH is released and the humidifier stops producing moisture. When
this occurs, the REFILL light will illuminate. The humidifier will not operate without the
tank properly seated on the base.
When putting the tank back on the base, make sure it is set properly and the SAFETY
SWITCH is compressed.
Never attempt to move the humidifier with water in the tank(s). If moving the
humidifier is necessary, be sure to unplug the humidifier and remove the tank(s).
The humidifier will not operate when the water in the base reaches a minimum level.
When this occurs, the REFILL light will illuminate.
WARNING: Never pour water into the mist chamber grill. Doing so may cause
personal injury and damage to the humidifier.
OPERATION
With the Power Control Knob in the OFF position, plug the power cord into a polarized
120V outlet.
REMEMBER: Do not force the polarized plug into the outlet; it fits one way only.
WARNING: Do not attempt to plug the humidifier in with wet hands, as an electrical
shock may occur.
Turn the Humidistat Control Knob to the MAX position (far right). Turn the Power
Control Knob to the desired position: HIGH for fast humidification or LOW for gradual
humidification. The POWER light will illuminate. Comforting, visible warm mist will
begin in 2-4 minutes.
NOTE: If the humidifier does not produce moisture, the humidistat may be
positioned too low. Turning the Humidistat Control Knob to a higher position
should start the humidifier. Do not force the Humidistat Control Knob beyond
the MAX position. Doing so will cause damage to the humidifier.
When the set humidity in the vicinity is reached, the HUMIDITY light will illuminate
and the humidifier will stop producing moisture. When the humidity drops below the
Humidistat setting, the humidifier will start producing moisture again automatically
and the HUMIDITY light will disappear. The on/off cycle will continue while the
humidifier is in use.
If condensation begins to form on walls or windows, lower the Humidistat Control
Knob setting (turn knob to the left).
When you are finished using the humidifier, be sure to turn the Power Control Knob to
the OFF position.
REFILLING THE TANK(S)
When the water drops to a minimum level in the base, the REFILL light will illuminate
and the humidifier will stop producing moisture. Follow the instruction in the SET UP
section to refill the tank(s).
NOTE: Depending on how level and flat the surface where the humidifier is placed,
models with two tanks may empty into the base together or separately.
REPLACING THE ABSORPTION SLEEVE
IMPORTANT! It is recommended that you remove and inspect the absorption
sleeve every time refilling the tank(s). Clean or replace the sleeve if any mineral
buildup or discoloration on the outside or inside of the absorption sleeve is visible.
Failure to properly maintain the absorption sleeve can result in poor performance
and possible malfunction of your humidifier. For best results, use distilled or
filtered water.
CAUTION: Make sure the heating element has cooled before replacing the
sleeve.
The absorption sleeve is a vital part of the humidifier. Do not attempt to use the
humidifier without the sleeve. Do not alter or attempt to repair any absorption sleeve.
Be sure to use only Optimus absorption sleeves with the humidifier. Using any other
absorption sleeves may cause damage to the humidifier, create a safety hazard, and
Loading ...
Loading ...
Loading ...
