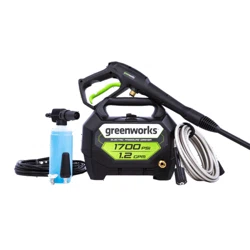
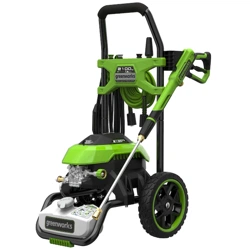
USER MANUAL 1700 PSI ELECTRIC PRESSURE WASHER
PRODUCT SPECIFICATIONS
Universal Motor ...................................................................................120V~ 60 Hz, 13 Amps
Max. Pounds Per Square Inch Pressure................................................................... 1700 PSI
Rated Gallons Per Minute ......................................................................................... 1.2 gpm
Maximum Inlet Water Temperature ....................................................................104°F (40°C)
Cleaning Units...........................................................................................................2,040 C.U.
Weight ..................................................................................................14.3 lbs. ( 6.5 kg)

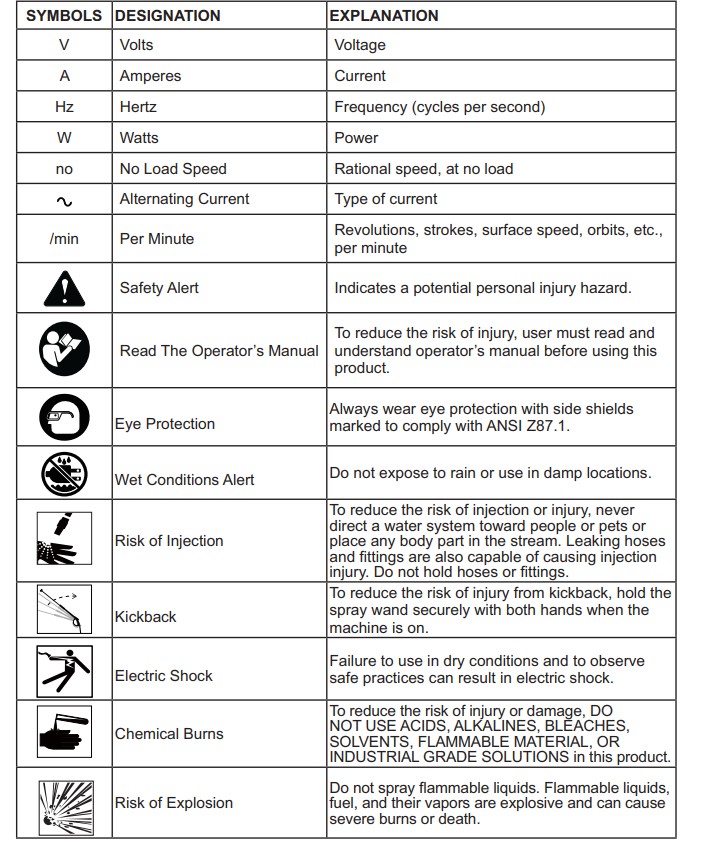
SYMBOLS
Some of the following symbols may be used on this product. Please study them and learn their meaning. Proper interpretation of these symbols will allow you to operate the product better and safer.
ELECTRICAL
ELECTRICAL CONNECTION
- This product has a precision-built electric motor. It should be connected to a power supply that is 120 volts, 60 Hz, AC only (normal household current). Do not operate this product on direct current (DC). A substantial voltage drop will cause a loss of power and the motor will overheat.
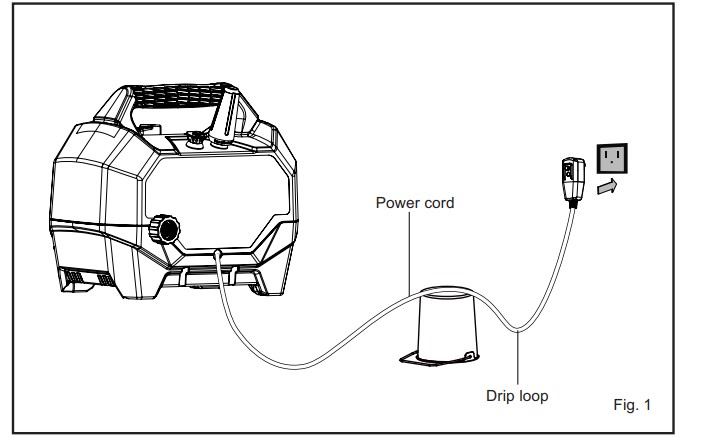
DRIP LOOP
- To prevent water from flowing along the power cable. and possibly reaching the electrical outlet and plug. we recommend using a simple drip loop as shown below.
KNOW YOUR PRESSURE WASHER
The safe use of this product requires an understanding of the information on the tool and in this operator’s manual as well as a knowledge of the project you are attempting. Before use of this product, familiarize yourself with all operating features and safety rules.(See Figure 2.)
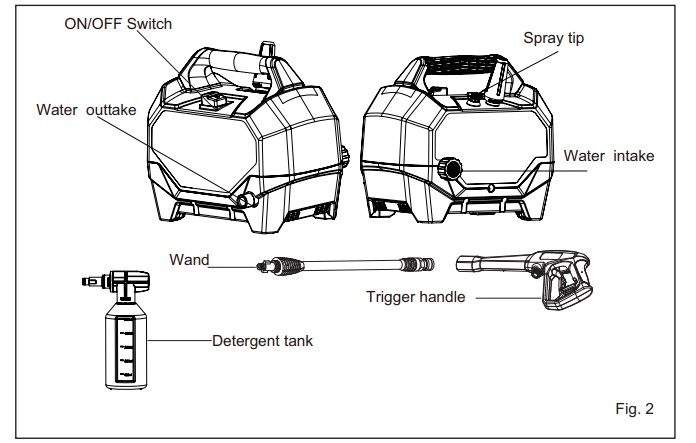
DETERGENT TANK
- Remove the cap from the detergent tank to add detergent to the pressure washer.
GFCI PLUG
- The pressure washer power cord is equipped with a GFCI plug to guard against the hazards of ground fault currents. This plug does not protect against short circuits, overloads, or shocks.
AUTO ON/OFF SWITCH:
- This pressure washer is equipped with an Auto Start/Stop feature. To operate: Set power switch to the On (I) position. Pump will pressurize and shut down immediately. Once the trigger of the gun is depressed the unit will turn on. Unit will shut off and be in standby mode when trigger is released.
TRIGGER AND WAND ASSEMBLY
- The Trigger and Wand allows you to operate the pressure washer by depressing the trigger to activate the pump to spray water using the desired spray tip.
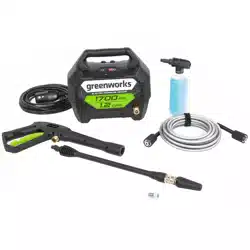
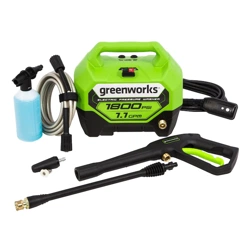
PACKING LIST

ASSEMBLY
UNPACKING
This product requires assembly.
- Carefully remove the product and any accessories from the box. Make sure that all the contents from the packaging list are included.
- Inspect the product carefully to make sure no breakage or damage occurred during shipping.
- Do not discard the packing material until you have carefully inspected and satisfactorily operated the product.
- If any parts are damaged or missing, please call 1-888-909-6757 for assistance.
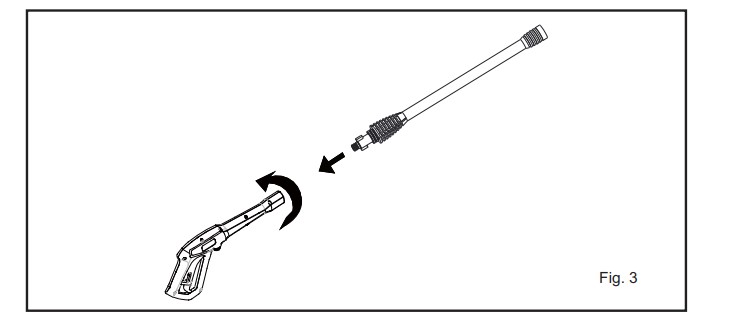
ASSEMBLING THE SPRAY WAND See Figure 3.
- Push the end of the spray wand into the trigger handle and rotate clockwise to secure.
- Pull on the spray wand to be certain it is properly secured.
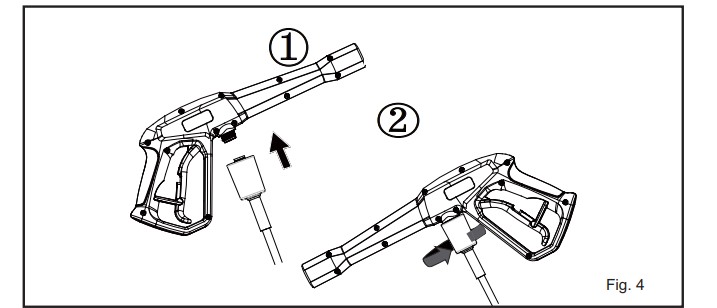
CONNECTING HIGH PRESSURE HOSE TO TRIGGER HANDLE See Figure 4.
- Align the pressure hose with the trigger handle and push up and into position
- With hose pushed into position on the trigger handle, secure in place by turning the hose lock clockwise until fully tightened.
NOTE: For easier installation of the hose to the unit or trigger, it is suggested to add pressure washer or dish detergent to the rubber seal at each end of the hose.
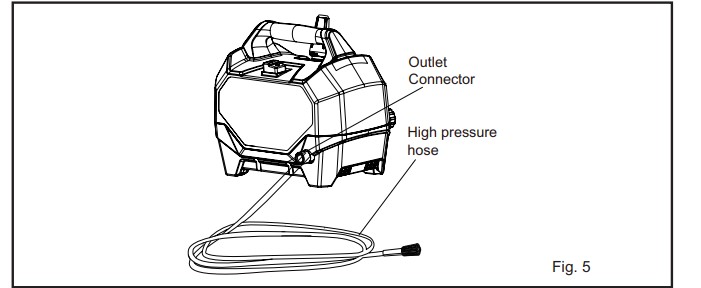
CONNECTING HIGH PRESSURE HOSE TO PRESSURE WASHER See Figure 5.
- Connect one end of the hose to the water outlet connector and the other end to the trigger gun.
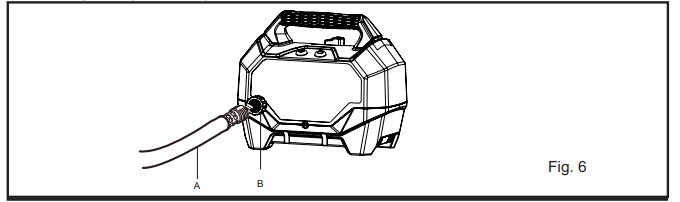
CONNECTING THE GARDEN HOSE See Figure 6.
NOTE: There must be a minimum of 10 feet of unrestricted garden hose between the water intake and the garden hose faucet or shut off valve (such as a “Y” shut off connector).
- Run water through the hose (A) for 30 seconds to clean any debris from the hose.
- Inspect the screen in the water intake (B).
- If the screen is damaged, do not use the machine until the screen has been replaced.
- If the screen is dirty, clean it before connecting the garden hose to the machine.
- With the hose faucet turned completely off, attach the end of the garden hose to the water intake. Tighten by hand only.
OPERATION
APPLICATIONS
You may use this product for the purposes listed below:
- Cleaning boats, cars, trucks, motorcycles, outdoor furniture, grills, house siding, driveways, patios and decks
DETERGENT ADDING AND USE
- Use only detergents designed for pressure washers; household detergents, acids, alkalines. Many detergents may require mixing prior to use. Prepare cleaning solution as instructed on the solution bottle
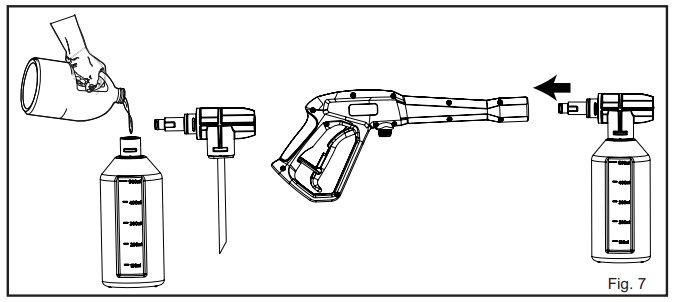
SOAP APPLICATION See Figure 7.
- Soap is applied under low pressure high volume for optimum performance.
To add detergent:
- Pour detergent in the detergent tank.
- Install the soap tank to the trigger gun.
- Start the pressure washer and spray the detergent on a dry surface using long, even, overlapping strokes. To prevent streaking, do not allow detergent to dry on the surface.
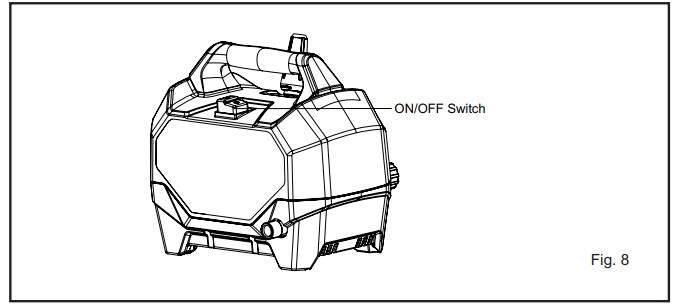
STARTING AND STOPPING THE PRESSURE WASHER See Figure 8.
NOTE: If the pressure washer pulsates and the water stream is intermittent turn the pressure washer off and continue to bleed air out of the system. Ensure to check that the garden hose is fully turned on and not kinked.
- After ensuring the On/Off switch is in the OFF ( O ) position, connect the pressure washer to the power supply.
- Press the reset button on the pressure washer’s plug to make sure the unit is ready for operation. • Press the switch to ON ( I ) position to start the motor.
- To stop the motor, release the trigger and press the switch to OFF( O ) position.
NOTE: The pressure washer may be on and the system may have pressure even when the pump and/or motor cannot be heard running. Always use caution around the pressure washer
NOTE: AUTO ON/OFF SWITCH: This pressure washer is equipped with an auto start/stop feature. To operate: Set the power switch to the On (I) position. Pump will pressurize and shut down immediately. Once the trigger of the gun is depressed, the unit will turn on. Unit will shut off and be in standby mode when trigger is released.
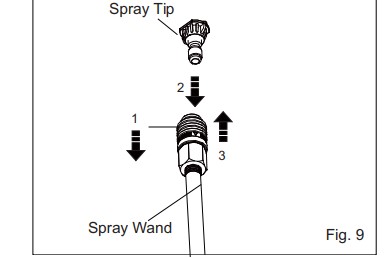
USING THE SPRAY TIPS (See Figure 9)
Each of the spray tips has a different spray pattern. Before starting any cleaning job, determine the best spray tip for the job. The following chart offers some general guidelines to help you choose the best spray tip for your application.
- Turn off the pressure washer and shut off the water supply. Pull trigger to release water pressure. • Engage the lock-out on the trigger handle by pushing the trigger lock button to the right.
- Pull out the desired spray tip from the tip storage.
- Pull back the quick-connect collar on the spray wand.
- Push the spray tip into place in the spray wand.
- Push the collar forward so that the spray tip is secured properly. Check to see that the spray tip is secure.
NOTE: Make sure the faucet is turned on fully and that there are no kinks or leaks in the hose.
- Pull back the quick-connect collar
- Push the spray tip into place
- Push the collar forward
TO DISCONNECT A SPRAY TIP FROM THE SPRAY WAND ONCE THE CLEANING JOB IS COMPLETE:
- Turn off the pressure washer and shut off the water supply. Pull trigger to release water pressure.
- Remove the spray tip by placing hand over spray then pulling back the quick-connect collar. Place spray tip in the tip storage area.
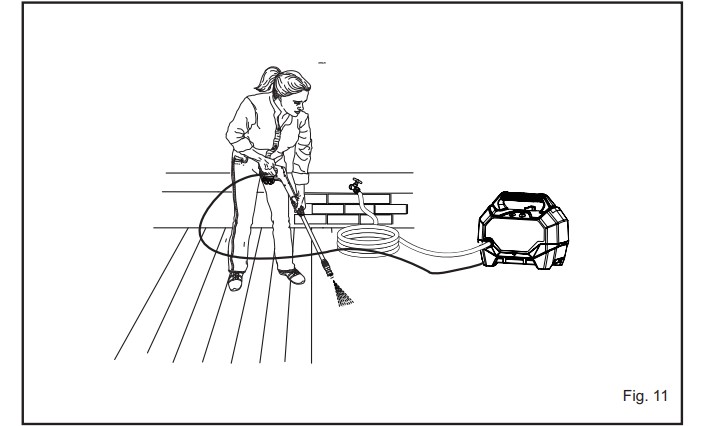
OPERATING THE PRESSURE WASHER (See Figure 11)
Use only detergents designed for pressure washers. Many detergents may require mixing prior to use. Prepare cleaning solution as instructed on the solution bottle.
- Turn the garden hose on then squeeze the high pressure trigger to relieve air pressure. Once a steady stream of water appears, release the trigger.
- After ensuring the switch is in the OFF position, connect the pressure washer to the power supply.
- Set the switch to the ON(I) position to start the motor.
- Turn the garden hose on then squeeze the high pressure trigger.
MAINTENANCE
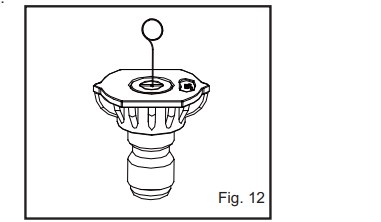
SPRAY TIP MAINTENANCE(See Figure 12)
a. Excessive pump pressure (a pulsing sensation felt while squeezing the trigger) may be the result of a clogged or dirty spray tip.
- Unplug the pressure washer.
- Turn off the pressure washer and shut off the water supply. Pull trigger to release water pressure.
- Remove the spray tip from the spray wand.
NOTE: Never point the spray wand at your face.
b. Using the spray tip cleaning tool provided, free any foreign materials clogging or restricting the spray tip opening.
- Using a garden hose, flush debris out of the spray tip by back flushing (running the water through the spray tip backwards or from the outside to the inside).
- Reconnect the spray tip to the spray wand.
- Turn on the water supply
STORING THE PRESSURE WASHER
- Store in a dry, covered area where the weather can’t damage it. It is important to store this product in a frost-free area. Always empty water from all hoses, the pump, and the detergent container before storing.
NOTE: Use of a pump saver will give you better performance and increase the life of the machine.
QUICK WINTERIZING PROCEDURE
You can protect your pressure washer from winter damage by doing below:
- Disconnect all water connections.
- Turn on the machine for a few seconds until the remaining water in the pump exits. Turn off immediately.
- Do not allow high-pressure hose to become kinked.
- Store the machine and accessories in a room that does not reach freezing temperatures. Do not store near furnace or other sources of heat as it may dry out the pump seals.
TROUBLESHOOTING
Motor will not start.
- On/Off switch is in the “OFF” (O) position.
- Set switch to the “ON” ( | ) position.
- Power cord is not plugged in.
- Electrical outlet does not supply adequate power.
- Tripped pressure washer circuit breaker.
- Allow to cool, and restart unit.
- Power switch is ON however gun trigger is not squeezed ON.
- With power switch ON push in on the gun trigger which will engage the AUTO ON switch.
Unit does not reach high pressure.
- Diameter of garden hose is too small.
- Replace with a 1” (25 mm) or 5/8” (16 mm) garden hose.
- Water supply is restricted.
- Check garden hose for kinks, leaks and blockage.
- Not enough water supply.
- Pressure Tip has not been installed on wand assembly.
- Add desired pressure tip to end of wand.
- Water intake filter is clogged.
- Remove filter and rinse in warm water.
Output pressure varies high and low.
- Not enough inlet water supply.
- Turn water on fully. Check garden hose for kinks, leaks or blockage.
- Pump is sucking air.
- Check that hoses and fittings are airtight. Turn ''OFF” machine. and purge pump by squeezing trigger gun until a steady flow of water emerge through the spray tip.
- Water inlet filter clogged.
- Remove filter and rinse in warm water.
- Supply voltage below minimum.
- Verify that only the pressure washer is running on this circuit.
- Calcified gun, hose or power spray tip.
- Run distilled vinegar through detergent tank.
Motor buzzes but fails to run
- Supply voltage below minimum.
- Verify that only the pressure washer is running on this circuit.
- System has residual pressure.
- Turn unit “OFF”, squeeze trigger on spray wand to release pressure, then turn unit “ON”.
- Voltage loss due to extension cord.
- Unplug any extension cords attached and plug the unit directly into the outlet.
- Pressure washer not used for long periods.
- Residual friction among components. Unit might hum.
- Disconnect water supply and power ON for 2 to 3 seconds, repeat couple times or until the motor starts.
No water
- Water supply is OFF.
- Kink in the garden hose.
- Remove kink in garden hose.