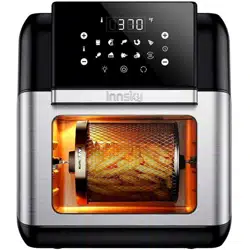
Innsky IS-AF001 - 10.6 Quart Air Fryer
Product's Documents
Below are documents related to this product, you can read online or download:
- User Manual - (English) Read Online | Download pdf
Kindly Reminder:
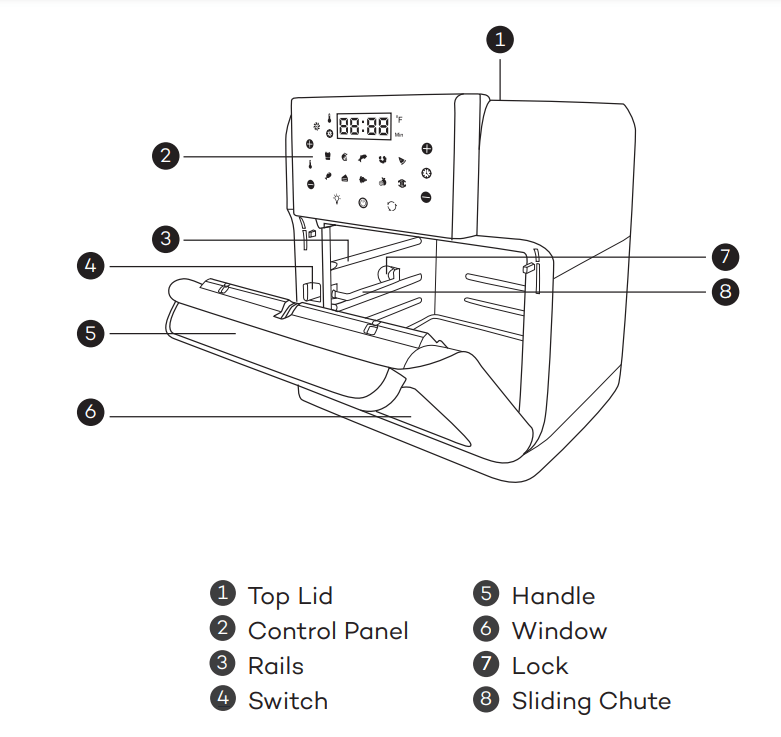
The front door is detachable for easy cleaning and maintenance.
Note: Never wash or submerge the main unit in water
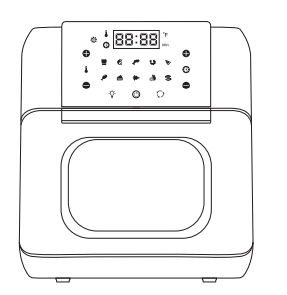
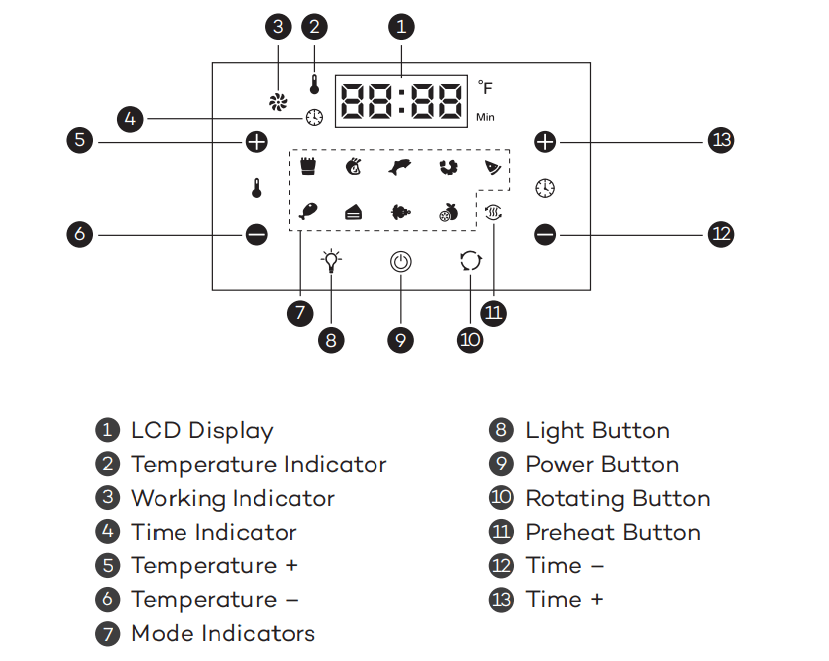
Connect the appliance to a power source, it enters standby mode with a beep. All the indicators on the control panel will flash once.
When the appliance is on, press the Light Button to turn on / off the light.
When the appliance is on, tap the Preheat Button to preheat it if needed.
Note: Tap the Rotating Button to start rotating if the rotisserie shaft or basket is used for more even result.
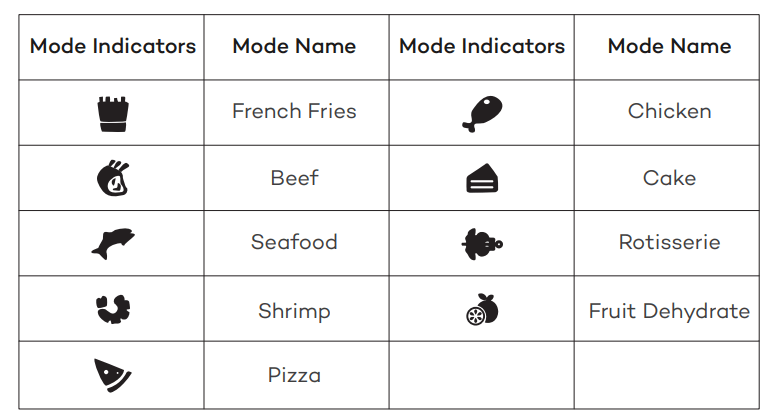
Cooking Mode | Temperature | Cooking Time |
| French Fries | 400°F(200°C) | 15min |
| Steaks / Chops | 350°F(177°C) | 25min |
| Fish | 360°F (182°C) | 15min |
| Shrimp | 320°F (160°C) | 12min |
| Pizza | 360°F (182°C) | 15min |
| Chicken | 370°F (185°C) | 40min |
| Baking | 320°F (160°C) | 30min |
| Rotisserie | 375°F (191°C) | 30min |
| Dehydrate | 90°F (32°C) | 120min |
Note: Dehydrate Function
Time Range: 1-24 hours
Temperature Range: 90°F-400°F
Tap the Time + / - Buttons to increase / decrease the cooking time with a difference of 1 minute in each tap.
Tap the Temperature + / - Buttons to change the cooking temperature
Kindly Reminder:
Tap and hold the + / - Buttons to increase / decrease the cooking time and temperature continuously
Recommended Cooking Time and Temperature
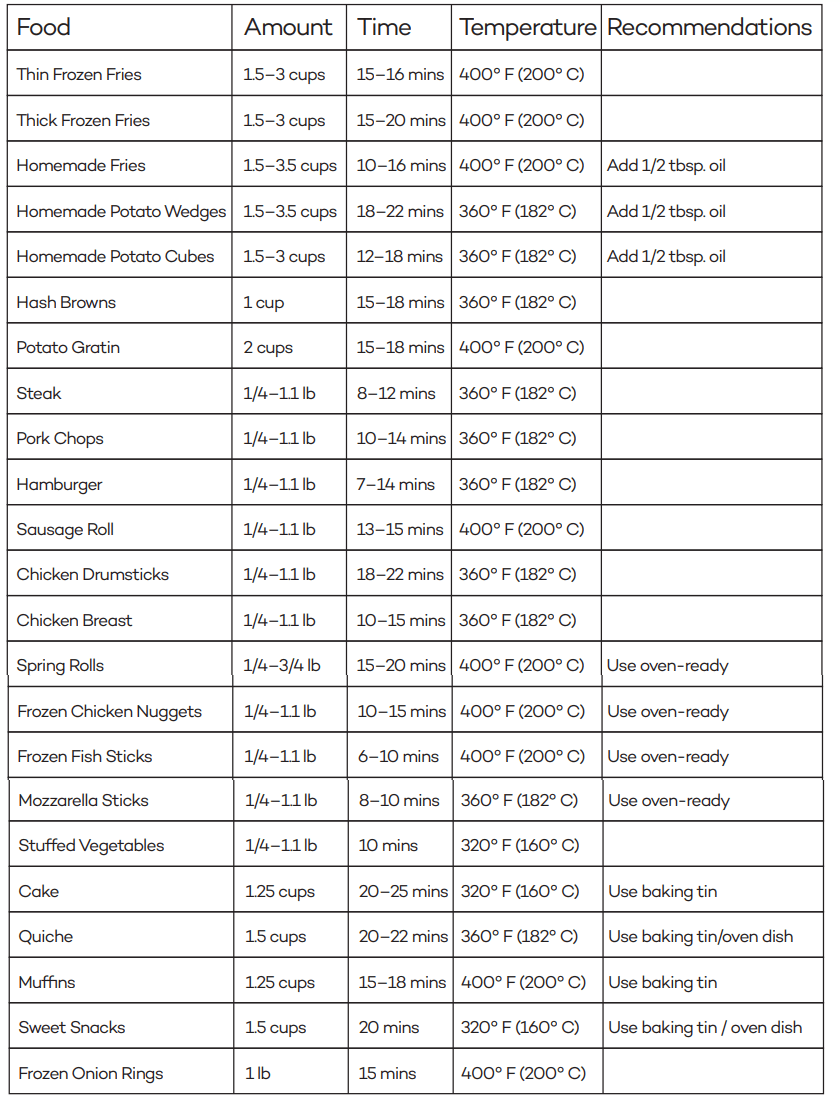
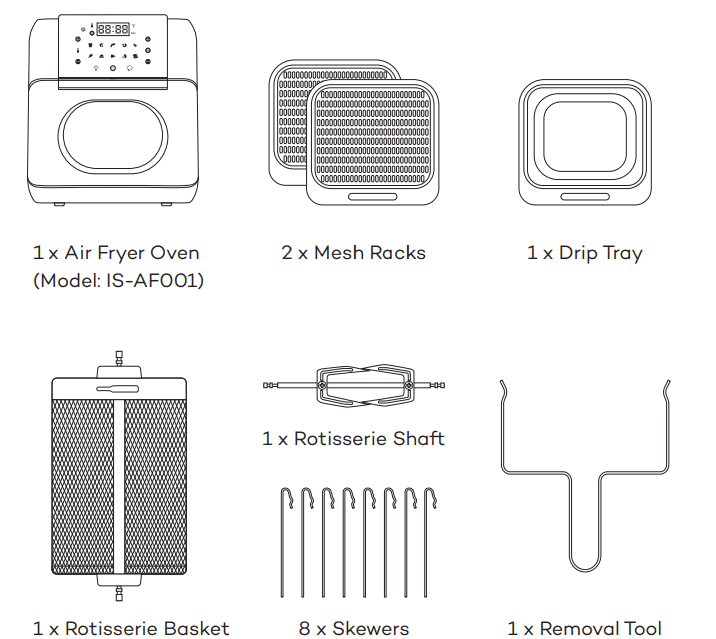
Please choose the proper accessories as per the ingredients to be cooked. Pull the
Handle to open the window and install the accessories as instructed below.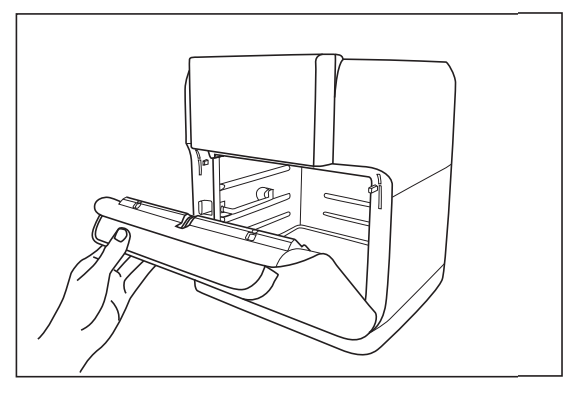
Mesh Racks
Slide the mesh racks into the upper two sliding chutes for dehydration or to cook crispy snacks / reheat items like pizza.
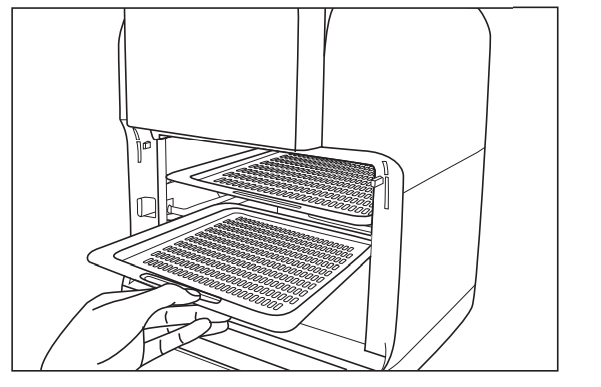
Drip Tray
Slide the drip tray into the lowest sliding chute to collect the dripping oil and residue for easier cleaning of the oven.
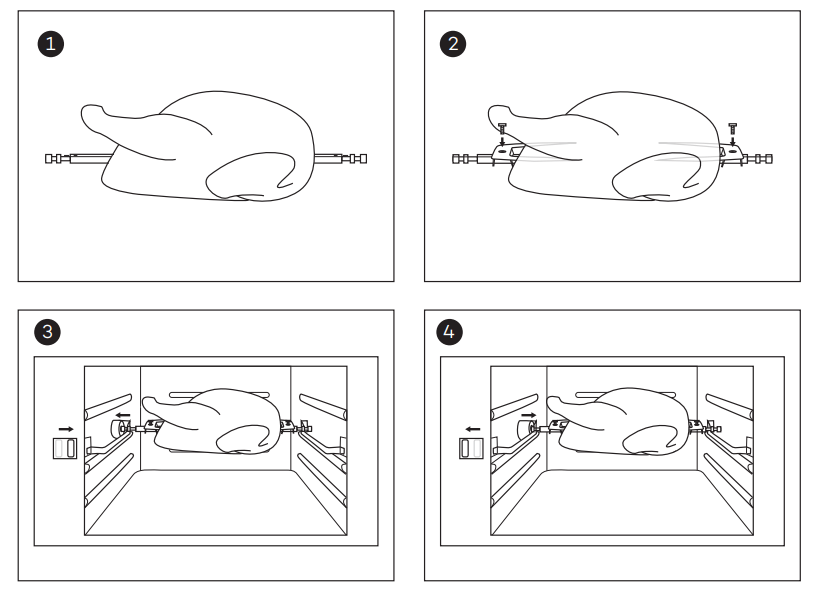
Rotisserie Shaft
It is used to roast whole chicken and relatively large pieces of meat.
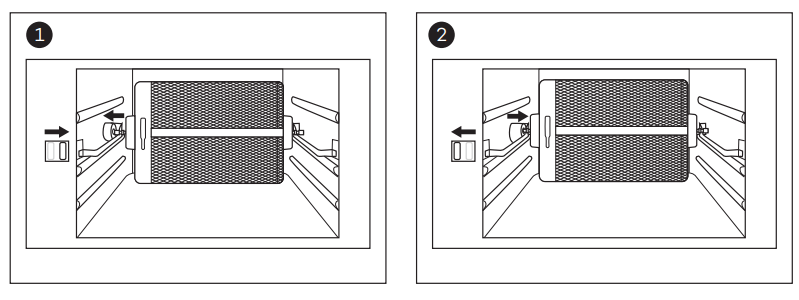
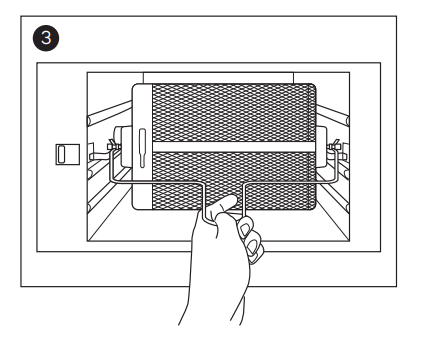
Rotisserie Basket
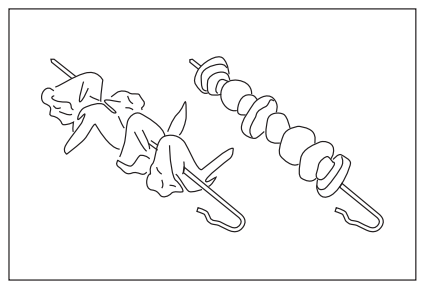
Skewers
It is used together with skewer racks to wear meat, fish, vegetables and other ingredient.
Warning
Skewers and other accessories are relatively sharp due to functional requirements. Please pay special attention during use, and take appropriate protection when necessary. When cooking is done, the temperature of the accessories is very high. Do not touch directly to prevent scalding. Please keep the accessories properly to prevent children from coming into contact with them.
Clean the air fryer oven after each use. Unplug the power cord from the wall socket and be certain the appliance is thoroughly cooled before cleaning.
Problem | Possible Cause | Solution | |
| The oven does not work | The appliance is not plugged in | Plug power cord into wall socket | |
| You have not turned on the Unit by setting the cooking time and temperature | Set the temperature and time as instructed | ||
| The product window is not closed properly | Check that window is closed | ||
| The ingredients fried with the air oven are not done | Too much amount of food | Reduce the amount of food for single cooking | |
| Setting temperature too low | Set the temperature higher | ||
| The ingredients are fried unevenly | When tray is used to make food, the tray position is not adjusted | During cooking, adjust the tray position appropriately | |
| White smoke comes out of the appliance | You are preparing greasy ingredients | When you fry greasy ingredients in the air fryer, a large amount of oil will leak into the pan. The oil produces white smoke and the pan may heat up more than usual. This does not affect the appliance or the end result | |
| The pan still contains grease residues from previous use | White smoke is caused by grease heating up in the pan. Make sure you clean the pan properly after each use | ||
| Fresh fries are not crispy | The crispiness of the fries depends on the amount of oil and water in the fries. | Make sure you dry the potato sticks properly before you add the oil Cut the potato sticks smaller for a crispier result. Add slightly more oil for a crispier result | |
| All lights flash and error code appears on the display | E1 | Broken circuit of the thermal sensor | Contact Customer Care Team |
| E2 | Short circuit of the thermal sensor | Contact Customer Care Team | |