User Manual Digital Laser Infrared Thermometer
Safety Use & Care
- DO NOT point the laser-light at another person or animal.
- DO NOT attempt to point laser-light at an aircraft.
- Avoid direct/indirect eye contact with the laser-beam. Laser radiation may cause eye damage.
- DO NOT view the beam with optical instruments.
- In the vicinity of use. make any bystanders aware of the dangers of looking directly into the laser beam.
- DO NOT allow children to operate the device.
- Use a 9V battery when replacing the battery within the device.
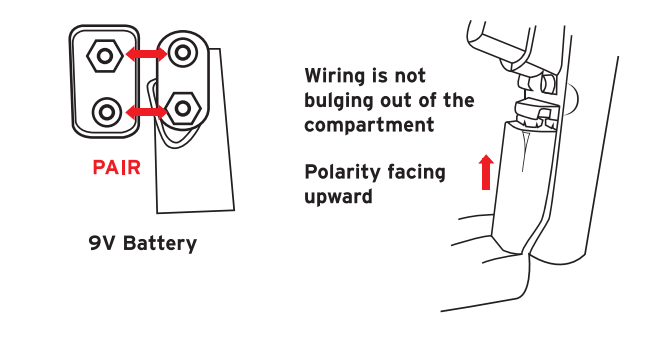
- Make sure to insert the battery in accordance with the correct polarities.
- ALWAYS remove the batteries when cleaning the device.
- DO NOT use leaking batteries or dispose old batteries in fire.
- Remove battery for storage if the device is not being used for a prolonged period of time.
- DO NOT disassemble the device or tamper with internal components. Doing so will void any warranty.
- DO NOT touch the lens or wipe it using anything other than a soft cloth or cotton swab.
- Keep the thermometer away from electromagnetic fields produced by objects such as arc welders and induction heaters.
- DO NOT expose the thermometer to direct sources of heat for extended periods of time.
- The thermometer measures surface temperature. not internal temperature. Do not use the Lasergrip as a reliable source to measure body temperatures.
Features & Specifications
- Laser guided targeting for aiming precision
- Narrow distance-spot ratio for accurate results at greater distances
- Safely measure hazardous or inaccessible objects
- Standard 9V battery powers up to 12 hours of cumulative use
- Auto-off after 15 seconds of inactivity
- Measurement Range: -58°F ~ 1022°F (-50°C ~ 550°C)
- Accurac 2% /2°C
- Resolution: O.19F/°C
- Maximum Output: <1mwW
- Wavelength: 630 - 670nm
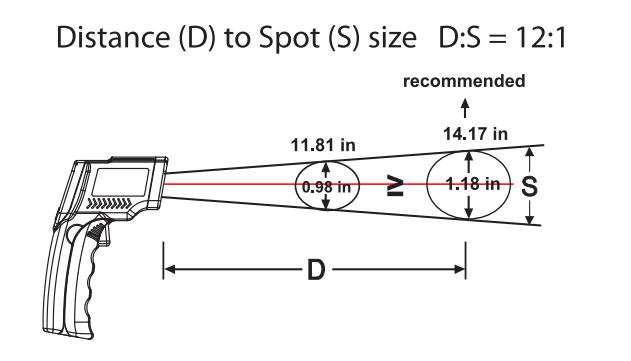
- Distance-Spot Ratio: 12:1
- Response Time: <500ms.
- Emissivity: 0.95
- Battery: Dc 9v
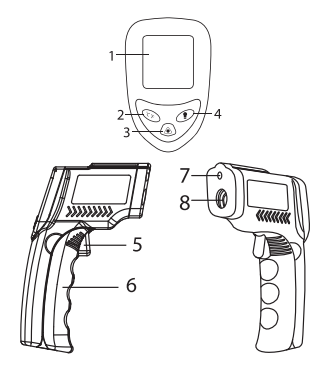
Function Diagram
- LCD Display
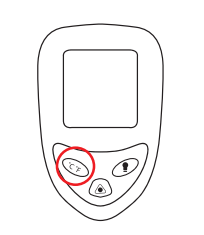
- Unit Switch Button (°C/°F)
- Laser Pointer On/Off
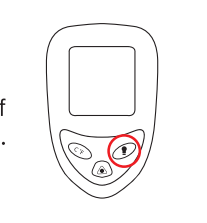
- Display Backlight On/Off
- Measurement Trigger
- Battery Compartment
- Laser Hole
- IR Sensor
Operation
Surface Temperature Measurement
- Once the battery is properly installed. press the measurement trigger to activate the device.
- Point the Lasergrip towards the surface of measurement.
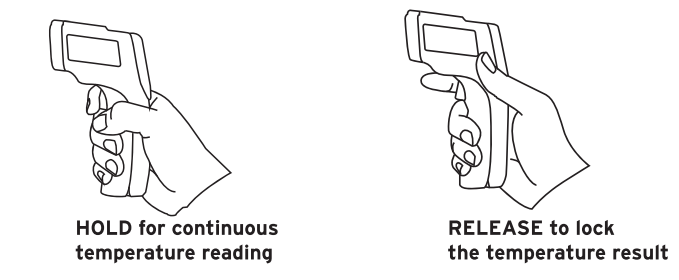
- Press and hold the measurement trigger and the laser will activate for aiming guidance.
- Keep holding the trigger as you move the Lasergrip if you wish to live scan the surface area for temperature measurement.
- Once the laser is pointed to the desired point of measurement. release the trigger and the LCD display will lock the calculated temperature.
- Press the measurement trigger once again to make another measurement. HOLD for continuous RELEASE to lock temperature reading the temperature result.
NOTE: The Lasergrip LCD will display HI’ when the measured temperature is above the measurable range. and will display "LO" when the measured temperature is below the measurable range.
Unit Conversion
To switch between units of temperature measurement. press the °C/"F button at any time while the Lasergrip is on.
Laser Activation
To activate and deactivate the laser. press the laser pointer On/Off button at any time while the Lasergrip is on.

Display Backlight Operation
To activate and deactivate the display backlight. press the display backlight On/Off button at any time while the Lasergrip is on.
Battery Replacement
A low battery icon will appear on the LCD display when the Laserarip's battery power is running low. Immediately replace the battery when the icon appears.
- Open the battery compartment and remove the used battery. Dispose the used battery properly.
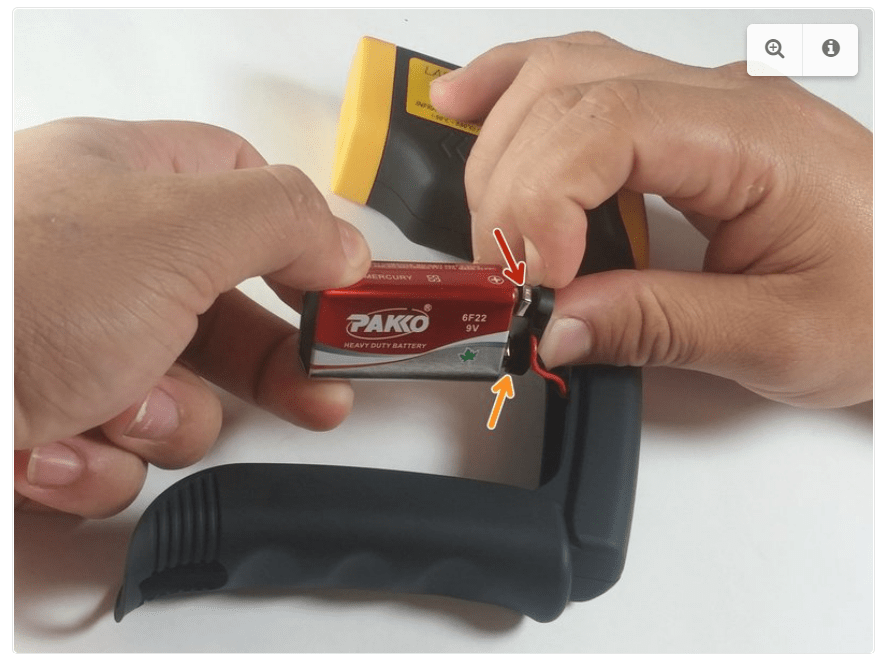
- Connect a new DC 9V battery. making sure it’s under the correct polarity.
- Insert the battery into the compartment and close the compartment lid. making sure the wiring is not being pinched by the compartment lid.
Distance-Spot Ratio
The Lasergrip 1080 measures surface temperature on the basis of distance to spot diameter ratio (D:S). As the distance between the thermometer and the surface increases. the total surface area measured will also increase. With a distance to spot ratio of 12:1 the surface area measured has a diameter of roughly 1/12 the distance.
For the most accurate results. make sure the target has a surface area of twice the corresponding spot diameter. Insufficient surface area will result in inaccurate results. The recommended distance to hold the Lasergrip from the surface of measurement is 14.17in (36 cm). This creates a spot measurement area of 1.18 inches (3 cm) in diameter.
Emissivity
The emissivity of a material is its efficiency in emitting thermal energy. Non-reflective surfaces have a higher emissivity (closer to 1) than reflective surfaces (closer to 0). Inaccurate results may occur when measuring reflective surfaces such as glass. polished wood. and granite.
To take accurate temperature measurement of reflective surfaces with low emissivity. place a strip of masking tape over the surface and allow for it to adjust to the temperature of the surface for approximately 30 minutes. Measure the surface. scanning the taped section. eliminating the issue of inaccuracy.

The device certification information is labeled directly on the device. The sticker is located on the left side of the
Lasergrip.
The device warning and aperture safety information are also labeled directly on the device; the sticker is located on the right side of the Lasergrip.
Any updates to the product information (date of manufacturing and manufacturer address) will be added as adhesive overlays.
Package Contents
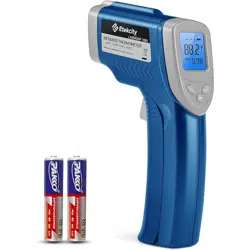
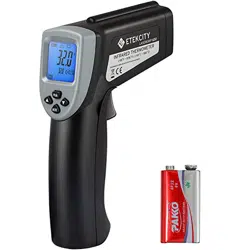
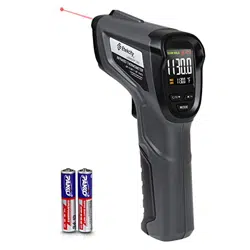
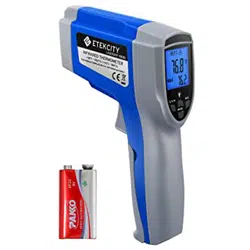
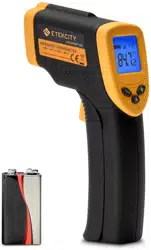
- 1x Etekcity Lasergrip 1080 Infrared Thermometer
- 1x 9V DC Battery
- 1x User Manual
Battery Replacement
This guide will teach you how to replace the battery if it is dead. It will require no tools and has no hazards.
- Step 1: Pull the battery cover away from the handle by gripping near the thumb groove.
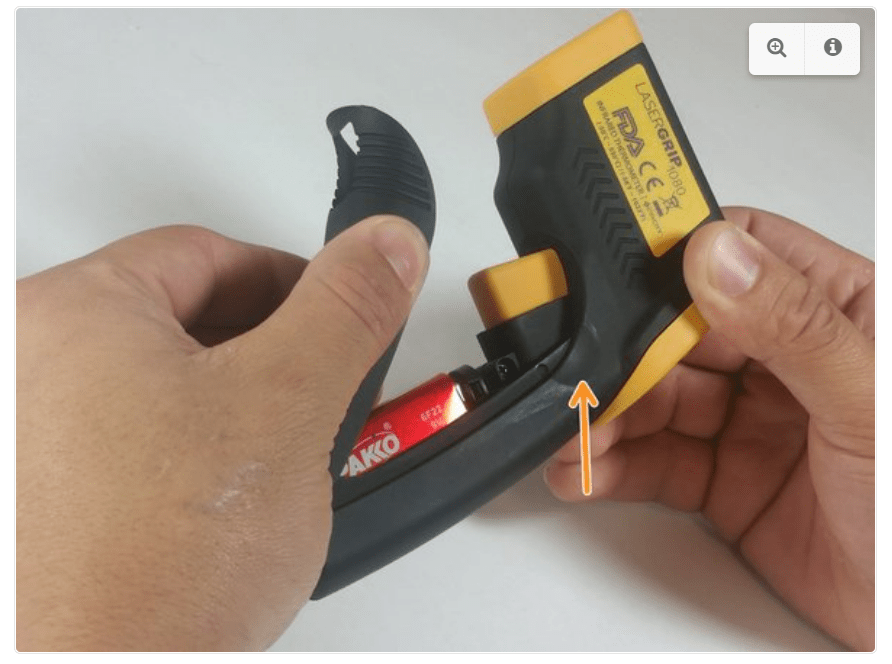
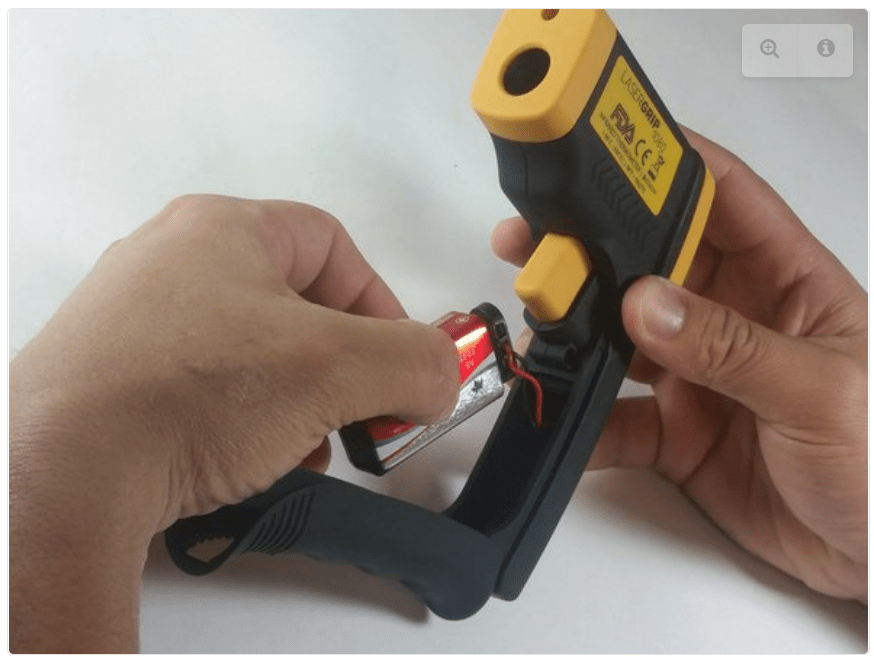
- Step 2: Gently pull the battery out of the handle.
 Excessive force could damage wires.
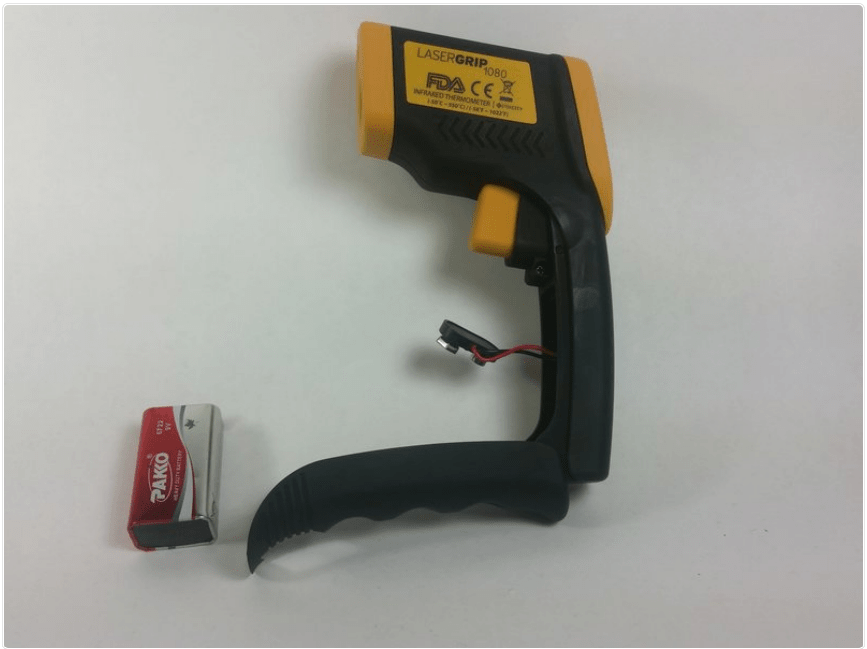
 When replacing the battery, this order is reversed.