Loading ...
Loading ...
Loading ...
9 ENGLISH
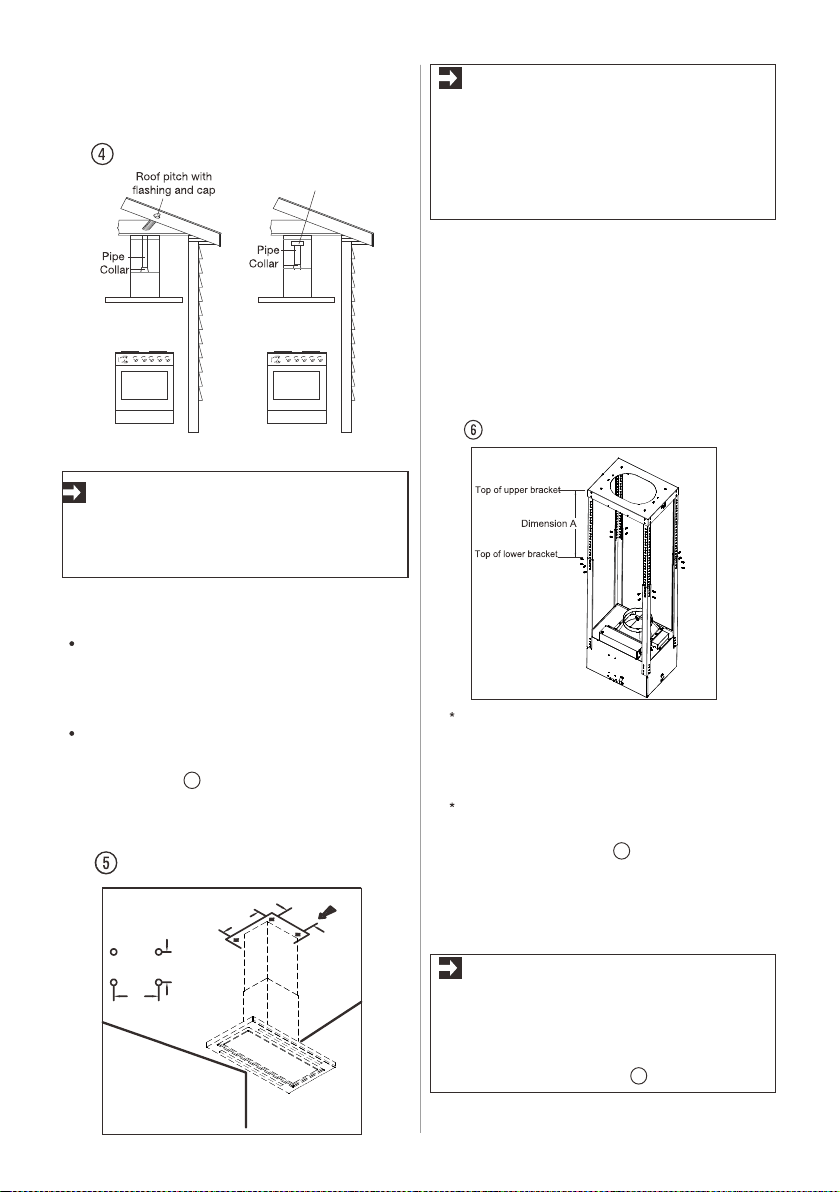
Examples of possible ducting or
air recirculation
IMPORTANT
This range hood is very heavy. Adequate
structure and support must be provided in
all types of installations.
Make sure that no cables or pipes will
become damaged (e.g. electric, gas, water;
test the areas in question with a cable
detector).
Using the template, mark and drill 4 holes
into the ceiling. Measure as displayed in
diagram (fig. ). The holes must be drilled
into a wood structure capable to support
150lbs load.
NOTE
1.The center of the template must match the
center of the cooktop and the edges must
be parallel to the sides of the cooktop.
2.Have a suitable ladder ready so that you
can easily reach up to the ceiling.
Unscrew 16 screws between the two sections
of the structure. Adjust extension of the hood
support structure (dimenssion A), as the final
height of the hood depends on this ,and
remember that with installation completed to
the hood must be at least 30" above the
cooktop.
1 With 8'/12'/14' extension chimney kit –
not supplied. Please call Electrolux at
1-800-944-9044 (USA) or 1-800-265-
8352 (Canada) to order this kit.
2 “ Dimension A” represents the height
from the top of upper bracket to the top
of lower bracket (fig. ).
Step 2
Step 1
Step 3
Fix the two sections of the structure
using 16 screws.
Fig.
Fig.
Fig.
Recirculation kit shown
5
6
7
101/16"
101/16"
71/16"
7
1/16
"
It is recommended to fix the supplied
4 supporting brackets (10,11) with
sponge strips(12,13)onto the lower
brackets to make sure two flue
covers fit closely(fig. ).
NOTE
Loading ...
Loading ...
Loading ...