USER MANUAL Upright Freezer
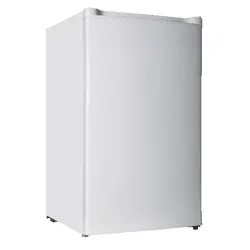
Configuration
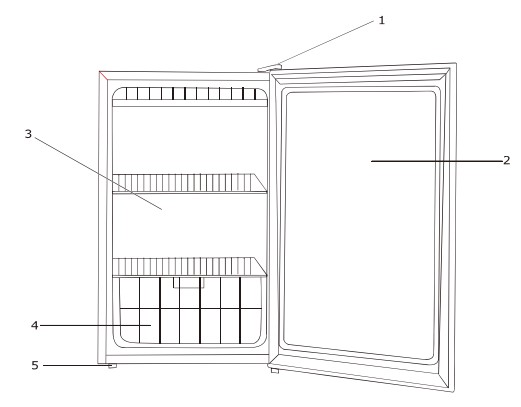
1. Top hinge
2. Freezer door
3. Wire tube evaporator assembly
4. Drawer
5. Adjustable Leg
Unpacking Your Upright Freezer
WARNING: Use two or more people to move upright freezer. Failure to do so can result in back or other severe injury.
Remove tape and any labels from your upright freezer before using (except the rating label). To remove any remaining tape or glue, rub the area briskly with your thumb.
Tape or glue residue can also be easily removed by rubbing a small amount of liquid dish soap over the adhesive with your fingers. Wipe with warm water, rinse and dry.
Do not use sharp instruments, rubbing alcohol, flammable fluids, or abrasive cleaners to remove tape or glue. These products can damage the surface of your upright freeze
When moving the upright freezer, do not tilt it beyond 45° from upright position.
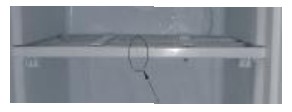
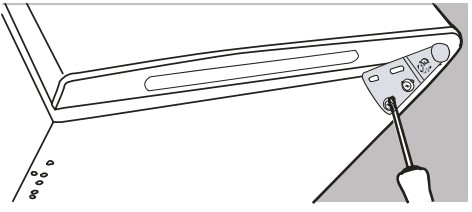
When using, please use scissors to cut out the plastic cable ties in the picture from top to bottom, a total of three cable ties.
Cleaning Before Use
After removing all packaging materials, (especially the foam between outside condenser and cabinet) clean the inside of your upright freezer before using it, wipe inside cabinet with a wet soft cloth and soapy water, then dry it.
Space Requirements
WARNING: Keep flammable materials and vapors, such as gasoline, away from upright freezer. Failure to do so can result in death, explosion, or severe burns.
To ensure proper ventilation for your upright freezer, allow 8inch between walls and each side, 4inch space on the back and 12inch space between countertop and the roof or ceiling.
If you are installing your upright freezer next to a fixed wall, leave enough space on the hinge side to allow the door to open and swing freely.
Never install your upright freezer near a heat source or direct sun light.
Electrical Requirement
WARNING: DO NOT REMOVE GROUND PRONG.
DO NOT USE AN ADAPTOR.
DO NOT USE EXTENSION CORD.
Failure to follow these instructions can result in death, fire or electrical shock.
Before you move your upright freezer into its final location, it is important to make sure you have the proper electrical connection.
Grounded Power Supply
AC 115Volt/60Hz, AC only, 10A fused and properly grounded electrical supply is required. It is recommended to use a separate circuit serving only this appliance. Use receptacles which cannot be turned off with a switch or pull chain. Do not use an extension cord.
NOTE: Before performing any type of maintenance or installation, turn off and disconnect the upright freezer from the electrical source. When you are finished, connect the upright freezer to the electrical source and reset the control to the desired setting
Leveling
It is very important that the freezer is leveled for proper operation. If the upright freezer is not leveled during installation; the doors may not close or seal properly, causing cooling, frost, or moisture problems.
To level your upright freezer you may either turn the level leg clockwise to raise that side or turn counter-clockwise to lower that side.
NOTE: Having someone pushing against the top of the upright freezer take some weight off the leveling leg. This makes it easier to adjust the leveling leg.
How To Use The Freezer
To obtain the best possible results from your upright freezer, it is important that you operate it properly.
Temperature Control
The temperature in the freezer is controlled by the thermostat control knob. The thermostat control box is located in compressor compartment. Turn the thermostat control knob up or down to regulate the temperature inside the freezer. The markings on control knob indicated the "1,2,...6" for the different temperature grades. The temperature decreases like numbers, position "1" being the warmest and position "6" being the coldest.
Set the control to a position between "1" and "6"; for normal use position would be between "2" and "5".
Storing Frozen Food
When using the freezer for the first time or after defrosting, turn the temperature control to position "6" for at least two hours before placing food inside.
All frozen food products should be placed in the freezer as soon as possible to avoid defrosting.
Always follow food storing recommendations (manufacturers' label).
Make sure the wire drawer does not pinch, bend or otherwise obstruct the refrigeration pipeline.
Freezing Fresh Food
Ensure that your freezing operations are carried out under the most hygienic conditions as freezing alone does not sterilize the food.
It is advisable to freeze food split in portions instead of bulk form. Never place hot or even warm food stuffs into the freezer. Prior to storing fresh food, pack it in plastic bags, aluminum sheets or freezing containers and place it into the freezer.
See the data plate on freezer's back for the maximum permissible amount of fresh food in pounds that can be frozen in a 24 hour period with a room temperature of 89.960F. Never freeze more than the maximum allowed.
Note: Never place bottled food or drinks in the freezer compartment.
For best performance, leave enough space in the upright freezer compartment for air to circulate around the packages.
Defrosting
Remove power plug from the wall socket, open the door and remove all the food and place it in a cool place. Defrost using a plastic scraper, or let the temperature rise naturally until the frost melts; then wipe away the remaining ice and water. After freezer is dry plug power cable back into the socket.
Note: To avoid damaging the freezing compartment wall, do not use any sharp objects to remove frost or separate frozen food packages.
Cleaning Your Freezer
Before you start to clean your freezer remove the mains plug from the power supply.
Use a clean sponge or soft cloth and a mild detergent in warm water. Do not use abrasive or harsh cleaners.
Hand wash, rinse and dry all surfaces thoroughly.
Do not use cleaning waxes, concentrated detergents, bleaches or cleaners containing petroleum on plastics or rubber parts.
Never use paper towels, window sprays, scouring cleansers or flammable fluids on plastic parts as these can scratch or damage material.
Clean with a soft cloth soaked in non-abrasive cleanser solution and then dry with a soft cloth.
Reversing The Door Position
Caution: To avoid personal injuries or property damages, we recommend someone assist you during the door reversal process.
- Ensure the appliance is unplugged and empty.
- Adjust both leveling legs to their highest position.
Tools Required
- Phillips head screwdriver
- Flathead screwdriver
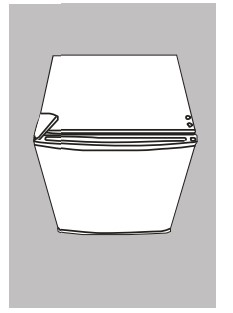
NOTE: To take the door off it is necessary to tilt freezer backward (not beyond 45 degrees). You should rest the appliance on something solid e.g. a chair just below the top panel so you can access the bottom of the appliance.
DO NOT lay the appliance completely flat as this may damage the coolant system.
1. Start by removing the bracket from the bottom: remove screws and foot from the bottom bracket. And remove the foot of opposite side.
2. Self-Tapping Screws/Bottom Bracket/Foot
3. Slide the door down, away from the hinge pin located on the top of the door.
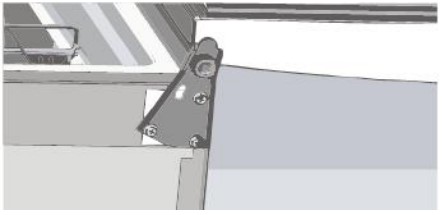
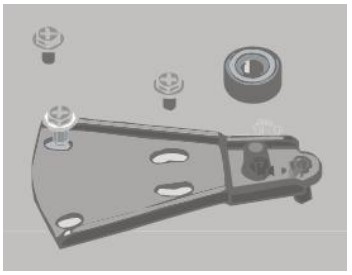
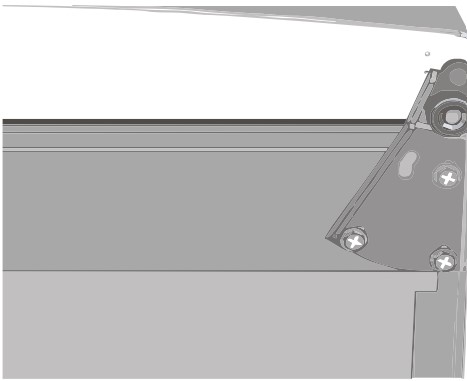
4. Remove the plastic cover from door hinge first. Then unscrew the two screws from top bracket and replace on the other side.
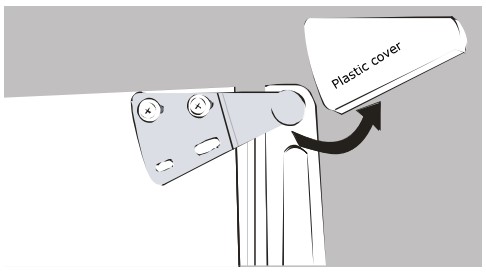
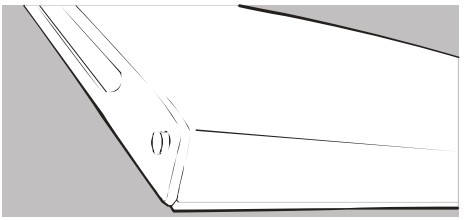
5. To install the bracket on the left side of the appliance, screw the two screws through the bracket and into the top of the appliance. Slide the door back on to the top hinge. Ensure the door is face up. Replace the plastic cover on the top bracket by pressing down until it clicks into position.
6. Screw the bottom hinge into place on the new side. Replace the foot on the other side.
7. Check that the door is aligned horizontally and vertically and that the seals are closed on all sides before finally tightening the bottom hinge. Re-adjust the leveling feet
Prolonged Off Periods
If the freezer is not in use for a long period of time, proceed as follows:
Disconnect the freezer from the main supply by removing the plug from the wall socket.
Clean and dry the inside as instructed in cleaning section.
Leave the door open to prevent any unpleasant smells from building up while the freezer is not in use.
Troubleshooting
In case of malfunction, you can solve many common problems easily:
Your upright freezer will not operate... Check if
- The power supply cord is unplugged.
The doors will not close completely... Check if
- The drawer is out of position.
- The gaskets are dirty.
- The upright freezer is not level.
The freezer is noisy when running... Check if
- The freezer is level and it is not in contact with another appliance or kitchen furniture.
The freezer does not cool sufficiently... Check if
- The door has been opened too often, or it has been left open for a while it will take time for the freezer to reach its set temperature.
- There is enough space on freezer's back to allow regular airflow.
The following characteristics should not be looked upon as a problem.
- A gentle trickling sound caused by coolant flowing inside the pipe.
- Compressor operating at high temperature.