Loading ...
Loading ...
Loading ...
22
English
Beginner
50-60% of maximum heart rate
Suitable for beginners, weight-watchers,
convalescents and persons who have not
exercised for a long Time. Exercise at least three
Times a week, 30 minutes at a Time.
Advanced
60-70% of maximum heart rate
Suitable for persons who want to improve and
maintain fitness. Exercise at least three Times a
week, 30 minutes at a Time.
Expert
70-80% of maximum heart rate
Suitable for the fittest of persons who are used to
long-endurance workouts.
Use
Adjusting the support feet
The equipment is equipped with 2 support feet. If
the equipment is not stable, the support feet can
be adjusted.
- Turn the support feet as required to put the
equipment in a stable position.
‼ NOTE
- The machine is the most stable when all
support feet are turned fully in. Therefore start
to level the machine by turning all support feet
fully in, before turning out the required support
feet to stable the machine. .
Adjusting the horizontal seat position
The horizontal seat position can be adjusted by
setting the seat to the required position.
- Loosen the seat adjustment knob.
- Move the seat to the required position.
- Tighten the seat adjustment knob.
Adjusting the vertical seat position
The vertical seat position can be adjusted by
setting the seat tube to the required position.
With the leg almost straight, the arch of the foot
must touch the pedal at its lowermost point.
- Loosen the seat tube adjustment knob.
- Move the seat tube to the required position.
- Tighten the seat tube adjustment knob.
Adjusting the handlebar
The handlebar can be adjusted according to the
height and the exercise position of the user.
- Loosen the handlebar adjustment knob.
- Move the handlebar to the required position.
- Tighten the handlebar adjustment knob.
Power supply (Fig. E)
The trainer is powered by an external power
supply. Refer to the illustration to locate the
trainer power input.
‼ NOTE
• Connect the power supply with the trainer
before connecting it to the wall outlet.
• Always remove power cord when
• machine is not in use.
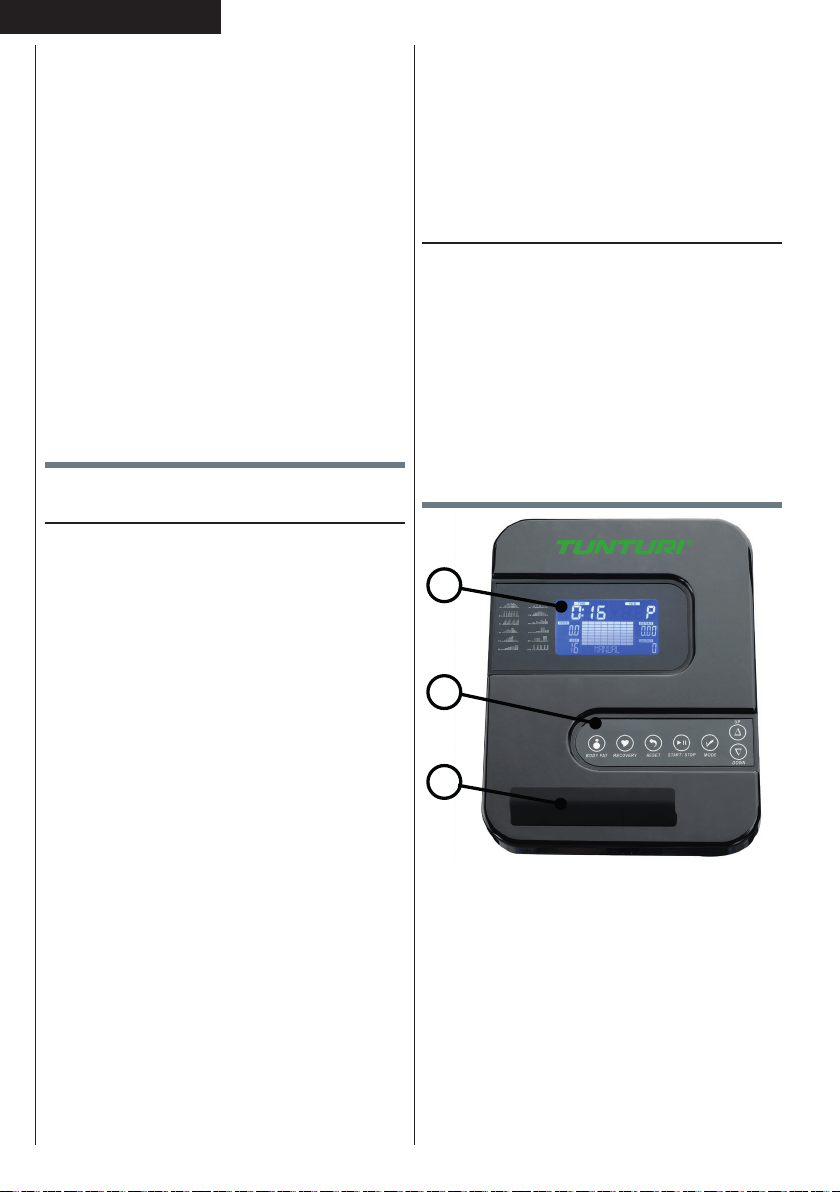
Console (fig F)
1
2
3
1. Display
2. Tablet/ book support
3. Buttons
⚠ CAUTION
• Keep the console away from direct sunlight.
• Dry the surface of the console when it is
covered with drops of sweat.
• Do not lean on the console.
• Only touch the display with the tip of your
finger. Make sure that your nails or sharp
objects do not touch the display.
Loading ...
Loading ...
Loading ...