Owner Manual Computing
Basics
Keyboard
Enter text or access computer functions with the keyboard.

NOTE:
- Images and available features may differ depending on the model and operating system.
- The keyboard layout may differ depending on the country. The hot keys will be mainly explained in this manual.
Using hot keys
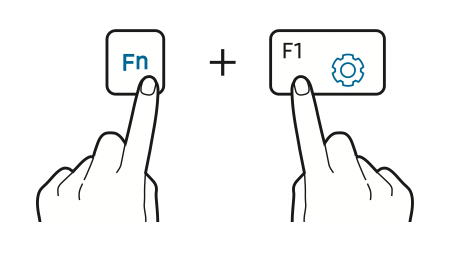
To use keyboard hot keys, do one of the following:
- Press and hold the Fn key and press a hot key.
- Press the Fn Lock key. When the Fn Lock key turns on, press a hot key.
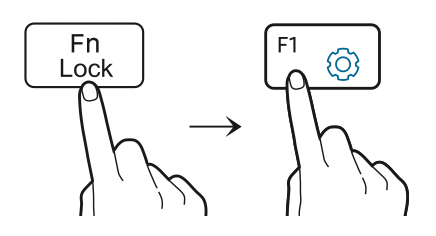
NOTE: When the Fn Lock key is on, hot keys are activated without pressing the Fn key.
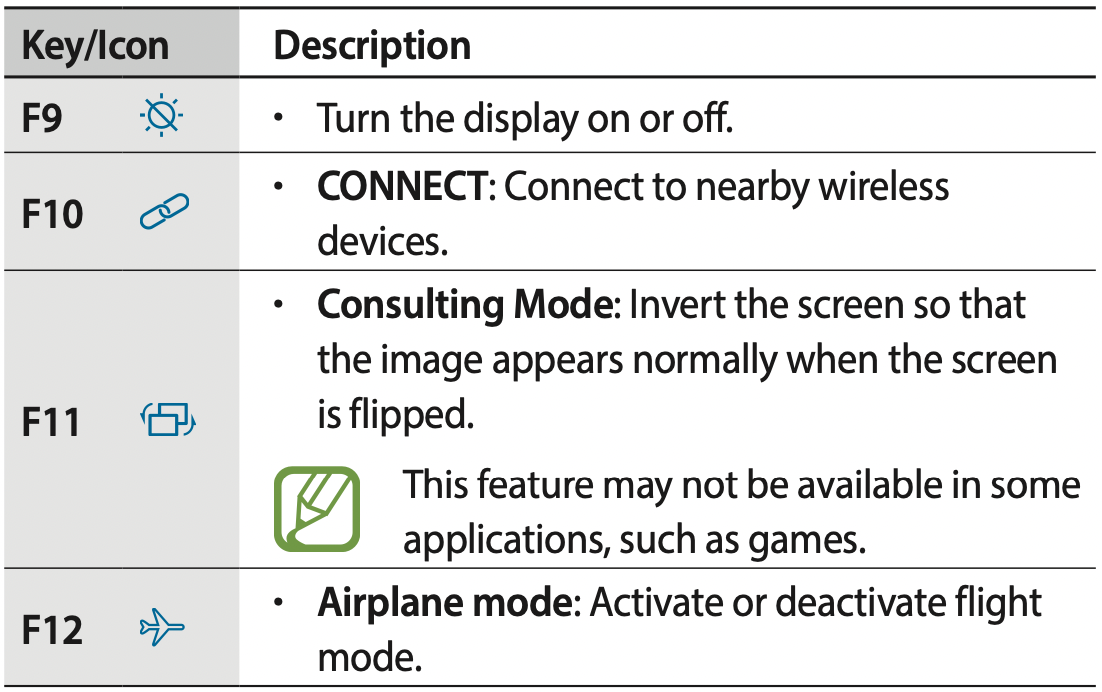
Hot key functions

Touchpad
Use the touchpad to move the cursor or select an item. The left and right buttons of the touchpad act the same as the left and right buttons of a mouse.
NOTE:
- Use the touchpad only with fingers. The touchpad will not recognize actions of other objects.
- Images and the touchpad layout may differ depending on the model.
Basic touchpad functions
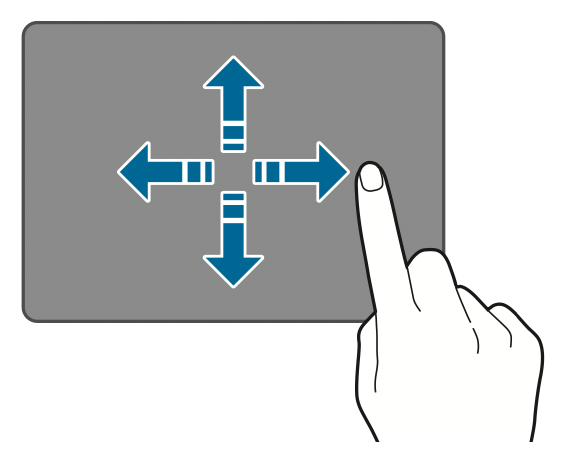
Moving
To move the cursor, move a finger on the touchpad.
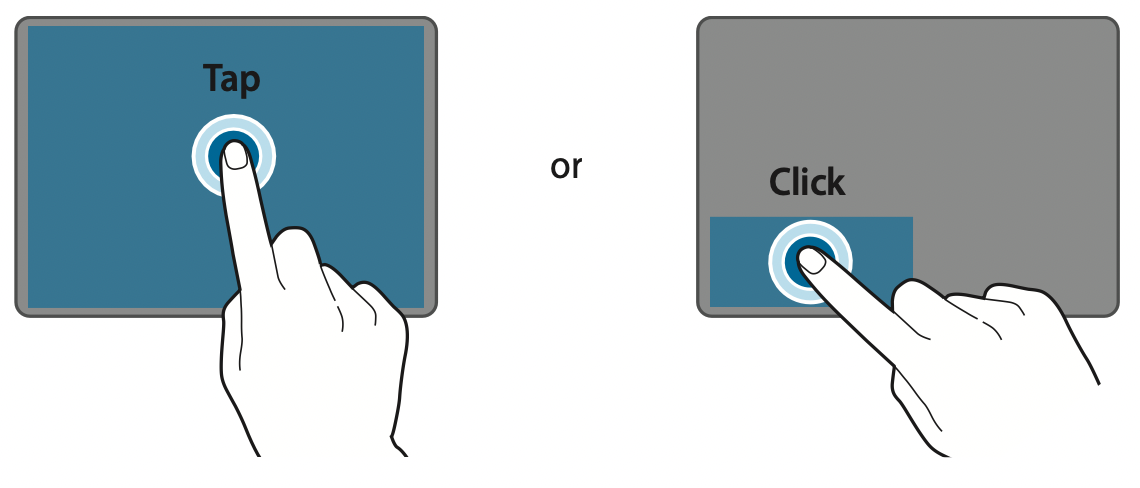
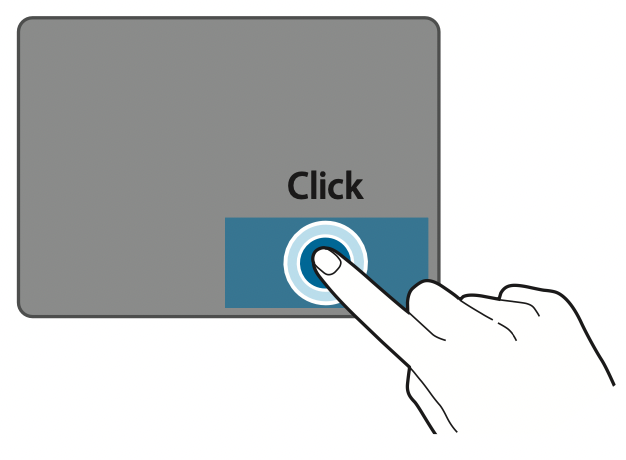
Clicking
Tap the touchpad or press the left touchpad button.
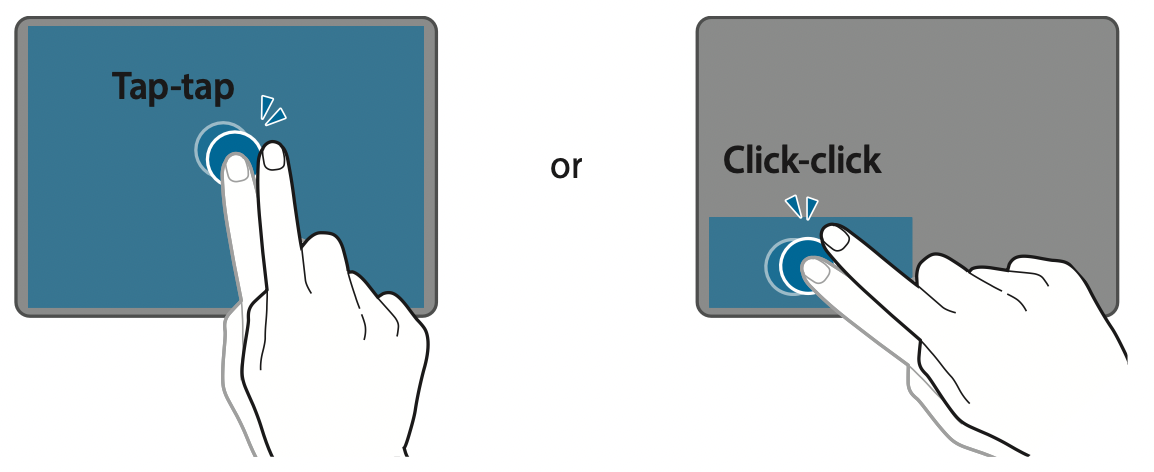
Double-clicking
Double-tap the touchpad or press the left touchpad button twice.
Right-clicking
This function enables right-clicking.
To right-click an item, press the right touchpad button.
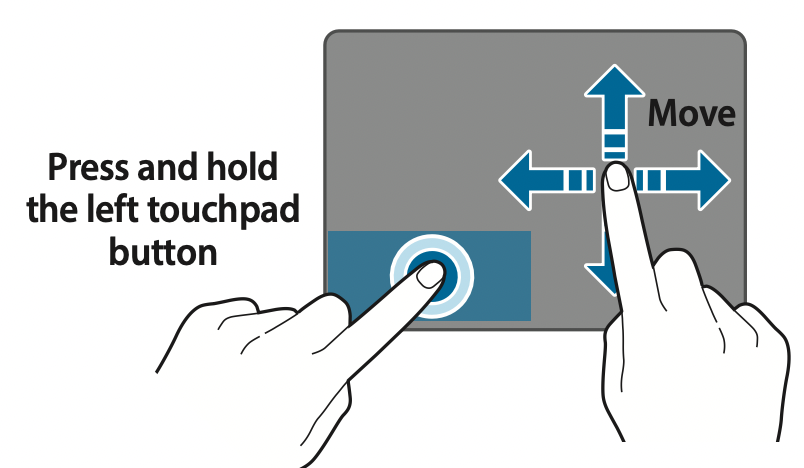
Dragging
To move an icon or an app tile to a desired location, press and hold it and then drag it to the target position with the left touchpad button pressed.
Gesture functions
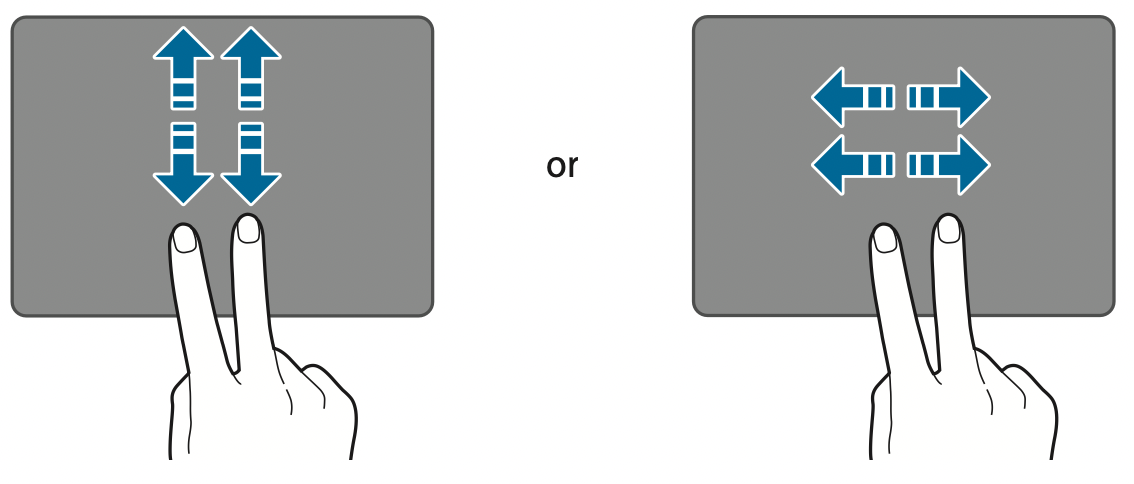
Swiping
To scroll up, down, left or right to a desired location, swipe with two fingers on the touchpad.
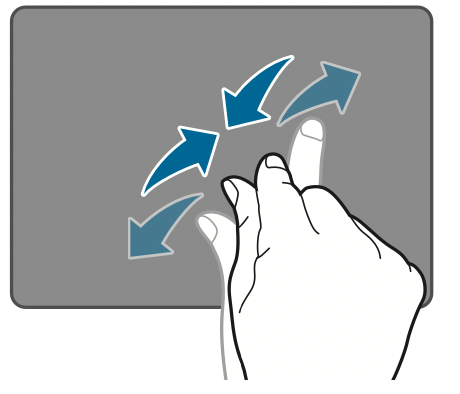
Pinching
To zoom in, spread two fingers apart while viewing a website, map, or image. Pinch to zoom out.
Configuring touchpad gestures
Configure touchpad gestures to use the touchpad more efficiently.
Select the Start button (  ) →
) →  → Devices → Touchpad → desired options.
NOTE: Some options in the touchpad settings may not be available depending on the model.
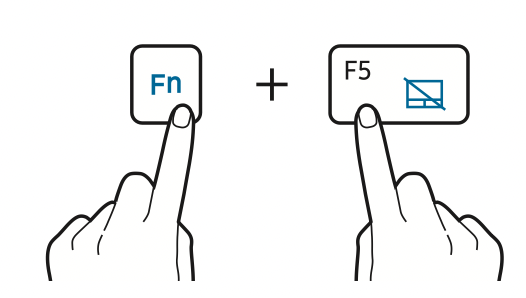
Touchpad lock
Press and hold the Fn key and press the F5 key to lock the touchpad.
SIM or USIM card (nano-SIM card) tray (LTE models only)
Insert the SIM or USIM card.
CAUTION:
- Use only a nano-SIM card (sold separately).
- Use caution not to lose or let others use the SIM or USIM card. Samsung is not responsible for any damages or inconveniences caused by lost or stolen cards.
NOTE:
- It is only for data network. The calling feature is not supported.
- Some services that require a network connection may not be available depending on the service provider.
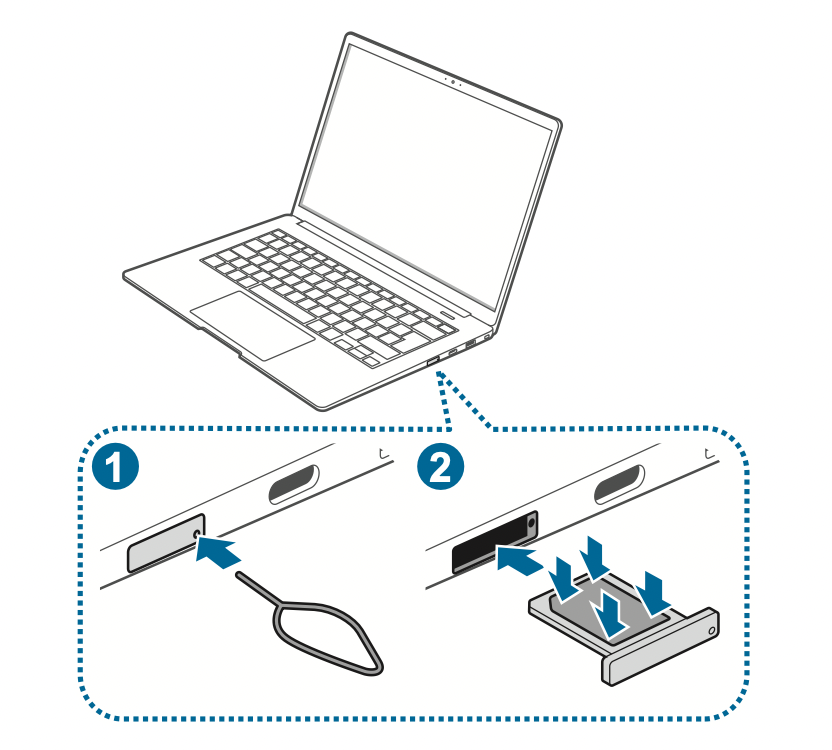
Installing the SIM or USIM card
- Insert the ejection pin into the hole on the tray to loosen the tray.
CAUTION: Ensure that the ejection pin is perpendicular to the hole. Otherwise, the device may be damaged.
- Pull out the tray gently from the tray slot.
CAUTION: Be careful to not hurt your fingertip while pulling out the tray.
- Place the SIM or USIM card on the tray with the gold-coloured contacts facing downwards.
- Gently press the SIM or USIM card into the tray to secure it and insert the tray back into the tray slot.
Cellular data (LTE models only)
You can insert the SIM or USIM card so you can access the Internet using your cellular data connection.
NOTE: You may incur additional charges when using a mobile network.
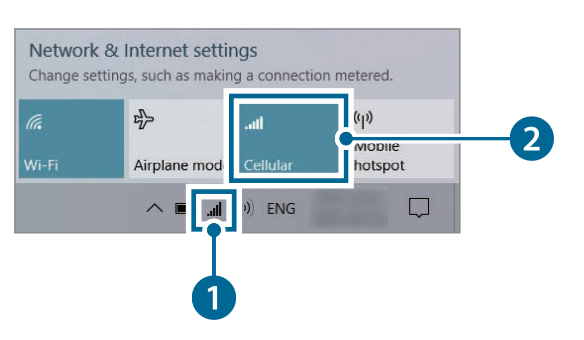
Turning the cellular data on
On the taskbar, select  → Cellular.
Cellular data will be connected.

Turning the cellular data off
To save battery power, turn off the cellular data when not in use.
- On the taskbar, select
 .
.
- Select Cellular.
Cellular data will be disconnected.
Memory card slot
Use a memory card to transfer data to other devices. You can use data stored on your device, such as digital cameras, smartphones, or tablets, on your computer, or you can take your saved data to another device.
Memory cards are sold separately.
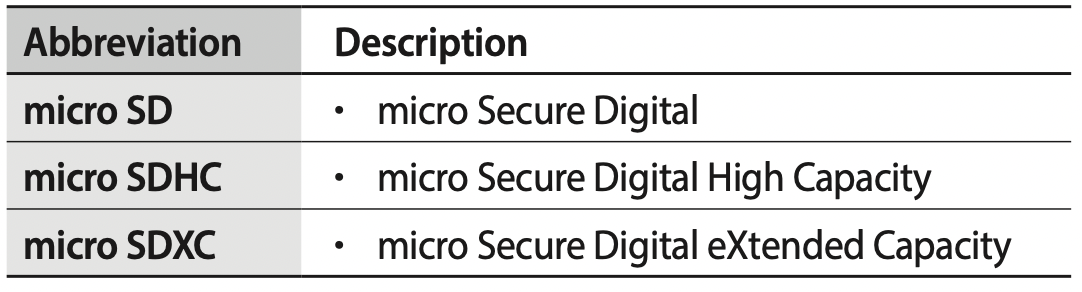
This computer supports the following types of memory cards.
CAUTION:
- Some memory cards may not be fully compatible with the computer. Using an incompatible card may damage the computer or the memory card, or corrupt the data stored in it.
- Use caution to insert the memory card in the indicated direction.
- Store the card separately to prevent losing the card when moving the computer.
- Memory card speeds vary.
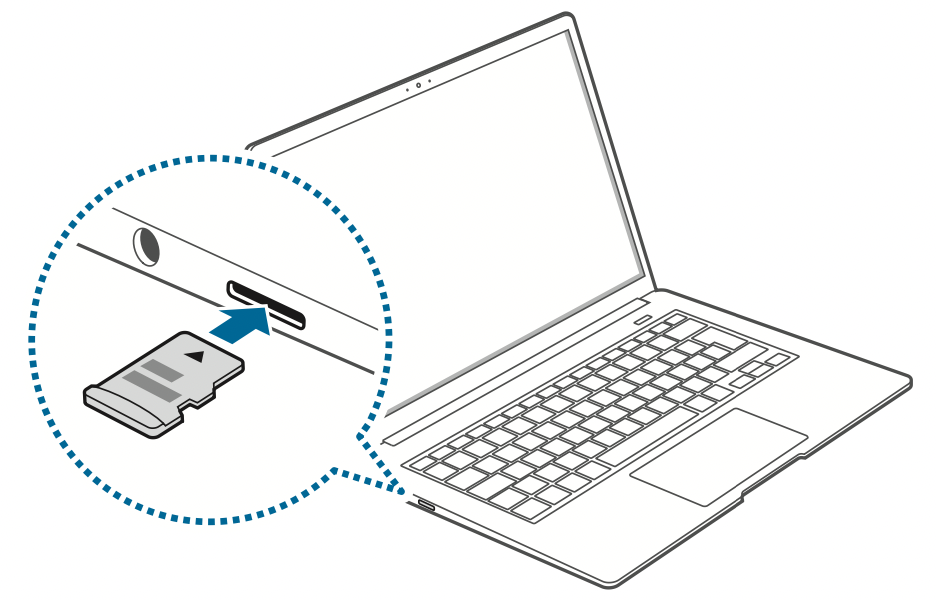
Inserting a memory card
- If a dummy card or a memory card adapter is inserted in the memory card slot, remove it.
- Insert a memory card into the memory card slot in the indicated direction until it clicks into place.
- If a pop-up message appears, choose an action.
- Select Open folder to view files.
- Save, move, or delete data on the memory card.
The memory card folder opens only on the desktop.
Removing a memory card
When you push the card, it clicks and disengages from the memory card slot. Grasp the end of the card and pull it out of the slot.
Formatting a memory card
Format the memory card to remove all data or before using it for the first time.
CAUTION: Formatting a memory card deletes all data saved on the card. If necessary, back up important data before formatting the card.
- On the taskbar, select File Explorer (
 ).
).
- Right-click the memory card drive, and then select Format.
- Select Start.
NOTE:
- To use a memory card to exchange data with a digital device, such as a digital camera, formatting the data with the digital device is recommended.
- When trying to use a formatted memory card in another digital device, format the memory card again in the device.
- Data protected by copyright laws cannot be reviewed or modified.
- Inserting and removing a memory card repeatedly may damage the memory card.
- Secure Digital Input Output (SDIO) is not supported.
- If the write-protect tab is in the locked position, you cannot format, write, or delete data on the card.
External display
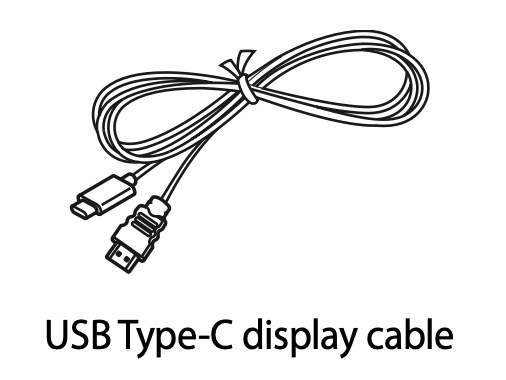
Connecting the computer to an external display device can be useful for presentations or when watching a movie. The cables and adapters required to connect an external display are sold separately. The computer supports USB Type-C display cables.
NOTE: Check the available ports on the display device to ensure that it is compatible with the computer.
Connecting to a display
- Connect the cable to the USB Type-C port of the computer on the right side.
- Connect the other end of the cable to the HDMI port of the external display.
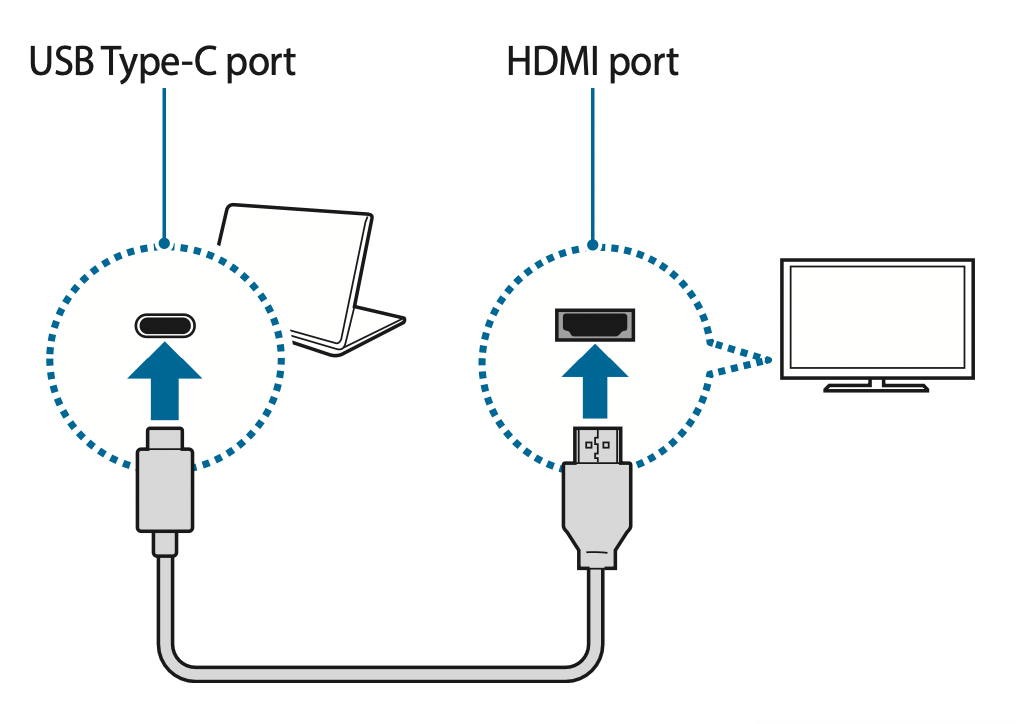
- Connect the power cord to the external display.
- Turn on the display and change its display mode to one that supports an external input.
- Press and hold the Fn key and press the F4 key.
- Select a mode.
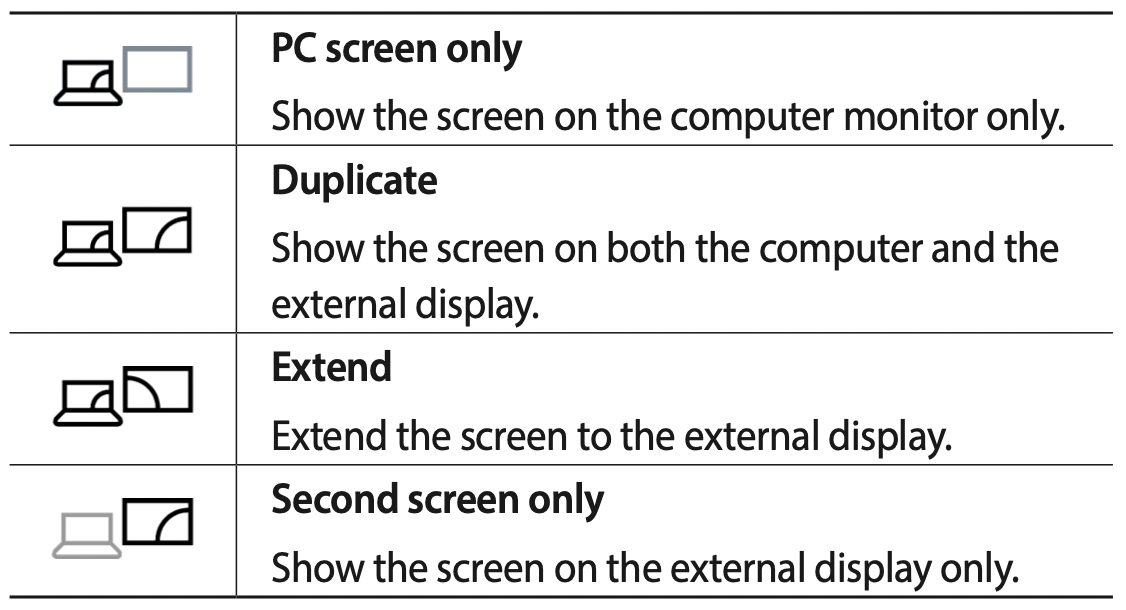
NOTE: You can also select the display mode in Windows settings.
Select the Start button ( ) →  → System → Display, and then select Detect on the Multiple displays option.
Wireless LAN
Connect the computer to a wireless network to use the Internet.
NOTE: The descriptions below are for computer models with a Wireless LAN card or device. A Wireless LAN device is optional. The pictures in this manual may differ from the actual product depending on the wireless LAN device model.
About Access Point (AP)
An Access Point (AP) is a network device that bridges wired and wireless LANs and corresponds to a wireless hub in a wired network. Multiple devices can be connected to an AP.
Connecting to a Wi-Fi network
- On the taskbar, select
 → Network.

- Select a network from the list of detected wireless networks and select Connect automatically → Connect.
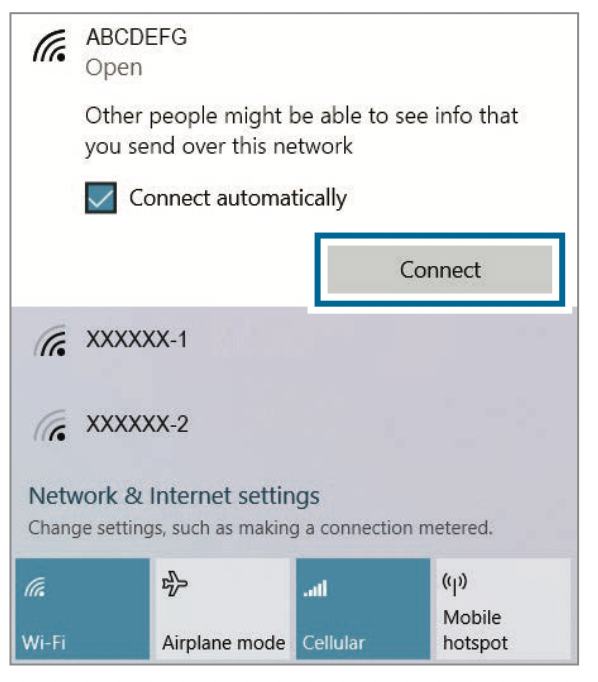
- Enter a password, if necessary, and select Next.
Once the computer has been connected to a wireless network, it will attempt to connect to it automatically when it is available. If you require a network password, contact the system administrator.
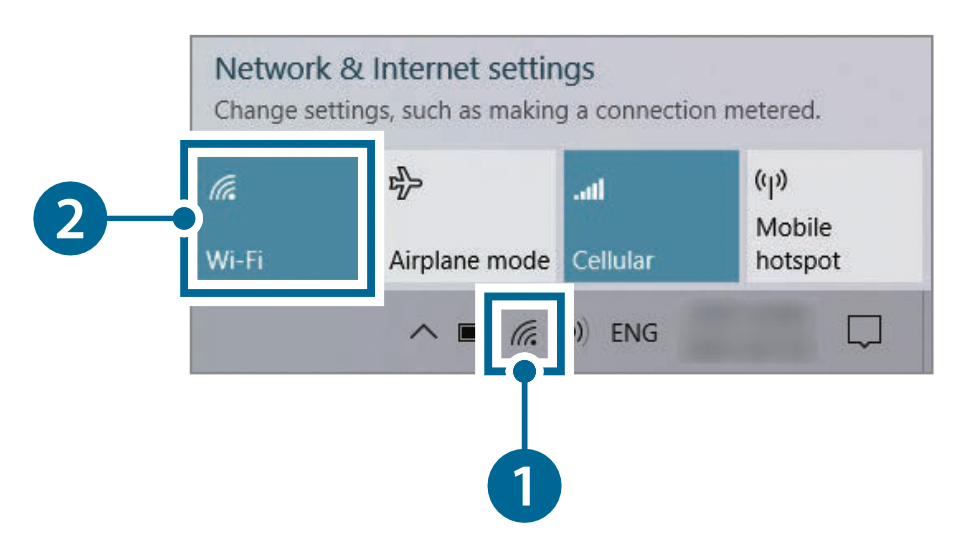
Deactivating the Wi-Fi feature
When you are not using the Wi-Fi feature, turn it off to save battery power.
- Select
 on the taskbar.
- Select Wi-Fi.
The Wi-Fi feature is deactivated.
Airplane mode
This disables all wireless functions on your computer. You can use only non-network services.
To activate Airplane mode, on the taskbar, select  → Airplane mode. Alternatively, press and hold the Fn key and press the F12 key.
Bluetooth
Use Bluetooth to listen to music or exchange data or media files with other Bluetooth-enabled devices.
CAUTION:
- Samsung is not responsible for the loss, interception, or misuse of data sent or received via Bluetooth.
- Always ensure that you share and receive data with devices that are trusted and properly secured. If there are obstacles between the devices, the operating distance may be reduced.
- Some devices, especially those that are not tested or approved by the Bluetooth SIG, may be incompatible with your device.
- Do not use the Bluetooth feature for illegal purposes (for example, pirating copies of files or illegally tapping communications for commercial purposes). Samsung is not responsible for the repercussion of illegal use of the Bluetooth feature.
Pairing with other Bluetooth devices
- Select
 on the taskbar.
- Check if the Bluetooth feature is on.
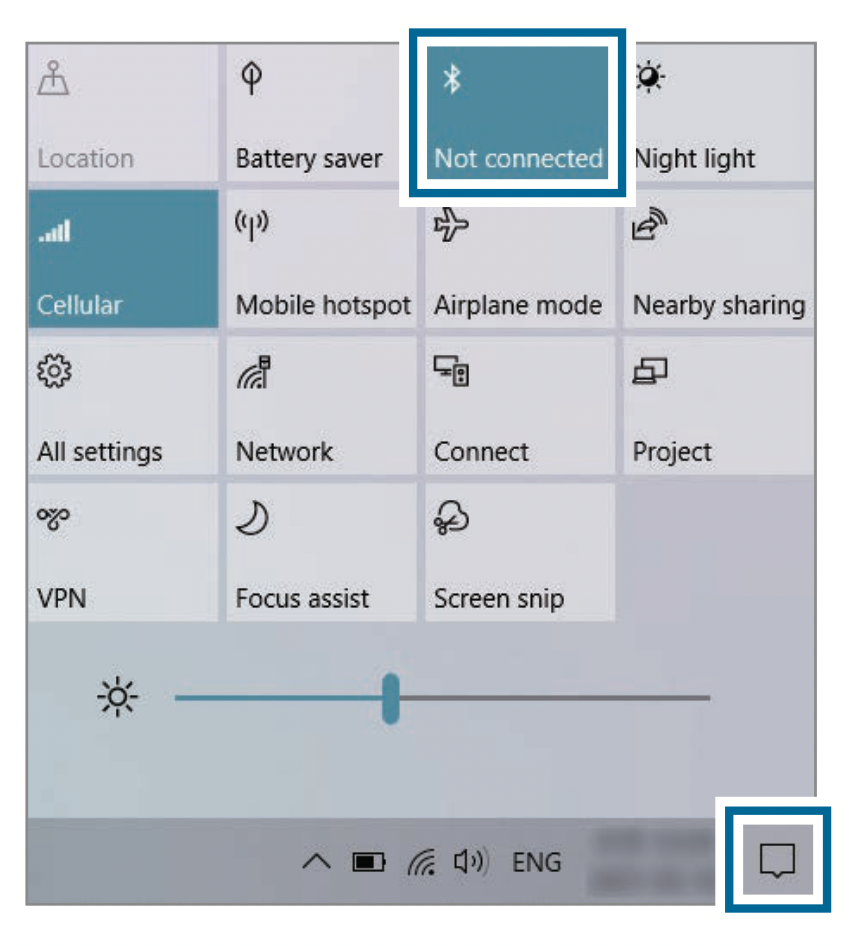
NOTE: Select Expand to expand the action center menu when the Bluetooth menu does not appear.
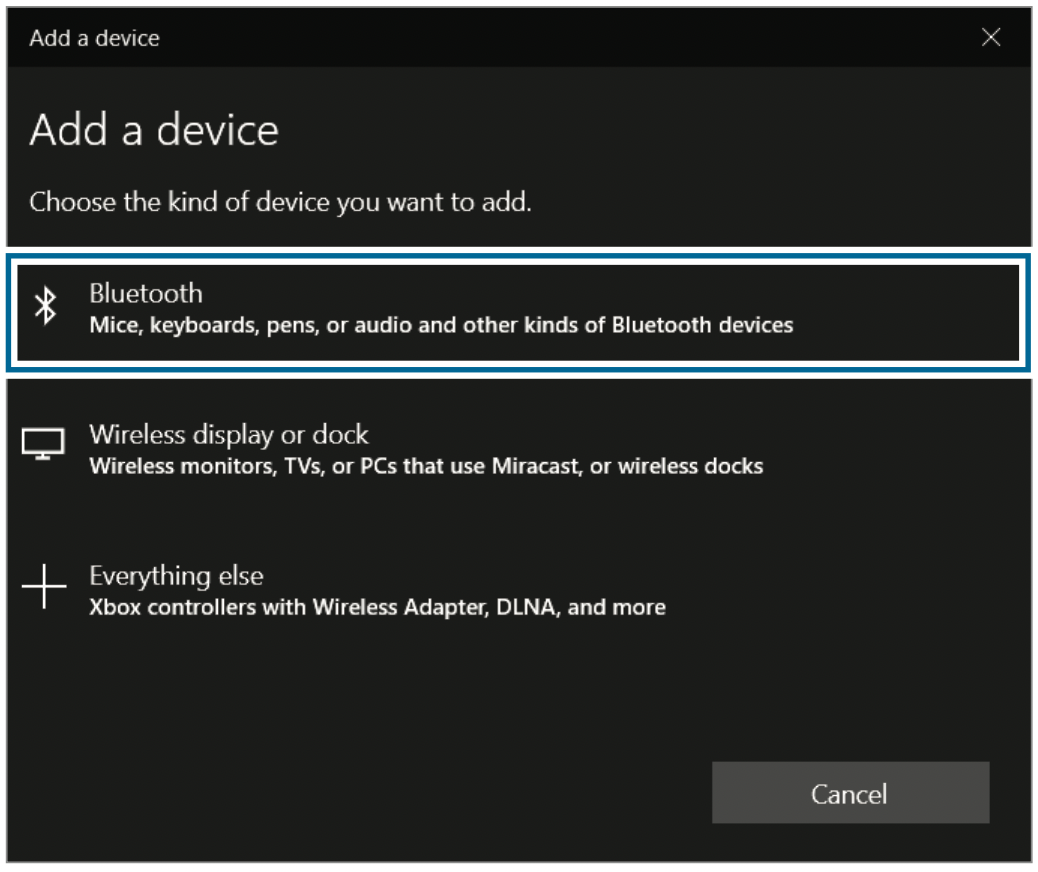
- Select the Start button (
 ) →
) →  → Devices → Bluetooth & other devices → Add Bluetooth or other device.
- Select Bluetooth to select a device you want to add and finish pairing.
Unpairing Bluetooth devices
- Select the Start button ( ) → → Devices. Your computer will display the paired devices.
- Select the device to unpair from your computer and select Remove device → Yes.
The connection to the Bluetooth device will be disconnected.
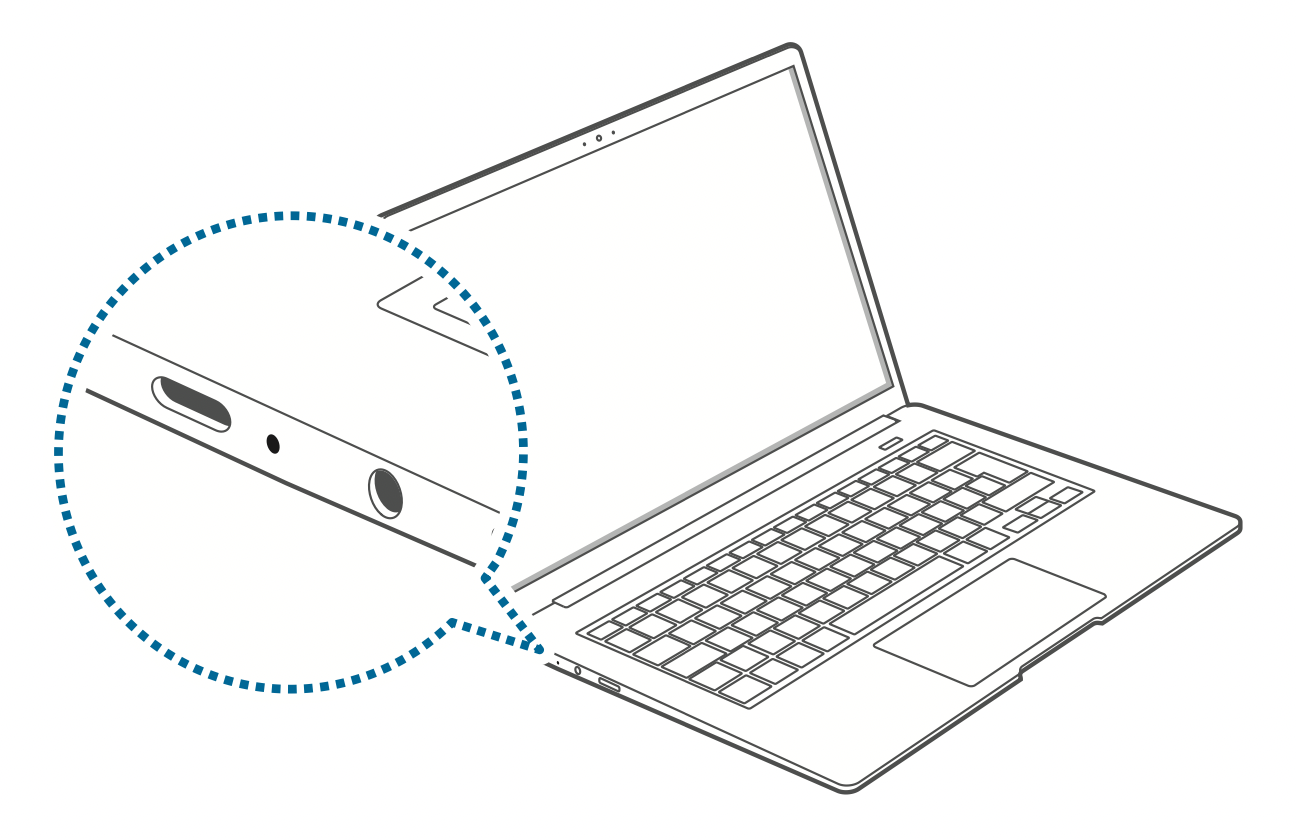
Security slot
You can secure the computer by connecting a lock and cable to the security slot.
Tie the lock and cable to a fixed object and install the other end of the cable to the security slot.
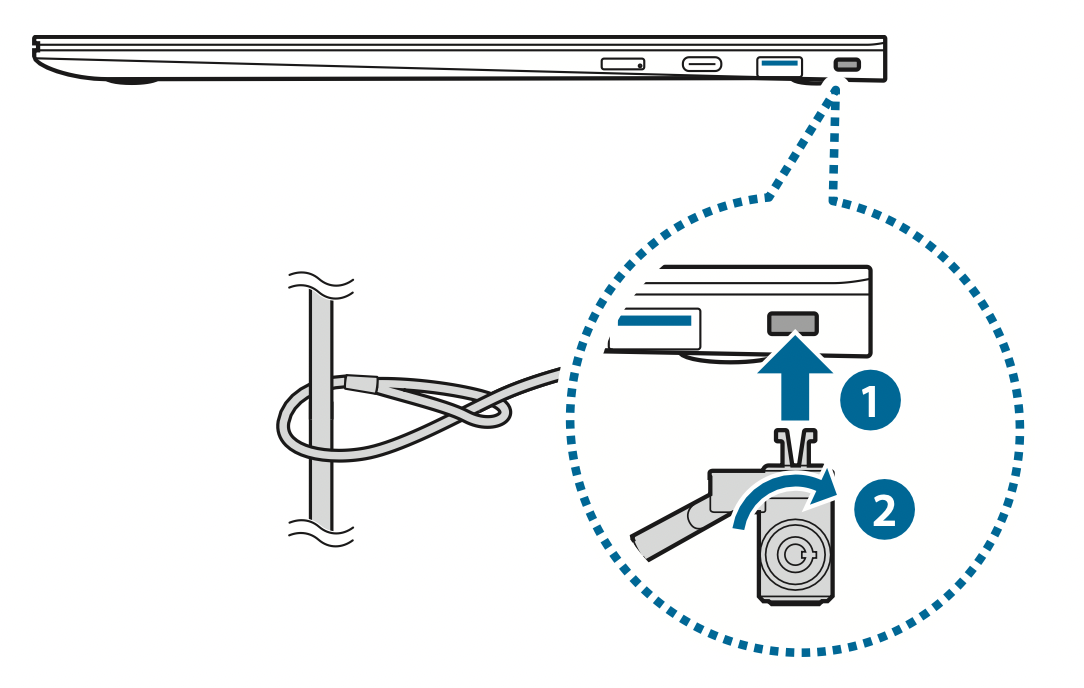
NOTE: To use this feature, you must purchase a lock and cable (sold separately) and use a Nano Lock from Kensington. If you use a lock other than a Nano lock, it cannot be guaranteed to work properly. Your product may differ from the one shown above. For more information, refer to your lock’s manual.
Applications
Using applications
NOTE:
- Images and features may differ depending on the model and the application version.
- Some applications may not be supported depending on the model.
- To uninstall an application, select the Start button () → → Apps → Apps & features, select an app to delete on the list, and then select Uninstall.
- Third-party software related services For descriptions about and service requests for third-party applications, please contact the relevant manufacturer. Some troubleshooting actions in response to service requests may not work depending on the application manufacturer.
Updating applications
Install and update applications and drivers on the computer easily and conveniently. Update periodically to keep the computer performing better and more stably.
NOTE: To check for available updates, the computer must be connected to the Internet.
Select the Start button () → → Windows Update.
Or, select the Start button () → Microsoft Store (  ) and search for an application to update.
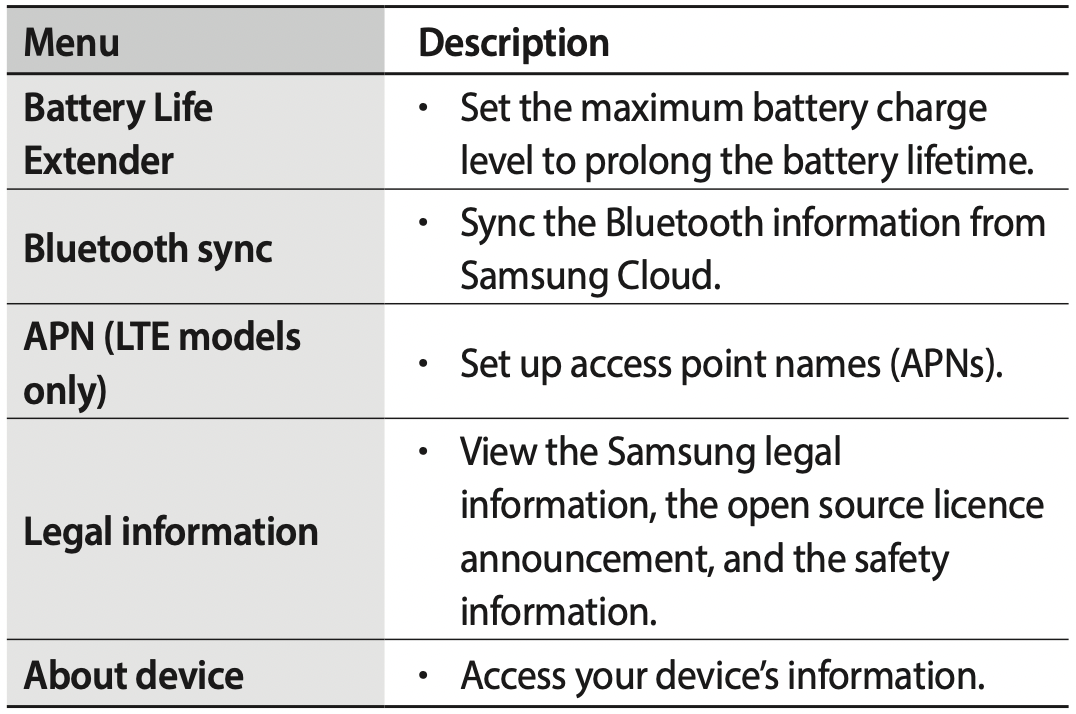
Samsung Settings
Configure the Samsung integrated settings and view additional information about your device.
NOTE: Images and features may differ depending on the model and the application version.
- Select the Start button () → Samsung Settings.
- Select an option to configure the corresponding function.
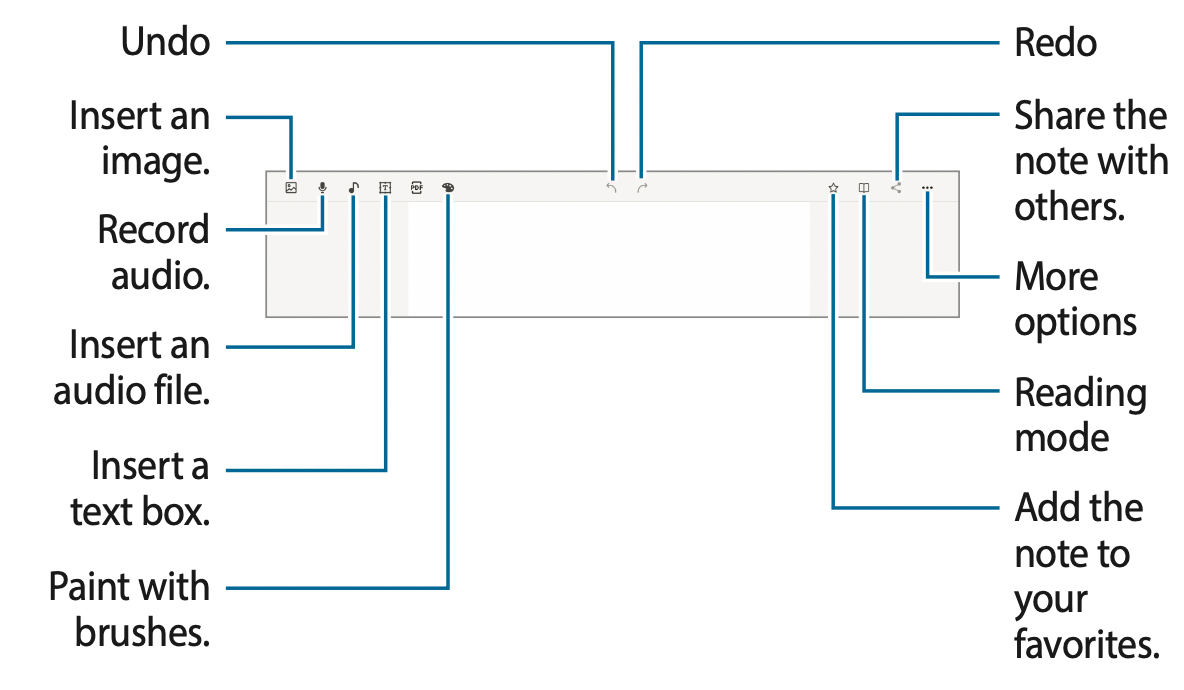
Samsung Notes
Create notes by entering text from the keyboard or by handwriting or drawing on the screen. You can also insert images or voice recordings into your notes.
Creating notes
- Select the Start button () → Samsung Notes → All notes →
 .
.
- Select an input method from the toolbar at the top of the screen and compose a note.
- When you are finished composing the note, select
 to save it.
Deleting notes
- Select the Start button ( ) → Samsung Notes → All notes.
- Right-click the note you want to delete on the note list and tap Delete.
Screen Recorder
Record the screen while using your computer.
- Select the Start button ( ) → Screen Recorder.
The screen recorder toolbar will appear on the top of the screen.

- Select Screen Recorder to start recording.
After a countdown, recording will start.
To change the screen recorder settings, select  before starting recording.
To capture the screen, select  .
.
To record the screen with a video overlay of yourself, select  . The web cam window will appear on the top left of the screen.
To write or draw on the screen, select  . The available toolbar will appear on the right side of the screen.
- When you are finished recording the screen, select
 .
.
You can view the file in This PC → Videos or Pictures.
- Select
 to finish the screen recorder toolbar.
NOTE:
- When the screen recorder toolbar disappears, move the mouse cursor to the top-center of the screen to make it reappear.
- If there is not enough space to save the file, the Screen Recorder application will automatically end.
- If your computer enters sleep mode while recording the screen, the recording will be paused and continue after waking up from sleep mode.
- If your computer turns off abnormally while recording the screen, the recorded file will not play normally.
- You cannot record the gaming screen with the Screen Recorder application, and some programs may not support the screen record or capture feature.
Setting the video resolution
- Select the Start button ( ) → Screen Recorder.
The screen recorder toolbar will appear on the top of the screen.
- Select
 .
.
The Settings window will appear.
- Select Display and select the resolution you want under Set video resolution.
Samsung Flow
Samsung Flow allows you to easily connect your mobile device to your computer to complete tasks, such as checking notifications or sharing content, more conveniently.
- Select the Start button () → Samsung Flow.
- On your mobile device, launch the Samsung Flow application.
If Samsung Flow is not installed, download it from the Galaxy Store or Play Store.
- Tap Start.
- Select your mobile device from the detected devices list.
- Confirm the passkey on both devices and tap Ok.
The devices will be connected.
NOTE:
- This feature is only available on some Samsung Android devices.
- Refer to the mobile device’s user manual for more information about how to use Samsung Flow.
Samsung Gallery
View images and videos stored in your computer. You can also sync content with the cloud to update in real time and safely store content across the devices using the same account.
Syncing with the cloud
- Select the Start button () → Samsung Gallery.
- Tap
 → Settings.
- Tap the Sync with Cloud switch.
The content in the Samsung Gallery application and the cloud will be synced.
NOTE: To use this feature, you must sign in to your Samsung account.
Samsung Care+
Samsung Care+ provides warranty services for accidents that could occur while using your computer, such as computer damage or loss.
Select the Start button ( ) → Samsung Care+.
The website will be connected. Refer to the website for more information.
Settings & Upgrade
Display brightness
Adjust the display brightness to reduce eye strain and save power.
Controlling brightness using the keyboard
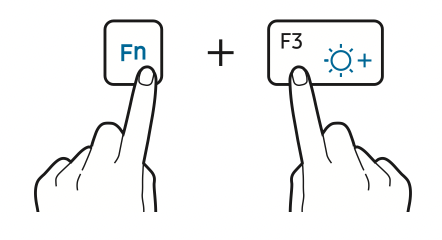
- To dim the display screen, press and hold the Fn key and press the F2 key.
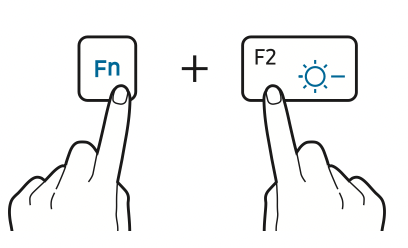
- To brighten the display screen, press and hold the Fn key and press the F3 key./
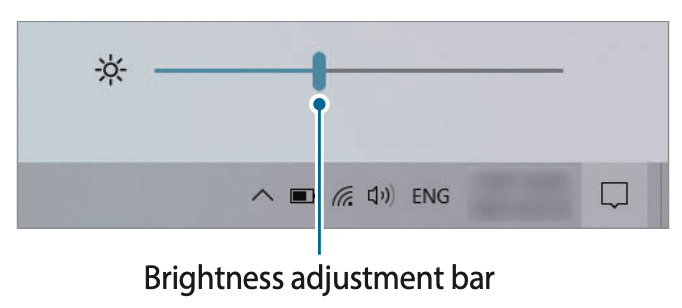
Controlling brightness using the taskbar
- On the taskbar, select
- Drag the adjustment bar to the desired brightness.
NOTE:
- The display screen is automatically set to the brightest level when the adapter is connected. The display screen automatically becomes dimmer when the adapter is disconnected. If you manually adjusted the brightness, the brightness will not change.
- The computer has an automatic screen brightness adjustment to extend the battery usage time. When necessary, the screen brightness is gradually adjusted.
Volume
Adjust the system volume or sound volume when playing music or video.
Controlling volume using the keyboard
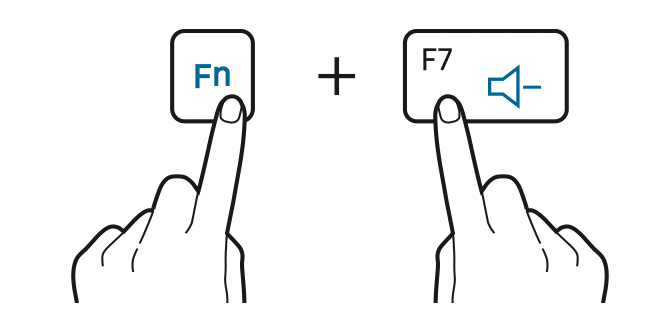
- To turn down the volume, press and hold the Fn key and press the F7 key.
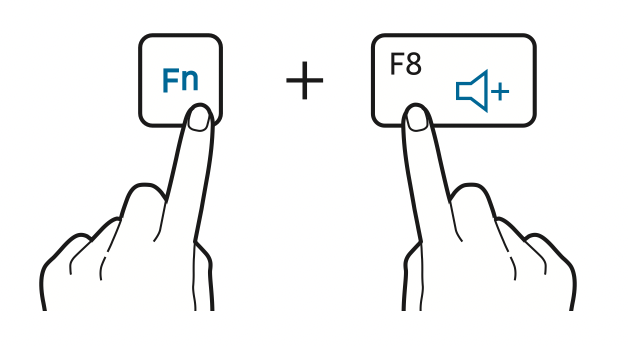
- To turn up the volume, press and hold the Fn key and press the F8 key.
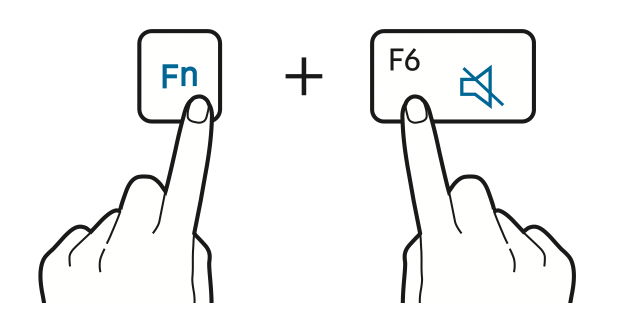
- To mute or unmute the volume, press and hold the Fn key and press the F6 key.
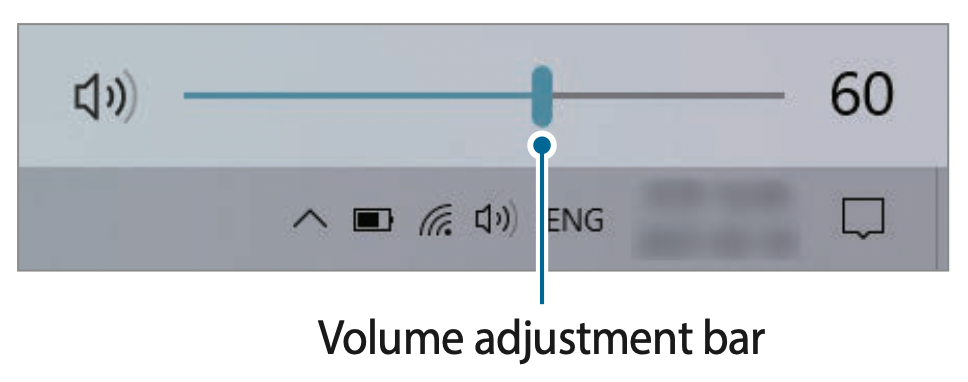
Controlling volume using the taskbar
- Select
 on the taskbar.
- Drag the adjustment bar to the desired volume.
BIOS (Setup utility)
Define a boot password, change the boot priority, or configure the installed chipsets.
NOTE:
- Incorrect settings may cause the system to malfunction or crash.
- The BIOS setup screens, menus, and items may appear differently depending on the model and BIOS version.
- BIOS setup functions are subject to upgrades.
Entering the BIOS screen
- Turn on the computer.
- Before the Samsung logo appears, press the F2 key several times.
- If the computer is password-protected, press the F2 key several times before the password screen appears.
- If the password screen or the Windows start screen appears, restart the computer and try again.
The BIOS screen
The BIOS setup screen appears as shown below.
You can change BIOS settings using the keyboard or mouse.
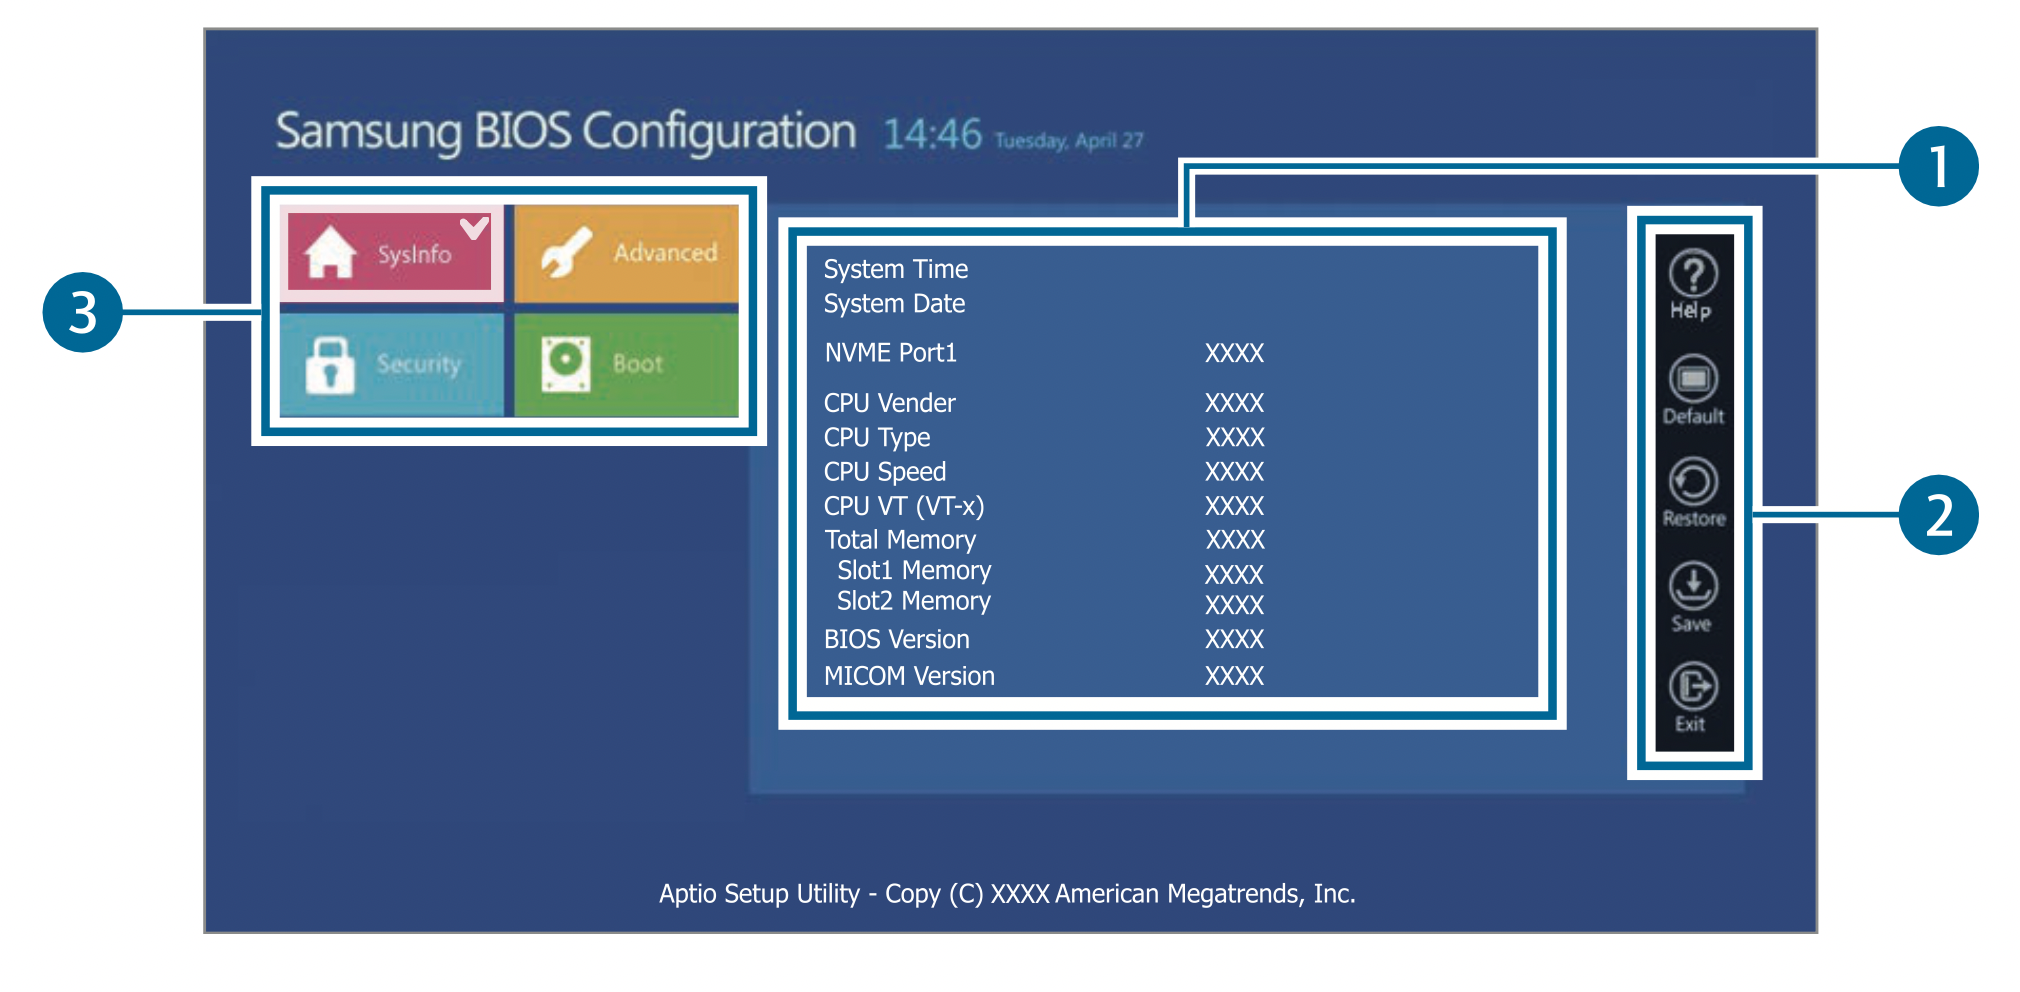
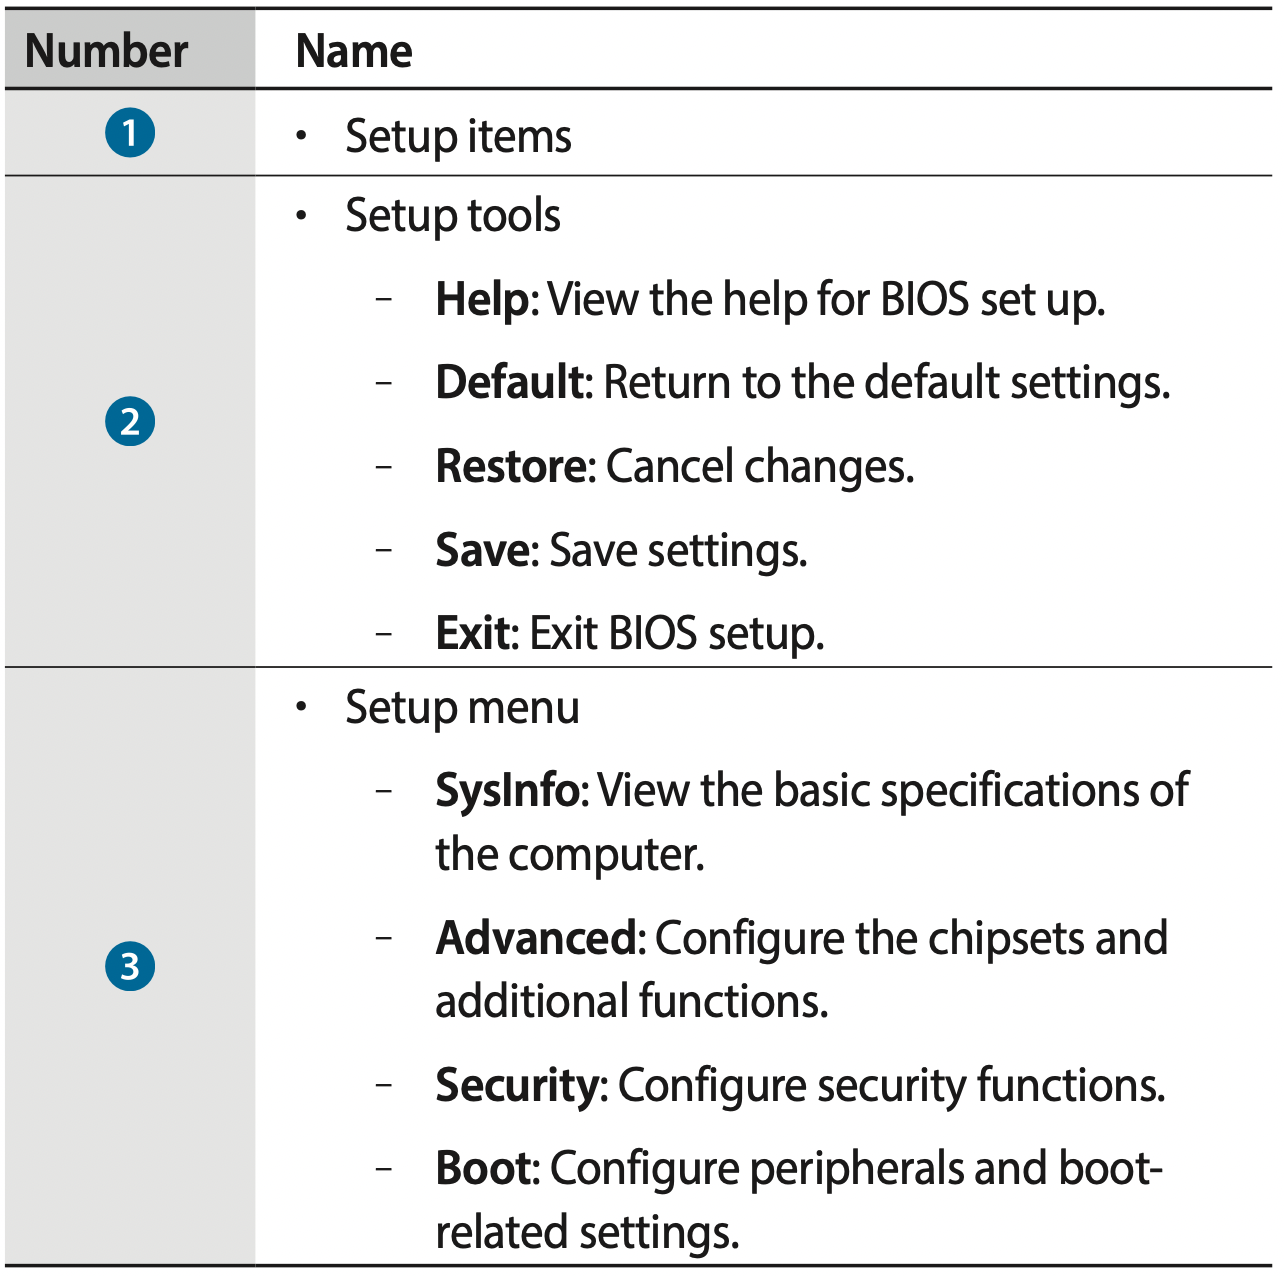
NOTE: The BIOS setup screen appears only in English.
Boot password
Setting a password with the BIOS enhances protection against viruses and hacking attacks.
CAUTION:
- Do not forget your password or expose it to others.
- If you forget the Supervisor Password, request assistance from the Samsung Service Center. In this case, a service fee will be charged.
- If you forget the User Password, disable the Supervisor Password, and the User Password will also be automatically disabled.
Setting passwords
There are two password settings available: Supervisor Password and User Password.
- Supervisor Password (low security level): This password is required when turning on the computer or entering the BIOS setup.
- User Password (low security level): This password is required to enter the BIOS setup. This password will be deactivated automatically if the Supervisor Password is disabled.
Setting a boot password
- Turn on the computer.
- Before the Samsung logo appears, press the F2 key several times.
- Access the Security menu.
- Select a password type (Supervisor Password or User Password).
If you cannot select an item, turn off the computer and turn it on again. Then, press the F2 key several times before the Samsung logo appears to enter the BIOS setup screen.
- Enter a password and select Ok.
The password can be up to 20 characters.
- Enter the password again to confirm it and select Ok.
- Select Save → Ok to save and restart.
NOTE:
- To enable the Password On Boot option, set a Supervisor Password and enter the password when starting up the computer.
- For some models, if the password entered message appears in the Setup Notice window, select Ok to complete the setup.
Removing a password
- Turn on the computer.
- Before the Samsung logo appears, press the F2 key several times.
- Access the Security menu.
- Select a password type (Supervisor Password or User Password).
- Enter the current password and select Ok.
- Without entering any characters, select Ok → Ok.
- Select Save → Ok to save and restart.
NOTE: For some models, to cancel the password, select Cancel in the Setup Notice window.
Boot priority
Change the boot priority from the BIOS setup.
- Turn on the computer.
- Before the Samsung logo appears, press the F2 key several times.
- Access the Boot menu.
- Select Boot Device Priority.
- Select an option menu to open the list.
- Select an option.
- Select Save → Ok to save and restart.
Select Exit → Ok to restart without saving the changes.
Using the Battery Calibration Function
When charging/discharging the battery repeatedly for a short time only, the battery usage time may be reduced by the difference between the actual battery charge and the remaining charge display.
You can make the actual battery charge and the remaining charge display the same by discharging the battery completely using the Battery Calibration function, and then recharging it again.
NOTE: The screen images and terms may differ from the actual product depending on the computer model and driver version.
- Turn off the computer and then disconnect the adapter.
- Turn the computer back on, and press the F2 key to enter the Setup screen.
- Select Advanced → Smart Battery Calibration.
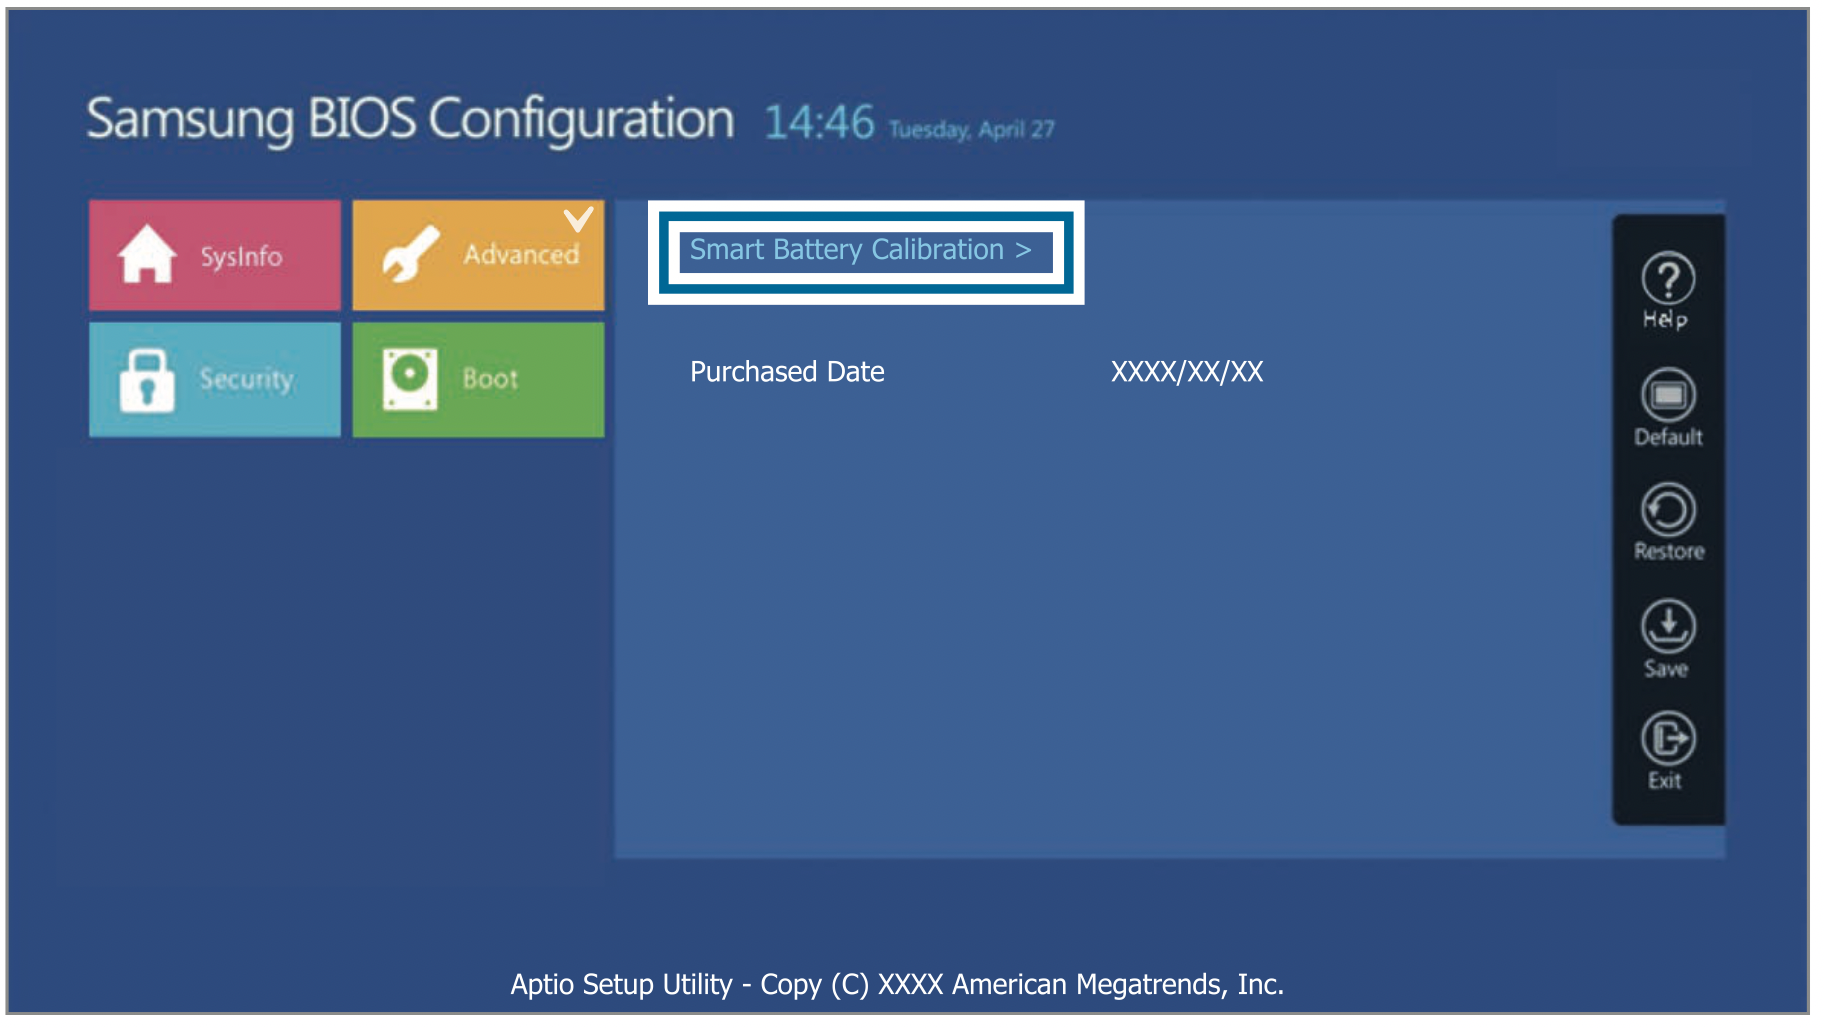
- The Battery Calibration function is activated and the battery is forcefully discharged. To stop the operation, press the Esc key.
This operation requires 3–5 hours depending on the battery capacity and the remaining battery charge.
Battery
Fully charge the battery using the adapter before using the computer for the first time.
CAUTION:
- Use only Samsung-approved adapters, batteries, and cables. Unapproved adapters or cables can cause the battery to explode or damage the computer.
- Incorrectly connecting the charger may cause serious damage to the computer.
- This computer is equipped with an internal battery. The battery is not user-serviceable or user-replaceable.
- To safely remove or replace the battery, take the device to a Samsung Service Center. You will be charged for this service.
- You can use the computer while it is charging, but the battery charging time may increase. If the battery temperature rises too much, the charging may stop as a safety measure.
NOTE: To restore the battery power after cutting it, connect the adapter.
Charging the battery
- Connect the adapter to the USB Type-C port of the computer.
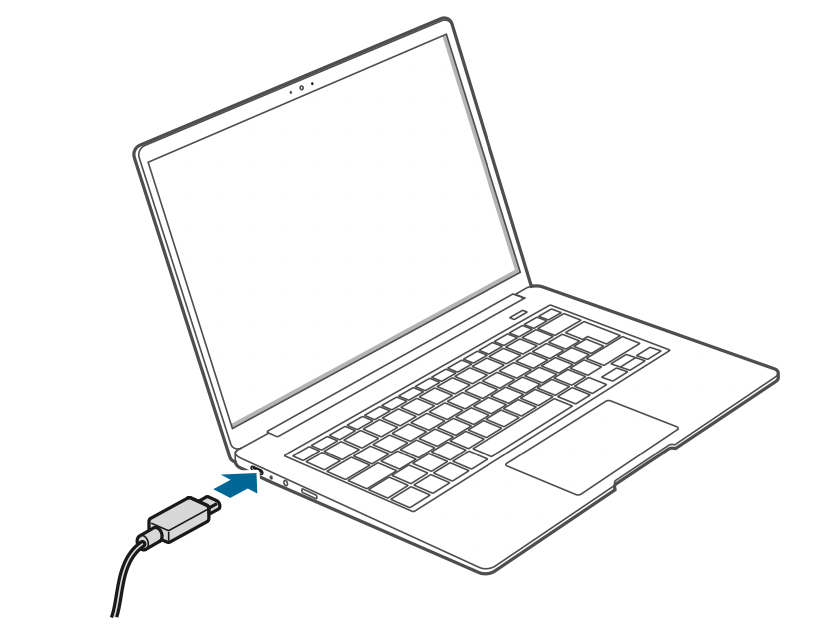
- Plug the adapter into an electric socket.
- When the battery is fully charged, the operating status LED turns green. Disconnect the adapter from the computer.

- Unplug the adapter from the electric socket.
CAUTION: Do not allow the adapter to make contact with your skin for a long time. A low-temperature burn may result.
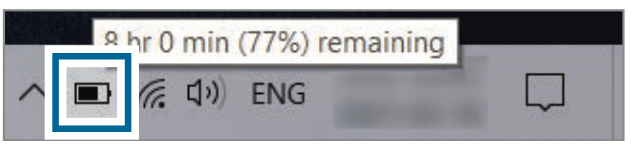
Battery status
When the adapter is removed, move the cursor over the battery icon on the taskbar to view the current battery charge.
Viewing the current battery charge when the computer is turned off
Connect the adapter to the computer to view the current battery charge when the computer is turned off.

Saving battery power
On the taskbar, select → Battery saver.
Battery saver mode is activated.
NOTE: Battery saver mode is disabled when the adapter is connected.
Windows recovery function
If there are performance issues with the computer, reinstall Windows using the recovery function of Windows.
CAUTION: Reinstalling Windows will erase all data saved on the computer. Back up applications and personal data to an external storage device before reinstalling Windows.
NOTE: After Windows is reinstalled, you can install the required Samsung apps.
- Select the Start button () → → Update & Security → Recovery.
- Select Reset this PC → Get started.
- Select Keep my files or Remove everything.