Loading ...
Loading ...
Loading ...
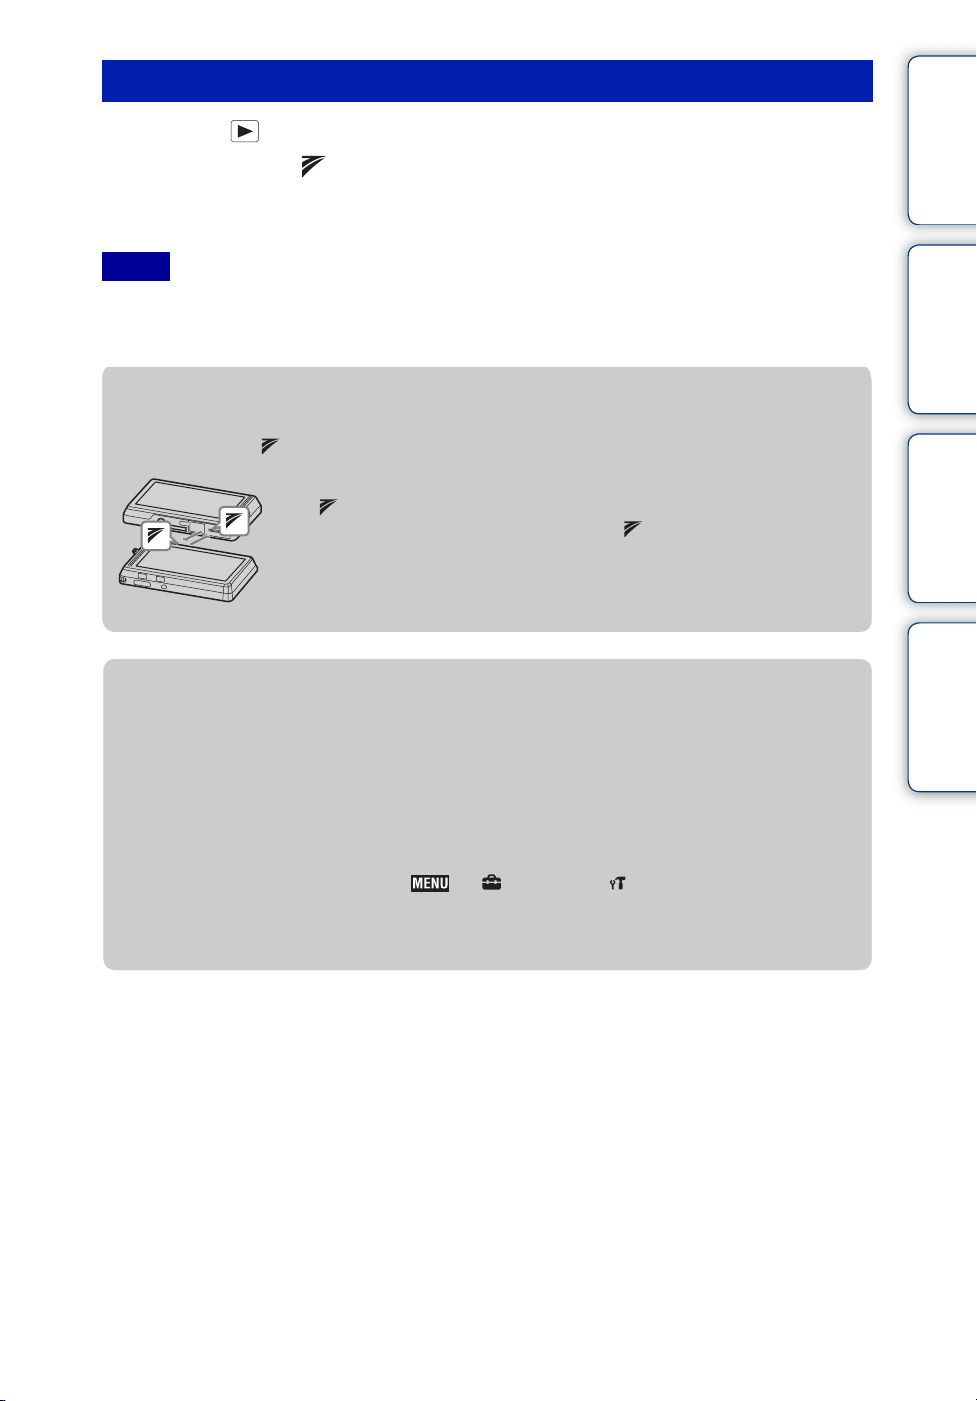
Table of
contents
Operation
Search
MENU/Settings
Search
Index
80
GB
1 Press the (Playback) button to turn on the camera.
2 Closely align the (TransferJet) marks on the camera and sending
device to receive images.
A notification sound is emitted when connection is made.
• Only images that can be displayed on the camera can be played.
• If an Image Database File error occurs during saving, a Recover Image Database File screen will appear.
• Play images that cannot be registered in the Image Database File using [Folder view (Still)].
Receiving images using TransferJet
Notes
zTips for sending and receiving data successfully
Closely align the (TransferJet) mark on the camera and other device.
• The transfer rate and range differ depending on the angle at which the
(TransferJet) marks are aligned.
• Sending and receiving data is easier if the (TransferJet) marks are
aligned with both cameras parallel to each other as shown in the figure.
zUsing separately sold TransferJet-compatible
devices
Using separately sold TransferJet-compatible devices allows you to transfer images to a PC
and can broaden your enjoyment of transferring data.
For details, see the operating instructions supplied with your TransferJet-compatible device.
• Note the following points when using TransferJet-compatible devices.
– Before use, set the camera to playback mode.
– If an image does not display, select t (Settings) t (Main Settings) and then set
[LUN Settings] to [Single].
– While connected, data cannot be written to or deleted from the camera.
– Do not disconnect while importing images to “PMB”.
Loading ...
Loading ...
Loading ...