Loading ...
Loading ...
Loading ...

8-16 Driving tips
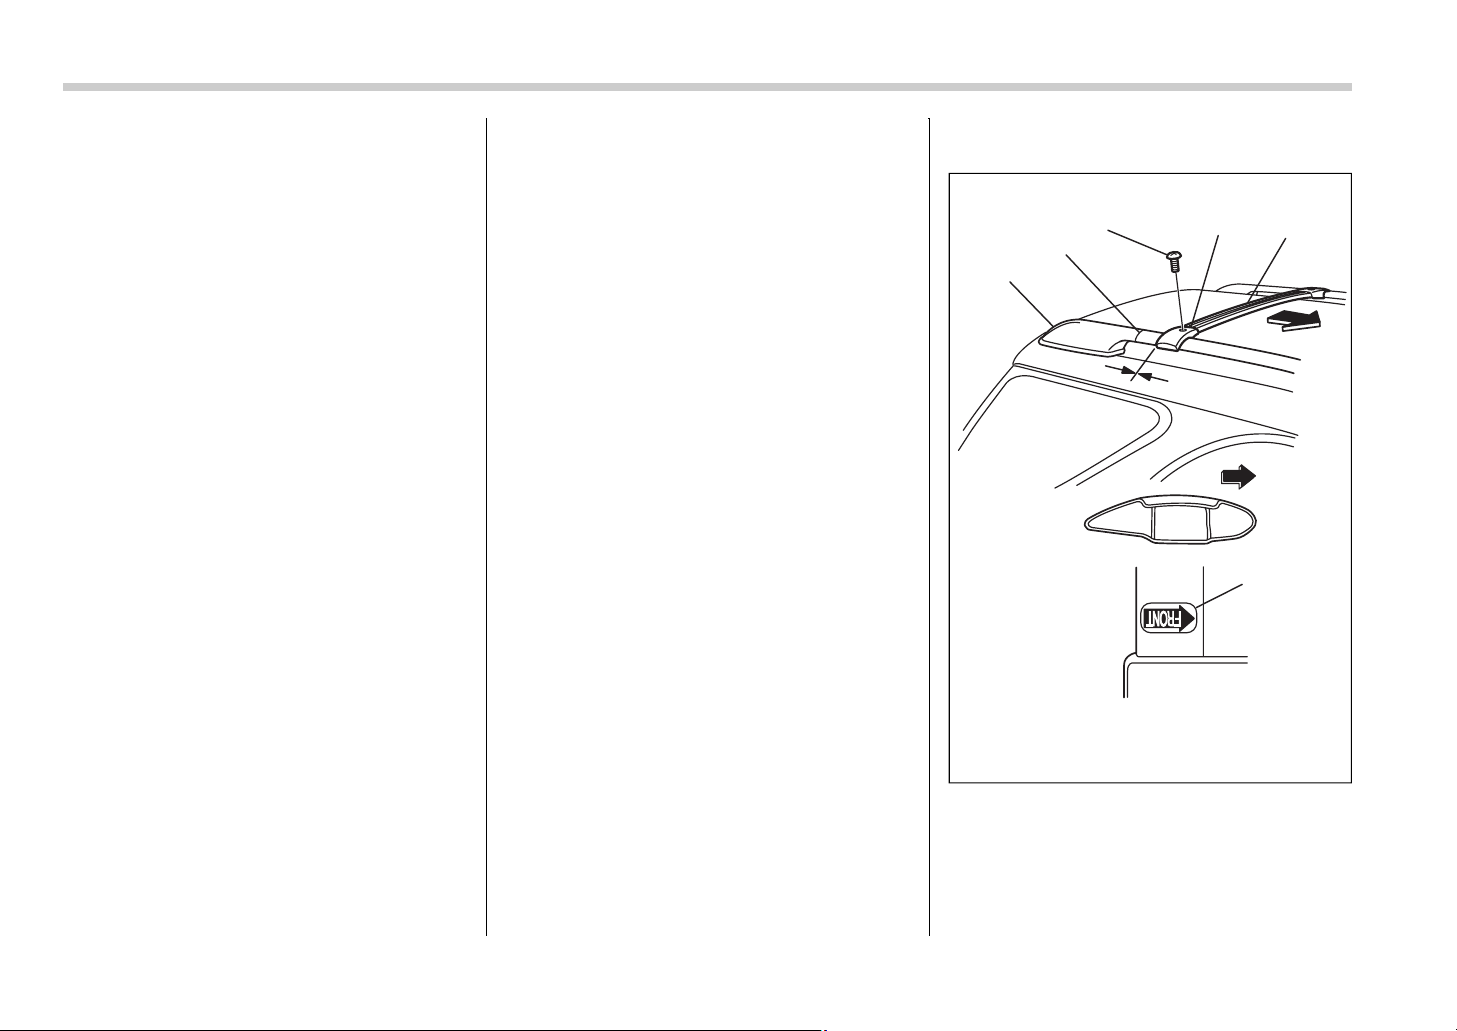
F: Front of vehicle
1) T30 torx® head screw
2) Front arrow label
3) Front crossbar
4) 100LBS load label
5) Lower clamp
6) Roof rail end support
7) Joint line
8) Front arrow label
a: 3 inches (76 mm)
1. Before placing the crossbar on the roof
rails, make sure that the T-30 torx® head
screw is removed from the top of each
crossbar end support.
2. Rotate the lower clamp on the bottom
of each end support downward approxi-
mately 90.
3. With the front direction arrow label on
the top right side of the crossbar pointing
toward the front of the vehicle, carefully
place the crossbar across the top of the
vehicle so that the crossbar end supports
rest on the top of the roof rails approxi-
mately 3 inches (76 mm) rearward from
the seam (joint) between the front roof rail
support and the roof rail.
4. Rotate (raise) the lower clamp up to the
bottom of the roof rail and loosely tighten
the T-30 torx® head screw with the torx®
wrench provided, through the top of the
end support and into the threaded insert in
the lower clamp on each end of the cross-
bar.
NOTE
It may be necessary to squeeze the
lower clamp and the end support to-
gether to compress the pads and gain
a better alignment of the pieces while
trying to start the screw. Use care not
to crossthread the screw in the insert.
5. Adjust the alignment of the crossbar on
the roof rails, and if available, use a T-30
torx® bit and torque wrench and tighten
the T-30 torx® head screws to 30 to 35
lbf·in (3.4 to 4.0 N·m, 0.35 to 0.41 kgf·m)
of torque (or tighten securely with the
torx® wrench provided).
Rear crossbar:
F: Front of vehicle
1) T30 torx® head screw
2) Front arrow label
3) Rear crossbar
4) Roof rail end support
5) Joint line
6
3
F
2
1
5
a
4
F
800264
Loading ...
Loading ...
Loading ...