Loading ...
Loading ...
Loading ...
Installation instructions
For flush installation of a frameless hob
with cement set and sealing strips
J004133-R12
12/06/2018
J004133-R12
5
Installation and cementing-in
1. Clean any grease or dirt from the edges of the hob with isopropyl alcohol. Leave to dry for a short time. Do not use water with
washing-up liquid!
2. Carefully place the hob in the prepared cut-out and with the help of the spacer set ensure that it sits flush with the surface of the
worktop.
3. Remove the hob. Position the spacer plates and fix them with adhesive tape.
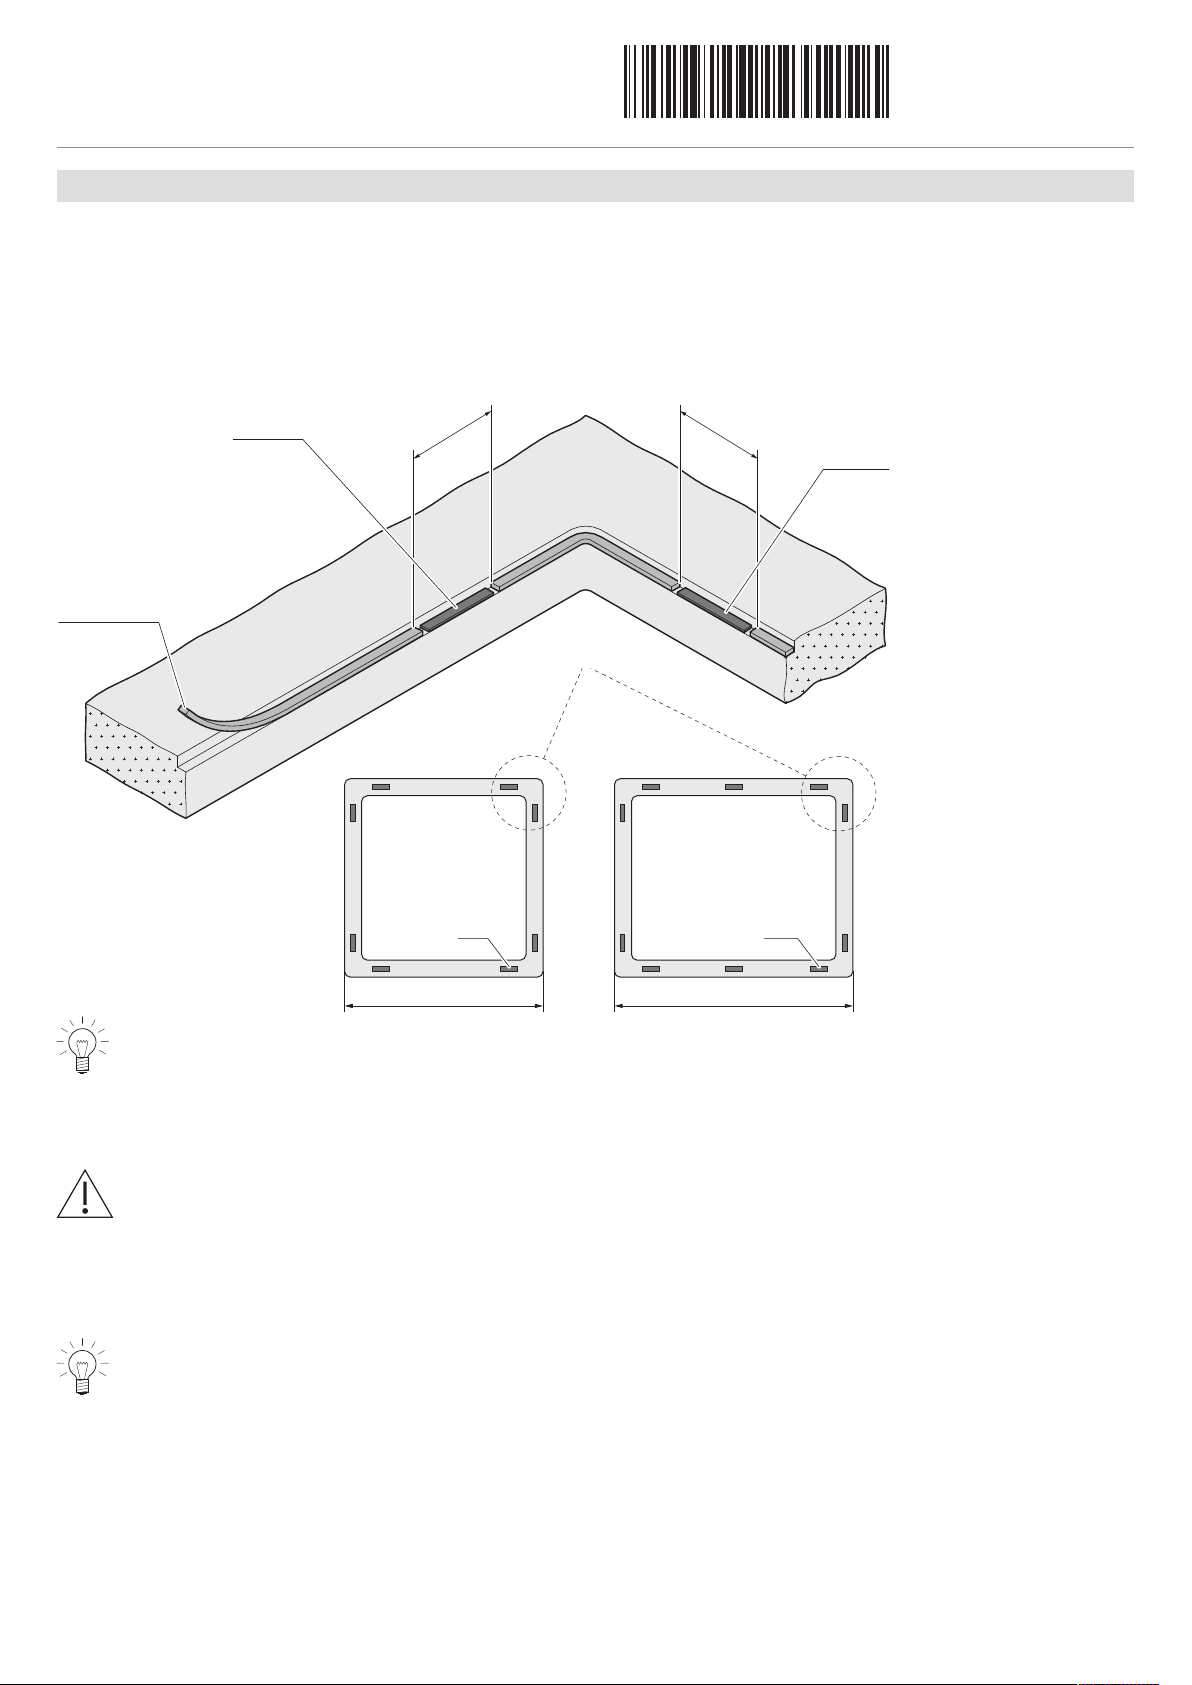
4. Stick the self-adhesive sealing strip (8 × 5mm) supplied with the hob to the cleaned edge mounting surface between the spacer
plates (Fig.8).
287–697 mm 767–903 mm
8× 10×
Sealing strip
8 × 5 mm
Spacer
Spacer
~5 cm
~5 cm
Fig. 8
As appropriate, the edges of the cut-out and the hob can be covered with wide masking tape before commencing the
cementing-in work, so that only the sealing gap is exposed.
5. Carefully place the hob in the prepared cut-out and with the help of the fugenboy (silicone finishing tool) align it so that the sealing
joint is uniform all around.
6. Check both axes are horizontal using a spirit level.
Do not press against the edge of the hob with any tools!
7. Press the silicone adhesive into the sealing joint, avoiding air bubbles and drawing a somewhat raised bead.
8. Spray the silicone bead with smoothing agent.
9. Using the fugenboy (silicone finishing tool), which has also been sprayed with smoothing agent, spread the silicone bead so it is
flush. Keep cleaning the fugenboy and spraying it and the silicone joint with smoothing agent.
The silicone adhesive requires a curing time (waiting time) of at least 24 hours to achieve the final strength and
elasticity. During this time the hob is not to be placed in operation nor subjected to any form of mechanical stress.
For this reason (impermissible mechanical stress), the final cleaning of the hob is only to take place after the expiry
of this waiting time. Cover the hob with cardboard or similar to prevent dust and dirt from settling during the drying
phase.