Loading ...
Loading ...
Loading ...
Installation instructions
For flush installation of a frameless hob
with cement set and sealing strips
J004133-R12
12/06/2018
J004133-R12
4
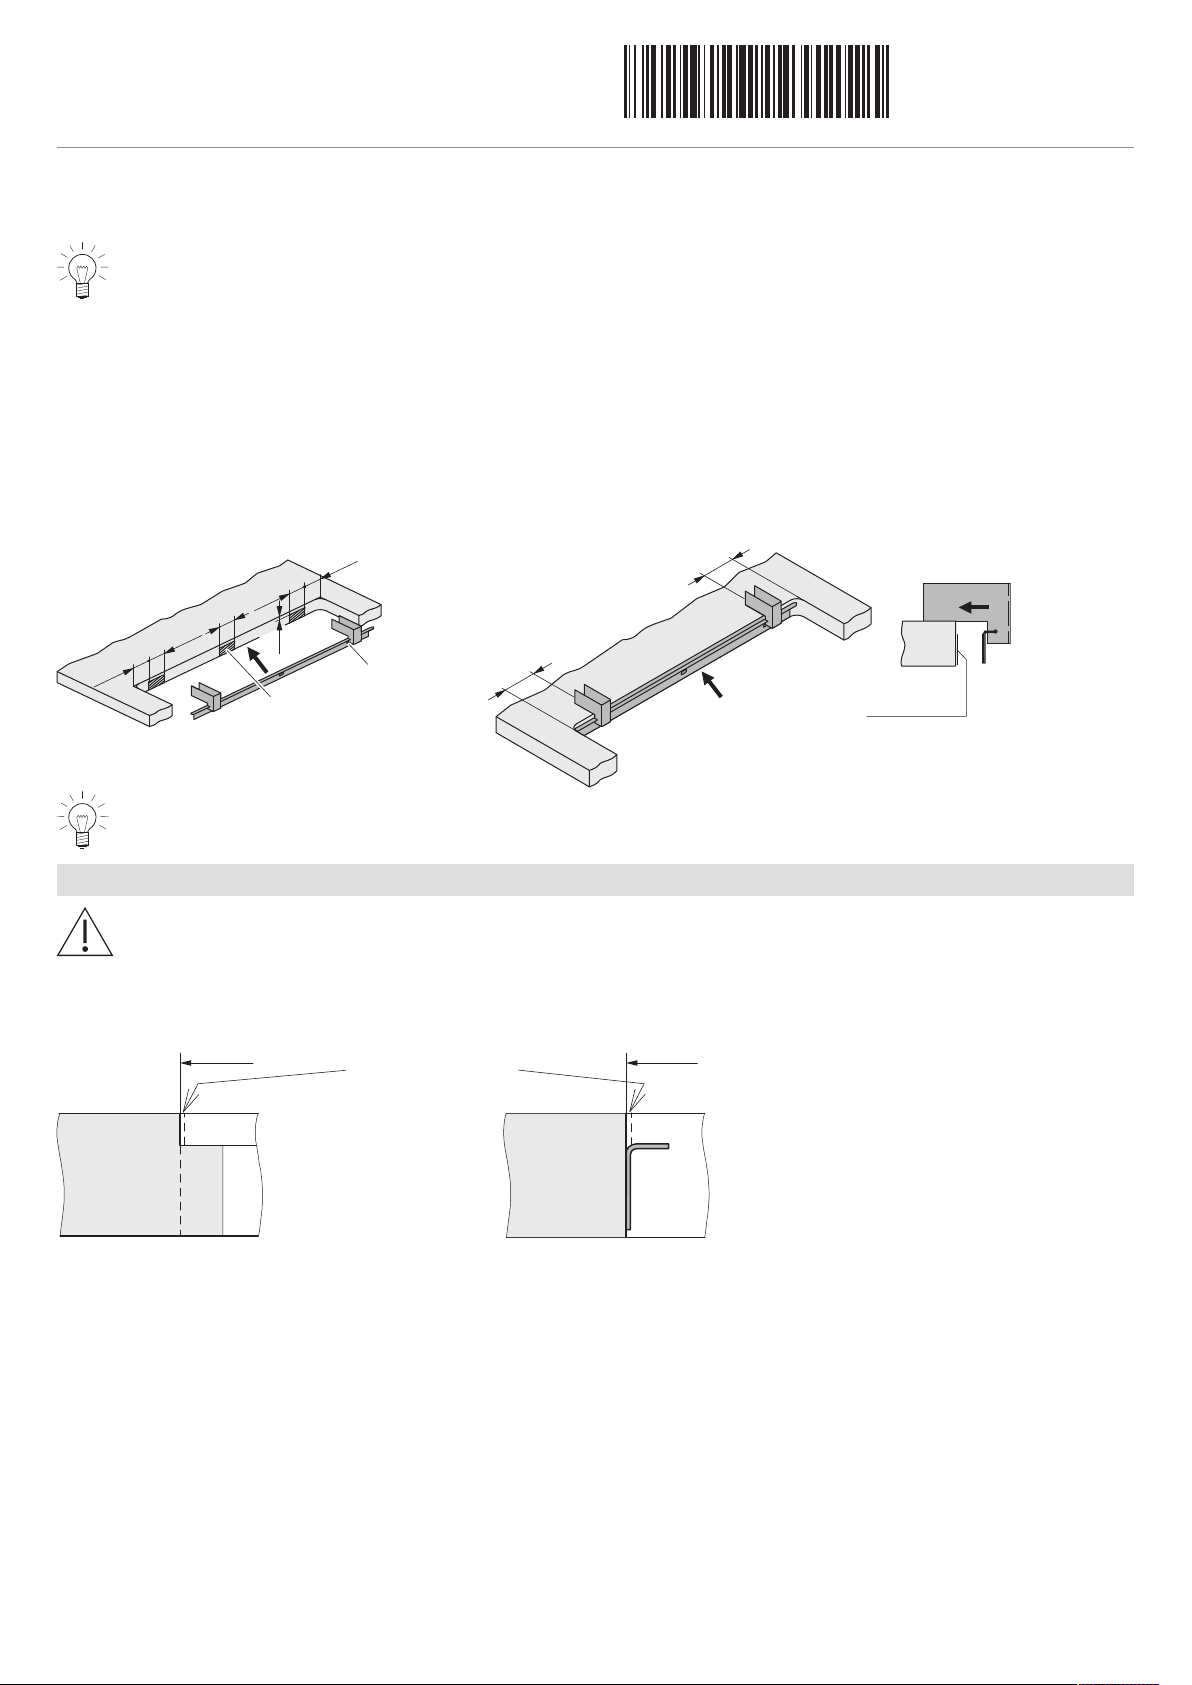
Steel angle set
When using the steel angle set, the cut-out B × T and the corner radius can be cut smoothly over the entire worktop thickness. The cor-
rect position of the sides of the angle mounting with reference to the work surface is set with the two spacer gauges supplied.
The steel angles can be screw mounted with wood surfaces.
1. Thoroughly clean and degrease the cut surface of the stone with isopropyl alcohol.
2. Coat the bonding surfaces on the stone side sparingly with instant adhesive (Fig. 4).
3. Thoroughly clean and degrease the bonding surface of the steel angle with isopropyl alcohol.
4. Place the two spacer gauges on the first mounting angle (Fig. 4).
5. Place the spacer gauges on the work surface, position the mounting angle centrally on the cut edge of the stone (Fig. 6) and apply
pressure (Fig. 5). The adhesive is sufficiently hardened after approx. 5 minutes and both spacer gauges can be removed. Keep the
spacer gauges for future use.
6. Bond the other three mounting angles using the same procedure.
~60
~60
Fig. 5 Fig. 6Fig. 4
~40
~40
~40
~40
~40
~6
Spacer gauge
Adhesive
Adhesive
The instant adhesive requires a curing time (waiting time) of at least 1hour to achieve the final strength and elasti-
city.
Preparing the cut-out
Lack of care in the preliminary work can result in the ingress of liquid which will lead to the swelling of the wood,
damaging the work surface.
In the case of special work surface materials, the use of unsuitable pre-treatment and adhesive materials can some-
times cause colour changes along the bonding and sealing joint.
▪ Make sure the cut-out is clean, free of dust and any other dirt.
Fig. 7
Apply primer to
this area
B × T
B × T
Loading ...