Loading ...
Loading ...
Loading ...
Servicing Your Honda 71
Valve Clearance
(cont’d)
Camshaft Holder Assembly Installation
1. Install the newly selected shims (1) on the
valve spring retainers (2).
NOTICE
Do not let the shims fall into the crankcase.
(2)
(1)
(2)
(1)
(1) shims
(2) valve spring retainers
2. Apply molybdenum disulfide oil (a mixture
of 1/2 engine oil and 1/2 molybdenum
disulfide grease containing more than 3%
molybdenum disulfide additive) to the
following parts.
– camshaft cam lobes
– each valve lifter outer surface
– plunger whole surface
– decompressor shaft sliding area
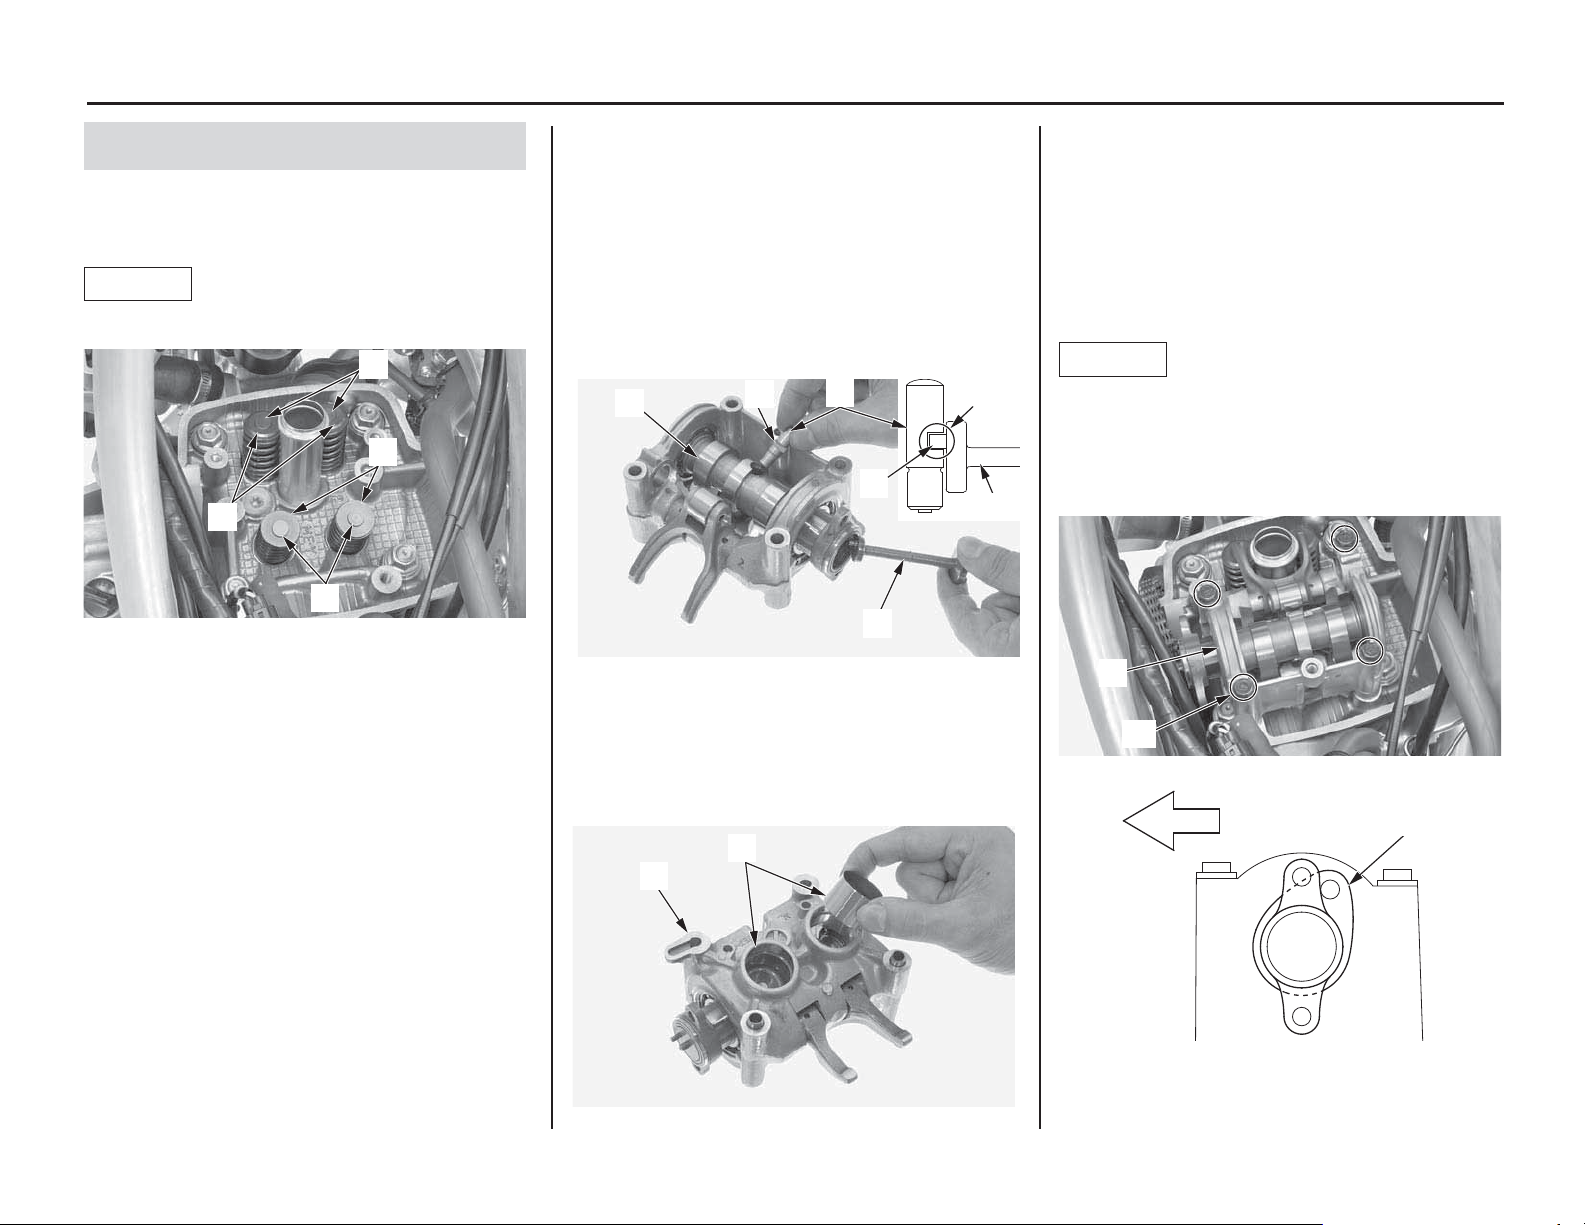
5. Install the camshaft holder assembly (9) onto
the cylinder head with the intake cam lobes
(10) facing up as illustrated below.
Apply engine oil to the camshaft holder
assembly bolt threads and seating surface.
Tighten the camshaft holder assembly bolts
(11) to the specified torque:
10 lbf·ft (14 N·m, 1.4 kgf·m)
NOTICE
Do not let the decompressor shaft and plunger
fall into the crankcase.
Tighten the camshaft holder assembly bolts in a
crisscross pattern in two or three steps.
(9)
(11)
Exhaust side
(10)
(9) camshaft holder assembly
(10) intake cam lobes
(11) camshaft holder assembly bolts
3. Install the plunger (3) into the camshaft (4)
with its rounded surface facing up and groove
(5) side toward the decompressor shaft (6).
Install the decompressor shaft while aligning
its tab (7) with the groove of the plunger
shown.
Check the operation of the plunger by turning
the decompressor shaft with your finger,
then pushing down and pull up the plunger
smoothly.
(7)
(6)
(6)
(4)
(5)
Align
(3)
(3) plunger (6) decompressor shaft
(4) camshaft (7) tab
(5) groove
4. Install the each valve lifter (8) in their
original location into the camshaft holder
assembly (9).
(8)
(9)
(8) valve lifters
(9) camshaft holder assembly
Loading ...
Loading ...
Loading ...