Loading ...
Loading ...
Loading ...
154 Taking Care of the Unexpected
If a Fuse Blows
All of the electrical circuits on your CRF have
a fuse to protect them from damage caused by
excess current flow (short circuit or overload).
If something electrical on your CRF stops
working, the first thing you should check for
is a blown fuse. Check the fuse before looking
elsewhere for another possible cause of the
problem. Replace a blown fuse and check
component operation.
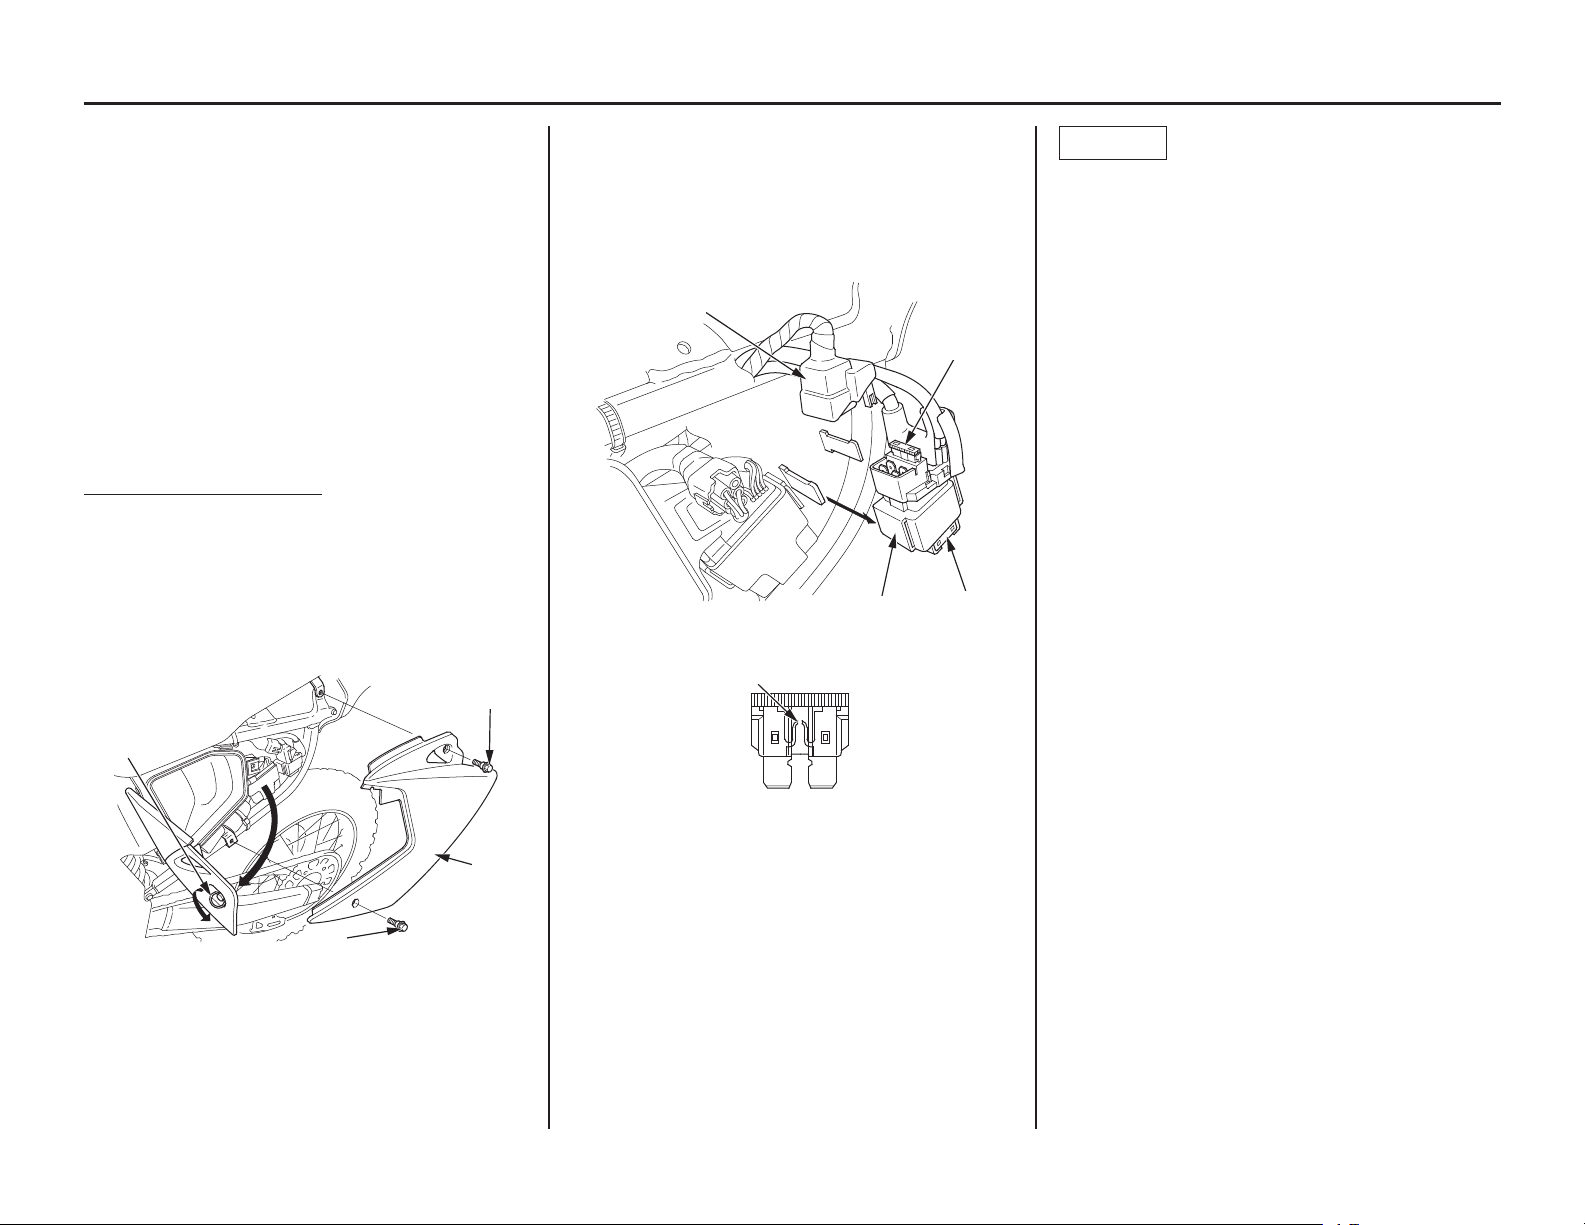
• The main fuse (and spare) are located on the
starter motor magnetic switch behind the left
side cover.
Recommended Main Fuse: 15A
1. To prevent an accidental short circuit, stop
the engine.
2. Open the air cleaner housing cover by turning
the quick fastener (1) counterclockwise
and remove the left side cover bolt (2), seat
mounting bolt (3) and left side cover (4).
(1)
(2)
(3)
(4)
(1) quick fastener
(2) left side cover bolt
(3) seat mounting bolt
(4) left side cover
3. Remove the starter magnetic switch (5) with
the rubber case.
4. Disconnect the wire connector (6) of the
starter magnetic switch.
5. Pull out the main fuse (7). If it is blown (8),
install the spare main fuse (9).
(6)
(7)
(9)
(5)
(8)
(5) starter magnetic switch
(6) wire connector
(7) main fuse
(8) blown fuse
(9) spare main fuse
6. Reconnect the wire connector and install the
starter magnetic switch.
If you do not have a replacement fuse with the
proper rating for the circuit, install one with a
lower rating.
NOTICE
Replacing a fuse with one that has a higher
rating greatly increases the chance of damage to
the electrical system.
If you replace a blown fuse with a spare fuse
that has a lower rating, replace the fuse with the
correct rating as soon as you can. Also remember
to replace the spare fuse that was installed.
If the replacement fuse of the same rating burns
out in a short time, there is probably a serious
electrical problem on your CRF.
Leave the blown fuse in that circuit and have
your CRF checked by your dealer.
7. Install the left side cover and left side cover
bolt.
8. Close the air cleaner housing cover.
Loading ...
Loading ...
Loading ...