Loading ...
Loading ...
Loading ...
10 11
ninjakitchen.com
ninjakitchen.com
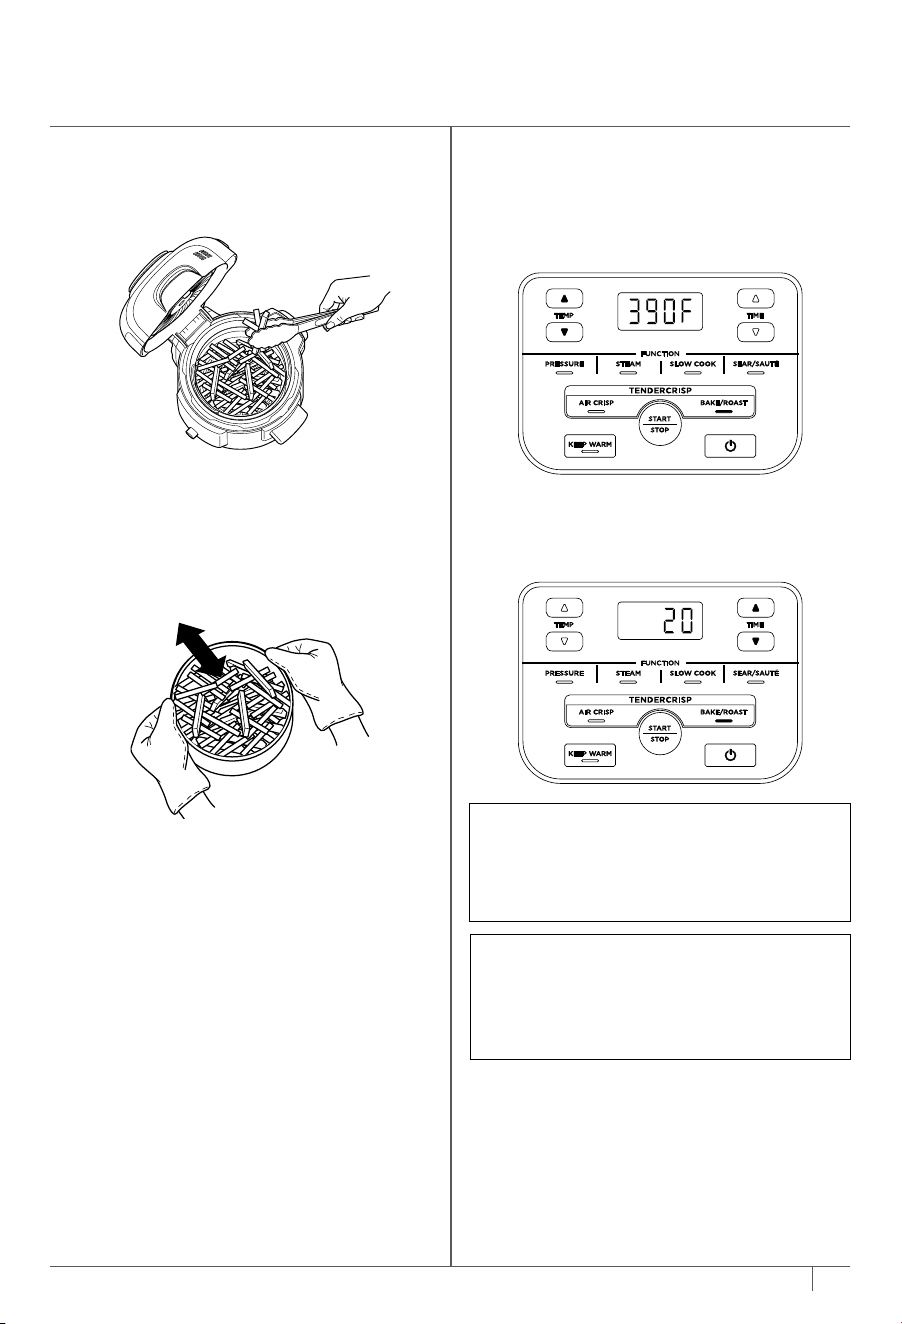
4 Add ingredients to the basket. Close the
lid and press the START/STOP button to
begin cooking.
5 During cooking, you can open the
lid and lift out the basket to shake or
toss ingredients for even browning,
if needed. When done, lower basket
back into pot and close lid. Cooking will
automatically resume after lid is closed.
6 When cook time is complete, the unit
will beep and display DONE.
USING YOUR FOODI™ COMPACT
TENDERCRISP™ PRESSURE COOKER
SWAP THE TOP
The two lids allow you to seamlessly transition
between all your favorite cooking methods.
Use the pressure lid to tenderize, then use
the crisping lid to crisp up your food.
USING THE CRISPING LID
The crisping lid is permanently attached to
the unit by a hinge. The lid can be opened
during the AIR CRISP and BAKE/ROAST
functions so you can check on and access
the ingredients. When the lid is opened,
cooking will stop and the timer will pause.
When the lid is closed, cooking and the
timer will resume.
USING THE COOKING FUNCTIONS
WITH THE CRISPING LID
To turn on the unit, plug the power cord into
a wall outlet, then press the Power button.
Air Crisp
1 Press the AIR CRISP button. The default
temperature setting will display. Use the
up and down TEMP arrows to choose a
temperature between 300°F and 400°F.
2 Use the up and down TIME arrows to
set the cook time in minute increments
up to 1 hour.
3 With the pot installed, place the Cook &
Crisp™ Basket in the pot. Basket should
have diuser attached.
NOTE: It is recommended to let the
unit preheat for 5 minutes before adding
ingredients. If preheating, before step 4,
close the lid, and press the START/STOP
button to begin.
Bake/Roast
1 Press the BAKE/ROAST button. The default
temperature setting will display. Use the
up and down TEMP arrows to choose a
temperature between 250°F and 400°F.
2 Use the up and down TIME arrows to
set the cook time in 1-minute increments
up to 1 hour, and in 5-minute increments
from 1 hour to 4 hours.
3 Place ingredients in or on the accessory
called for in your recipe, then place
accessory in the pot. Close the lid
and press the START/STOP button
to begin cooking.
4 When cook time is complete, the unit
will beep and display DONE.
NOTE: It is recommended to let the unit
preheat for 5 minutes before adding
ingredients. If preheating, before step 3,
close the lid, and press the START/STOP
button to begin.
NOTE: If running for 20 minutes or less,
the clock will count down by minutes
and seconds. If running for more than
20 minutes, the clock will count down
by minutes only.
Loading ...
Loading ...
Loading ...