Loading ...
Loading ...
Loading ...
13
INSTALLATION INSTRUCTIONS
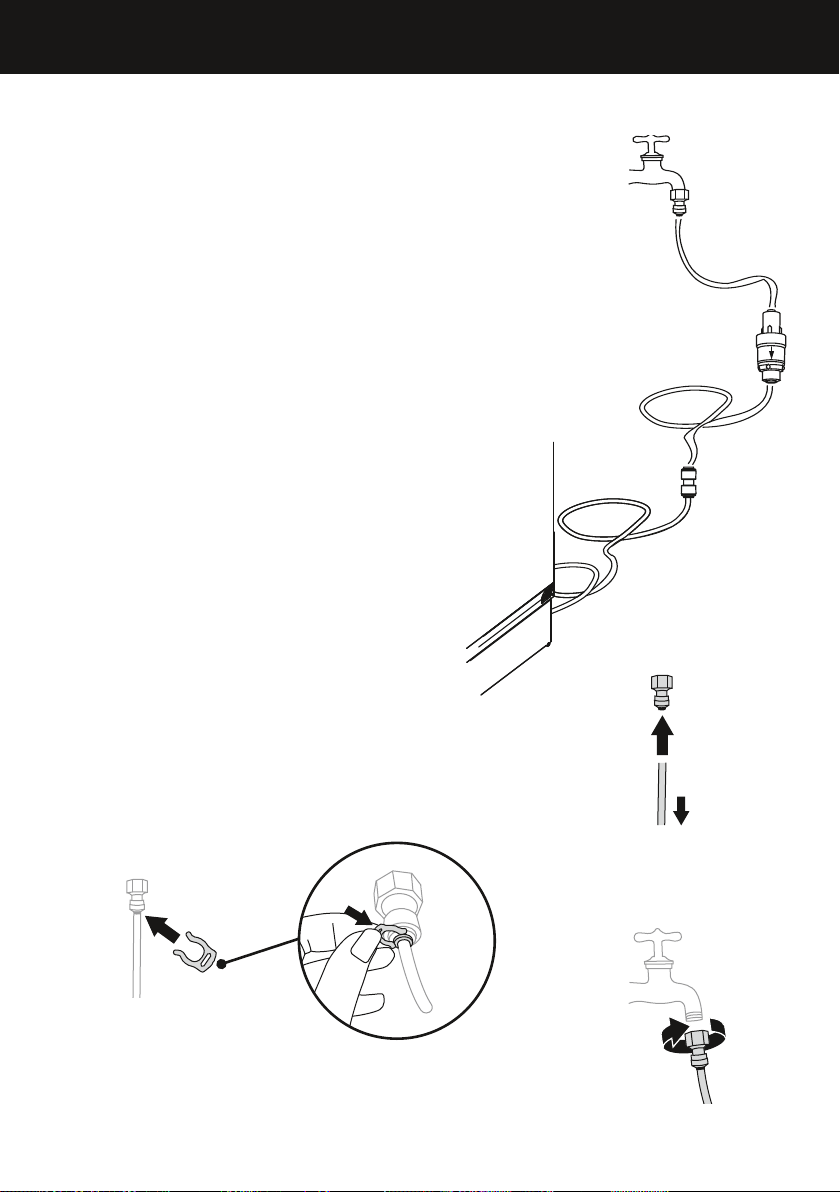
Connecting water (Water dispensing and Automatic Ice models)
1
Ensure the refrigerator is NOT plugged into a
power supply. Locate the isolation tap for water
connection – cold water supply only. (Tee and
tap fitting not supplied).
2
Uncoil a tubing with quick fitting from the back
of the refrigerator (refer to A).
– The quick fitting is pre-assembled with
the tubing at the factory.
3
Connect one end of a long tubing (4m) to the
quick fitting, and insert the other end to a PLV
(refer to B).
4
Insert one end of a short tubing (200mm) to
the inlet of the PLV. (Refer to C).
– Ensure the arrow on the PLV is pointing
away from the tap. The arrow indicates
the direction of water flow.
5
Insert the other end of the short tubing firmly
to the tap connection. (Refer to C).
– The tubing should push in at least 16mm
before reaching the stop.
6
Pull gently on the short tubing to ensure it is
locked in place (refer to D).
7
Secure the connection by attaching a locking
key in between the tap connection and
lockingcollet (refer toE).
8
Fasten the tap connection to the cold water
supply tap. Take care not to over-tighten the
tap connection (refer to F).
Note: The tap connection supplied should fit
most installation situations.
9
Turn isolating tap on and check thatall
connections are dry and free of drips.
2
3
4
F
E
Pull gently on tubing to
ensure it is locked in.
D
A
B
C
tap connection
200mm tubing
PLV
4m tubing
quick fitting
Loading ...
Loading ...
Loading ...