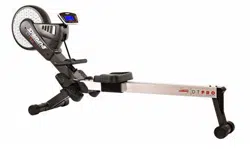
Insert the Axle #D 2PCS, Bolt #C(M8*16) 4PCS ,Washer #B((ID8.2) 4PCS to the Pedal #55 then attach them to the Front Stabiliser#56 , use the Allen Key S6 #G 2 PCS to lock them well. Use the hands to put into the End Cap (26)2PCS to the two sides of Front Stabiliser (56)
Step 2.
Stand the Main Frame #1 upright onto the Styrofoam in the carton. Use the 2 PCS Bolts #A (M8*38) to connect the Front Stabiliser #56 with the Main Frame #1 and use the Allen Key S6 #G to fasten them well.
Step 3.
Assemble the Rear Stabiliser (31) to the rear end of the Main Rail (36) and fix it with 1xM8*40 Knob (25) And 1xWasher (65). Insert the Saddle (46) in the right direction onto the Main Rail (36).
NB/: Both the M8*40 Knob (25) and Washer (65) are pre-assembled on the Mail Rail (36). Please remove them before assembly and restore them afterwards.
Step 4.
Connect the Main Rail (36) to the Main Frame (1) with 2x M8*20 Bolt (F) and 2x Rubber Cushion (E).
Step 5.
Take the 4 x Screw (52) from the rear of the Computer. Put Sensor Wires of Computer (54) through the Square Plate (59). Connect two Sensor Wires (51) (54). Use 2 x Screw (I) to tighten the Computer (58) and Main Frame (1).
STORAGE
Step 1.
Store your machine in a dry area away from children and high-traffic areas. Be sure it is secure and will not fall downward onto children or pets.
Step 2.
Loosen the Knob (#25) first, then pull the Rear Stabiliser (#31) out and fold it down.
TENSION KNOB ADJUSTMENT
You should begin your “Exercise Period” at the resistance level and speed to suit your needs. Remember to start out slow and work your way up to the fitness level you desire.
WORKOUT AREA
The “Free area” should be no less than 0.6m all around the training area. The free area ensures room for emergency dismount.
OPERATION INSTRUCTIONS
MODE
Push down for selecting functions.
SET
To set TIME, COUNT, DISTANCE & CALORIES
RESET
For resetting TIME, COUNT, DISTANCE & CALORIES
TIME
(i) Count the total time for exercise start-to-end.
(ii) Press ‘MODE’ button until ‘TIME’ appears, press ‘SET’ button to set exercise time. Automatic countdown will commence
DISTANCE
(i) Count the distance from exercise start-to-end.
(ii) Press ‘MODE’ button until ‘DIST’ appears, press ‘SET’ button to set exercise distance. Automatic countdown will commence.
STROKES/ MIN (RPM)
Automatically accumulates the workout counts per minute.
CALORIES
(i) Count the total calories from exercise start-to-end.
(ii) Press ‘MODE’ button until ‘CAL’ appears, press ‘SET’ button to set calorie target. Automatic countdown will commence
WARM UP & COOL DOWN!
To prevent injuries you should start with warm-up, cool-down and stretching exercises before and after each workout.
No matter how you do sports, please do some stretch at first. The warm muscle will extend easily. This reduces the risk of a spasm, or muscle injury, during exercise. To warm up yourself we suggest the following stretch exercise as shown in the graphic: Do not overstretch or pull your muscles.
IF IT HURTS, STOP IT!
Side bends
Pass the arm over your head and bend the upper body in the same direction. Hold this position for 10 to 15 seconds and slowly straighten up yourself. Repeat this 3 times for each side. (picture 1).
Toe Touch
Slow bend forward from your waist, letting your back and shoulders relax as you stretch toward your toes, Reach down as far as you can and hold for 15 counts. And then relax, repeat 3 times. (picture 2)
Calf-Achilles Stretch
Lean against a wall with your left leg in front of the right and your arms forward, Keep your right leg straight and the left foot on the floor, then bend the left leg and lean forward by moving your hips toward the wall, Hold, then repeat on the other side for 15 counts. Then relax and repeat 3 times for each leg. (picture 3)
Quadriceps stretch
With one hand against a wall for balance, reach behind you and pull your right foot up .Bring your heel as close to your buttocks. hold for 10-15counts,relax.Repeat three times for each foot. (picture 4)
Inner Thigh Stretch
Sit with the soles of your feet together with your knees pointing outward. Pull your feet as close into your groin as possible. Gently push your knees towards the floor. Hold for 15 counts.Then relax and repeat 3 times. (picture 5)
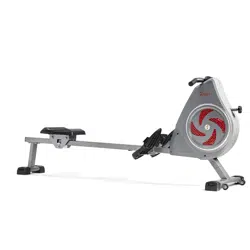
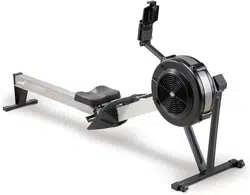
ROWING EXERCISES
Using your ROWING MACHINE will provide you with several benefits:
1. It will improve your overall physical fitness, strengthening the heart and improving circulation as well as exercising all the major muscle groups; the back, waist, arms, shoulders, hips and legs.
2. Tone your muscles and in conjunction with a calorie-controlled diet: it will help you lose weight. Rowing is an extremely effective form of exercise.
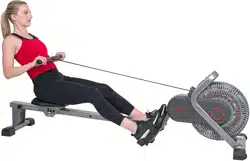
The Basic Rowing Stroke
1. Sit on the saddle and fasten your feet to the pedals using the Velcro straps. Then take hold of the rowing bar.
2. Take up the starting position, leaning forward with your arms straight and knees bent as shown in (Fig 1).
3. Push yourself backwards, straightening your back and legs at the same time (Fig 2).
4. Continue this movement until you are leaning slightly backwards, during this stage you should bring your arms out of the side. (Fig 3). Then return to stage 2 and repeat. See attached.
Training Time
Rowing is a strenuous form of exercise, because of this it is best to start with a short and easy exercise programme and build up to longer and harder workouts. Start rowing for about 5 minutes and as you progress, increase the length of your workout to match your improving level of fitness. You should eventually be capable of rowing for 15-20 minutes, but do not try to achieve this too quickly. Try to train on alternate days, 3 times a week. This gives your body time to recover between workouts.
Alternate Rowing Styles
Arms Only Rowing
This exercise will tone muscles in your arms, shoulders, back and stomach. Sit as shown in Fig 4 with your legs straight, lean forward and grasp the handles. In a gradual and controlled manner lean back to just past the upright position continuing to pull the handles towards your chest. Return to the starting position and repeat. See attached.
Legs Only Rowing
This exercise will help tone muscles in your legs and back. With your back straight and arms stretched out, bend your legs until you are grasping the rowing arm handles in the starting position, (Fig 7.). Use your legs to push your body back whilst keeping your arms and back straight.
Muscle Toning
To tone muscle while on your ROWING MACHINE you will need to have the resistance set quite high. This will put more strain on your leg muscles and may mean you cannot train for as long as you would like. If you are also trying to improve your fitness, you need to alter your training programme.
You should train as normal during the warm up and cool down phases, but towards the end of the exercise phase you should increase resistance making your legs work harder. You will have to reduce your speed to keep your heart rate in the target zone.
Weight Loss
The important factor here is the amount of effort you put in. The harder and longer you work, the more calories you will burn. This is effectively the same as if you were training to improve your fitness, the difference being the goal.
Hold the handlebar all the time during exercise, do not let the resistance rope bounce automatically