Loading ...
Loading ...
Loading ...
ASSEMBLY INSTRUCTIONS
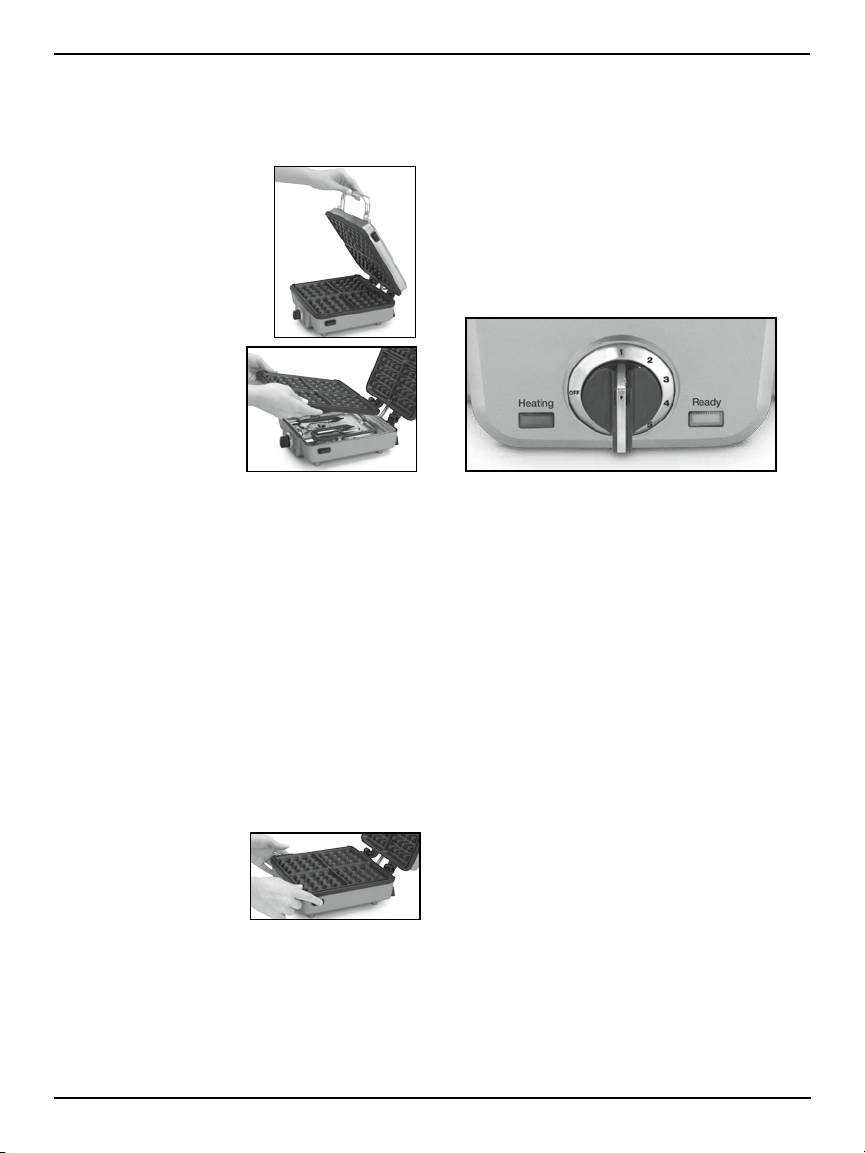
To insert plates
1. Place the closed unit on a clean, flat surface
where you intend to use it.
2. Lift lid by grasping the
handle and pushing up in
one fluid motion. Lid will
stay open at a 105° posi
-
tion until you lower it.
3. Insert one plate at a time.
Waffle plates: Each plate
is designed to fit in either
the upper housing
or the lower housing
of the waffle maker.
The word LOWER or
UPPER is embossed
on the right side of
each plate.
Pancake plate: The 4-slot plate is designed to
fit in the lower housing only. The word LOWER is
embossed on the right side of the plate. The flat
plate is designed to fit in the upper housing only.
The word UPPER is embossed on the right side
of the plate.
4. Locate the two holes at the back of the hous
-
ing. Tilt the back end of the plate and line up the
pegs at the back of the plate with the holes at
the housing. Slide the plate underneath the holes
and push down the front end of the plate. It will
snap into place.
To remove plates
1. Locate the plate release buttons on the right side
of the unit. Press firmly on button and the plate
will pop up slightly from the base.
2. Grasp the plate with two hands, slide it out from
the holes at the housing,
and lift it out of the base.
3. Press on the other plate
release button to remove
the second plate in the
same manner.
OPERATING INSTRUCTIONS
1. Plug the power cord into a standard
electrical outlet.
2. Adjust the temperature knob to the desired
browning setting.
3. The red indicator light will turn on to signal that
the power is on and the unit will begin to heat.
We recommend preheating in the closed position.
When the unit has reached desired temperature,
the green indicator light will turn on and the audi
-
ble tone will sound. You are now ready to begin.
Note: The first time you use your unit it may have
a slight odor and may smoke a bit. This is normal,
and common to appliances with a nonstick surface.
4. Please refer to the Cooking Chart on pg. 7 for
further details on preparing foods.
CLEANING AND CARE
When you are finished cooking, turn the tempera-
ture knob to Off and unplug the power cord from
the wall outlet. Allow the unit to cool down com
-
pletely before handling.
Press the plate release buttons to remove plates
from the housing. Be sure that the plates have
cooled completely before handling (at least 30 min
-
utes). The plates can be washed in the dishwasher.
Do not use metallic objects such as knives or forks
for cleaning. Do not use a scouring pad for cleaning.
The nonstick coating can be damaged.
To clean exterior, wipe with a soft dry cloth. Never
use an abrasive cleanser or harsh pad.
NEVER IMMERSE CORD, PLUG OR UNIT IN
WATER OR OTHER LIQUIDS.
Any other servicing should be performed by an
authorized service representative.
4
Loading ...
Loading ...
Loading ...