Loading ...
Loading ...
Loading ...
64
Using the supplied software
This section describes the process using a
Windows computer as an example.
The supplied CD-ROM contains two
software applications: “PicturePackage”
and “ImageMixer.”
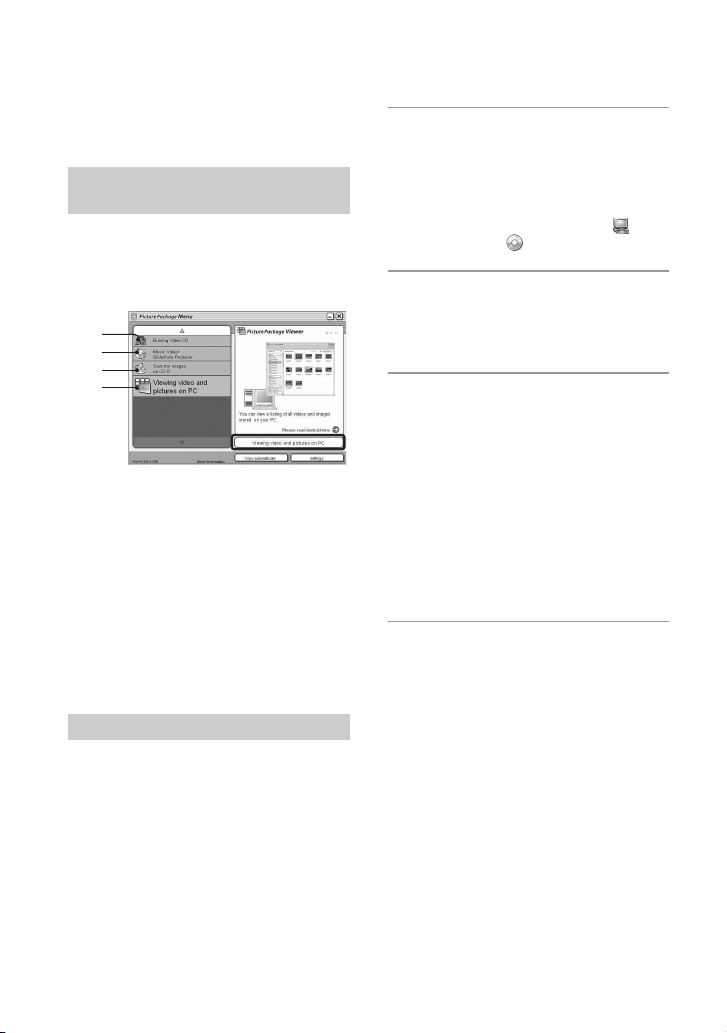
PicturePackage
What you can do:
A Burning Video CD
The “ImageMixer VCD2” screen appears.
B Music Video/Slideshow Producer
C Save the images on CD-R
D Viewing video and pictures on PC
How to start up the functions:
Click one of A-D, then click the button at
the lower right of the screen.
You can install the “PicturePackage” and
“ImageMixer VCD2” software using the
following procedure.
• If you have not yet installed the USB driver
(page 56), do not connect the camera to the
computer before you install the
“PicturePackage” software (except for Windows
XP).
• In Windows 2000/XP, log on as Administrator.
• When “PicturePackage” is installed, the USB
driver is installed automatically.
1 Turn on your computer, and insert
the CD-ROM (supplied) into the
CD-ROM drive.
The installation menu screen appears.
• If it does not appear, double-click (My
Computer)
t (PICTUREPACKAGE)
2 Click [PicturePackage].
The “Choose Setup Language” screen
appears.
3 Select the desired language, then
click [Next] twice.
This section describes the English
screen.
The “License Agreement” screen
appears.
Read the agreement carefully. If you
accept the terms of the agreement, click
the radio button next to [I accept the
terms of the license agreement] and then
click [Next].
4 Follow the instructions on the
screen to complete the
installation.
• “ImageMixer VCD2” and “DirectX” will be
installed if you have not yet installed them.
• When the restarting confirmation message
appears, restart the computer following the
instructions on the screen.
Overview of the supplied
software
Installing the software
A
B
C
D
Loading ...
Loading ...
Loading ...