Loading ...
Loading ...
Loading ...
Preparation:
• Place the heater on a firm, level surface and plug into a grounded 120V, 60Hz power outlet.
• Only operate heater when it is in an upright position.
• Insert two AAA batteries into the remote control before using. Batteries are not included.
Please note that infrared heaters do not heat or blow hot air like a traditional space heater. Infrared heaters
are intended to supplement an already-heated, insulated room. Square footage specifications assume a single
enclosed room, not an entire home. Infrared heaters do not heat through walls or floors, and are not intended
to replace a main heat source. Infrared heat can take at least 24 hours to warm a room, but they operate more
efficiently to maintain the desired temperature. Infrared heaters will not work well in uninsulated, unheated
spaces like screened-in porches, RV’s, garages, unheated basements, etc.
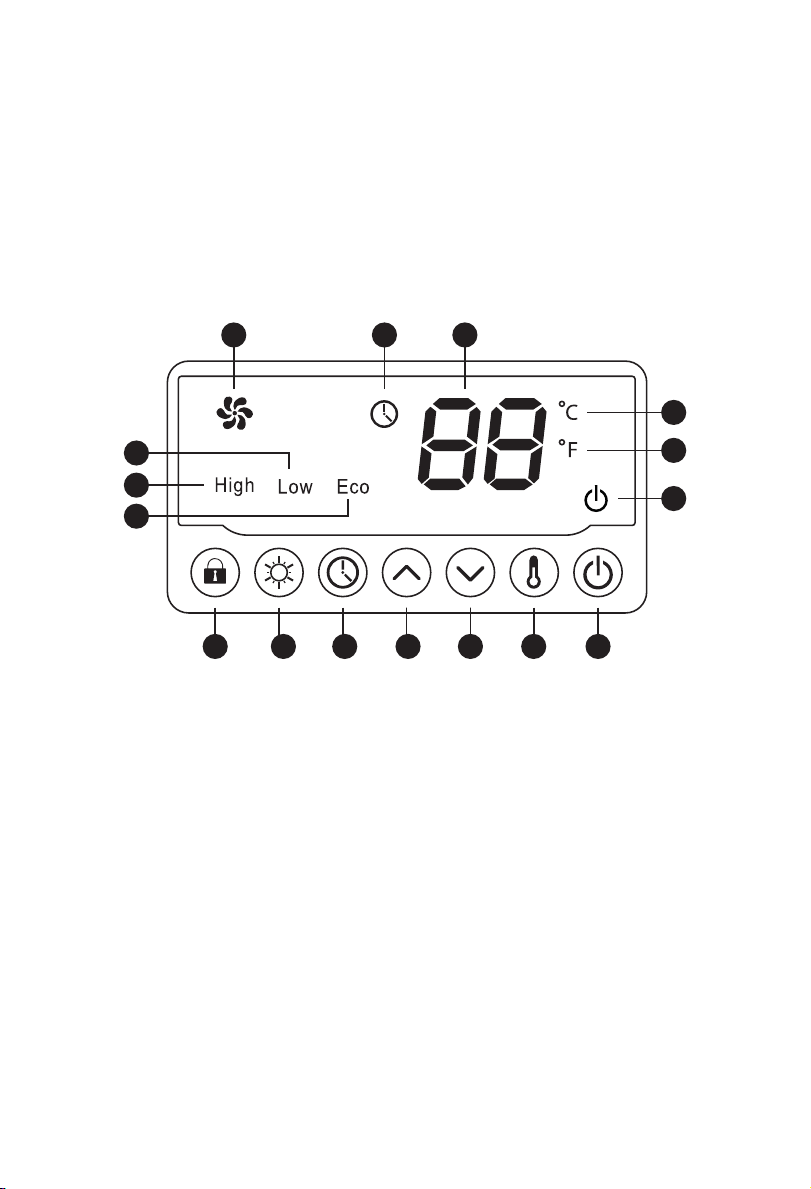
Control Panel:
4
1 Fan Indicator Light
Indicates when the Fan is on
2 Timer Indicator Light
Indicates when the timer function is active
3 Digital Display
Readout of the set room temperature or timer value
4 Celsius Indicator Light
Indicates that the temperature is being displayed in Celsius
5 Fahrenheit Indicator Light
Indicates that the temperature is being displayed in Fahrenheit
6 Power Indicator Light
Indicates when the unit is receiving power from the wall outlet
7 Power Switch Button
Powers the heater ON or OFF
8 Ambient Temp. Button
Indicates ambient temp / hold to toggle between °C/°F
9 Temp-Down Button
Decreases the set temperature
10 Temp-Up Button
Increases the set temperature
11 Timer Button
Engages the on/off timer function
12 Heater Mode Button
Toggles between Hi / Low / Eco Modes
13 Safety Lock Button
Hold to Lock / Unlock heater’s control panel
14 Energy Saving Indicator
Indicates when energy-saving mode is on
15 High Heat Indicator
Indicates when High Heat mode is on
16 Low Heat Indicator
Indicates when Low Heat mode is on
1 2 3
78910111213
14
15
16
4
5
6
Loading ...
Loading ...
Loading ...