CONTENTS
1 Panel, front
1 Panel, back
2 Support, side
1 Support, center
4 Foam
21 Screw, #8 x 1/2"
Note: Additional screws are provided but not used.
INDUCTION RANGE RISER INSTALLATION
1
Place the front panel face down on a protected work
surface, then remove the protective material from the
back of the panel.
Note: Limit the amount of protective material removed
to ensure the stainless steel is protected throughout the
assembly process.
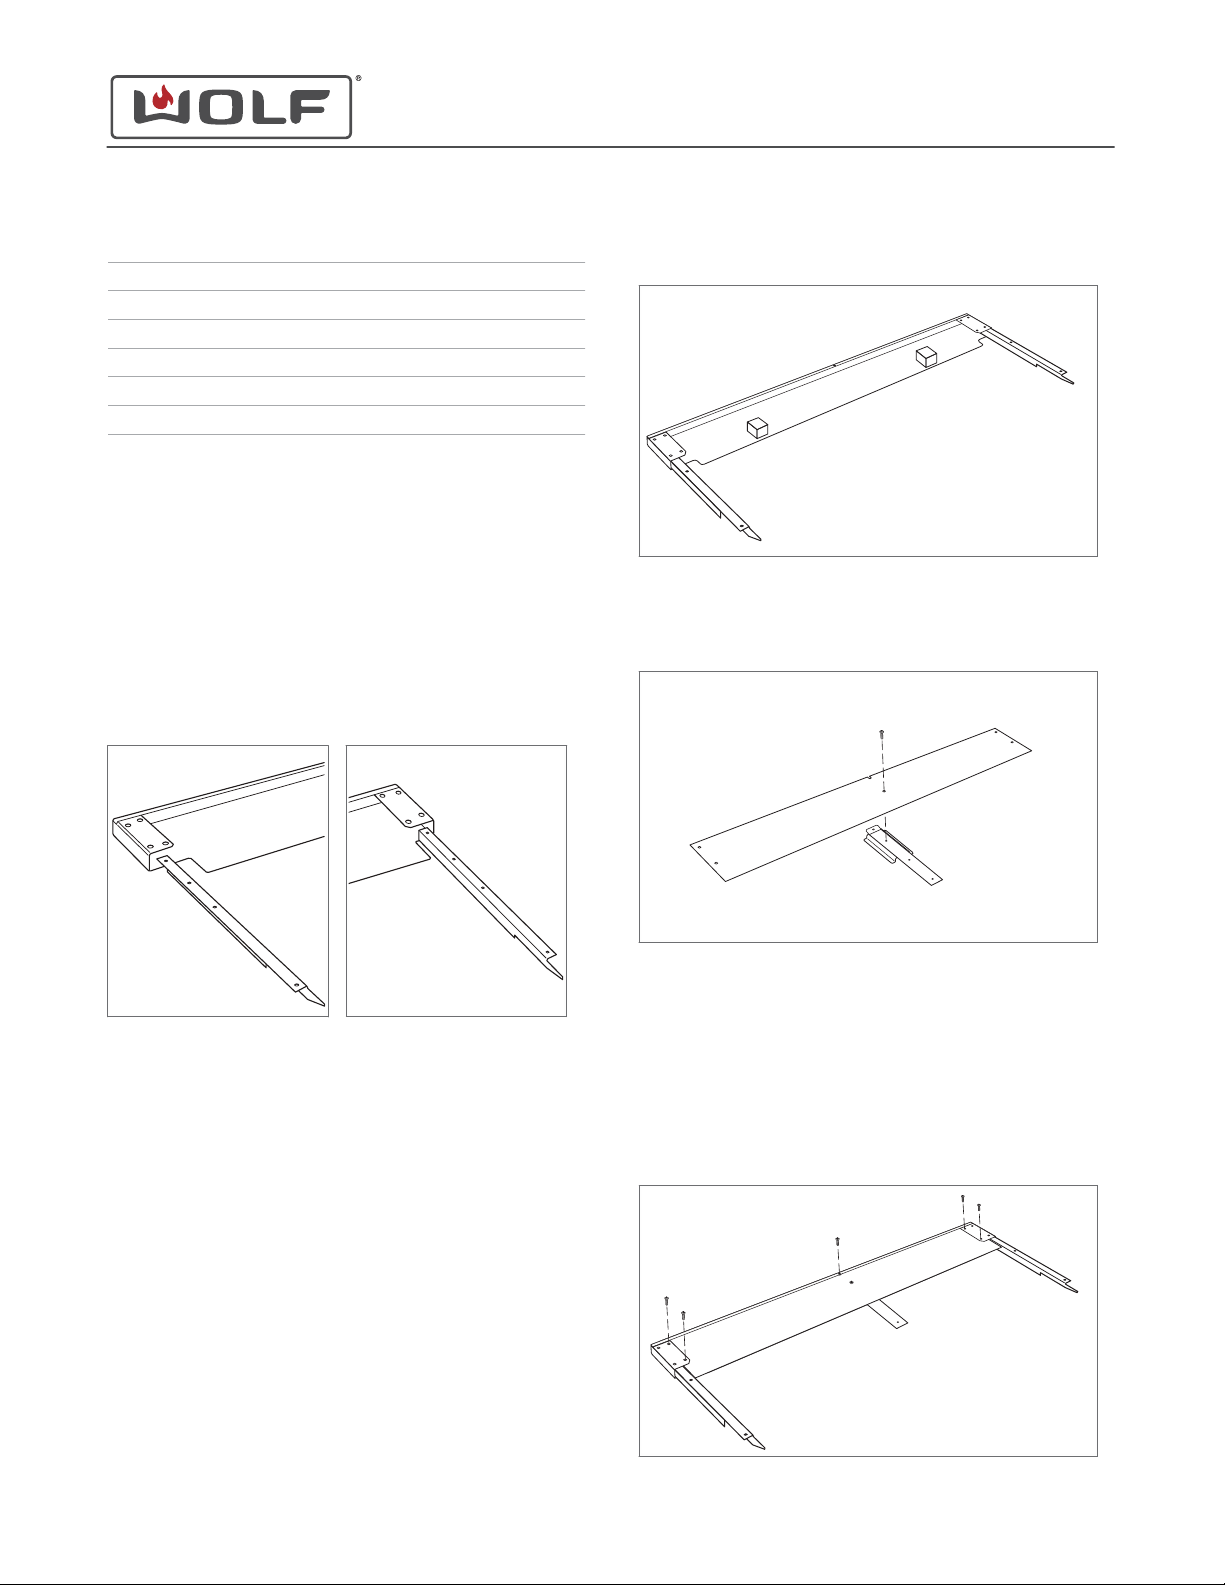
2
Insert the side supports into the riser assembly and
secure using two #8 x 1/2" screws per side.
3
Remove the paper backing from two of the foam
pieces, then adhere each to another piece of foam to
create two (square) blocks.
4
Remove the paper backing from the two foam blocks.
5
Install both blocks (centered) between the side
supports and centerline of the front panel.
6
Place the center support bracket on a protected work
surface, then place the back panel on the center
support and install one #8 x 1/2" screw in the back
panel bottom hole.
7
Remove the paper backing from the black tape on the
center support flanges, then align the center support
hole with the center hole on the front panel.
Note: Angle the center support slightly to ensure the
tape doesn't adhere before the support is properly
aligned with the center hole.
8
Press the center support to secure the tape to the front
panel, then secure the back panel to the front panel
using five #8 x 1/2" screws.
Induction Range Riser Installation
wolfappliance.com 800.222.7820
9013728 REV-A 04/2017
Page 1 of 2
*9013728$REVA*

9
Remove the island trim from the range by extracting the
screws along the top and both sides.
10
Install the new riser.
Note: The foam blocks are designed to prevent gaps
between the cooking surface and riser. The foam
blocks may need to be compressed slightly while the
riser is installed.
11
Once the riser is installed, insert two screws through
the back of the range and into the right, left and center
supports.
Induction Range Riser Installation
wolfappliance.com 800.222.7820
Page 2 of 2
