www.philips.com/welcome
User manual
Always there to help you
Register your product and get support at
Question?
Contact
Philips
HMP5000


1
English
EN
Contents
1 Control and play 2
2 Options 3
Video options 3
Audio option 3
Photo options 4
3 File browsing 5
Browse all les 5
Browse movie les 6
Browse music les 7
Browse photo les 7
4 File management 9
Basic operations 9
5 Set up a network 11
Wireless network setup 11
Wired network setup 12
6 Playmedialesfromacomputer
(DLNA) 13
7 Internet Services 14
8 Settings 15
System 15
Audio 16
Video 16
Wireless network setup 16
MISC 17
9 EasyLink 18
10 Updatesoftware 19
Update software via the Internet 19
Update software via USB/SD 19
11 Troubleshooting 20
12 Specication 21
2 EN
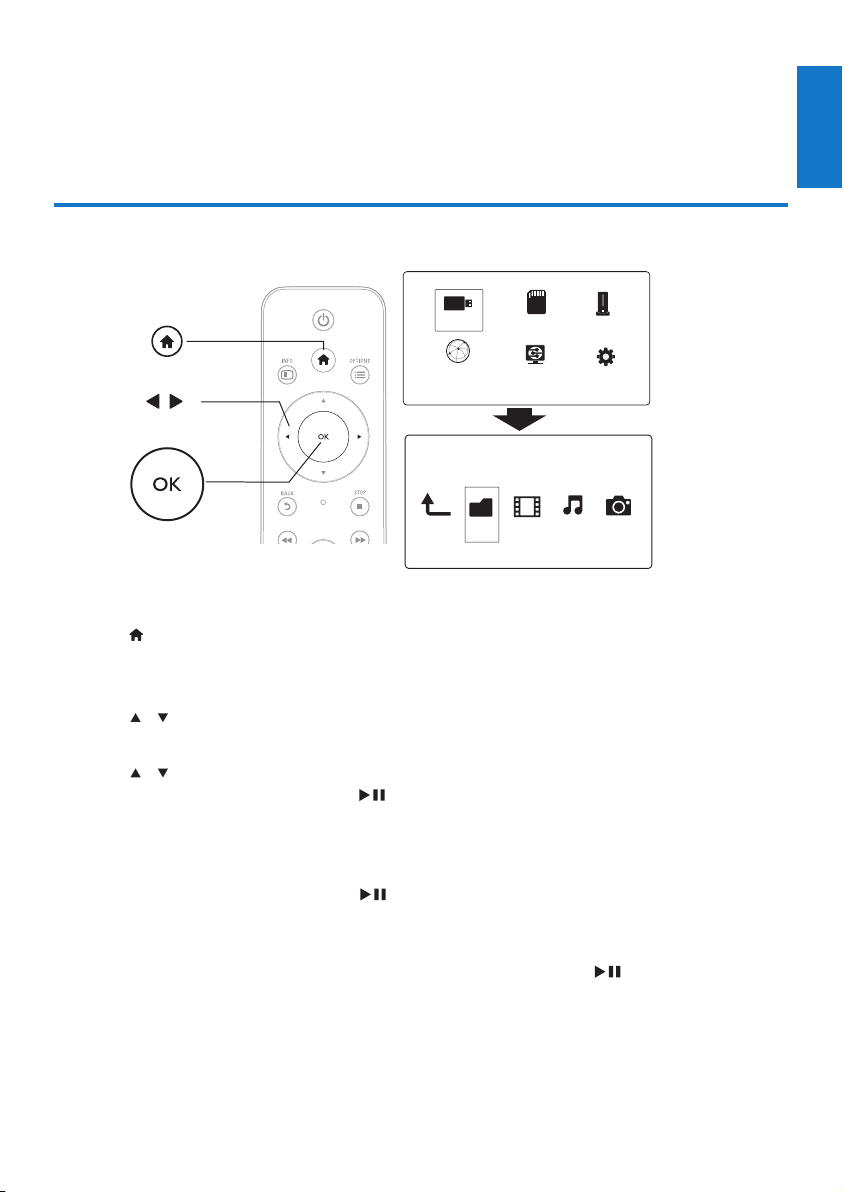
1 Control and play
Use your remote control to control the play.
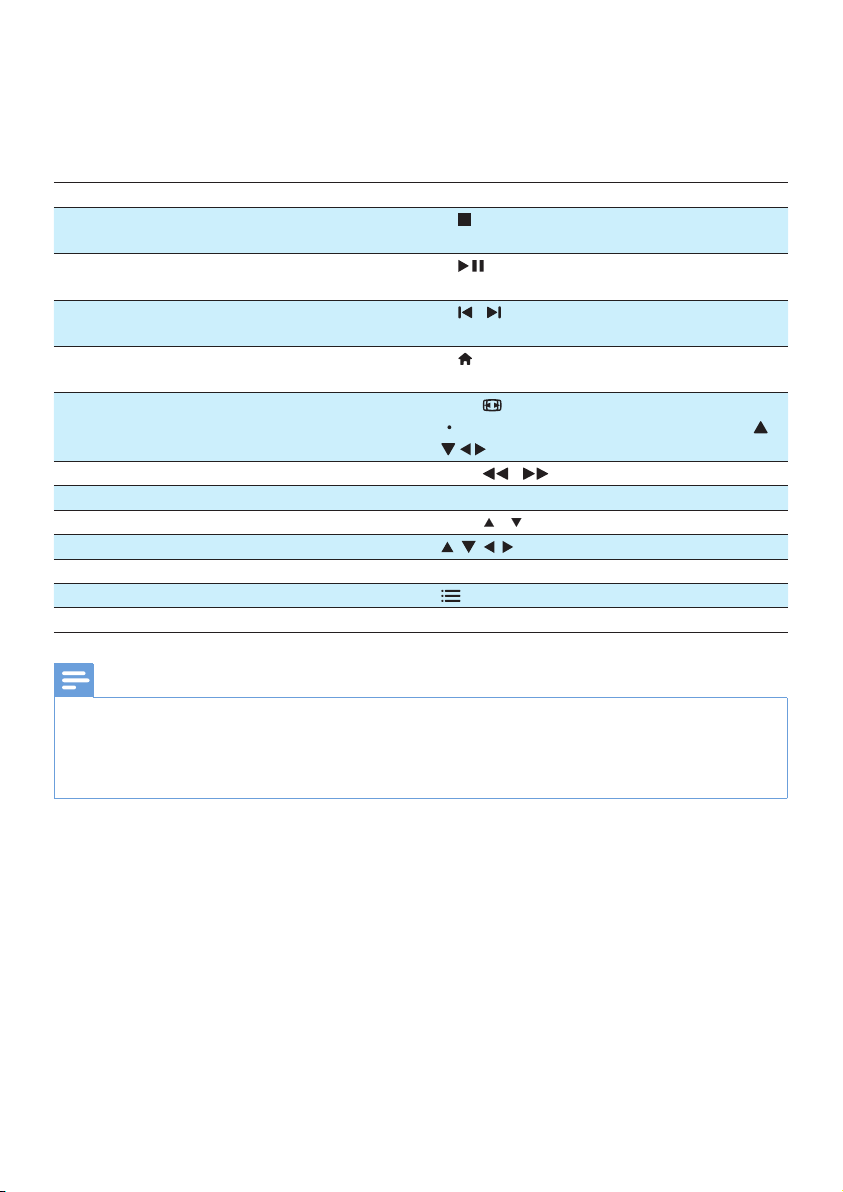
Function Buttons / Actions
Stop the play. •
Pause or resume the play. •
Skip to the previous/next media le. • /
Return to the home page. •
Zoom in or out. Press repeatedly.
To pan through an enlarged photo, press
.
Search backward/forward fast. Press / repeatedly to select a speed.
Access subtitle settings. SUBTITLE
Rotate a photo. Press / .
Navigate menus. , , ,
Conrm a selection or entry. OK
Access option menus during play or in the le list.
Access the le editing menu in the le folder list. EDIT
Note
• You can only play DivX videos that were rented or purchased with DivX® registration code of this player. (Refer to "Setup' >
"MISC" > [DivX® VOD Code])
• Subtitle les with the following lename extensions (.srt, .smi, .sub, .ssa, .ass, .txt) are supported but not displayed in the le list.
• The subtitle lename has to be the same as the lename of the DivX video (the le extension excluded).
• The DivX video le and the subtitle le must be saved under the same directory.
3
English
EN
2 Options
During play, press to access the option items.
Video options
[Subtitle]: Adjust subtitle settings. Press to select an item and to adjust values. Then press OK
to conrm.
[Audio]: Select an audio language.
[GOTO]: Skip play to the specic time. Press to select an item and to adjust values. Then press
OK to conrm.
[Repeat Title]: Repeat the current title.
[Repeat All]: Repeat the movie le.
[RepeatOff]: Turn off a repeat mode.
[Video Setting]: Adjust the video settings. Press to select an item and to adjust values. Then
press OKto conrm.
Audio option
[RepeatOff]: Turn off a repeat mode.
[Repeat One]: Repeat the current music le.
[Repeat All]: Repeat all the music ies.
[ShufeLoop]: Play music les in a random loop.
a
b
c

4 EN
Photo options
[Slide Timing]: Set a display interval for a slideshow.
[Slide Transition]: Select a transition effect for a slideshow.
[RepeatOff]: Turn off a repeat mode.
[Repeat All]: Repeat all the photo ies.
[ShufeLoop]: Play photo les in a random loop.
[Background Music]: Select and play a music le during slideshow.
[Video Setting]: Adjust the video settings.

5
English
EN
3 File browsing
You can browse media les stored in a USB/SD storage device.
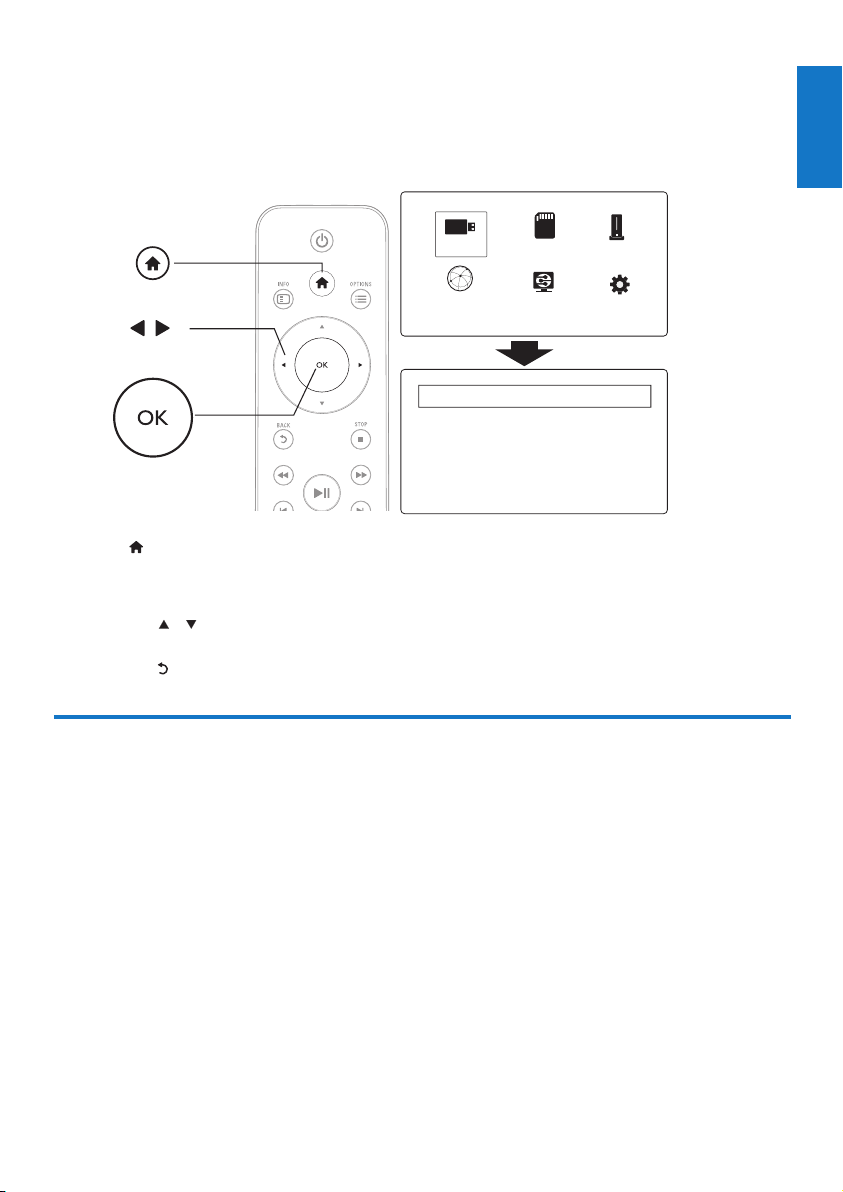
1 Press .
2 Select [USB]/ [Card] / [Esata].
3 Select a mode to browse media les.
• [Folder]
• [Movies]
• [Music]
• [Photos]
Browseallles
1 Press to select [Folder] and press OK to conrm.
2 Select your USB/SD storage device and press OK.
3 Press in the le browser.
a
b
c
Folder Movies Music Photos
USB
CARD
Esata
Network
Setup
Internet Service
Folder Movies MusicPhotos

6 EN
4 Press / to select a mode to view or arrange les.
[Thumbnails]: Display thumbnails of les or folder.
[List]: Display les or folder in a list.
[Preview]: Display les or folders with a preview window.
[All Media] Display all media les.
[Movies]: Display movie les.
[Photos]: Display photo les.
[Music]: Display music les.
Browsemovieles
1 Press to select [Movies] and press OK to conrm.
2 Press in the le browser.
3 Press / to select a mode to view or arrange les.
[Search]: Search movie les. Follow on screen instruction to type in key words in the mini keyboard and
press to start search.
[Thumbnails]: Display thumbnails of movie les.
[List]: Display movie les in a list.
[Preview]: Display les or folders with a preview window.
[All Movies]: Display all movies les.
[Show DVDs]: Display all ISO les.
[Flash Animation]: Display all ash les.
[Go to Folder]: Go to the folder where the selected le is placed.
[Name]: List movies les in an alphabetical order of their names.
[Size]: List movies les in the ascending order of their sizes.
[Most Viewed]: List most viewed movie les.
[Recently Added]: List movie les added recently.
Folder Movies Music Photos
7
English
EN
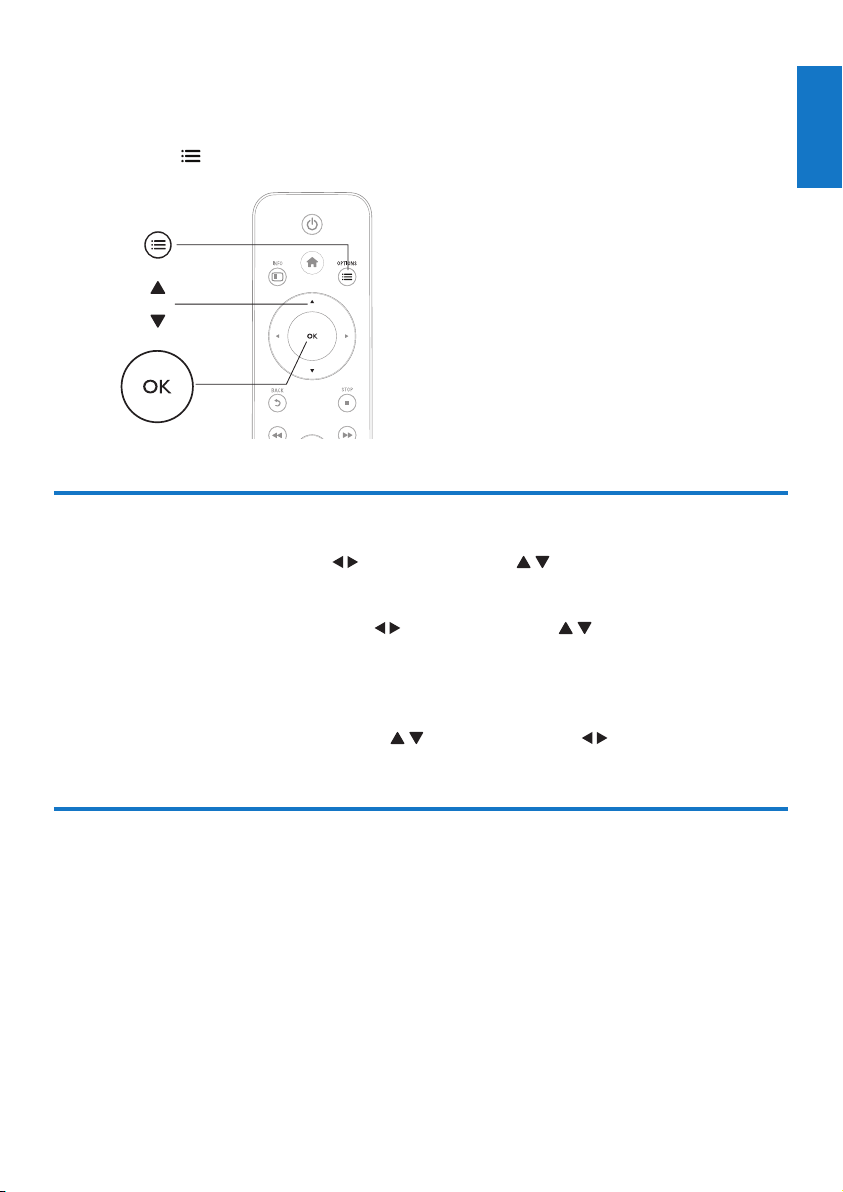
Browsemusicles
1 Press to select [Music] and press OK to conrm.
2 Press in the le browser.
3 Press / to select a mode to view or arrange les.
[Search]: Search music les. Follow on screen instruction to type in key words in the mini keyboard and
press to start search.
[Thumbnails]: Display thumbnails of music les.
[List]: Display music les in a list.
[Preview]: Display movie les with a preview window.
[Go to Folder]: Go to the folder where the selected le is placed.
[All Songs]: Display all music les.
[Albums]: Display music les by albums.
[Artists]: Display music les by artists.
[Genres]: Sort music les by genres.
[Years]: Sort music les by years.
[Playlists]: Display play lists.
[Recently Played]: List music les played recently.
[Recently Added]: List music les added recently.
[Name]: List music les in an alphabetical order of their names.
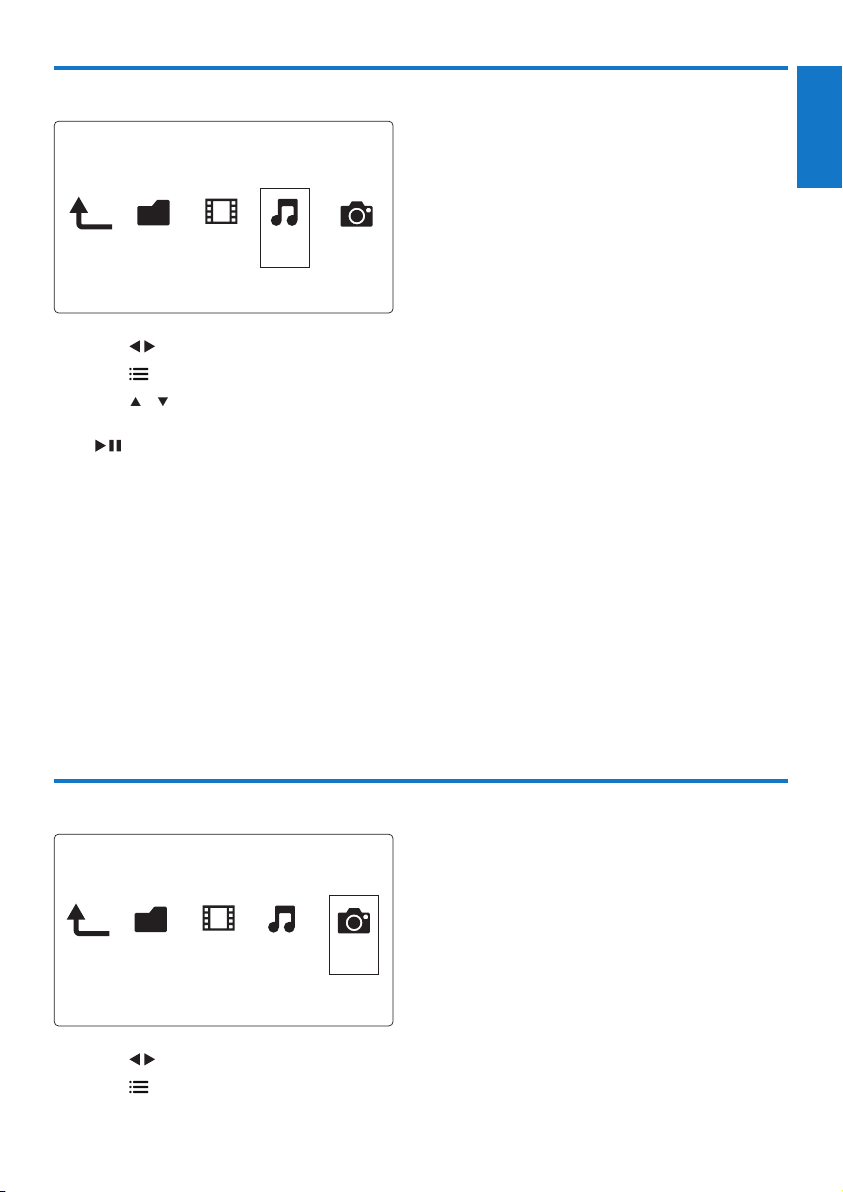
Browsephotoles
1 Press to select [Photos]and press OK to conrm.
2 Press in the le browser.
FolderMoviesMusic Photos
Folder Movies MusicPhotos

8 EN
3 Press / to select a mode to view or arrange les.
[Search]: Search photo les. Follow on screen instruction to type in key words in the mini keyboard and
press to start search.
[Thumbnails]: Display thumbnails of photo les or folder.
[List]: Display les or folder in a list.
[Preview]: Display les or folders with a preview window.
[Photo Directory]: Display photo les in the directory mode.
[LeafFolderView]: Display photo les in the leaf folder mode.
[Date view]: Sort photo les by date modied.
[All Photos]: Display all photos les.
[Albums]: Sort photo les by albums.
[Name]: List photo les in an alphabetical order of their names.
[Recently Added]: List photo les added recently.
[Recently Played]: List photo les played recently.
9
English
EN
4 File management
You can manage media les on the storage device.
Basic operations
1 Press .
2 Select [USB]/ [Card] / [Esata] >[Folder].
3 Select a partition of your USB/SD storage device and press OK.
4 Press / to select a le or folder and press [Edit].
» The le editing menu is displayed.
5 Press / to select your operation and press OK to conrm.
[Copy]: Select a destination and press to conrm.
» The selected le or folder is copied to the destination.
[Delete]: Select [Yes] and press OK to conrm.
» The selected le or folder is deleted.
[Move]: Select a destination and press to conrm.
» The selected le or folder is moved to the destination.
[Rename]
1 Select [Rename] to edit the name in the mini keyboard, and then press to conrm.
2 Select [OK] and press OK to apply the new name.
a
b
c
Folder Movies Music Photos
USB
CARD
Esata
Network
Setup
Internet Service
10 EN
Usethelelist
[Multiple Select]
1 Press / to select a le or folder and press to add to the list.
2 Press [Edit]when you complete adding les and folders.
3 Select an operation.
[Copy] Select the destination and press to conrm.
[Delete] Select [Yes] and press to delete the selected les
or folders.
[Move] Select the destination and press to conrm.
[Save Playlist] • Select [OK] to save a play list.
• Select [Rename] to edit the name in the mini
keyboard, and then press to conrm.
[Save Photo Album] • Select [OK] to save a photo album.
• Select [Rename] to edit the name in the mini
keyboard, and then press to conrm.
Note
• Press and hold for two seconds to remove a connected storage device safely.
11
English
EN
5 Set up a network
By connecting this player to a computer network and the Internet, you can
• Play photos, music, and video les streamed from your computer.
• Watch online TV programs.
• Browse Internet photo albums.
• Update the software of this player through the Internet.
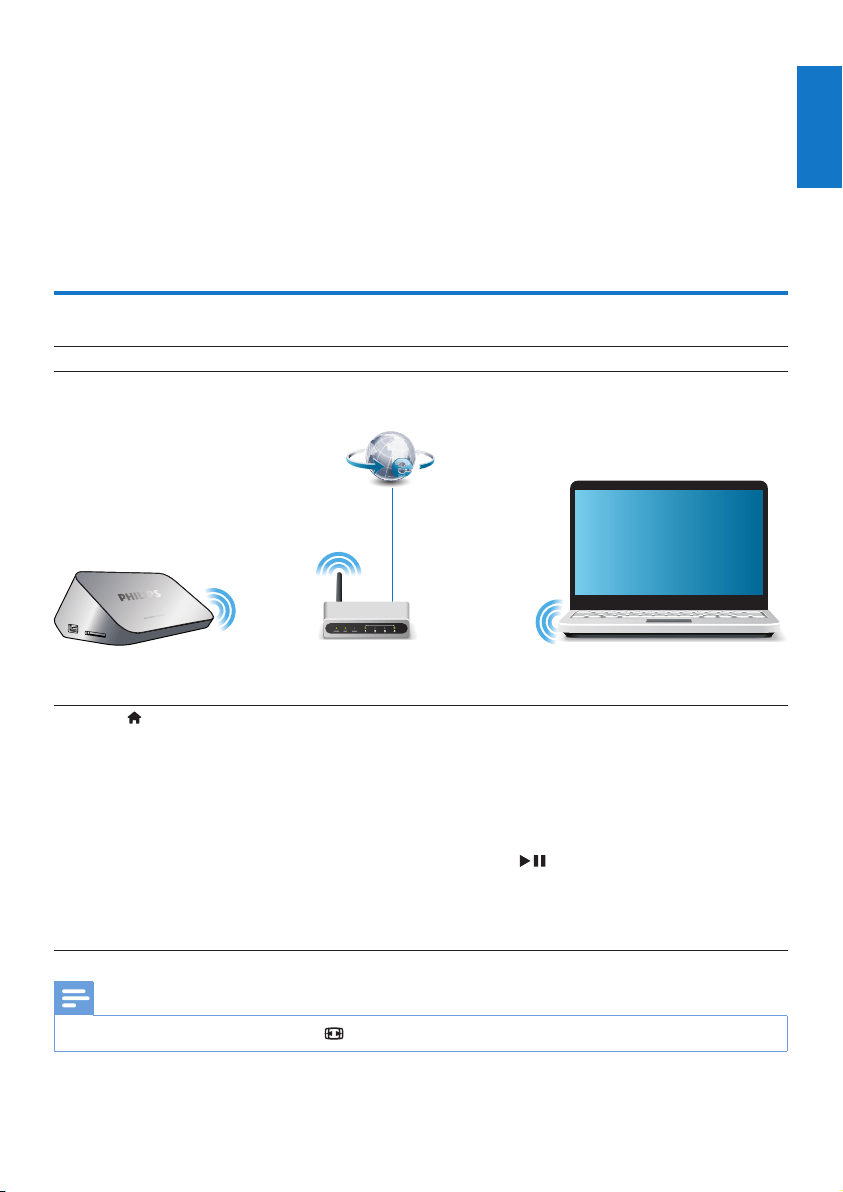
Wireless network setup
What you need A wireless router that is connected to the Internet
1 Connect this player to a computer network or the Internet through a wireless router.
2 Perform the wireless network installation.
1), Press .
2), Select [Setup] and press OK.
» The setup menu is displayed.
3), Select [Network]>[Wireless] > [Connect] and pressOK.
» A list of available wireless networks is displayed.
4), Select your network from the list and press OK.
5), Enter your WEP or WPA key in the mini keyboard and press .
» A connection test is started
» The status of network connection is displayed after the test is completed.
6), Press OKto exit.
Note
• To re-scan available wireless networks, press .
PC (DLNA)
12 EN
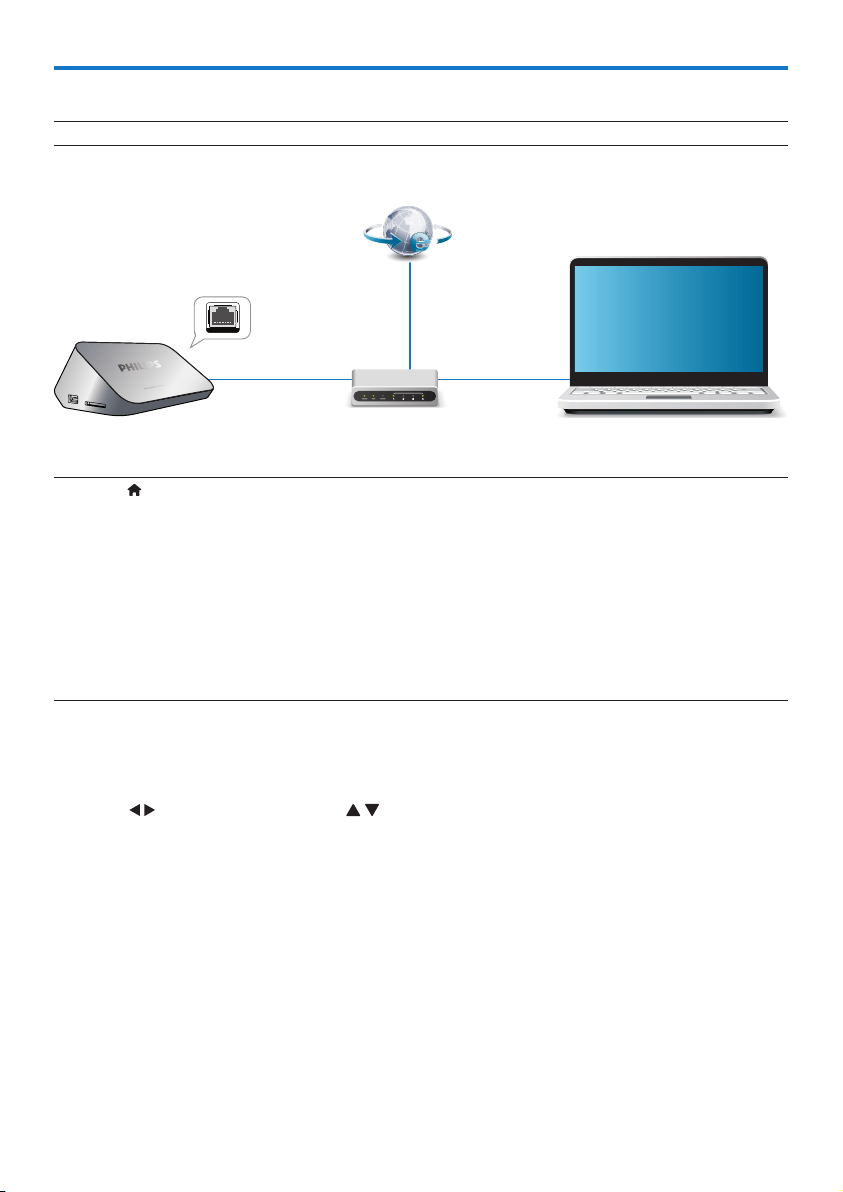
Wired network setup
What you need A wired router that is connected to the Internet
1 Connect this player to a computer network or the Internet through a wired router.
2 Perform the network installation.
1), Press .
2), Select [Setup] and press OK.
» The setup menu is displayed.
3), Select [Network] > [Ethernet] > [DHCP IP (AUTO)] > [DHCP (AUTO)] and press OK.
» A dialog box is displayed.
4), Select [Yes] and press OK to save the network settings .
» A connection test is started.
» The status of network connection is displayed after the test is completed. .
6), Press OKto exit.
You can set the IP address manually.
1 Select [Network] >[Ethernet] > [FIX IP (MANUAL)].
» The IP address table is displayed.
2 Press to select a item and press to adjust the value.
3 Press OK when you complete setting the IP address.
» A dialog box is displayed.
4 Select [Yes] and press OK to save the network settings.
PC (DLNA)

13
English
EN
6 Playmediafilesfromacomputer
(DLNA)
With this DLNA-certied player connected to a computer network, you can play video, music, and
photo from a computer.
Note
• To browse media les on a PC, make sure that a DLNA media server software (such as Windows Media Player 11 or higher)
is installed on the PC.
1 Connect this player to a computer network (see "Set up a network").
2 On the PC, in the software of the DLNA media server (such as Windows Media Player 11 or
higher), you need to set:
a Shareyourmediatothisplayer(see"Help"documentinthemediaserversoftware).
b Sharelesoraddlestothelibrary(see"Help"documentinthemediaserversoftware).br
3 Press .
4 Select [Network], and press OK.
» A content browser is displayed.
• To browse shared folders of a PC, select[Shared Folder] and pressOK.
• To browse shared media les, select [Shared Media Files]and pressOK.
5 Select a media le, and press OK to play.
• To access the menu of browsing options, press .
• For details, see "Browse all les".
14 EN
7 Internet Services
With this player, you can access online various services, such as movies, pictures, music, and games.
What you need Connect this player to the Internet. (see "Set up a
network").
1 Press .
2 Select [Internet Services] and press OK.
» The Internet services are displayed.
3 Select a service.
• [Facebook]: a social networking service
• [AccuWeather]: an online weather forecasting service worldwide
• [YouTube]: a video-sharing service
• [Piccasa]: an online photo album
1 Follow the on-screen instruction and use your remote control to enjoy the services.
Function Button/Action
Select a service or item.
Conrm a selection. OK
Return to a previous page, or delete input text.
Return to the home page.
15
English
EN
8 Settings
You can change settings of this player in the setup menu.
1 Press .
2 Select [Setup] and press OK to conrm.
» The setup menu is displayed.
• Press / to select a menu item or setting option.
• Press OK to access the lower-level menu.
• Press to return to the upper-level menu.
System
[Menu Language]: Select a language for on-screen menu.
[Subtitle]: Select a subtitle language for video.
[Screen Saver]: Enable the screen saver in case of inactivity (for example, in pause or stop mode).
[DLNA DMR]: Enable this player to play photos, music, and video les streamed from your
computer.
[Device Name]: Change the name of this player.
[Auto Scan]: Scan media les on a storage device automatically.
[Scan Storage]: Start or stop scanning media les on a storage device.
[Resume Play]: Resume playback of a video le from the point where you last stopped.
[FactoryDefault]: Reset all settings to factory default.
EasyLink
MISC
Audio
System
Network
Video
a
b
c
USB
CARD
Esata
Network
Setup
Internet Service

16 EN
Audio
[Night Mode]: Equalize loud sound and soft sound. If enabled, you can watch movies at a low
volume at night.
[HDMI Output]: Select an output sound format when connecting the HDMI jack.
[SPDIF Output]: Select an output sound format when connecting the digital audio jack.
[Lip Sync]: Enable this function to synchronize audio to video playback.
Video
[Aspect Ratio]: Select display aspect ratio.
[TV System]: Select a video resolution setting that best is supported by your TV. See your TV
manual for details.
Note
• If a selected video resolution is not supported with your TV and a blank screen appears, to recover picture display, wait for 10
seconds.
• For a composite (CVBS) connection, if no video output is made when you set the video resolution is to an HD resolution
(1080p, 1080i, 720p), connect this player to the TV with an HDMI connection to play HD videos.
[Video Zoom]: Zoom in or out video scenes.
[1080P 24Hz]: Use 1080p 24Hz video output mode for video content.
Note
• The video resolution and the frame rate of the video content is 1080p 24Hz.
• Your TV supports the 1080p 24Hz.
• Ensure that you use an HDMI cable to connect this player to your TV.
[Deep Color]: Display colors with more shades and hues when the video content is recorded in
Deep Color mode and the TV supports this feature.
[Video Setting]: Adjust the video settings.
Wireless network setup
[Ethernet]: Congure the IP address of this player.
[Wireless]: Set up a wireless network connection.
[NetworkInfo]: Display the current network status.

17
English
EN
MISC
[VersionInfo]: Display the information about software version of this player.
[DivX® VOD Code]: Display the DivX® registration code and deregistration code.
[Online upgrade]: Select to update software from a network.
[USB upgrade]: Select to update software from USB storage device.
18 EN
9 EasyLink
This player supports Philips EasyLink which uses the HDMI CEC (Consumer Electronics Control)
protocol. You can use a single remote control to control EasyLink compliant devices that are connected
through HDMI.
1 Connect the HDMI CEC compliant devices through HDMI, and turn on the HDMI CEC
operations on the TV and other connected devices (see the user manual of the TV or other
devices for details).
2 Press .
3 Select [Setup] > [Easy Link].
4 Select [On]under the options:
• [Easy Link] > [On]
• [One Touch Play] > [On]
• [One Touch Standby] > [On]
» EasyLink function is turned on.
One Touch Play
When you play a le with this player, the connected HDMI CEC TV automatically switches to the
HDMI input channel.
One Touch Standby
When you switch a connected device (for example TV) to the standby mode with its own remote
control, this player switches to the standby mode automatically.
Auto Power On From TV
When you switch a connected device (for example TV) to this player port with its own remote
control and this player is standby mode, this player switches to the power on mode automatically.
Note
• WOOX Innovations does not guarantee 100% interoperability with all HDMI CEC devices.

19
English
10Updatesoftware
Beforeyouupdatethesoftwareofthisplayer,checkthecurrentsoftwareversion:
1 Press .
2 Select [Setup] >[MISC] > [VersionInfo.], and press OK.
UpdatesoftwareviatheInternet
1 Connect the player to the Internet (see "Set up a network").
2 Press , and select [Setup].
3 Select [MISC] > [Online upgrade].
» If an upgrade media is detected, you are prompted to start the update.
4 Follow the instructions on the TV screen to update the software.
» When the update is complete, this player automatically turns off and on again.
UpdatesoftwareviaUSB/SD
1 Check the latest software version on www.philips.com/support.
• Search for your model and click on "Software and drivers".
2 Download the software to the root directory of a USB storage device.
3 Connect the USB storage device to the (USB) connector on this player.
4 Press .
5 Select [Setup] > [MISC]> [USB upgrade].
» If an upgrade media is detected, you are prompted to start the update.
6 Follow the instructions on the TV screen to update the software.
» When the update is complete, this player automatically turns off and on again.
Caution
• Do not turn off the power or remove the USB storage device when the software update is in progress because you might
damage this player.
EN

20
11 Troubleshooting
If you contact Philips, you will be asked for the model and serial number of this player. The model
number and serial number are at the bottom of this player. Write the numbers here:
Model No. __________________________
Serial No. ___________________________
No picture.
• Refer to the TV user manual for how to select the correct video input channel
NosoundoutputfromtheTV.
• Make sure that the audio cables are connected to the audio input sockets that are grouped with
the selected video input sockets.
ThecontentsoftheUSBstoragedevicecannotberead.
• The format of this USB storage device is not supported.
• The supported memory size is 1TB maximum.
• Make sure that this player supports these les. (Refer to "Specications" > "File")
• DRM-protected video les that are stored on a USB/SD storage device cannot be played through
an analog video connection (for example, composite). You need to use an HDMI connection to
play these les.
Subtitles are not displayed or not properly displayed.
• Make sure that the player supports the formats of the subtitles. (Refer to "Specications" >
"Subtitle support")
• To use a separate subtitle le for DivX video play, do the following:
a NamethesubtitleleinthesamewayasyoudowiththeDivXvideole,withle
extension names unchanged.
b SavethesubtitleleunderthesamedirectoryastheDivXvideoleonthemassstorage
device.
c Throughtheplayer,playtheDivXvideofromamassstoragedevice.
• If you stream DivX video les through DLNA, the separate subtitle les are not supported.
EN

21
English
12Specification
Note
• Specication and design are subject to change without notice.
File
• Video: MPEG 1/2/4(MPEG 4 Part 2), H.264, VC-1, H.263, VP6(640 x 480), DivX Plus HD, DivX
3/4/5/6, Xvid, RMVB 8/9, RM, WMV (V9), AVI, TS, M2TS, TP, TRP, ISO, VOB, DAT, MP4, MPG,
MOV (MPEG 4, H.264), ASF, FLV(640 x 480), MKV, M4V.
• Audio: Dolby digital, AAC, RA, OGG, MKA, MP3, WAV, APE, FLAC, DTS, LPCM, PCM, WMA
(V9), IMP/MS ADPCM, WMA Pro
• Picture: .JPEG, JPG, PNG, TIFF, GIF (unanimated GIF), BMP, TIF, M-JPEG, HD-JPEG
USB storage device
• Compatibility: Hi-Speed USB (2.0)
Subtitle support
• .srt, .sub, .smi, .ssa, .ass, .txt, .psb, .idx+.sub
SD card
• Compatibility: SDHC 2.0 (up to 32 GB)
Video
• Signal system: PAL /NTSC
• Composite video output: 1 Vpp ~ 75 ohm
• HDMI output: 480i, 480p, 576i, 576p, 720p, 1080i, 1080p, 1080p24
Audio
• Analog stereo output
• Signal to noise ratio (1 kHz): > 90 dB (A-weighted)
• Dynamic Range (1 kHz): > 80 dB (A-weighted)
• Frequency response: +/-0.2 dB
• Digital output: Optical
Main Unit
• Dimensions (L x W x H): 160 x 91 x 54.1 mm
• Net Weight: 0.34 Kg
• Input: 100-240V~ 50/60Hz, 15W
Power
• Power consumption: < 15 W
• Power consumption in standby mode: < 1 W
EN

Specicationsaresubjecttochangewithoutnotice.
2013 © WOOX Innovations Limited. All rights reserved.
This product was brought to the market by WOOX Innovations
Limitedoroneofitsafliates,furtherreferredtointhisdocumentas
WOOXInnovations,and isthemanufactureroftheproduct.WOOX
Innovations is the warrantor in relation to the product with which
this booklet was packaged. Philips and the Philips Shield Emblem are
registeredtrademarksofKoninklijkePhilipsN.V.
HMP5000_12_UM_V3.0