Loading ...
Loading ...
Loading ...
19
CARE AND USE/INSTALLATION
CARE AND CLEANING
Long Term Storage/Winterization
Time to Winterize, when the daily low ambient temperature
is at or below 38° F.
1. Turn unit off, (see page 8).
2. Remove all contents.
3. If necessary, move the unit so you can gain access to
the rear of the product.
4. Unplug the unit from the power outlet.
5. It is also recommended that the power to the outlet be
turned-off if the circuit is not required for other items
during the Winter season.
6. Shut-off CO2 tank valve.
7. Drain beer line(s)
8. Disassemble faucet and clean, (see page 17).
9. Soak and clean Sankey Low-Boy tap, (see page 17).
10. When cleaning unit pay particular attention to any
cracks and crevices that may have accumulated dirt
and debris.
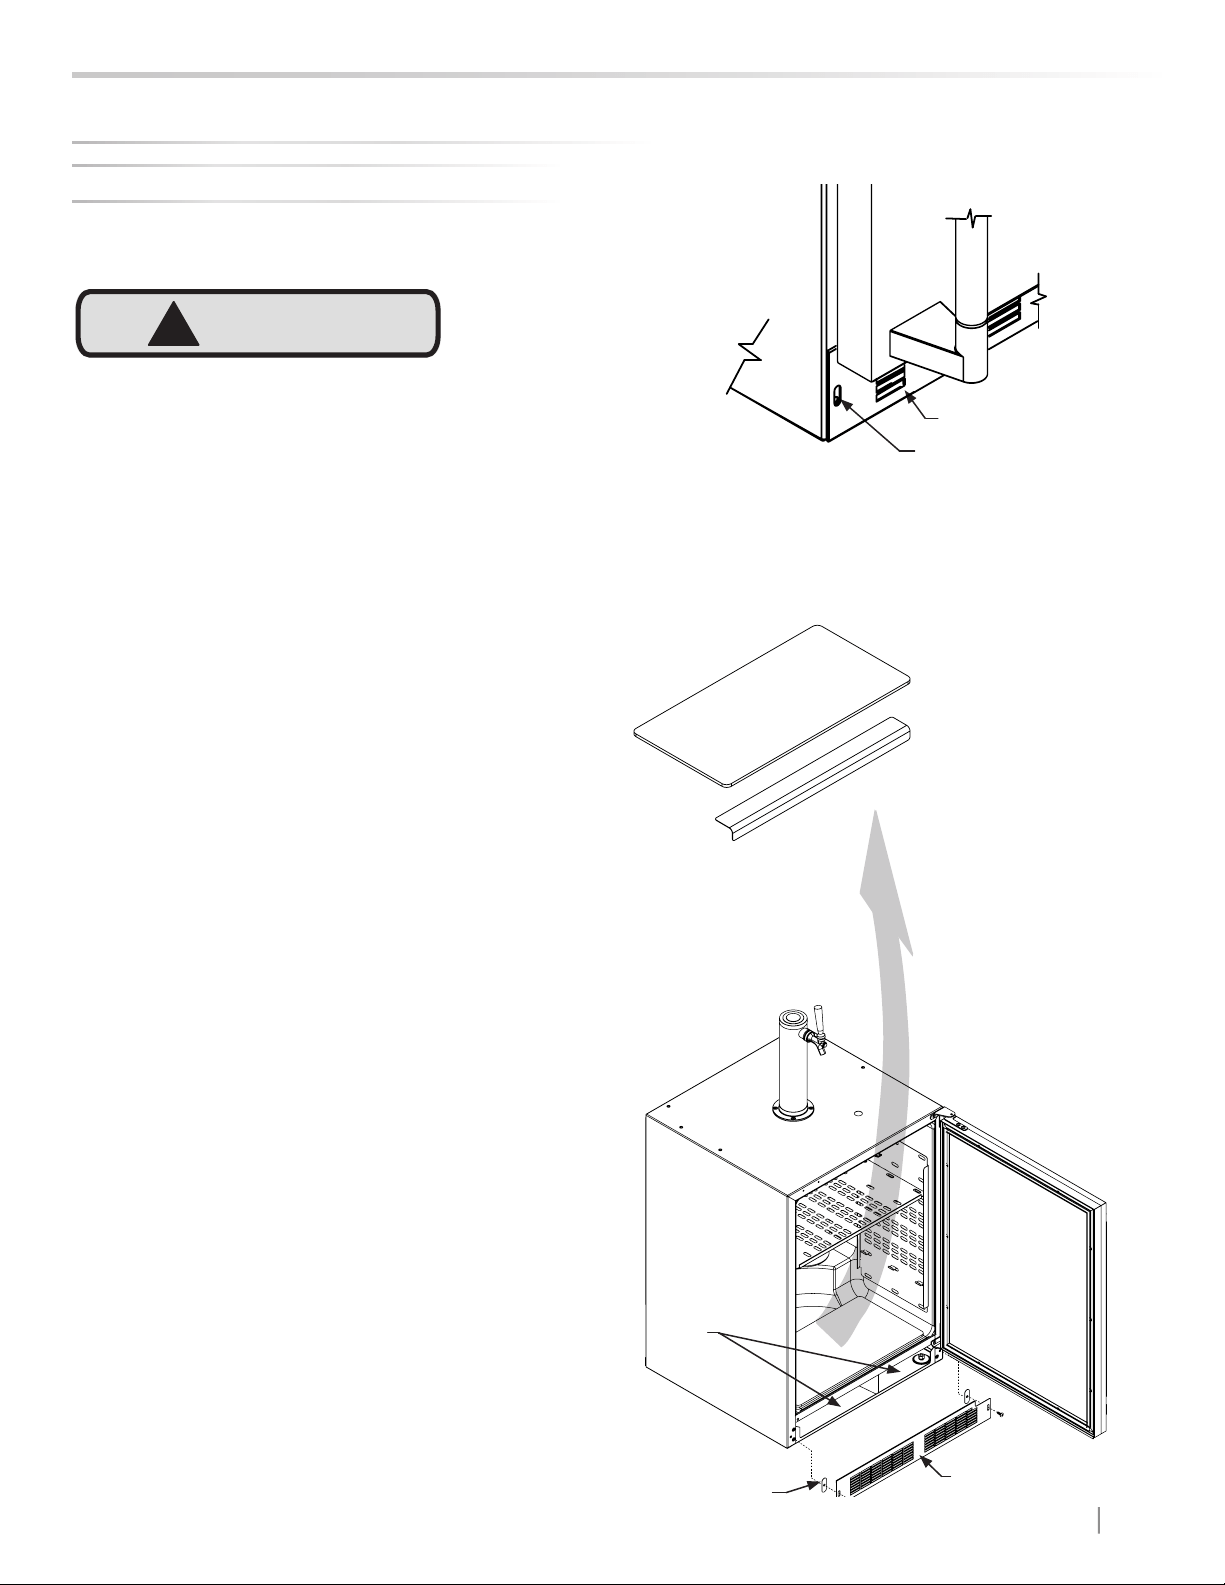
11. Remove the front toe-grille, (see Figure 42 and Figure
43), and use a brush and vacuum to clean dirt and
debris from beneath the unit.
12. Thoroughly clean the toe-grille and re-install on the
unit.
13. Remove the rear access cover, (see Figure 44), and
use a brush and vacuum to clean dirt and debris from
the machine compartment.
14. Thoroughly clean the rear access cover and re-install
on the unit.
15. Wipe down all interior surfaces with anti-bacterial
cleaner to be followed with clean rinse water to remove
any residual chemicals which could cause staining. Do
not use any abrasive cleaners or scouring pads.
16. Leave door open and allow to completely dry out be-
fore closing door.
!
CAUTION
Operating of the unit at ambient temperatures below the
recommended Winterization temperature will void your war-
ranty.
a. Remove Sankey tap (keg coupler), (see page 17).
b. Remove faucet on tower, (see page 17).
c. Beer lines will gravity drain.
d. Clean beer line tubing, (see page 18).
• If the plastic defrost drain pan located under the
compressor contains water, use a sponge to re-
move as much water as possible
• Remove plastic oor protector and stainless steel
lower edge guard to clean underneath.
Front grille screw
Front grille
Figure 42
Remove oor
protector and
edge guard
and clean
Floor protector
Edge
guard
Figure 43
Figure 43a
Grille
Spacer
Clean out
behind
grille
Loading ...
Loading ...
Loading ...