Loading ...
Loading ...
Loading ...
Installing the wine conditioning unit
Preparing the installation niche
Keep the door of the wine condi-
tioning unit closed until the appliance
is secured inside the niche!
Risk of tipping over!
The installation niche must be se-
cured to the wall behind it with sev-
eral screws. Only this can ensure that
the wine conditioning unit will not tip
over after being installed!
Always use the provided anti-tip
brackets to secure the niche.
Due to the sheer size and weight of
the wine conditioning unit, it needs
to be ensured that it cannot tip for-
wards once it is built into the niche.
Using the installation equipment
Parts required for installation of the
wine conditioning unit are supplied
with the wine conditioning unit. The
plastic bags supplied are marked with
letters for easy identification.
When performing the individual as-
sembly steps, observe the letters
specified and use the matching plas-
tic bag with the required installation
equipment.
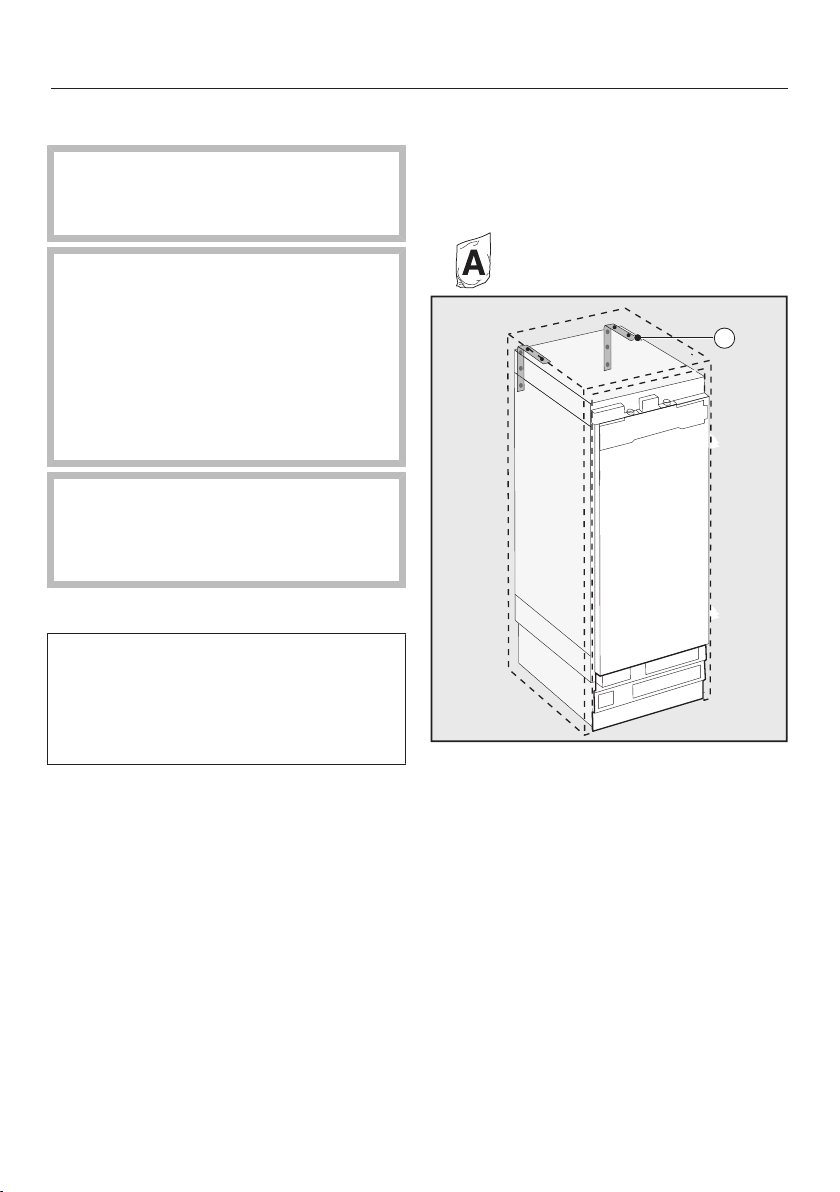
Securing the installation niche
The provided anti-tip brackets en-
sure the installation niche is securely
fixed to the wall.
Use 2 anti-tip brackets
for each in-
dividual wine conditioning unit or 4
anti-tip brackets for each (side-by-
side) combination of 2 wine condi-
tioning units.
Position the anti-tip brackets on
the left and right of the niche.
2
25
Loading ...
Loading ...
Loading ...