Loading ...
Loading ...
Loading ...
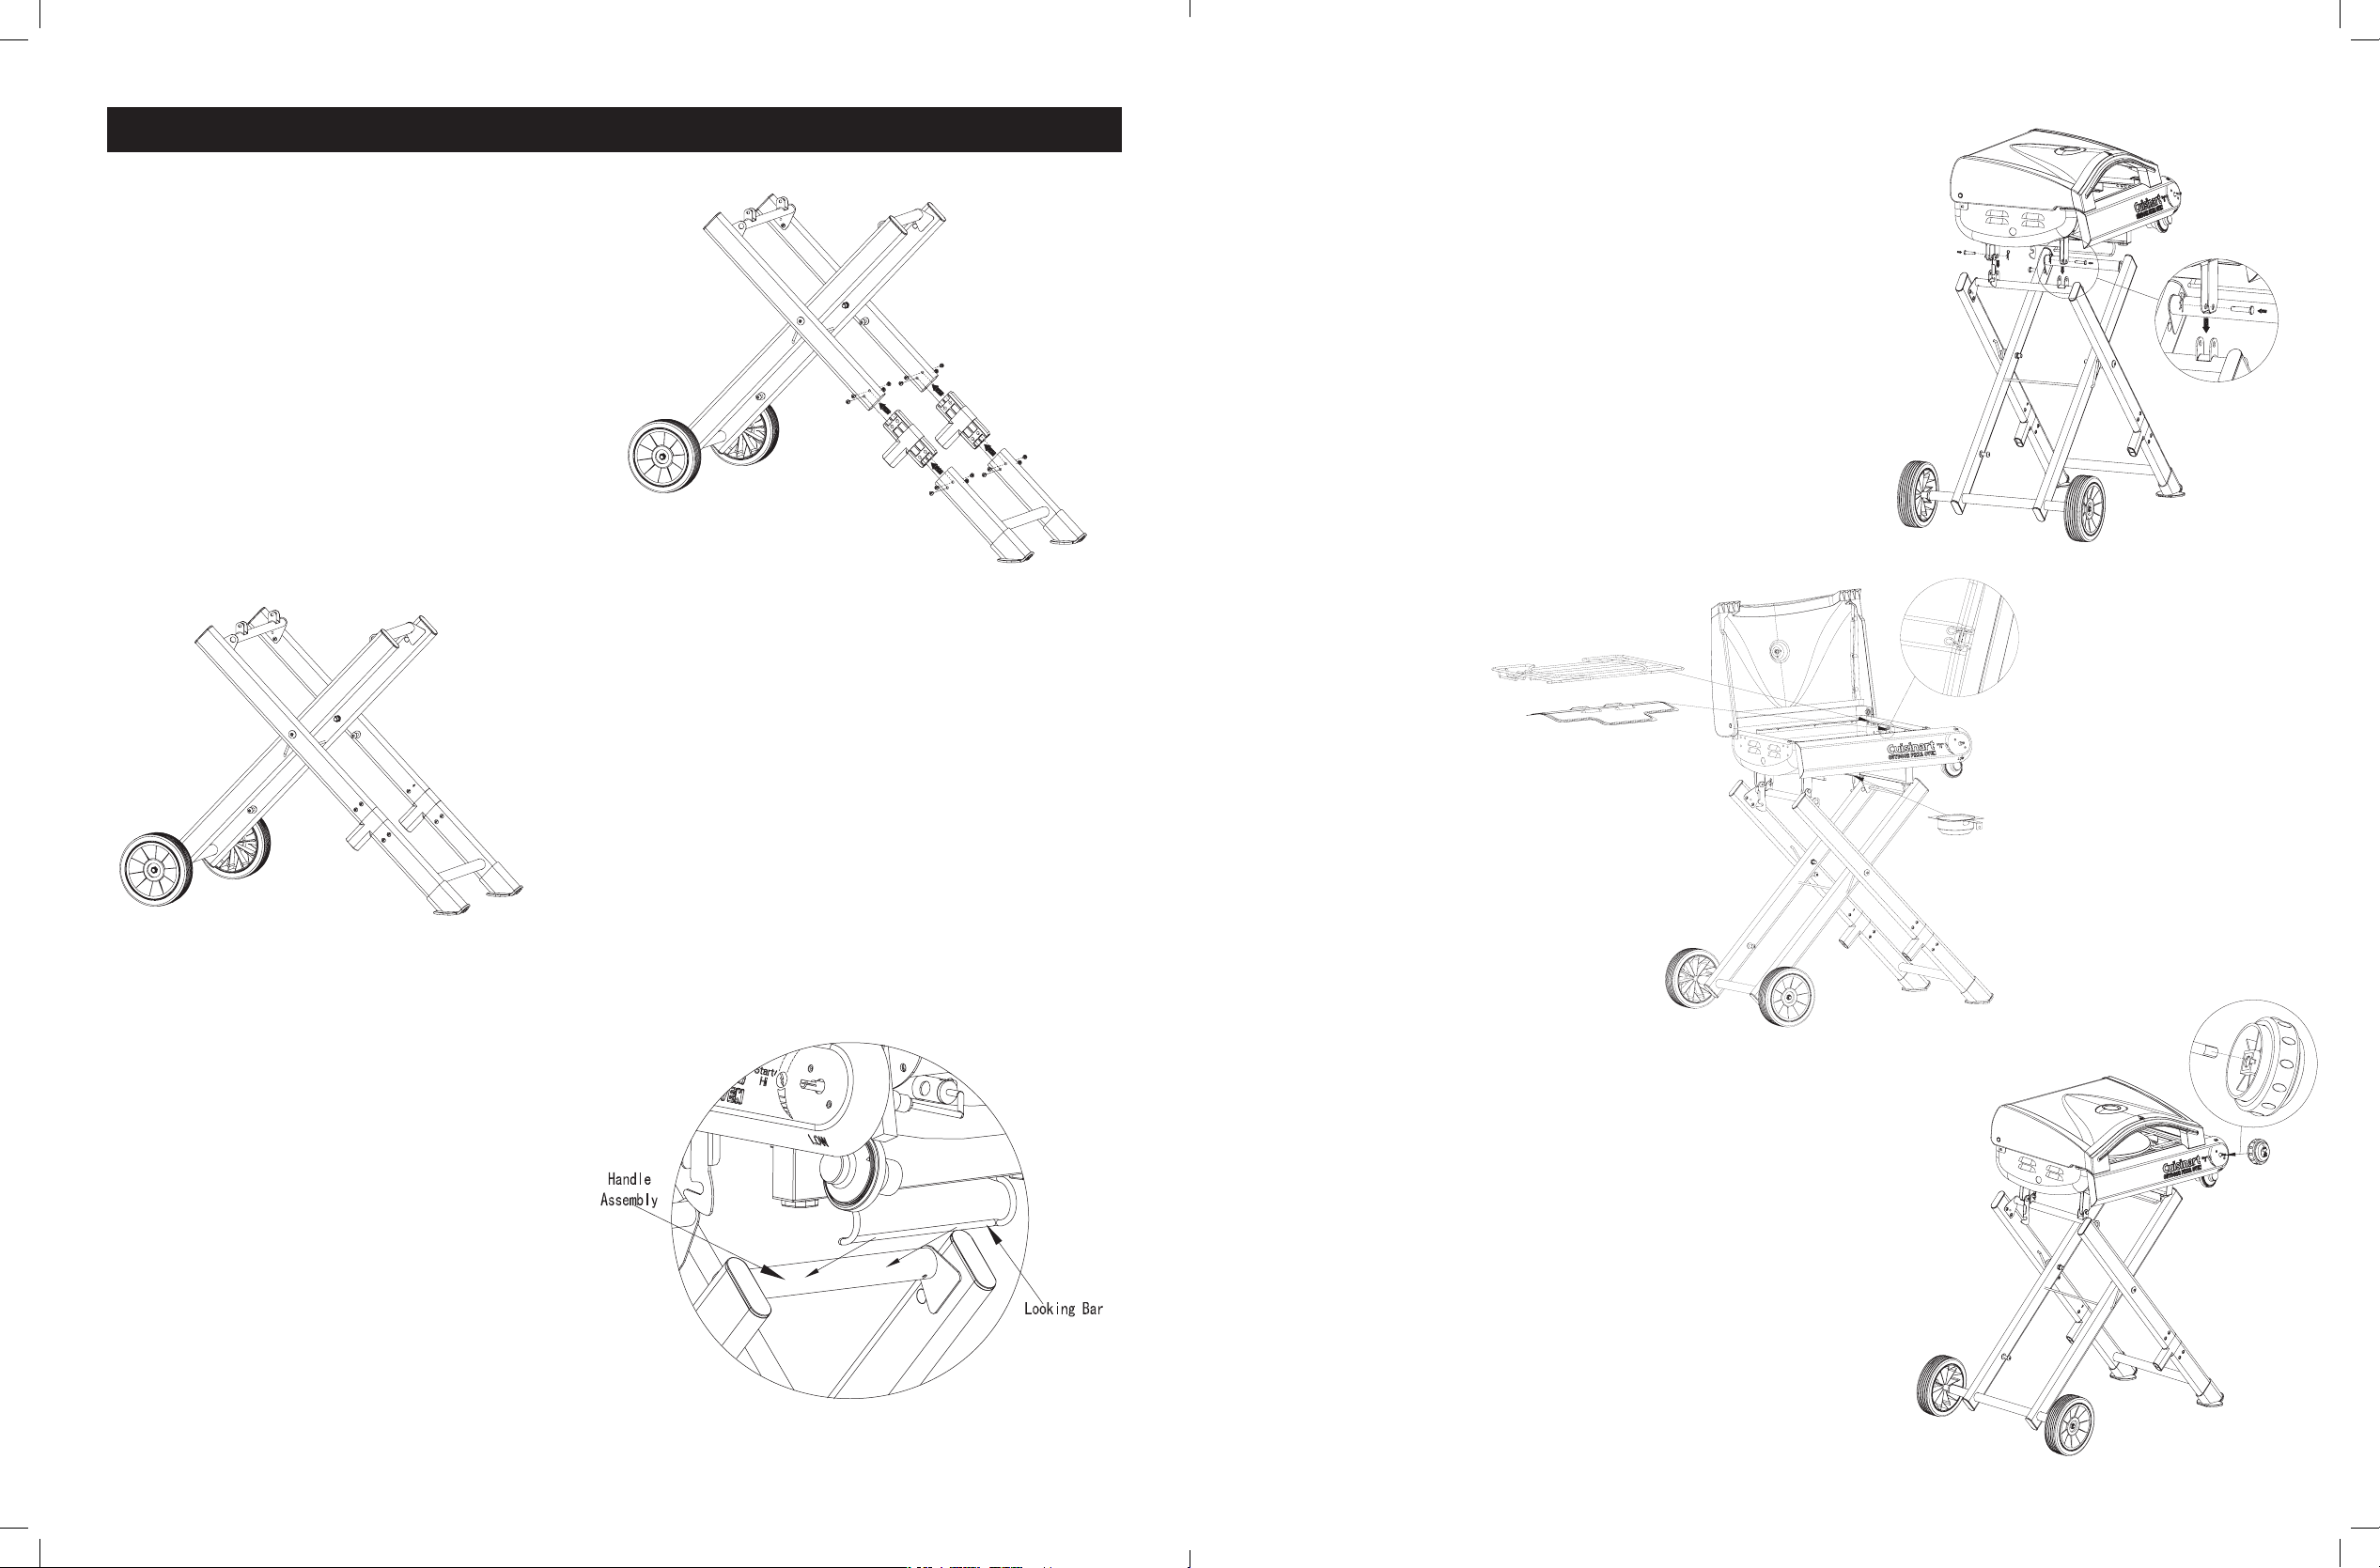
Step 4:
Grill Body Assembly
• Make sure wheels and leg assembly
are stable and will not slide.
• Angle Grill Body (Part A) so Locking
Bar rests under Handle Assembly.
Step 5:
Pizza Stone and Wood Chip Tray
• Place the Smoke Chip Cup (Part Q) into the top
left corner of the pizza stone holder.
• Place the Pizza Stone (Part O)at the center of the
pizza stone holder.
Step 6:
• Assemble the control knob
• Align and insert the at side of the shaft from the regulator to
the at side of hole behind the knob (Part P). The knob indicator
should be pointing straight up to the off position.
4. Assembly Instructions (cont.)
8
9
• Lower Grill Body onto Left Up Tube
Assembly (Part M) as shown, aligning the
brackets on the bottom of the Grill Body
between the brackets on the Left Up
Tube Assembly.
• Secure Grill Body using 1 Grill Body
Connector Pin (Part E) and 1 Connector Pin
Cotter Pin (Part F) for each bracket
as shown.
• Secure Locking Latch on back right
side of grill.
• Install Flame Tamer (Part B), Pizza Stone Holder
(Part C) and Drip Tray (Part D) as shown.
Step 3:
Leg Assembly
• Complete cart assembly by inserting Bottom
Leg Connector (Part K) into Cart Leg Assembly
(Part J) as shown. Repeat for both sides of Cart
Leg Assembly.
• Be certain to insert Bottom Leg Connectors
(Part L) so that the support faces inward toward
the base Wheels.
• Secure Cart Leg Assembly, Bottom Leg
Connector and Bottom Leg Assembly
with 16 Screws (Part N) as shown.
Loading ...
Loading ...
Loading ...