Loading ...
Loading ...
Loading ...
08 09
1
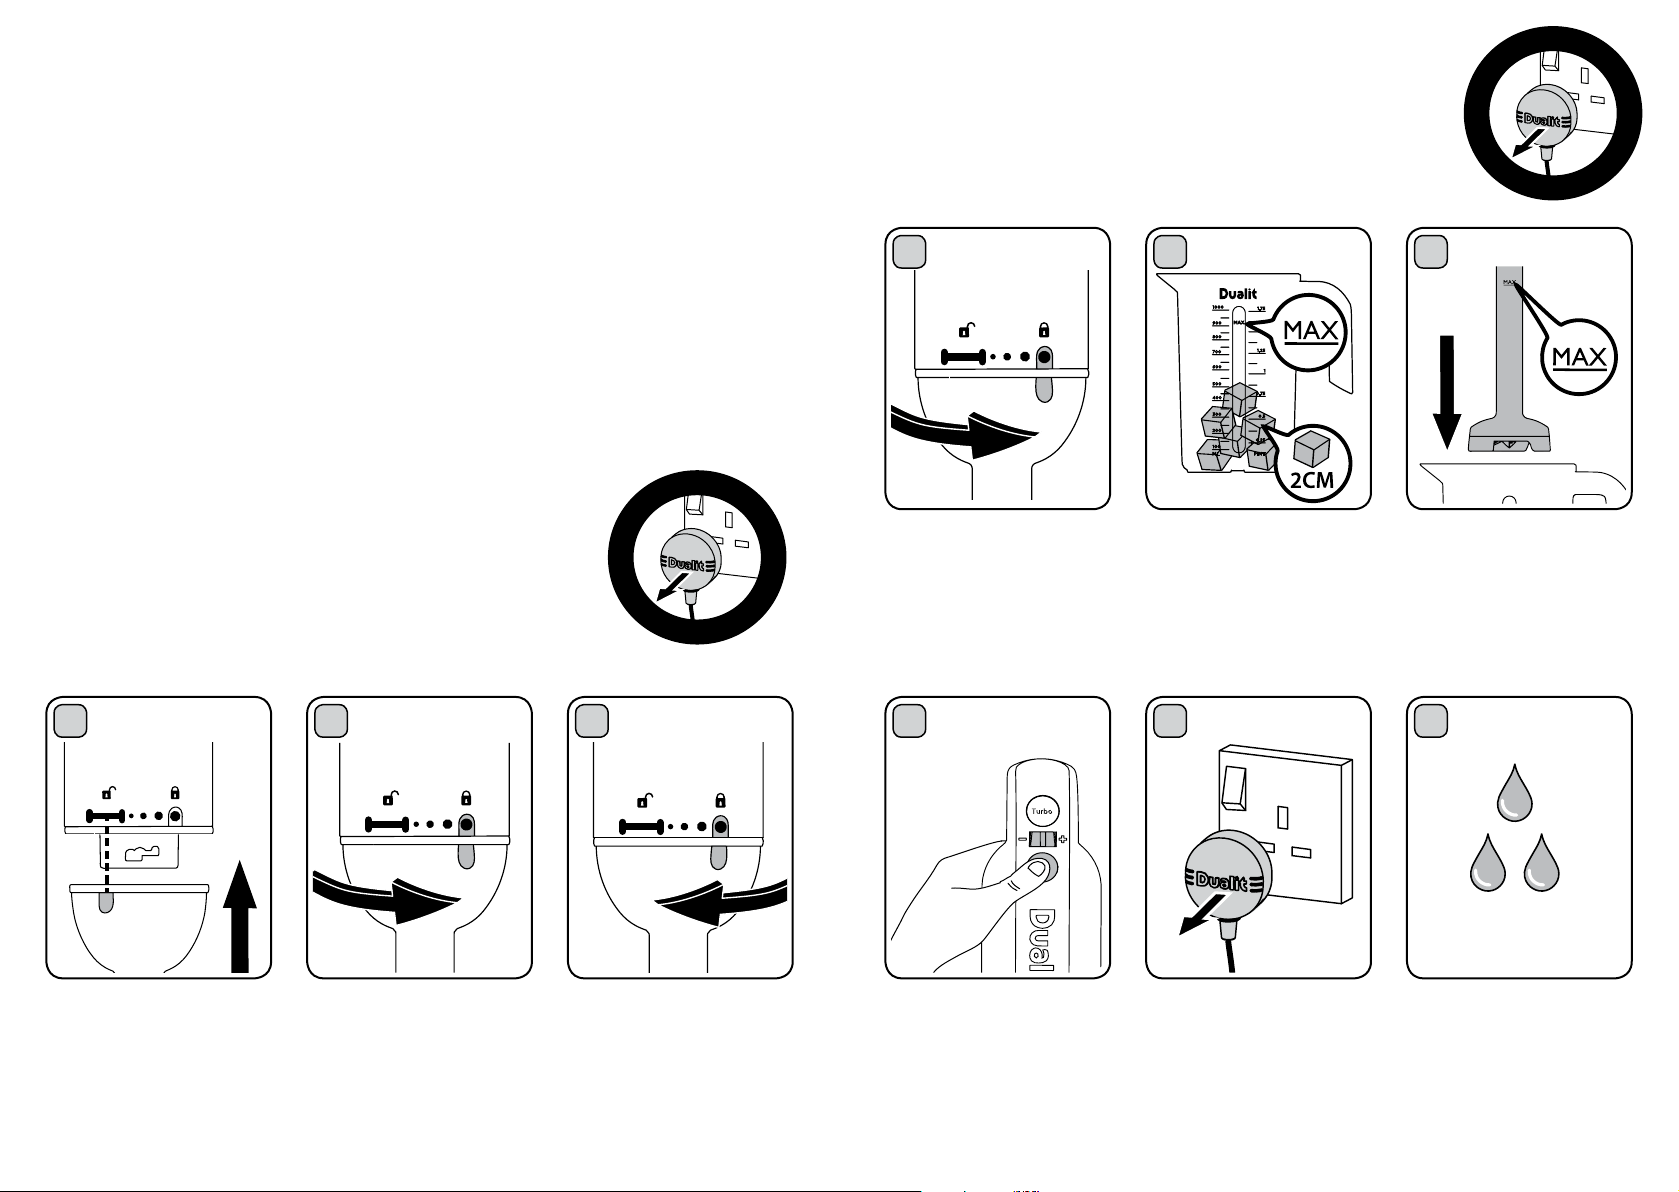
LOCATE
2
ATTACH
To attach the Wand or
Gearbox - Hold the Main
align the indent with the
unlock symbol.
Push and twist the accessory
clockwise with your other
hand, until the indents on
the sides of the parts are
aligned.
1
ATTACH WAND
2
INGREDIENTS
Ensure the hand blender is
unplugged. Attach the wand
to the main body. Ensure the
wand is securely attached
into the main body.
Caution: avoid contact
with the blades.
Place your ingredients into a
tall container, pan or mixing
jug to avoid splashing.
3
INSERT WAND
Dip the wand deep into the
pan or jug ensuring the depth
of the mixture does not
exceed the ’Max’ marks on
the wand shaft. NOTE: Keep
wand foot submerged to
avoid splashing.
4
TURN ON
6
CLEAN PARTS
5
TURN OFF
Plug in the hand blender.
Set the speed to
minimum (-), press the
power button to start
blending.
Remove the wand from
the main body. Remove
the wand from the jug or
pan before pouring. Clean
parts immediately after
When blending is complete,
release the power button
then unplug.
ATTACHING AND
REMOVING ACCESSORIES
Do not attach or remove accessories with the main body plugged in to the supply.
USING THE WAND
The wand is a powerful tool for liquidising or mixing ingredients.
For max loadings see chart on page 14.
USING YOUR HAND BLENDER
The following sections will explain use of your hand blender. Please read this section carefully.
Do not blend for more than 1 minute in any 4 minute period, if you accidentally do, unplug
and leave the hand blender to fully cool to room temperature before re-using.
For max loadings see chart on page 14.
3
REMOVE
To remove the accessory,
unplug and reverse the
procedure.
U
N
P
L
U
G
W
H
E
N
N
O
T
I
N
U
S
E
U
N
P
L
U
G
W
H
E
N
N
O
T
I
N
U
S
E
See pg 19
Loading ...
Loading ...
Loading ...