Loading ...
Loading ...

Weatherproof gaps between the exterior and interior
walls and the sleeve with caulking or equivalent
wetherproofing material.
When using an explosive actuating fastening
tool, a special nail (Ref. Ramset #1516SD drive
pin 2-½” lg. - 9/64” dia. with Ǭ” dia steel
washer) should be used. No equipment or
method should be used that is not in compliance
with Federal Register Volume 39, No. 125 or
American National Standard Safety Requirements
for Power Actuated Fastening System
(ANSI A10.3-1977)
Power Level of the case load should not be
greater than power level 1 identified by a load
color gray.
Caulk the entire opening on the inside between
the sleeve and the building interior.
STEP 3 (cont.)
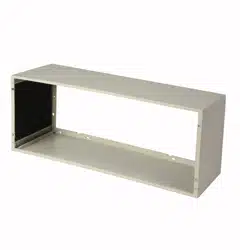
Installation of the sleeve in the wall opening
IMPORTANT:
Install sleeve level from left to right and level from
roomside to the outside.
2. Firmly secure the sleeve to the wall structure.
Do not drill any holes in the bottom of the sleeve.
3
Inside wall
Top
Secure sleeve through
side and/or top only
2” min. from
sleeve bottom
STEP 3 (cont.)
Installation of the sleeve in the wall opening
3.
Caulk the entire opening on the outside between
the sleeve and the building exterior.
4.
NOTE:
Jack stud
Main stud
Wood screw
Molly or toggle bolt
Expansion
anchor bolt
Power
activated nail
(see note)
No holes permitted in bottom of sleeve
(exception—RAD10 internal drain kit).
Choice of attachment devices through
both ends of sleeve or the top. Mounting
screw holes and attachment devices by
installer.
STEP 4: Weatherproofing
NOTE:
* It is critical to caulk around perimeter of wall sleeve
on all four sides on the outside and the roomside
where it joins the building to prevent air and water
infiltration.
Outdoor
grille
Sleeve
Roomside
Steel lintel
Caulk*
Flashing
Drip rail
Caulk*
Caulk*
Finished floor
or top of
carpet
Caulk*
Loading ...
