
Loading ...
Loading ...
Loading ...
en Accessories
10
4.4 Appliance door
If you open the appliance door during operation, opera-
tion stops. If the appliance door is closed, you can con-
tinue operation with .
5 Accessories
Only use original accessories. These have been made
especially for your appliance. Here you can find an
overview of your appliance's accessories and how to
use them.
Accessories Use
Wire rack ¡ Wire rack for baking
and roasting in oven
operation.
¡ Wire rack for grilling,
e.g. steaks, sausages
and bread
¡ Wire rack as a storage
space, e.g. for flat
ovenproof dishes
5.1 Other accessories
You can purchase other accessories from our after-
sales service, specialist retailers or online.
You will find a comprehensive range of products for
your appliance in our brochures and online:
www.siemens-home.bsh-group.com
Accessories vary from one appliance to another. When
purchasing accessories, always quote the exact
product number (E no.) of your appliance.
You can find out which accessories are available for
your appliance in our online shop or from our after-
sales service.
Glass roasting dish
Use
¡ Stews
¡ Bakes
Pizza tray
Use
¡ Tray bakes
¡ Biscuits
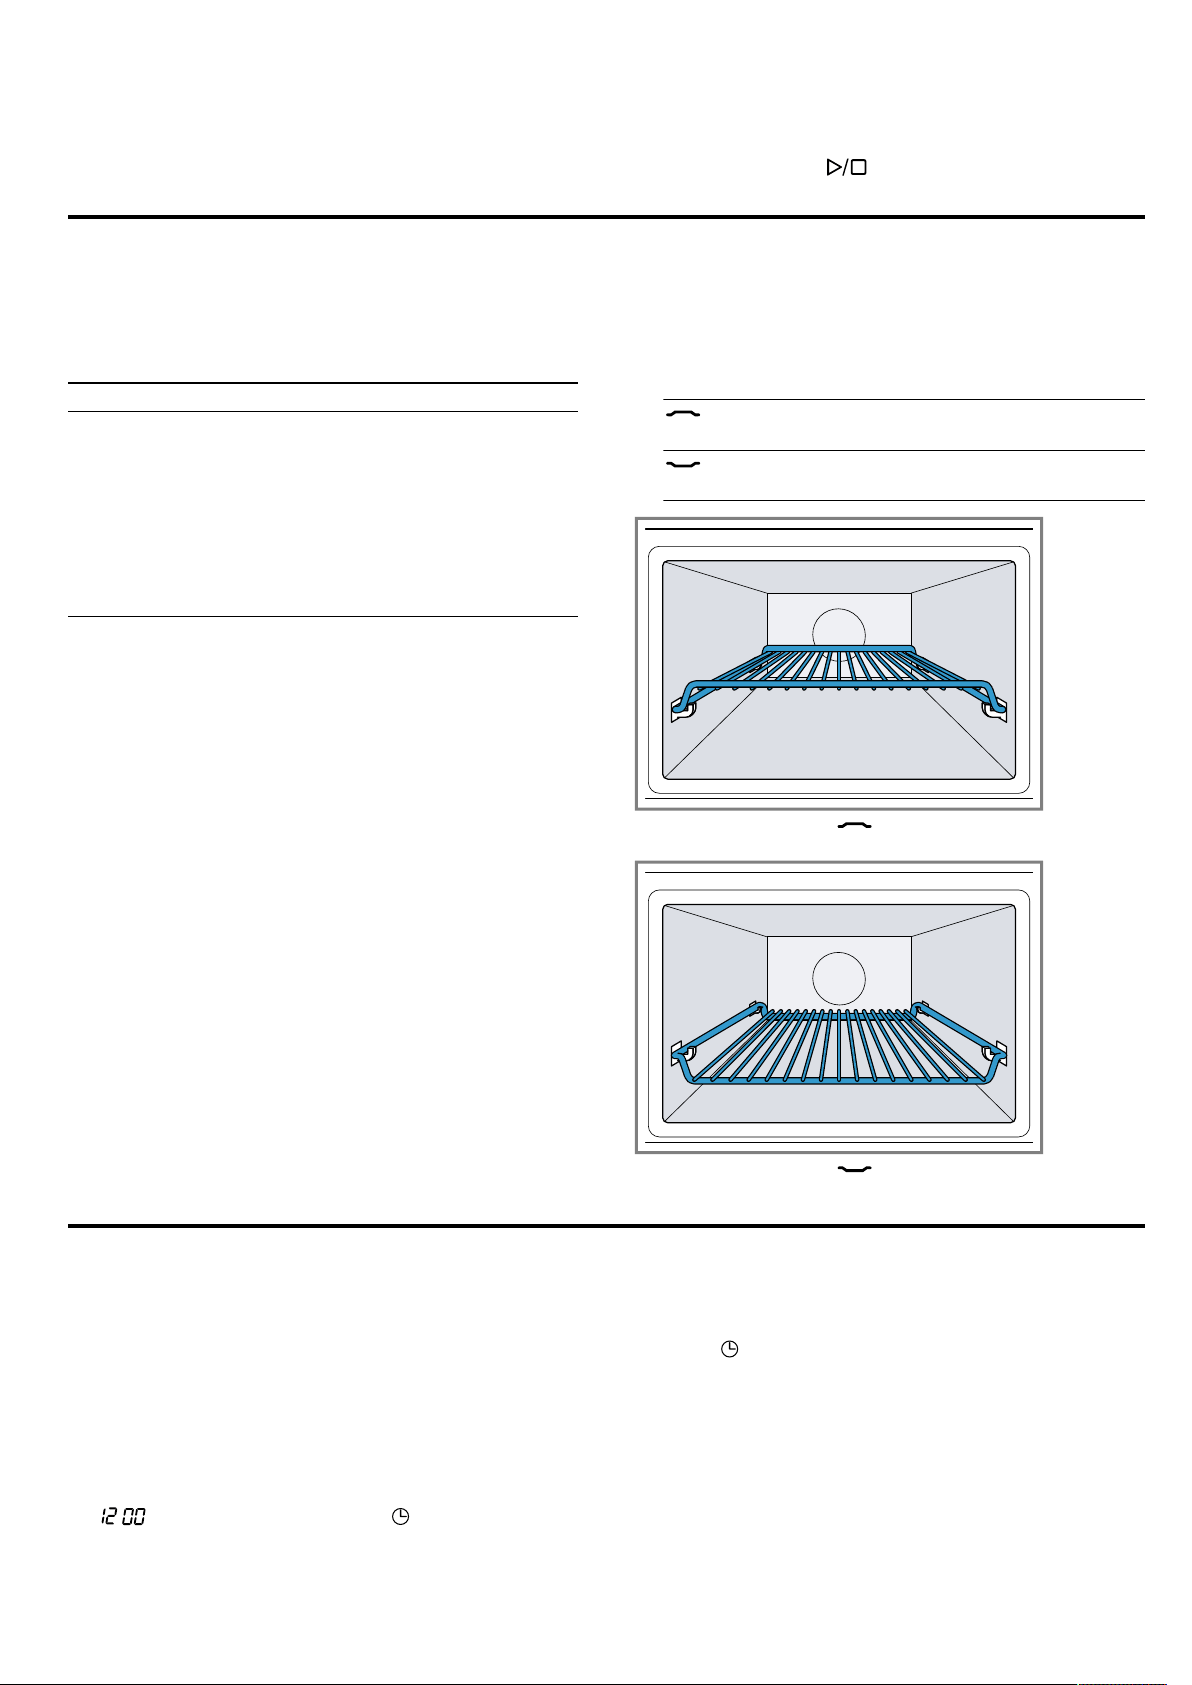
5.2 Inserting the accessory
The accessory can be inserted in two positions.
▶
Insert the accessory so that it does not touch the
appliance door.
Insert the accessory in the high po-
sition.
Insert the accessory in the low po-
sition.
The image shows the position.
The image shows the position.
6 Before using for the first time
Configure the settings for initial start-up. Clean the ap-
pliance and accessories.
6.1 Performing the initial configuration
After connecting the appliance to the power supply or
following a power cut, the following prompt appears in
the display for the setting the time. It may take a few
seconds for the prompt to appear.
▶
Connect the appliance to the power supply.
a : flashes in the display and lights up.
Setting the time
1.
Set the time using the rotary selector.
2.
Press .
a The clock time is set.
Loading ...
Loading ...
Loading ...