Loading ...
Loading ...
Loading ...

Page 9
We recommend mounting the DRC-200 within easy reach of the driver, on the center
console or dashboard of the vehicle. Select an appropriate location to mount the
control knob assembly and status LED on the dashboard or console of the vehicle. You
will need to access the rear of the mounting panel for installation.
Note: Before drilling or cutting, make sure there is adequate space behind the
mounting surface to fit the DRC-200 controller box and status LED, including its
wire assembly and harness.
Control Knob Installation:
1. Drill a 3/8” (9.5 mm) hole in the center of the mounting area.
2. Remove the knobs (inner, then outer) from the DRC-200 shaft. Do NOT remove
the preinstalled nut and washer.
3. From behind, insert the controller’s shaft through the drilled hole and push
forward.
4. Place a supplied washer, then nut on the front of the shaft and tighten using
an 11 mm wrench or deep-well socket. Take care not to over-tighten this nut,
especially when mounting to a plastic panel.
5. Turn each control fully counter-clockwise and place the knobs on the shaft (outer,
then inner) with their markers pointing at 7:00. The knobs should sit close to the
panel, but still permit the button to be pushed.
6. Route the control cable from the JLid
™
Port of your TwK
™
88 / D8 and connect to
the harness jack of the DRC-200 controller.
Status LED Installation:
1. Drill an 8 mm hole in the center of the mounting area.
2. From behind, insert the status LED (without its mounting grommet) through the
drilled hole.
3. Snap the mounting grommet over the LED body and then insert it into the hole
and press until flush with the surface.
7
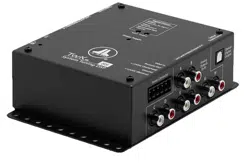
USB Port
The USB Port is designed for connection of a PC to your TwK
™
processor using the
supplied USB A/B cable. Once connected, you’ll be able to use the JL Audio TüN
™
Software Interface to setup and configure the full functionality of your TwK
™
DSP.
Refer to the TwK
™
-TüN
™
Overview included with the downloaded TüN
™
Software for
minimum system requirements and detailed info for the installation and use of the
TüN
™
Software Interface.
Loading ...
Loading ...
Loading ...