Loading ...
Loading ...
Loading ...
13
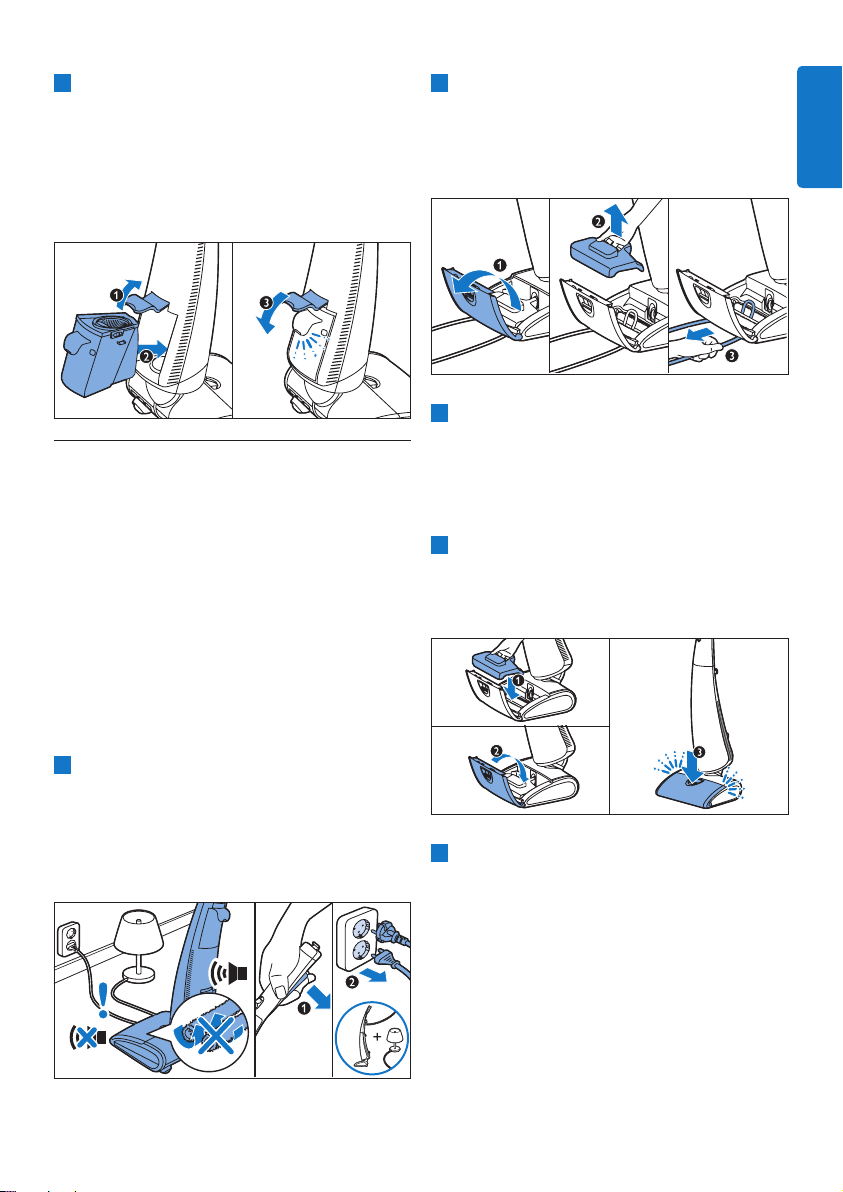
2 Open the mopping nozzle lid (1), remove the
mopping brush cover (2) and take out the
can remove the mopping brushes to have a
better look.
3 If the active protection system was activated
because the mopping brushes are too wet,
remove the mopping brushes and squeeze
them over the sink (see chapter ‘Cleaning and
maintenance’, section ‘ Cleaning the mopping
nozzle’).
4 Place the mopping brush cover (1) and close
the mopping brush lid (2). Press the mopping
nozzle lid (3) to lock it (‘click’), otherwise the
appliance is not reset.
5 Put the plug in the wall socket. Press the
nozzle with your foot and release the
appliance from parking position. Push the
unlock slide forwards (1) and press and hold
the power-on button (2). You can release the
unlock slide when the appliance switches on
(3). Keep the power-on button pressed to
continue cleaning.
6 Lift and hold the lever (1) and slide the dirty
water tank back into the appliance completely
(2). Press down the lever (3) to lock the
the lever for the dirty water tank is locked
properly. If the lever is not locked properly, the
dirty water tank may fall out during cleaning.
5.6 Active protection system is
activated
The active protection system has been designed
to recognise when a foreign object other than dirt
system is activated, it stops the mopping brushes
immediately to prevent damage to the object and
appliance. The motor sound decreases and the
active protection system is also activated when
the mopping brushes are too wet or when you
move the appliance over a carpet. To continue
cleaning, follow the instructions below!
1 Release the power-on button to switch off
the appliance (1). Put the appliance upright
in parking position (‘click’) and pull the plug
out of the wall socket. If the object picked up
is the cord of another appliance, unplug this
appliance as well (2).
ENGLISH
Loading ...
Loading ...
Loading ...