Loading ...
Loading ...
Loading ...

breaker supplying power to the alarm circuit. If the alarms still does not sound,
see the trouble-shooting guide in section 12.
DO NOT use an open flame to test your alarm; you could damage the alarm or
ignite combustible materials and start a structure fire.
Erratic or low sound coming from your alarm may indicate a defective alarm,
and it should be returned for service (see section 13).
5. NUISANCE ALARMS
Smoke alarms are designed to minimize nuisance alarms. Cigarette smoke will
not normally set off the alarm unless the smoke is blown directly into the alarm.
Combustion particles from cooking may set off the alarm if the alarm is located
close to the cooking area. Large quantities of combustible particles are generat-
ed from spills or when broiling. Using the fan on a range hood which vents to
the outside (non-recirculating type) will also help remove these combustible
products from the kitchen.
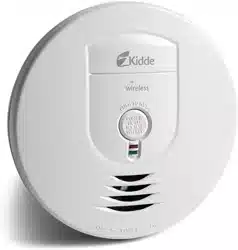
Kidde Wireless Battery Powered Smoke Alarm (Model RF-SM-DC) has a HUSH
®
button that is extremely useful in a kitchen area or other areas prone to nui-
sance alarms. For more information, refer to Section 4 OPERATION AND TEST-
ING. If the alarm does sound, check for fires first. If a fire is discovered, get out
and call the fire department. If no fire is present, check to see if one of the rea-
sons listed in Section 2 may have caused the alarm.
In rare occasions, interference from other electronic devices may cause nuisance
alarms. If you do get nuisance alarms, please refer to the trouble-shooting guide
at the end of this and each of your Kidde Wireless products’ user’s guides.
6. MAINTENANCE
ALARM REMOVAL
IF THE SMOKE ALARM’S TAMPER RESIST FEATURE HAS BEEN ACTIVATED,
REFER TO THE PARAGRAPH ON SMOKE ALARM TAMPER RESIST FEATURE
IN SECTION 3 FOR REMOVAL INSTRUCTIONS.
To remove the alarm from the trim ring, rotate the alarm counter clockwise in
the dir
ection of the “OFF” arrow on the cover.
ALARM REPLACEMENT
Ten years after initial power-up, this unit will “chirp” every 30 seconds to indi-
cate that it is time to replace the alarm. A label has been provided on the side
of the alarm that has “Replace by” printed on it. Write the replace by date on
Loading ...
Loading ...
Loading ...