1
54
2
6
3
7
Small Animals:
A little trimming will really enhance a dog’s appearance. Carefully
begin trimming the legs and feet according to the style desired. The
legs may be trimmed while your animal is sitting on a table with
the leg in your hand or while the animal is standing. Trimming with
the grain (or lay) of the hair will give a slightly longer cut. Be careful
when trimmin around joints and projections.
Continue by trimming around the muzzle, chin and ears. Hold your
dog’s muzzle with your free hand and trim around the face and
chin.
To trim the ears, lay the ear in the palm of your hand. Trim from
the top of the ear downward, clipping the outside of the ear first,
and then the inside. Hold the ear with your free hand and scissor
the sides.
Large Animals:
Begin trimming the legs by starting at the fetlock or pastern,
trimming and lightly bending upward. Turn the trimmer upside
down and trim from the knee down to the hairline where you
blended the fetlock or pastern.
For and ideal appearance, you will want to completely trim any
white leg markings going against the grain of the hair growth. If a
horse has a white marking on one pastern and the remaining legs
do not have markings, it is not necessary to clip the pastern of the
unmarked legs. To trim your animal’s face, place the trimmer at the
bottom of the jaw line and trim up the chin. Stop at the jowl so that
the jowl hair will remain longer to give the head some depth.
White face markings can be trimmed clean to the head for a sharp,
sleek look. You’ll be surprised how much nicer the horse will look
when the star or blaze is trimmed.
Carefully trim the hair around the nose, mouth, and chin to enhance
the appearance of the horse. Next trim down the center of the bridle
path, being careful not to extend into the forelock.
Trimming a horse’s ears can sometimes be tricky, as horses to
SAVE THESE
INSTRUCTIONS
For Household Use Only
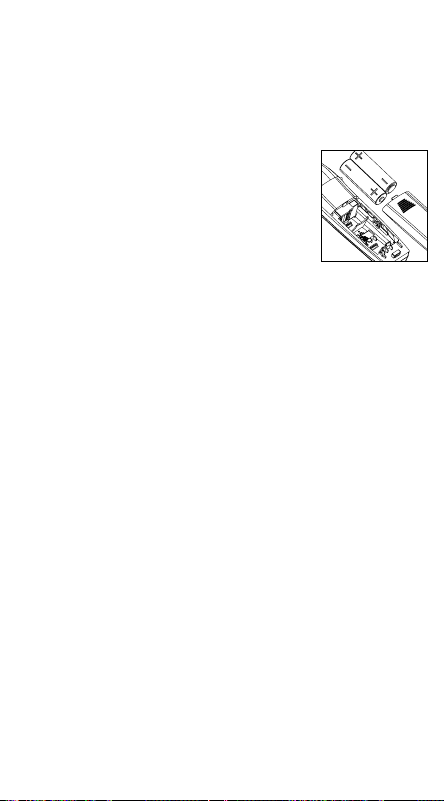
BATTERY INSTRUCTIONS
1. Remove battery cover from trimmer by push-
ing in and back on the plastic door in the direc-
tion of the arrow.
2. Insert two AA batteries as indicated by molded
outline in trimmer.
IMPORTANT: Be sure to insert the negative (-)
end of each battery first, so that it depresses the spring at the bot-
tom of the battery compartment. Then slide the positive (+) end into
position. Do not allow the negative terminal clips to bend and cut the
casing of the batteries.
Lithium or alkaline batteries may be used with your Wahl trimmer.
Lithium batteries will provide the longest operating time before
battery replacement is needed. Trimmer should run approximately
three hours on alkaline batteries.
3. Replace battery cover to its original position.
4. Move switch to “ON” position to use.
5. To maximize battery life, trimmer should be shut “OFF”
immediately after using.
6. To replace batteries, complete Step 1, remove batteries one at a
time.
TROUBLESHOOTING
If your trimmer fails to operate when switched “ON,” check your
batteries to see if they are properly installed. Positive end (center
post) should be located as shown in battery housing. Make sure the
switch is in the “ON” position and check to be sure blades are free to
move. If blades become clogged with debris, manually pushing the
blades back and forth a few times while unit is turned “OFF” may help
free the blades and allow the trimmer to operate. If it still does not
operate, your batteries have probably exceeded their useful life. To
maximize battery life, replace all batteries at the same time.
CARING FOR YOUR TRIMMER
OILING BLADES
For best results, use Wahl Clipper Oil on the blades only when
necessary, or approximately once a month. Motor bearings are
permanently lubricated—do not attempt to oil.
When oiling your trimmer, turn the trimmer “ON - I,” hold the unit
with the blades facing DOWN and squeeze three drops across the
front of the blade and one drop on each side on the heel of the
blade. Wipe off excess oil with soft cloth.
NOTICE—DO NOT OVER OIL!
Excessive oiling or application of
liquids will cause damage if allowed
to seep back into motor.
BLADE CARE
Trimmer blades have precision-hardened, ground and lapped
cutting teeth. Blades should be handled carefully and never
bumped or used to cut dirty or abrasive material. Clean with the
included brush.
Heads should be removed from the trimmer prior to rinsing in water.
After rinsing, allow the heads to air dry completely before reattaching
to the trimmer body. The trimmer body should always be kept away
from water to maximize the life of the motor, battery, and control
components.
CLEANING/STORAGE
Before storing your trimmer, use the cleaning brush to whisk
any loose hairs from the unit and the blades. Store unit in such a
manner so that blades are protected from damage.
When the trimmer is not in use, the trimmer blade guard
attachment should be in place to protect the blades.
This appliance should be stored in a manner where it is not
subjected to Crushing, Heating above 100°C (212°F), or
Incineration.
SHARPENING
Trimmer blades have precision-ground cutting teeth. Blades should
be handled carefully and never bumped. To keep blades sharp, cut
only clean hair and avoid cutting into dirt or abrasive particles.
Blades should be sharpened or changed in sets only.
New replacement blades may be acquired from a Wahl Authorized
Service Center.
For products purchased outside of the United States,
please contact your distributor.
Wahl Clipper Corporation • Attn: Repair Department
3001 Locust Street • Sterling, IL 61081
Telephone: (815) 767-9245
5 or 6-Position Guide
makes achieving a consistent
trim easy, every time. The guide can be removed (providing an
additional cutting position) and reattached without changing the
preset cutting length, so once you have found the perfect length,
there’s no guesswork in achieving it every trim. The trimming
guide is a two-piece assembly, consisting of a base and a comb.
It should not be disassembled. To attach the guide, simply slide
it on at a slight angle and press the release tab down to secure
in position. To remove the guide, gently push up on the release
tab and slide the assembly away from the trimmer. Adjust the
trimming length by pressing on the thumb lever and moving the
comb forward or backward to the desired setting.
OPERATING INSTRUCTIONS
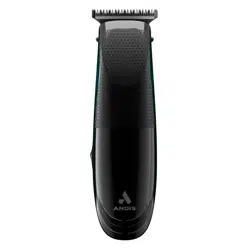
WAHL ANIMAL TRIMMER
Grooming Preparation
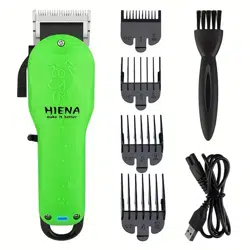
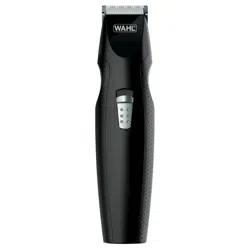
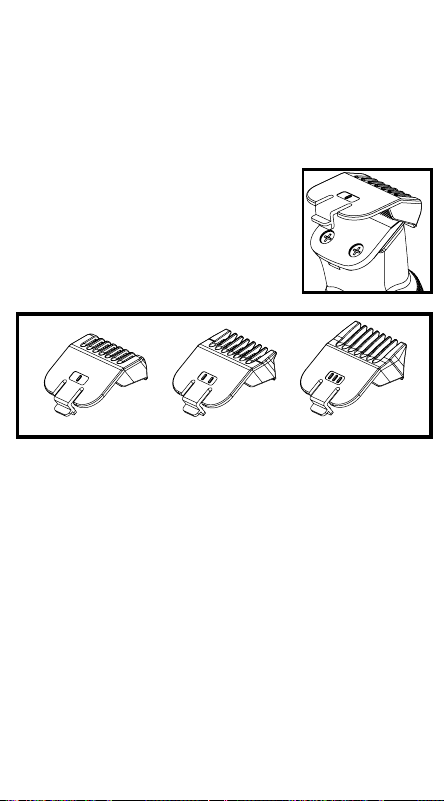
The Wahl Animal Trimmer features three trimming guides to
trim and style your animal. For identification purposes, the
short-cut attachement has one bar (I) marking on the front of the
attachement while the medium-cut attachment has two bars (II)
and the bar (III) marking is the long cut.
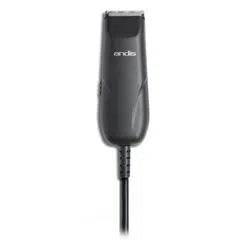
Operating Instructions for
Cordless Battery Trimmer
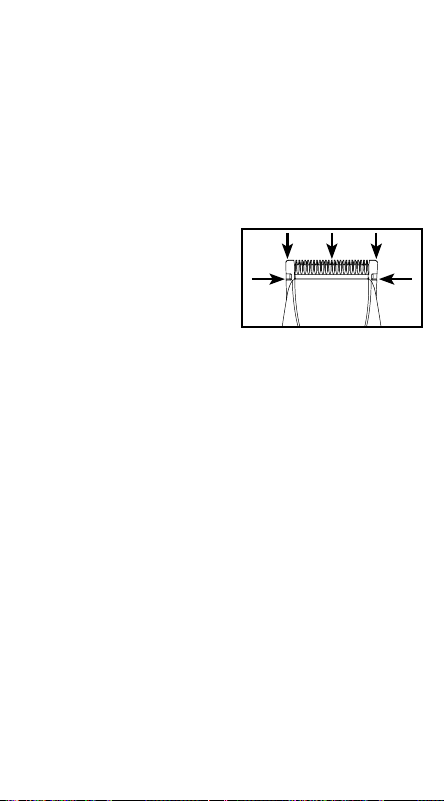
How To Attach Trimming Guides
To attach the trimming guides to the unit, insert one side of the
trimming guide on the front of the blades and push the other side
back until both sides are locked into position.
To remove trimming guide, pull away from side to release
attachment from trimmer.
CAUTION: Make certain that the guide
is securely in place on the blades before
operating unit. The two small plastic tabs
inside the guide should be OVER the blade
and locked in the blade groove as shown in
illustration.
This trimmer offers an easy way to trim
around eyes, ears, and legs without shaving hair completely off.
After selecting the length and trimming guide desired, begin
trimming your animal
Where to Begin:
Begin by bathing your animal to remove any dirt. Clean hair will not
dull blades. Rinse well and allow the coat to dry completely. Comb
through the coat to remove any tangles and make tirmming as easy
as possible.
This trimmer is intended for use in trimming and touch-ups. For
complete clipping jobs of body hair, you will need a more powerful
clipper.
WAHL CLIPPER CORPORATION
World Headquarters
P.O. Box 578 • Sterling, Illinois 61081
Phone (800) 767-9245
© 2018 Wahl Clipper Corporation
Part No. 1001690 v.2018.01
Printed in Vietnam
For more information or Product Registration, visit pet.wahl.com
1-YEAR LIMITED WARRANTY
Valid in U.S.A. Only
If your Wahl product fails to operate satisfactorily within one
(1) year from the date of original purchase or receipt as a gift,
Wahl will, at our option, repair or replace it and return it to you
FREE OF CHARGE. Do not return this product to store where
purchased. Products needing repair under this warranty should
be returned with postage prepaid to:
Wahl Clipper Corp.
Attn: Repair Department
3001 Locust Street
Sterling, Illinois 61081
Include a note describing the defect and the date of original
purchase or receipt as a gift (if in warranty). Products out of
warranty will be repaired at our standard repair charges.
This warranty is void and no repair or replacement will be made
under this warranty or otherwise if: (1) The product is modified
in any manner or repaired by anyone other than Wahl Clipper
Corporation or Wahl authorized service center. (2) The product
has been used commercially or subjected to unreasonable use.
This warranty gives you specific legal rights and you may
also have other rights which may vary from state to state. No
other written express warranty is given. Any implied warranty,
including any warranty of merchantability which may arise from
purchase or use, is limited to the year period provided in this
express warranty. Some states may not allow such limitation,
so it may not apply to you. No responsibility is assumed for
incidental or consequential damages of any type, or for the use
of unauthorized attachments. Some states may not allow the
exclusion or limitation of incidental or consequential damages, so
the limitation or exclusion may not apply to you. Outside U.S.A.,
check with store for Wahl authorized distributor’s warranty.
pet.wahl.com
1/16” 1/8” 3/16”
SERVICE AND REPAIR
If you have problems with your trimmer, send it prepaid
with a note explaining the problem to:
Wahl Clipper Corporation
Attn: Repair Department
3001 Locust Street
Sterling, IL 61081
Telephone (800) 767-9245
For products purchased outside the United States, contact your distributor.
not tolerate the noise well. The secret to trimming ears is to get in
and out as quickly as possible. Hold the tip of the ear between two
fingers. Begin at the point and rim down toward the horse’s head.
You’ll find that the ear leather can be turned almost inside out. Then
place the back of the ear in the cup of the hand and squeeze the ear
leather so the outer edges touch. Trim the hair that extends beyond
edges.
To thin the hair on the tail and mane, hold your trimmer upside
down with the blades pointed in toward the hair. Then lightly,
starting at the top of the hair and stroking downward in a combing
type manner, remove just a little hair at one time.
Touch Up Trimmer
™

1
54
2
6
3
7
Small Animals:
A little trimming will really enhance a dog’s appearance. Carefully
begin trimming the legs and feet according to the style desired. The
legs may be trimmed while your animal is sitting on a table with
the leg in your hand or while the animal is standing. Trimming with
the grain (or lay) of the hair will give a slightly longer cut. Be careful
when trimmin around joints and projections.
Continue by trimming around the muzzle, chin and ears. Hold your
dog’s muzzle with your free hand and trim around the face and
chin.
To trim the ears, lay the ear in the palm of your hand. Trim from
the top of the ear downward, clipping the outside of the ear first,
and then the inside. Hold the ear with your free hand and scissor
the sides.
Large Animals:
Begin trimming the legs by starting at the fetlock or pastern,
trimming and lightly bending upward. Turn the trimmer upside
down and trim from the knee down to the hairline where you
blended the fetlock or pastern.
For and ideal appearance, you will want to completely trim any
white leg markings going against the grain of the hair growth. If a
horse has a white marking on one pastern and the remaining legs
do not have markings, it is not necessary to clip the pastern of the
unmarked legs. To trim your animal’s face, place the trimmer at the
bottom of the jaw line and trim up the chin. Stop at the jowl so that
the jowl hair will remain longer to give the head some depth.
White face markings can be trimmed clean to the head for a sharp,
sleek look. You’ll be surprised how much nicer the horse will look
when the star or blaze is trimmed.
Carefully trim the hair around the nose, mouth, and chin to enhance
the appearance of the horse. Next trim down the center of the bridle
path, being careful not to extend into the forelock.
Trimming a horse’s ears can sometimes be tricky, as horses to
SAVE THESE
INSTRUCTIONS
For Household Use Only
BATTERY INSTRUCTIONS
1. Remove battery cover from trimmer by push-
ing in and back on the plastic door in the direc-
tion of the arrow.
2. Insert two AA batteries as indicated by molded
outline in trimmer.
IMPORTANT: Be sure to insert the negative (-)
end of each battery first, so that it depresses the spring at the bot-
tom of the battery compartment. Then slide the positive (+) end into
position. Do not allow the negative terminal clips to bend and cut the
casing of the batteries.
Lithium or alkaline batteries may be used with your Wahl trimmer.
Lithium batteries will provide the longest operating time before
battery replacement is needed. Trimmer should run approximately
three hours on alkaline batteries.
3. Replace battery cover to its original position.
4. Move switch to “ON” position to use.
5. To maximize battery life, trimmer should be shut “OFF”
immediately after using.
6. To replace batteries, complete Step 1, remove batteries one at a
time.
TROUBLESHOOTING
If your trimmer fails to operate when switched “ON,” check your
batteries to see if they are properly installed. Positive end (center
post) should be located as shown in battery housing. Make sure the
switch is in the “ON” position and check to be sure blades are free to
move. If blades become clogged with debris, manually pushing the
blades back and forth a few times while unit is turned “OFF” may help
free the blades and allow the trimmer to operate. If it still does not
operate, your batteries have probably exceeded their useful life. To
maximize battery life, replace all batteries at the same time.
CARING FOR YOUR TRIMMER
OILING BLADES
For best results, use Wahl Clipper Oil on the blades only when
necessary, or approximately once a month. Motor bearings are
permanently lubricated—do not attempt to oil.
When oiling your trimmer, turn the trimmer “ON - I,” hold the unit
with the blades facing DOWN and squeeze three drops across the
front of the blade and one drop on each side on the heel of the
blade. Wipe off excess oil with soft cloth.
NOTICE—DO NOT OVER OIL!
Excessive oiling or application of
liquids will cause damage if allowed
to seep back into motor.
BLADE CARE
Trimmer blades have precision-hardened, ground and lapped
cutting teeth. Blades should be handled carefully and never
bumped or used to cut dirty or abrasive material. Clean with the
included brush.
Heads should be removed from the trimmer prior to rinsing in water.
After rinsing, allow the heads to air dry completely before reattaching
to the trimmer body. The trimmer body should always be kept away
from water to maximize the life of the motor, battery, and control
components.
CLEANING/STORAGE
Before storing your trimmer, use the cleaning brush to whisk
any loose hairs from the unit and the blades. Store unit in such a
manner so that blades are protected from damage.
When the trimmer is not in use, the trimmer blade guard
attachment should be in place to protect the blades.
This appliance should be stored in a manner where it is not
subjected to Crushing, Heating above 100°C (212°F), or
Incineration.
SHARPENING
Trimmer blades have precision-ground cutting teeth. Blades should
be handled carefully and never bumped. To keep blades sharp, cut
only clean hair and avoid cutting into dirt or abrasive particles.
Blades should be sharpened or changed in sets only.
New replacement blades may be acquired from a Wahl Authorized
Service Center.
For products purchased outside of the United States,
please contact your distributor.
Wahl Clipper Corporation • Attn: Repair Department
3001 Locust Street • Sterling, IL 61081
Telephone: (815) 767-9245
5 or 6-Position Guide
makes achieving a consistent
trim easy, every time. The guide can be removed (providing an
additional cutting position) and reattached without changing the
preset cutting length, so once you have found the perfect length,
there’s no guesswork in achieving it every trim. The trimming
guide is a two-piece assembly, consisting of a base and a comb.
It should not be disassembled. To attach the guide, simply slide
it on at a slight angle and press the release tab down to secure
in position. To remove the guide, gently push up on the release
tab and slide the assembly away from the trimmer. Adjust the
trimming length by pressing on the thumb lever and moving the
comb forward or backward to the desired setting.
OPERATING INSTRUCTIONS
WAHL ANIMAL TRIMMER
Grooming Preparation
The Wahl Animal Trimmer features three trimming guides to
trim and style your animal. For identification purposes, the
short-cut attachement has one bar (I) marking on the front of the
attachement while the medium-cut attachment has two bars (II)
and the bar (III) marking is the long cut.
Operating Instructions for
Cordless Battery Trimmer
How To Attach Trimming Guides
To attach the trimming guides to the unit, insert one side of the
trimming guide on the front of the blades and push the other side
back until both sides are locked into position.
To remove trimming guide, pull away from side to release
attachment from trimmer.
CAUTION: Make certain that the guide
is securely in place on the blades before
operating unit. The two small plastic tabs
inside the guide should be OVER the blade
and locked in the blade groove as shown in
illustration.
This trimmer offers an easy way to trim
around eyes, ears, and legs without shaving hair completely off.
After selecting the length and trimming guide desired, begin
trimming your animal
Where to Begin:
Begin by bathing your animal to remove any dirt. Clean hair will not
dull blades. Rinse well and allow the coat to dry completely. Comb
through the coat to remove any tangles and make tirmming as easy
as possible.
This trimmer is intended for use in trimming and touch-ups. For
complete clipping jobs of body hair, you will need a more powerful
clipper.
WAHL CLIPPER CORPORATION
World Headquarters
P.O. Box 578 • Sterling, Illinois 61081
Phone (800) 767-9245
© 2018 Wahl Clipper Corporation
Part No. 1001690 v.2018.01
Printed in Vietnam
For more information or Product Registration, visit pet.wahl.com
1-YEAR LIMITED WARRANTY
Valid in U.S.A. Only
If your Wahl product fails to operate satisfactorily within one
(1) year from the date of original purchase or receipt as a gift,
Wahl will, at our option, repair or replace it and return it to you
FREE OF CHARGE. Do not return this product to store where
purchased. Products needing repair under this warranty should
be returned with postage prepaid to:
Wahl Clipper Corp.
Attn: Repair Department
3001 Locust Street
Sterling, Illinois 61081
Include a note describing the defect and the date of original
purchase or receipt as a gift (if in warranty). Products out of
warranty will be repaired at our standard repair charges.
This warranty is void and no repair or replacement will be made
under this warranty or otherwise if: (1) The product is modified
in any manner or repaired by anyone other than Wahl Clipper
Corporation or Wahl authorized service center. (2) The product
has been used commercially or subjected to unreasonable use.
This warranty gives you specific legal rights and you may
also have other rights which may vary from state to state. No
other written express warranty is given. Any implied warranty,
including any warranty of merchantability which may arise from
purchase or use, is limited to the year period provided in this
express warranty. Some states may not allow such limitation,
so it may not apply to you. No responsibility is assumed for
incidental or consequential damages of any type, or for the use
of unauthorized attachments. Some states may not allow the
exclusion or limitation of incidental or consequential damages, so
the limitation or exclusion may not apply to you. Outside U.S.A.,
check with store for Wahl authorized distributor’s warranty.
pet.wahl.com
1/16” 1/8” 3/16”
SERVICE AND REPAIR
If you have problems with your trimmer, send it prepaid
with a note explaining the problem to:
Wahl Clipper Corporation
Attn: Repair Department
3001 Locust Street
Sterling, IL 61081
Telephone (800) 767-9245
For products purchased outside the United States, contact your distributor.
not tolerate the noise well. The secret to trimming ears is to get in
and out as quickly as possible. Hold the tip of the ear between two
fingers. Begin at the point and rim down toward the horse’s head.
You’ll find that the ear leather can be turned almost inside out. Then
place the back of the ear in the cup of the hand and squeeze the ear
leather so the outer edges touch. Trim the hair that extends beyond
edges.
To thin the hair on the tail and mane, hold your trimmer upside
down with the blades pointed in toward the hair. Then lightly,
starting at the top of the hair and stroking downward in a combing
type manner, remove just a little hair at one time.
Touch Up Trimmer
™
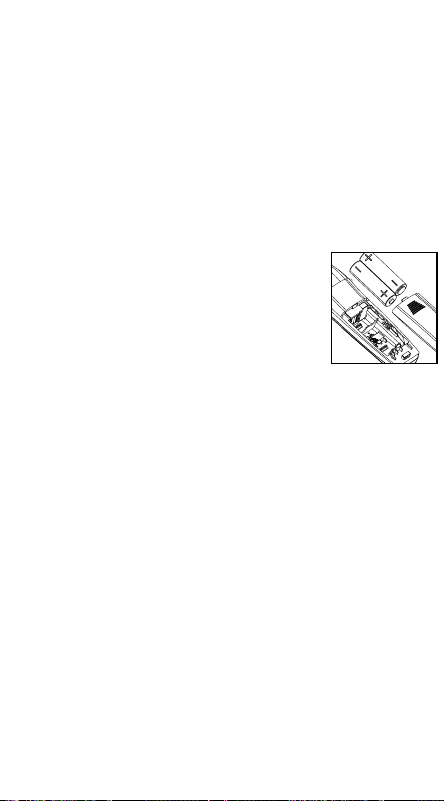
1
54
2
6
3
7
pelo. Si un caballo tiene una marca blanca en una cuartilla y las
otras patas no tienen marcas, no será necesario cortar la cuartilla
de las patas sin marcas. Para recortar la cara del animal, coloque
la recortadora en la parte inferior de la línea de la mandíbula y
recorte la barbilla. Deténgase en la quijada para que el pelo de la
mandíbula permanezca más tiempo y le dé cierta profundidad a
la cabeza.
Las marcas blancas en la cara se pueden recortar hasta la cabeza
para lograr un aspecto elegante y limpio. Se sorprenderá de lo
bonito que se verá el caballo cuando se le recorte la estrella o el
lucero.
Recorte con cuidado el pelo alrededor de la nariz, la boca y
la barbilla para realzar el aspecto del caballo. A continuación,
recorte el centro del trayecto de la brida, teniendo cuidado de no
extenderse hacia el copete.
Recortar las orejas de un caballo suele resultar difícil, ya que
los caballos no toleran demasiado bien el ruido. El secreto para
recortar las orejas es introducir y sacar la herramienta lo más
rápido posible. Sostenga la punta de la oreja entre dos dedos.
Comience en la punta y baje hacia la cabeza del caballo. Verá
que el cuero de la oreja casi se puede voltear hacia fuera. A
continuación, coloque la parte posterior de la oreja en la palma de
la mano y apriete el cuero de la oreja para que los bordes externos
se toquen. Recorte el pelo que se extiende más allá de los bordes.
Para retirar pelo de cola y la melena, sostenga la recortadora boca
abajo con las cuchillas hacia el pelaje. Luego, comenzando en la
parte superior del pelo y peinando el pelaje hacia abajo, quite solo
un poco de pelo a la vez.
SERVICIO Y REPARACIÓN
Si tiene problemas con la recortadora, envíela con franqueo
prepagado y una nota explicando el problema a:
Wahl Clipper Corporation
Attn: Repair Department
3001 Locust Street • P.O. Box 578
Sterling, IL 61081
Teléfono (800) 767-9245
Para productos comprados fuera de Estados Unidos,
póngase en contacto con su distribuidor.
esté en la posición de encendido y compruebe para asegurarse
de que las hojas puedan moverse libremente. Si las hojas
se atascan con residuos, empujando manualmente las hojas
unas cuantas veces hacia atrás y hacia adelante con la unidad
apagada se pueden desatascar las hojas y hacer que funcione
la recortadora. Si sigue sin funcionar, es probable que las pilas
hayan excedido su vida útil. Para optimizar la duración de las
pilas, reemplaza todas las pilas AA al mismo tiempo.
CUIDADO DE LA RECORTADORA
LUBRICACIÓN DE LAS HOJAS
Para lograr resultados óptimos, use aceite para cortadora de Wahl
en las cuchillas solo cuando sea necesario o aproximadamente
una vez al mes. Los cojinetes del motor están lubricados
permanentemente. No trate de lubricarlos.
Cuando lubrique su recortadora, colóquela en posición de
encendido (“ON – I”), sostenga la unidad con las cuchillas mirando
hacia ABAJO y escurra tres gotas por la parte delantera de las
cuchillas y una en cada lado de la parte plana de la cuchilla. Limpie
el exceso de aceite con un paño suave.
AVISO: ¡NO LUBRIQUE
EXCESIVAMENTE!
La lubricación o aplicación de
líquidos excesiva causará daños si se
deja que se filtre y llegue al motor.
CUIDADO DE LAS HOJAS
Las hojas de la recortadora tienen dientes de corte endurecidos
con precisión, rectificados y pulidos. Las hojas deben manipularse
con cuidado y no golpearse nunca ni usarse para cortar materiales
sucios o abrasivos. Limpiar con el cepillo incluido.
Se debe desmontar los cabezales de la recortadora antes de
enjuagar en agua. Luego de enjuagarlos, espere hasta que los
cabezales se sequen completamente con el aire antes de volver
a colocarlos en la recortadora. La recortadora no se debe mojar
para maximizar la duración del motor, la batería y el componente
de control.
LIMPIEZA/ALMACENAMIENTO
Antes de guardar la recortadora, use el cepillo de limpieza para
retirar los pelos sueltos de la unidad y hojas. Guarde la unidad de
tal manera que las hojas estén protegidas contra los daños.
Cuando no se use la recortadora, el protector de hojas debe estar
colocado para proteger las hojas.
Este aparato se debe guardar de manera que no sea sometido
a aplastamiento, calentamiento a más de 100°C (212°F) o
incineración.
AFILADO
Las hojas afiladas tienen unos dientes de corte pulido de precisión. Las
hojas deben ser manejadas cuidadosamente y nunca deben de golpearse.
Para mantener las hojas afiladas corte solamente pelo limpio y evite cortar
sobre suciedad o partículas abrasivas.
Solamente puede afilar o cambiar los juegos completos de hojas.
Los reemplazos nuevos de hojas se encuentran disponibles en su
tienda favorita más cercana, o bien en Wahl Clipper Corporation. Para
productos comprados fuera de Estados Unidos, comuníquese con su
distribuidor.
Wahl Clipper Corporation
Attn: Repair Department
3001 Locust Street • Sterling, IL 61081
Teléfono: 815 767 9245
Guía de 5 o 6 posiciones que hace que siempre
se logre con facilidad un recorte uniforme. La guía puede
quitarse (proporcionando una otra posición de corte) y
volverse a conectar sin cambiar la longitud de corte prefijada,
de modo que una vez que haya encontrado la longitud
perfecta, no tenga que adivinar cuál es en cada recorte. La
guía de recorte es un conjunto de dos piezas compuesto por
una base y un peine. No debe desmontarse. Para conectar
la guía, deslícela simplemente formando un ligero ángulo y
pulse la lengüeta de desenganche hacia abajo para sujetar en
posición. Para quitar la guía, empuje suavemente hacia arriba
la lengüeta de desenganche y deslice el conjunto alejándolo
de la recortadora. Ajuste la longitud de recorte haciendo
fuerza hacia abajo sobre la palanca y moviendo el peine hacia
adelante o hacia atrás hasta el ajuste deseado.
Instrucciones de uso
Recortadora Wahl para animales
Preparación Para El Acicalamiento
La recortadora Wahl para animales cuenta con tres guías de
recorte para recortar y arreglar el pelaje del animal. Para facilitar
la identificación, el accesorio de corte bajo tiene la marca de una
barra (I) en la parte frontal del accesorio, mientras que el accesorio
de corte medio tiene dos barras (II), y la marca de las tres barras
(III) indica el corte largo.
Colocación De Las Guías De Recorte
Para colocar las guías de recorte en la unidad, inserte un lado de
la guía de recorte en la parte frontal de las hojas y empuje el otro
lado hacia atrás hasta que ambos lados queden en posición fija.
Para quitar la guía de recorte, retírela de un lado para liberar el
accesorio de la recortadora.
PRECAUCIÓN: Antes de utilizar la unidad, asegúrese de que la guía
esté bien colocada en las cuchillas. Las dos pequeñas lengüetas de
plástico dentro de la guía deben estar SOBRE la cuchilla y fijas en
la ranura de la cuchilla como se muestra en la ilustración.
Esta recortadora permite recortar el pelo alrededor de los ojos, las
orejas y las patas sin afeitarlo por completo.
Después de seleccionar la guía con la longitud y el tipo de recorte
deseado, comience a recortar el pelo del animal.
Cómo Comenzar:
Comience por bañar al animal para eliminar la suciedad. El pelo
limpio evitará que se dañen las cuchillas. Enjuáguelo bien y deje
que el pelo se seque por completo. Peine al animal para eliminar
los enredos y facilitar el recorte todo lo posible.
Esta recortadora está diseñada para realizar recortes y retoques.
Para cortar el pelo corporal por completo, necesitará una cortadora
más potente.
Animales Pequeños:
Un recorte bajo mejorará el aspecto de los perros en gran
medida. Con cuidado, comience a recortar la zona de las patas
de acuerdo con el estilo deseado. La zona de las patas se puede
recortar mientras el animal está sentado sobre una mesa con
la pata sobre su mano o mientras el animal está parado. Si se
recorta a contrapelo o siguiendo la forma del pelo se logrará un
corte un poco más largo. Tenga cuidado al recortar alrededor de
articulaciones y salientes.
Continúe recortando alrededor del hocico, la barbilla y las orejas.
Sostenga el hocico del perro con su mano libre y recorte alrededor
de la cara y la barbilla.
Para recortar las orejas, coloque la oreja en la palma de su mano.
Recorte desde la parte superior de la oreja hacia abajo, recortando
primero la parte exterior de la oreja y luego el interior. Sostenga la
oreja con su mano libre y corte a los lados.
Animales Grandes:
Comience a recortar las patas comenzando por el espolón o la
cuartilla, recortándolas y doblándolas ligeramente hacia arriba.
Coloque la recortadora hacia abajo y recorte desde la rodilla hasta
la línea del pelo donde recortó el espolón o la cuartilla.
Para lograr un aspecto óptimo, recorte por completo cualquier
marca blanca en las patas en sentido contrario al crecimiento del
GUARDE ESTAS
INSTRUCCIONES
Solo Para Uso
Doméstico
PARA USAR SÓLA CON LA RECORTADORA
GROOMSMAN QUE FUNCIONA POR PILAS
1. Quite la tapa de las pilas de la recortadora empujando hacia
adentro y hacia atrás la puerta de plástico en
el sen tido de la flecha.
2. Introduzca dos pilas AA según viene indicado
por el contorno moldeado de la recortadora.
IMPORTANTE: Asegúrese de introducir
primero el extremo negativo (-) de cada pila,
de modo que comprima el resorte de la parte inferior del
compartimiento de las pilas. Deslice después el extremo positivo
(+) hasta colocarlo. No deje que se doblen los contactos de los
terminales negativos y corten el recubrimiento de las pilas.
La recortadora Wahl puede utilizarse con baterías alcalinas
o de litio. Las baterías de litio le brindarán un tiempo de
funcionamiento más prolongado antes de necesitar un
reemplazo. La recortadora debe funcionar aproximadamente tres
horas con pilas alcalinas.
3. Vuelva a poner la tapa de las pilas en su posición original.
4. Ponga el interruptor en la posición de encendido para usar la
recortadora.
5. Para prolongar al máximo la duración de las pilas, la recortadora
debe apagarse inmediatamente después de utilizarse.
6. Para reemplazar las pilas, complete el Paso 1, quitando las
pilas de una en una.
LOCALIZACIÓN Y REPARACION DE FALLAS
Si la recortadora no funciona con el interruptor en la posición de
encendido, compruebe las pilas para ver si están bien instaladas.
El extremo positivo (saliente central) debe estar colocado según
se indica en la caja de las pilas. Asegúrese de que el interruptor
1/16” 1/8” 3/16”
GARANTÍA LIMITADA DE UN AÑO
Válida solo en los Estados Unidos
Si su producto Wahl deja de funcionar satisfactoriamente durante
el período de un (1) año a partir de la fecha de compra original o
de haberlo recibido como regalo, Wahl reparará o reemplazará el
producto a su criterio y se lo devolverá gratuitamente. No devuelva
este producto a la tienda dónde usted lo ha comprado. Los
productosque necesiten ser reparados bajo los términos de esta
garantía, deben ser enviados, con franqueo pagado a:
Wahl Clipper Corp.
Attn: Repair Department
3001 Locust Street
Sterling, Illinois 61081
Incluya una nota describiendo el problema y la fecha de la compra
original o recibo del regalo (si aún está bajo garantía). Los productos
fuera de garantía serán reparados a nuestros precios regulares de
reparación.
Esta garantía quedará anulada y no se efectuará ninguna reparación
o reemplazo en el caso de que: (1) Si el producto se modifica
de cualquier manera o es reparado por cualquier otra persona
con excepción de Wahl Clipper Corporation o centro de servicio
autorizado Wahl. (2) El producto se ha utilizado comercialmente o se
ha sujetado al uso desrazonable.
Esta garantía le otorga derechos legales específicos y usted podrá
tener otros derechos que pueden variar de un estado a otro. No
existe otro documento como tal y no se dará ningún otro por
escrito. Cualquier otra garantía implícita, incluyendo cualquier
garantía mercantil que pueda surgir de la compra de este producto
o de su uso, está limitada al período de años mencionado en esta
garantía expresa. Es posible que algunos estados no permitan
dichas limitaciones, y por tanto puede que esta limitación no sea
aplicable a su caso. No se asume ninguna responsabilidad por
daños incidentales o daños causados por la utilización inadecuada,
o por el uso de accesorios sin autorización del fabricante. Puede
que algunos estados no permitan la exclusión o la limitación de
daños incidentales o por daños debidos a la utilización inadecuada
de este producto, de modo que la exclusión o limitación pueda no
ser aplicable a su caso. Esta garantía es solo válida en los Estados
Unidos. Fuera de los Estados Unidos, pregunte en la tienda por la
garantía del distribuidor autorizado de Wahl.
Para mas informacion o Registracion de Producto
visite pet.wahl.com
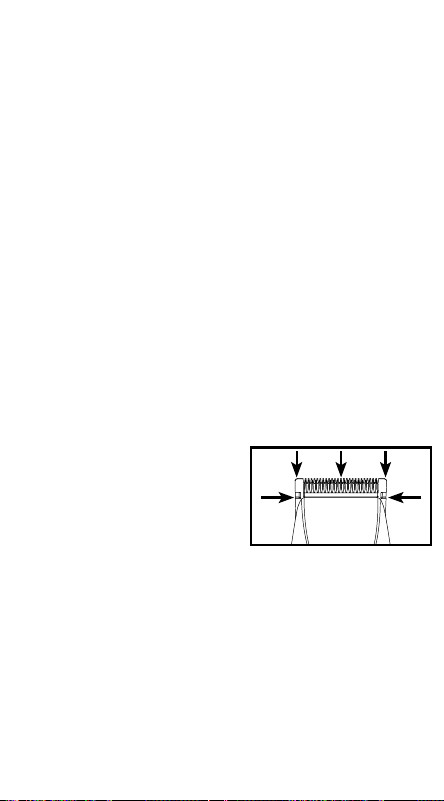
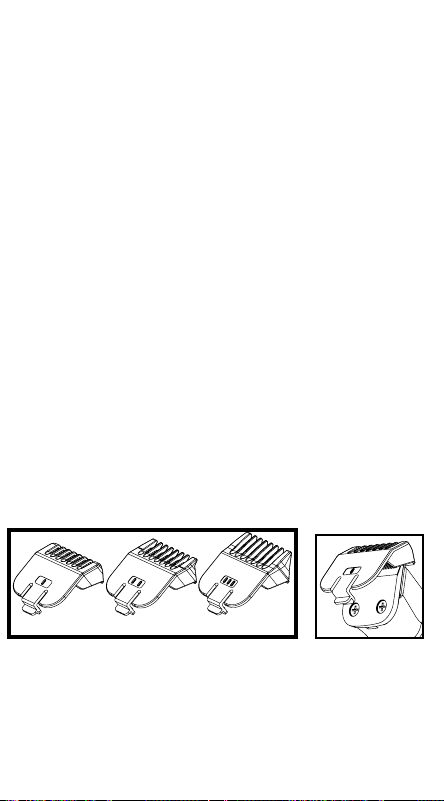