Loading ...
Loading ...
Loading ...
Electrical Wiring
ENGLISH
Installation Manual 49
CAUTION
1. “X” mark means DIP switch must be off, Otherwise the function may not perates correctly.
2. If each DIP switch doesn’t set correctly, unit will operate abnormally.
3. In case of proceeding test run, start after checking if all indoor unit is off.
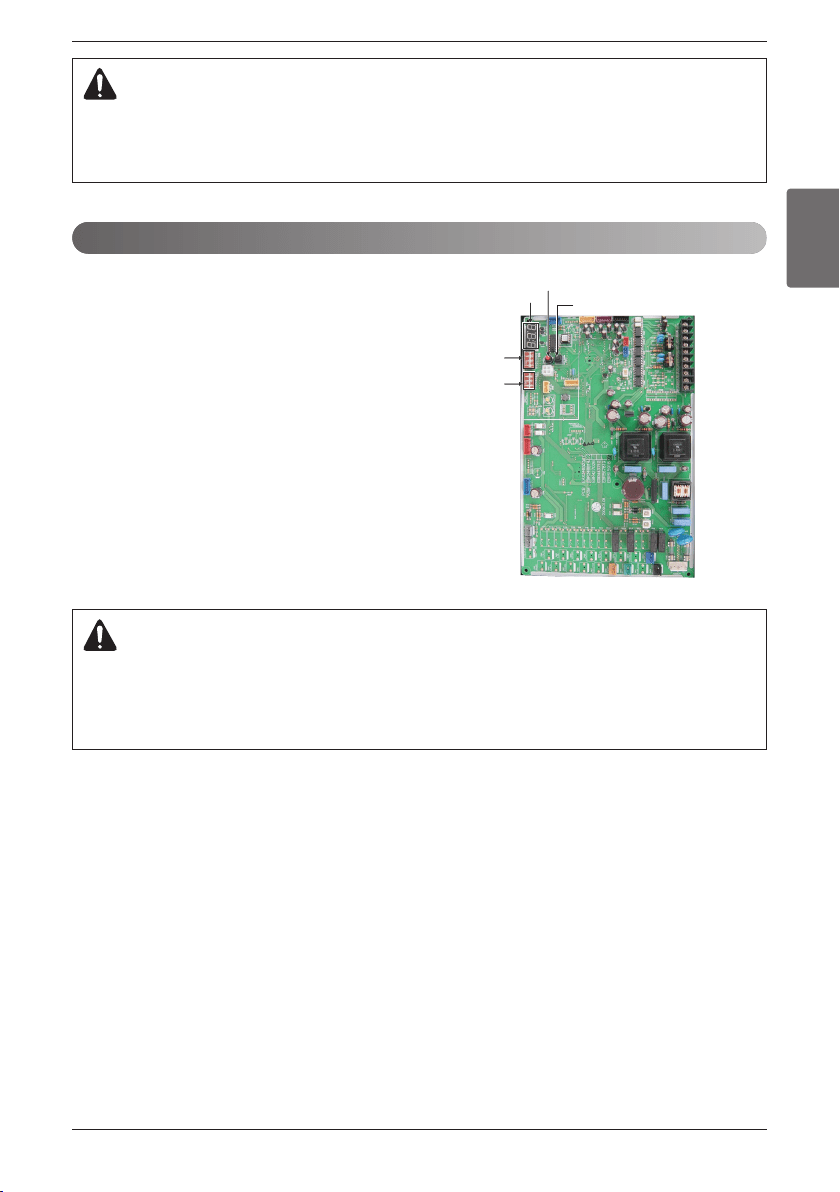
SW01B
(DIP S/W)
SW02B
(DIP S/W)
7 - Segment
SW02V
Auto addressing
SW01V
Data confirm
• The address of indoor units would be set by auto
addressing
1) Wait for 3 minutes after applying power supply
(outdoor unit, indoor unit).
2) Press the switch of the outdoor unit (SW02V) for 5
seconds.
3) A "88" is indicated on 7-segment LED of the outdoor
unit PCB.
4) For completing addressing, 2~7 minutes are required
depending on numbers of indoor unit connection set.
5) Numbers of indoor unit connection set whose
addressing is completed are indicated for 30seconds
on 7-segment LED of the outdoor unit PCB.
6) After completing addressing, address of each indoor
unit is indicated on the wired remote control display
window. (CH01, CH02, CH03, ............. CH06:
Indicated as numbers of indoor unit connection set.)
CAUTION
In replacement of the indoor unit PCB, always perform auto address setting again.
- If power supply is not applied to the indoor unit, operation error occurs.
- Auto addressing is only possible on the main PCB
- Auto addressing has to be performed after 3 minutes to improve communication.
Automatic Addressing
Loading ...
Loading ...
Loading ...