USER MANUAL
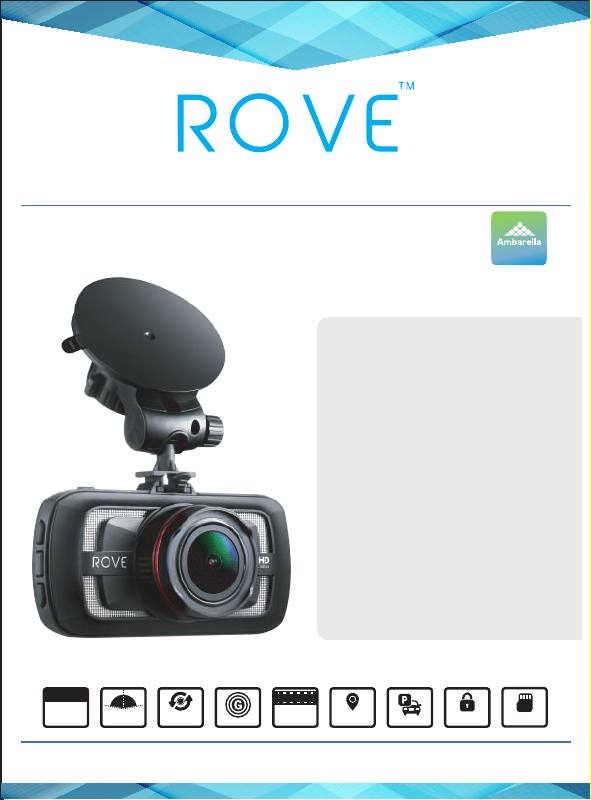
HD
QUAD
1440P@30fps
VIEW ANGLE
170
0
LOOP CYCLE
RECORDING
PARKING MODE
SENSOR
GPS
GEO-TAGGING
EMERGENCY
LOCK BUTTON
LANE DEPARTURE
WARNING SYSTEM
FORWARD COLISION
WARNING SYSTEM
ADAS
TRUTH BE TOLD
USER MANUAL
Model: A12-60
A12-A75
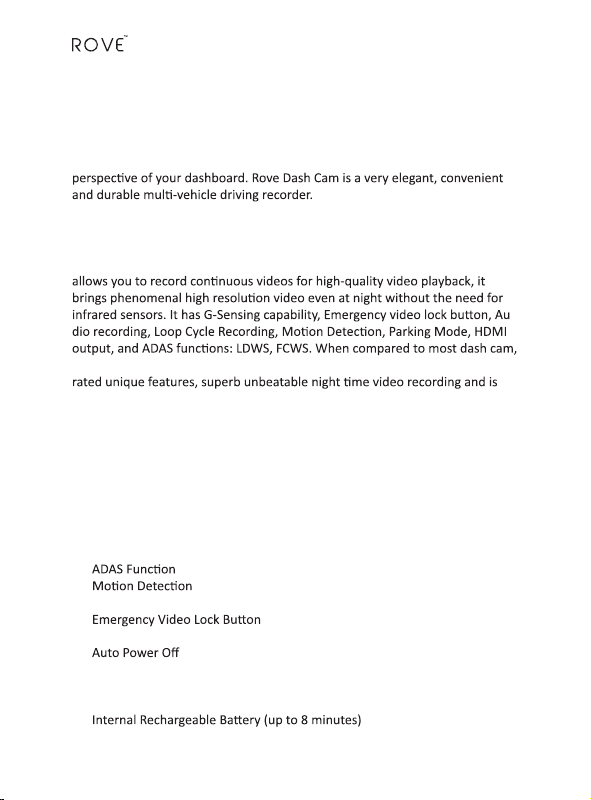
This user manual will give you
details on how to use, operate,
technical specifications and
precautions while in use. Before
use, please read this manual
thoroughly and fully understand.
Please keep this manual in a
safe place; it may take few times
to learn how to use ROVE
Dash-Cam and its functions.
Please do not hesitate to contact
us if you have any question?
Please visit
http://www.rovedashcam.com
for phone support information.
We are happy to help !!
www.rovedashcam.com
A12-A55
CLASS 10 MicroSD
512 GB MAX SUPPORT
Cls 10


USER MANUAL
INDEX PAGE #
INTRODUCTION 3
WARNINGS/PRECAUTIONS – SAFETY INFO. 4
UNIT STRUCTURE APPERANCE & BUTTONS: 5
BUTTONS AND INTERFACE INSTRUCTIONS 6 - 10
UNDERSTANDING STATUS ICONS 11 - 12
CHARGING & POWER ON/OFF INSTRUCTIONS 13
CAMERA OPERATION 13 - 17
3 – CAMERA MODES 18 - 21
3 – CAMERA MODE’S SETTINGS 21 - 25
SYSTEM SETTINGS 26 - 27
PRODUCT SPECIFICATIONS 28 - 29
LED STATUS INDICATOR & BATTERY INFO. 29
GPS & VIDEO PLAYER INSTALLATION 31 - 33
WARRANTY, SAFETY & LEGAL 34 - 36
TROUBLE SHOOTING 37 - 38
CONTACT US 39
Table of Contents:
INTRODUCTION
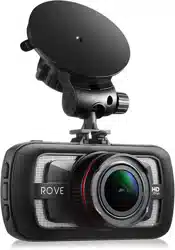
Thank you for purchasing ROVE™ A12-60 Quad HD 2560x1440P @ 30fps
Digital Vehicle Dash Cam (Automobile Black Box). This product provides high
quality image capture and irrefutable evidence for what goes on from the
Product Overview:
This product is a leading Quad HD Digital Vehicle Black Box Recorder. Equipped
with QUAD-HD 1440P @ 30fps with Ambarella A12-A55 processor which
-
this exclusive product design provides an elegant appearance, packed with top
very easy-to-use.
Features:
3.0” Color LCD Screen
Ambarella A12-A55 Chipset
QUAD HD 2560x1440P @ 30fps – 16:9
170° View Angle
Loop Cycle Recording
Split Record Mode
G-sensor
Parking Mode
512 GB Max Class 10 MicroSD Support
3
Built in Speaker & Microphone
GPS Geo-Tagging Device Included
Time, Date, Driver ID & Driving Speed Stamp Support

USER MANUAL
Warnings/Precauons: IMPORTANT SAFETY INSTRUCTIONS
WARNING: FAILURE TO COMPLY WITH THE FOLLOWING WARNINGS COULD
RESULT IN SERIOUS ACCIDENT, INJURY OR EVEN DEATH.
Do not put the unit in a damp environment. This machine is not designed
with waterproong features. Please do not expose to water of any kind,
including rain water.
Do not try to open the shell or try to repair it yourself. If the accessories
for this machine have any problem, please contact the seller for assistance.
This camera is intended to use inside motor vehicle. Don’t install it
where it will block the driver’s view of the road including mirrors or the
deployment of airbag.
Do not place the camera loose on top of dashboard or in-front of air bags.
Do not mount the camera where it can become distracon if it became
loose and falls of the windshield while driving.
Do not expose this machine to an excessive heat, dust or use any chemical
substance or cleaning solvent to clean this machine. Instead please use a
so, moist cloth for cleaning.
Pay careful aenon when cleaning the lens surface. Use a so, moist
cloth to clean the lens to avoid compromising video quality.
Removing the camera from the vehicle when not in use is recommended.
This prevents likelihood of the or exposure to excessive heat to prevent
damage to unit.
Do not operate camera while driving, or aempt to change any sengs
etc. Pull o the road rst and only do so when it is safe.
Exercise cauon while driving. ADAS funcons are an added safety feature
and should not be relied upon for your complete safety. Ulize cauon and
use your own judgment while driving and making decisions.
Some Countries or USA States prohibit drivers from mounng anything on
windshield or prohibit mounng on certain area of the windshield. It is
owner/operator’s responsibility to mount or use of this device in
compliance with local laws.
Do not leave the camera in direct sunlight for a long period of me or
where the temperature could go above 140°F (60°C).
4
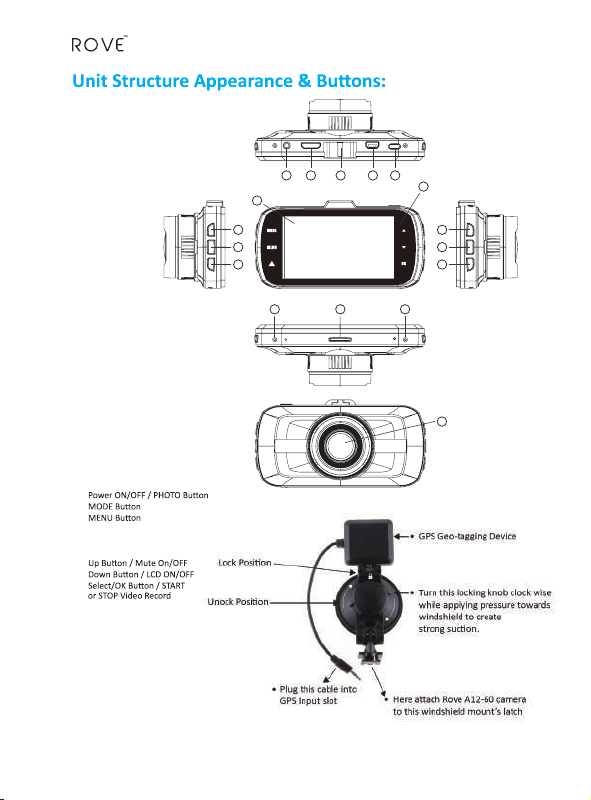
1) GPS Input
2) HDMI Output
3) Windshield Mount Latch
4) Mini USB Power Input/Data Output Slot
5)
6)
7)
8) Emergency Video Lock
9) 3.0” LCD
10) LED Status Light Indicator
11)
12)
13)
14) MIC
15) Micro SD Card Slot
16) Reset
17) Lens
1
14 15 16
9
10
2 3 4 5
6
7
8
17
11
12
13
5
USER MANUAL
1 GPS Input
GPS Input: This is where you plug in your external GPS Geo-Tagging device.
2 Mini HDMI Output
Connect mini HDMI output to HDMI HD Television
input to view HD Videos directly on your television.
See Page 16 & 20 for more details.
3 Windshield Mount Latch
Connect camera to windshield mount.
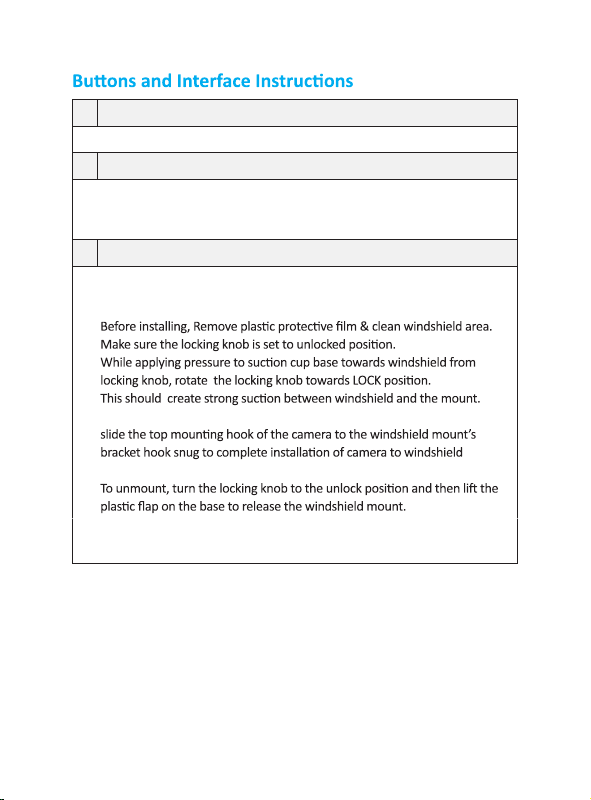
How to install Windshield Mount and Camera assembly?
(1)
(2)
(3)
(4) Now you can connect the camera with long mini USB power cable, then
mount.
(5)
6

•
•
Data Output: You can connect included mini-USB data cable, from
computer directly.
• P.S. (Please do NOT use “Windows Media Player” to play this high
bit- rate videos. We recommend downloading free VLC Media Player to
4 Mini USB Power Input/Data Output Slot
5
• Power ON/OFF: Press once to turn the camera ON. Press and HOLD to
turn the camera OFF.
How to take Photos?
• Press once while video is being recorded to take photo. You can also
•
P.S. (You can maximum take 50 Photos. Aer that you will have to
delete photos manually to take more photos. You can do so by
connecng camera to computer or by going in to photo mode's
menu sengs.
Toggle/Switch between Locked / Unlocked Files Folder:
• While in Playback Mode by pressing Power ON/Photo buon will toggle/
switch between locked and unlocked files folder.
enjoy seamless high quality vides from your ROVE Dash Cam.
Download Free VLC Media Player at hp://www.videolan.org
you can also use our CAR DV PLAYER to view videos. Please visit
www.rovedashcam.com to download it free.
7
Power Input: Connect included mini USB long DC Car charger to
provide power to the camera. When you start your car it will provide
power to camera. This will auto turn ON camera and auto start
recording video if Micro SD card is inserted. When you shut off your
car which will disconnect power, then internal baery will take over, it
will stop recording the current video. save that last video file safely
and it will auto turn OFF camera within few seconds automacally.
USER MANUAL
6
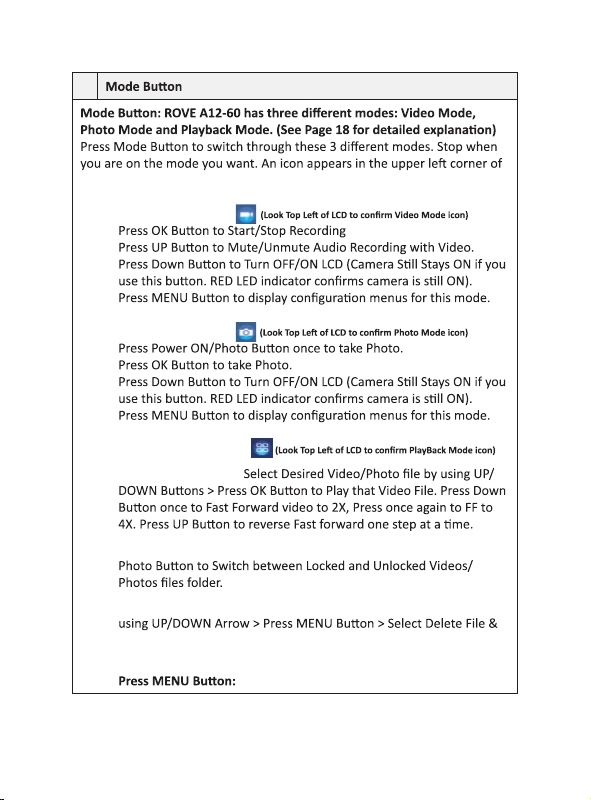
the screen for each mode.
While Under Video Mode:
•
•
•
•
While Under Photo Mode:
•
•
•
•
While Under PlayBack Mode:
• To Play Video/Photo:
• How to Switch between Locked / Unlocked Files: Press Power ON/
• To Delete One Video/Photo: Select Desired File to be Deleted by
Press OK > Select “Delete This File” & Press OK > Select “ √ ” & Press
OK to DELETE.
•
to go back to play back mode and exit.
8
7
While Under Video Mode:
While Under Photo Mode:
While Under PlayBack Mode: Press Menu Once to enter PlayBack
8
How to Lock the video that is currently being recorded Manually?
While Video is Being Recorded:
• Press Emergency Lock Once to Manually Lock the Current Video.
P.S. (1)
P.S. (2) Emergency Locked Videos will be saved under Video PlayBack
Mode, under “Locked Files” See. #6 for more details.
P.S. (3)
Event Locked videos will be marked in a seprate Folder name “EVENT”
9 LCD
3.0” TFT LCD Screen, 960x240P
10 LED
11
Press to scroll UP
While Video is Being Recorded: Press to Mute ON/OFF for Audio
Recording.
While in Playback Mode:
9
(1) (The manually locked video by pressing emergency lock
not be deleted by loop cycle Recording Funcon. It can only be deleted
manually)buon will
USER MANUAL
12
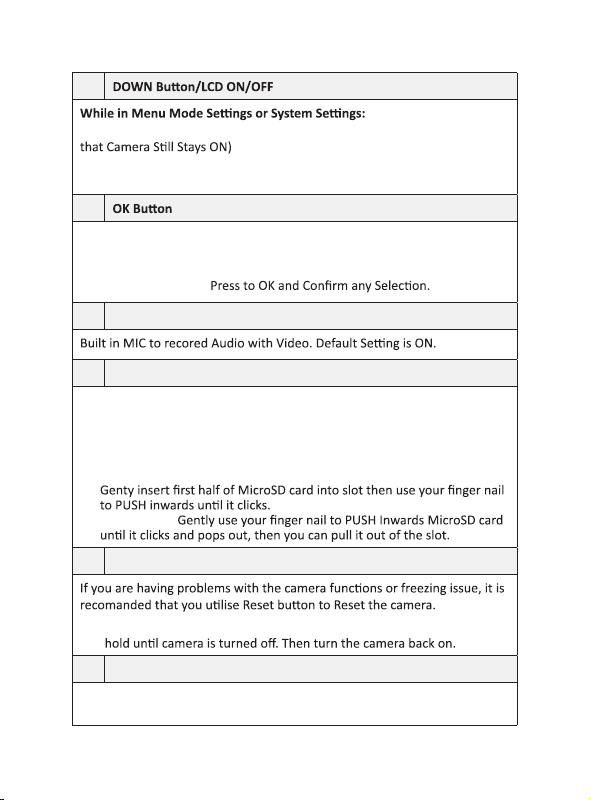
Press to Scroll Down
While in Video or Photo Mode: Press to Turn OFF/ON LCD. (Please Note
While in Playback Mode & Video is being played: Press once to Fast
Forward video to 2X, Press once again to FF to 4X.
13
While in Video Mode: Press Once to START / STOP Recording.
While in Photo Mode: Press to take Photo
While Under PlayBack Mode: Press to Select / Play Video or View Photo
While in Menu Mode:
14 MIC
15 Micro SD Card Slot
Mirco SD Card, MAX Support upto 512 GB.
How to Insert & Remove Micro SD Card?
• TO INSERT: First, Make sure you allign MicroSD Card correctly as
directed on camera slot. If card does not slide in smoothly do NOT force
inset it. Please re-check its correct allignment before proceeding.
•
• TO REMOVE:
16 How to Reset?
Insert a pin or paper clip into the reset slot while camera is ON, then press
and
17 Lens
170° Ultra Wide A+ Viewing angle with 6 layers of lenses for more ambiant
light capture with 4MP CMOS sensor.
10
We recommend SAMSUNG Class 10 or higher MicroSD card to prevent freezing of operang system.
(Beware of fake memory cards)
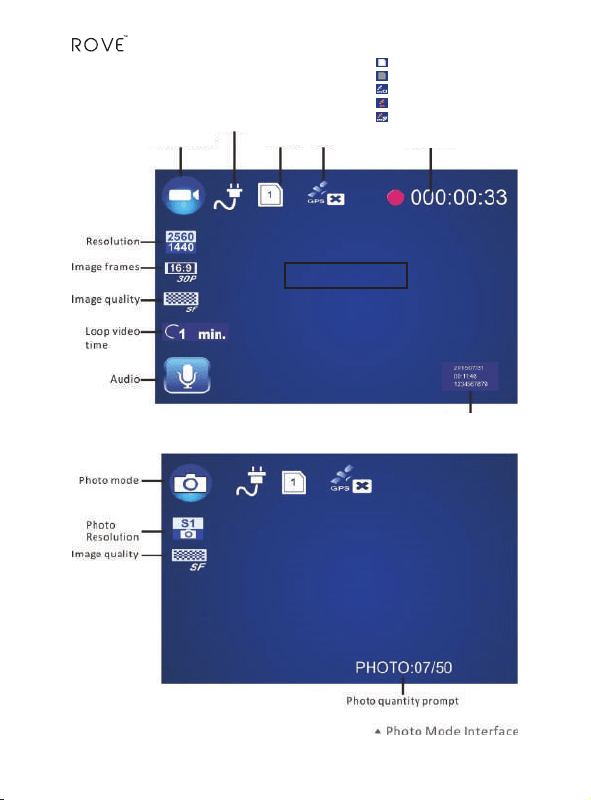
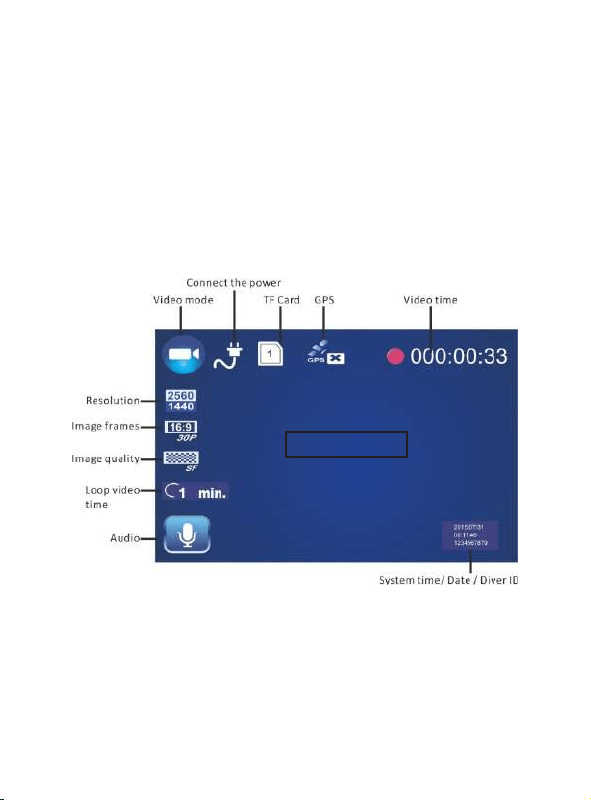
UNDERSTANDING STATUS ICONS:
Video Mode
11
Memory Card: GPS
Power cable connected
Video Mode Video Time
1
1
Memory Card Inserted Correctly
Memory Card BAD or NOT Inserted Correctly
GPS Cable NOT Connected.
GPS cable connected & Looking for Signal.
GPS is Connected Successfully & has Signal.
Video Stamps
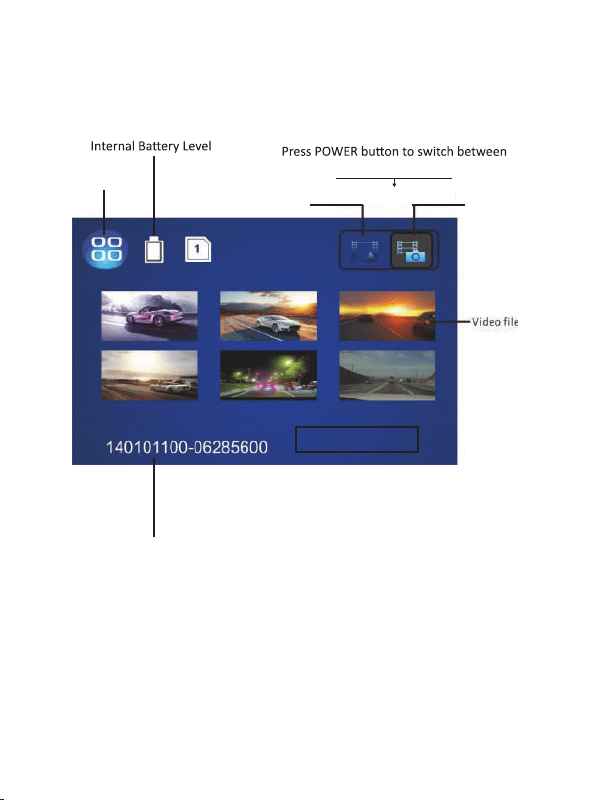
Playbak Mode
Power NOT Connected
Video File Name
these two folders.
Normal Files
FOLDER
Emergency LOCKED
Files FOLDER
Playback Mode
USER MANUAL
12
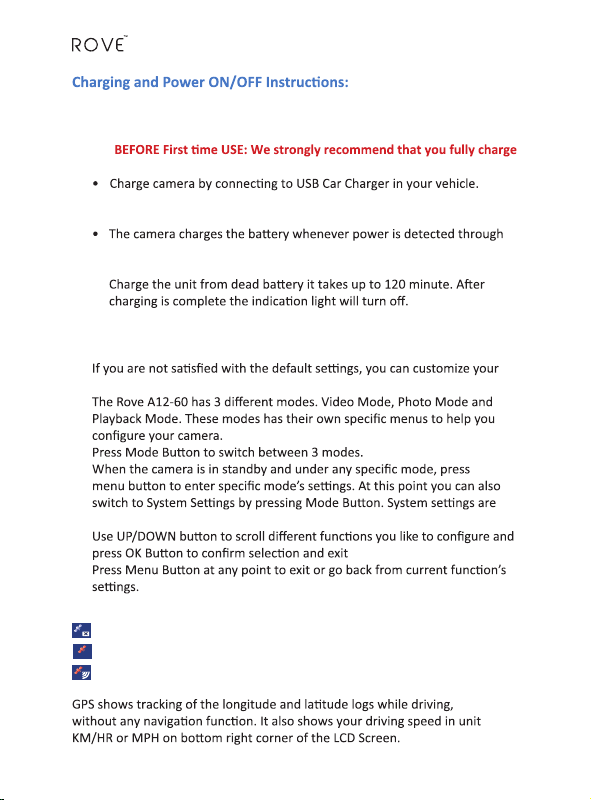
1. CHARGING:
•
your ROVE A12-60 Dash Cam for atleast 6 Hours to prevent any errors.
2. OPERATION:
SETTING UP YOUR ROVE DASH-CAM:
•
own through Mode and Menu.
•
•
•
common between all three modes.
•
13
you can also use your cell phone's USB charger to connect with included
cable and charge the camera. such as iPhone or Samsung's USB charger.
the mini-USB port.
• A solid blue light indicates: A Unit is currently being charged. To fully
GPS satellite icon on LCD represents as following.
(1) GPS Satellite icon with "X" under: NO GPS Connected
(2) GPS Satellite icon in RED: GPS is connected & Looking for Signal
(3) GPS Satellite icon in RED with RED & WHITE Signal Bars:
GPS is connected & have signal.
GPS
GPS
GPS
and also
stamps it to video file.
USER MANUAL
TURN ON/OFF YOUR CAMERA:
Auto power ON / OFF:
•
start recording once it receives power, e.g. when the car engine is started.
ROVE A12-60 Dash-Cam is already pre-configured to auto power on
itself once it loses power, e.g. when the c
• Start your car with ROVE Dash-Cam connected via mini-USB car charger
recording video if Micro SD memory card is already installed.
•
•
•
connected.
Manual Power ON/OFF: (TIP: User Paper clip to insert MicroSD Card)
•
start recording if camera is not plugged in with external power.
•
manually.
STORAGE & MEMORY CARD:
• The camera supports Micro SD card. Max Capacity 512GB
• We recommend that you use class 10 or higher Micro SD card to avoid
How to Insert & Remove Micro SD Card?
• TO INSERT: First, Make sure you allign MicroSD Card correctly as directed
on camera slot. If card does not slide in smoothly do NOT force inset it.
Please re-check its correct allignment before proceeding.
•
clicks.
• TO REMOVE: Gently PUSH Inwards MicroSD card unitl it clicks and pops
out, then you can pull it out of the slot.
14
(TIP: User Paper clip to easily insert MicroSD Card)
RECORDING A VIDEO:
•
to Start/Stop video recording.
•
loses power, i.e. when the car engine is starts/stopped.
RECORDING MUTE VIDEO:
• When the camera is in either standby or while it is recording, you can
PLAYBACK ON CAMERA:
• To Enter Playback Mode: When camera in in standby mode, press Mode
• To Play Video:
• Fast Forward:
video and return to the tumbnails view of videos/photos.
15
between these two folders.
Playback Mode
Locked File
Normal File
Playback Mode.
USER MANUAL
• To View Photo:
Ok to view photo full screen. OK again to return to thumbnail view.
• How to Switch between Locked File / Normal File: While in playback
• To Delete One Video/Photo: Select Desired File to be Deleted by using UP/
Select “Delete This File” & Press OK > Select “ √ ” & Press OK to DELETE.
• To Delete ALL Videos/Photos:
Select “Delete All Files” & Press OK > Select “ √ ” & Press OK to DELETE
• to go back to Playback Mode Home from any point in
this mode.
TAKING A PHOTO:
•
photo/snapshot.
•
photo.
• You can take maximum of 50 photos. You have to delete them manually to
be able to take more photos again.
PLAYBACK ON TV:
• Connect camera to TV or Monitor with included HDMI Cable.
• Camera also needs external power for connuous playback.
You can user your cell phone's charger to provide power also.
• Once you connect to TV/Monitor, Operaon is the same as playback on camera.
PLAYBACK / COPY FILES ON A COMPUTER:
• When you wish to review the videos or photos on computer, a SD card reader
on your PC or LAPTOP is required. Please use included SD card adapter for
your ROVE Dash-Cam directly to your computer via provided mini-USB
data cable while memory card is already inserted into the camera. When you
displayed on LCD.
16

• Car DVD Player soware is already pre placed inside camera. To install
the soware rst me on your computer, connect the camera to
computer by provided mini-USB data cable. Aer connecon you will see
two separate added external drives (e.g. drive “F” & “G”, depending on
how many other drives already preinstalled on your computer, drive
names can vary). One of the Drive here, e.g. “G” will have folder named
“PLAYER”. Double Click the le to begin installaon of Car DVD Player
soware. Follow on screen direcons. The player also displays GPS locaon
and speed as video plays if video was recorded while GPS Geo-Tagging
device connected.
• To access your ROVE Dash-Cam videos on your computer double click on
other drive “F”. This Folder should have two separate folders insude. (1)
DCIM (Contains Unlocked Videos) (2) EVENT (Contains Locked Videos).
• To play your ROVE Dash-Cam videos we recommend “VLC Media Player”.
You can download this free soware from www.videolan.org.
• You can also remove your Micro SD card and insert into SD Adapter, then
insert it to the computer to view or copy your video/photo les directly to
your computer.
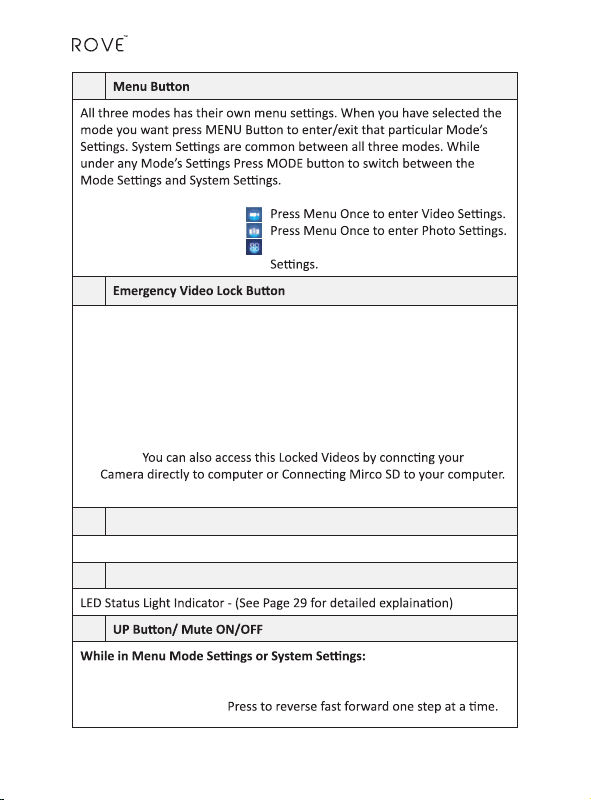
MANUAL EMERGENCY LOCK BUTTON TO PROTECT VIDEO:
How to Lock the video that is currently being recorded Manually?
While Video is Being Recorded:
• Press Emergency Lock Once to Manually Lock the Current Video.
P.S. (1) (The manually locked video by emergency lock buon will not be deleted
by loop cycle Recording Funcon. It can only be deleted manually)
P.S. (2) Emergency Locked Videos will be saved under Video PlayBack Mode, under
“Locked Files” See. #6 for more details.
P.S. (3) You can also access this Locked Videos by conncng your Camera directly
to computer or Connecng Mirco SD to your computer. Event Locked videos will
be marked in a seprate Folder name “EVENT”
• The camera supports automac loop cycle recording funcon which means that
the oldest video le will be over-wrien by new video les automacally when
the memory card is almost full unless the video is protected by Emergency Video
Lock buon or by G-Sensor automacally (Read-only le aribute).
• The camera can auto protect videos if the G-sensor force exceeds the congured
threshold sengs under video menu. You can also manually protect the video
by pressing the Emergency Video Lock Buon for the video that is being currently
recorded. Please note you can’t lock a le that has already been recorded.
17
USER MANUAL
18
3 - CAMERA MODES:
• ROVE Dash-Cam has three dierent Modes. (1) Video Mode, (2) Photo
Mode, and (3) Playback Mode.
• Press the MODE Buon to switch between these three modes. An icon
on top le LCD indicates the current mode you are in.
• If the video is being recorded then press OK buon to Stop Video
Recording rst before you can switch between all three modes.
(1) Video Mode: While Under Video Mode
(Look Top Le of LCD to conrm Video Mode)
Video Mode
• Video mode lets you record live videos and store them on the installed
MicroSD Memory card.
• Press OK Buon to Start/Stop Recording
• Press UP Buon to Mute/Unmute Audio Recording with Video.
• Press Down Buon to Turn OFF/ON LCD (Camera Sll Stays ON if you use this
buon. RED LED conrms camera is sll ON).
•
•
3-modes, See Page 26.)
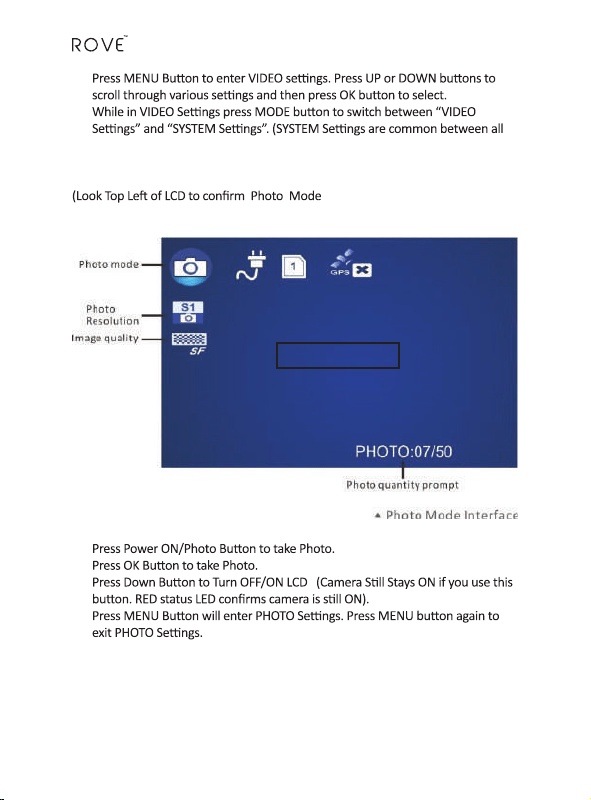
(2) Photo Mode: While Under Photo Mode
•
•
•
•
Photo Mode
19
USER MANUAL
20
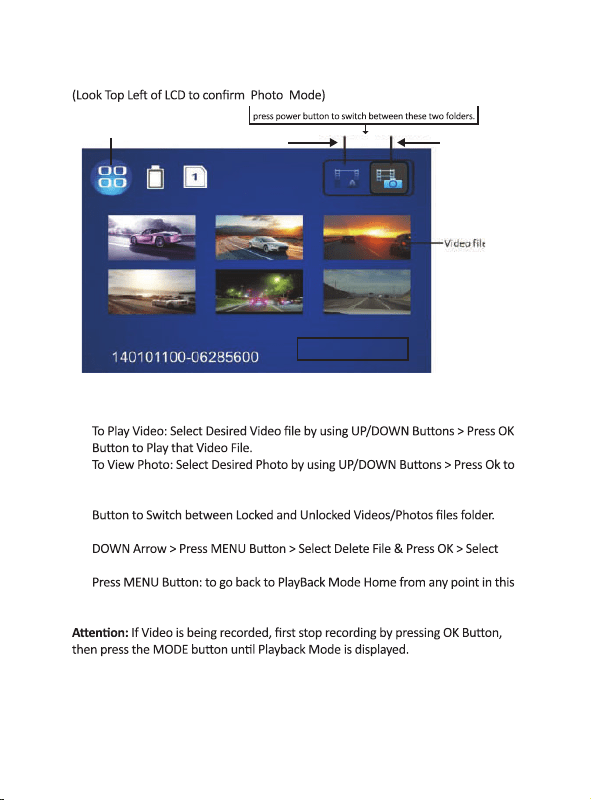
(3) Playback Mode: While Under PlayBack Mode:
•
•
view photo full screen.
• How to Switch between Locked Files / Normal Files: Press Power ON/Photo
• To Delete One Video/Photo: Select Desired File to be Deleted by using UP/
“Delete This File” & Press OK > Select “ √ ” & Press OK to DELETE.
•
mode.
Playbak Mode
Playback Mode
Locked File
Normal File
PLAY VIDEOS ON TELEVISION:
You can connect your ROVE™ A12-60 Dash Cam to your HD television
1.
2. Connect your Dash Cam with Mini-HDMI Cable to your HDTV’s HDMI
connector.
3. Power ON your camera and also your HDTV.
4. At this point the television screen should display camera’s screen
4 – SETTINGS
•
•
(Explained on Page 26)
•
•
•
•
and exit.
21
5.
6.
and HDTV safely.
USER MANUAL
22
A. 3-DIFFERENT MODES SETTINGS:
1.
Video RESOLUTIONS:
take more storage space.
• 2560x1440(30fps-16:9)
• 2560x1440(30fps-16:9) HDR
• 2304x1296(30fps-16:9)
• 1920x1080(60fps-16:9)
• 1920x1080(30fps-16:9)
• 1920x1080(30fps-16:9) HDR
• 1280x720(60fps-16:9)
VIDEO QUALITY:
• S. Fine – Super Fine (Highest bit-rate videos – Larger in memory size)
• Fine – Good (Medium bit-rate videos)
• Normal (Lower bit-rate videos – Smaller in memory size)
ADAS DETECT*:
ADAS = Advanced Driving Assistant System
2304*1296)
2. LDWS* - Lane Departure Warning system: a lane departure warning
system is a mechanism designed to audibly warn a driver when the vehicle
begins to move out of its lane on freeways and roads. These systems
are designed to minimize accidents by addressing the main causes of
3. FCWS* - Front Collision Warning system: FCWS detects the vehicle
ahead and issues early warnings to alert driver audibly for taking a dodge
or braking maneuver prior to collision through CMOS camera mounted on
the windshield. It helps driving safety by keeping appropriate distance
from vehicle ahead.
OPTIONS: ON, OFF
MOTION DETECT:
•
•
•
manually if the unit is recording), it will record when anything moves
in front of the camera. It will stop recording when there are no moving
objects. If the image in front of camera is constantly changing, the unit
before using this feature.
OPTIONS: ON, OFF
G-SENSOR SENSITIVITY:
•
over the threshold value is detected, the current video that is being
PARKING MODE:
•
which can provide power up to 8 minutes if camera is fully charged.
OPTIONS: ON, OFF
23
“Moon Detecon” to ON and disable the “Back Light Display” funcon
in the menu sengs.

USER MANUAL
24
SPLIT RECORD MODE (Loop Cycle Recording):
• This funcon will split video les to desired conguraon of
1-min, 3-min or 5-min.
• When you select either 1-min, 3-min or 5-min, which will TURN
ON Loop cycle funcon. This allows old video les to be replaced
automacally with new video les so it can connuously record
in an innite loop overwring the oldest video le with the
newest les so you don’t have to manually delete videos from
memory card when it is full.
• By choosing “OFF” when memory card becomes full, it will
display “CARD FULL” and it will NOT allow you to record any
further unl you manually delete all video les.
OPTIONS: 1-min, 3-min, 5-min, OFF
MIC (In-Built Microphone):
• Rove Dash-Cam has built in microphone. You can choose the
microphone on/o as per your need.
OPTIONS: Mic ON, Mic OFF
ANTI-FLICKER:
• Here you can set the sensor icker frequency to t your AC
power frequency and reduce the eect of ickering lamps.
OPTIONS: 60Hz, 50Hz
2. Photo Mode Sengs:
PHOTO RESOLUTION:
• Here you can choose the photo resoluon you want to use; higher
resoluon photos will take more storage space.
OPTIONS: S1= 4M (2688x1512 16:9); S2= 8M (3264x2448 4:3); S3= 14M
(4384x3288 4:3); S4= 16M (4608X3456 4:3)
PHOTO QUALITY:
• Here you can adjust the photo quality. The quality will aect photo grains,
sharpness, and contrast and so on. Beer quality photos will take more
storage space.
OPTIONS: Super Fine, Fine, Normal
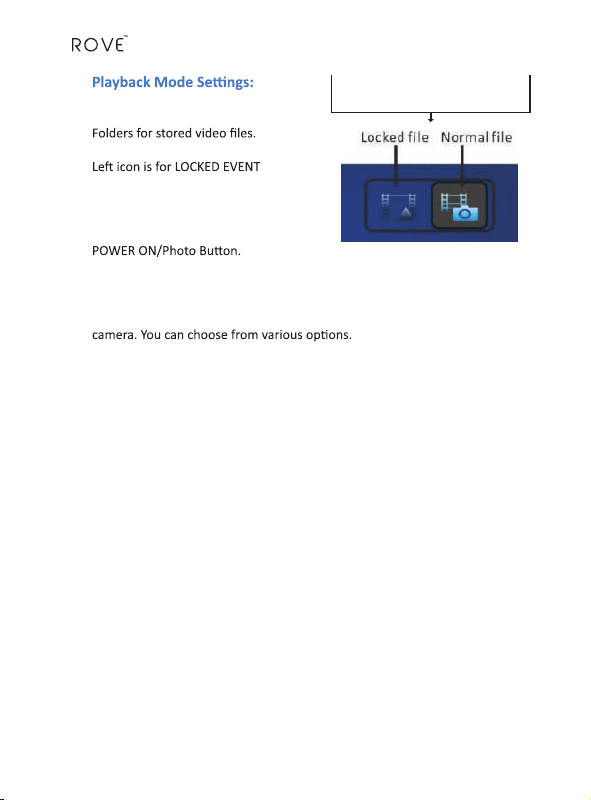
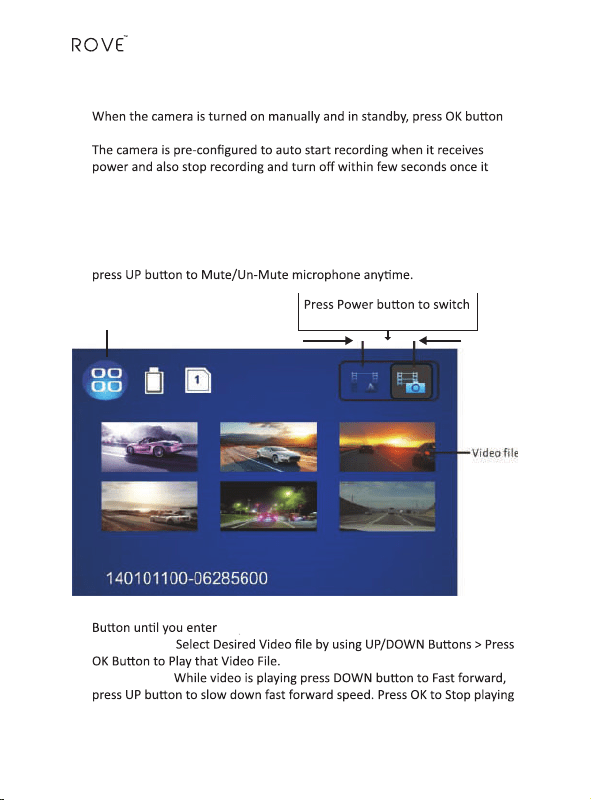
3.
• In this mode there are Two Main
(see two icons on top right corner)
Press POWER buon to switch
between these two folders.
•
marked Video Files. Right icon is for
NORMAL Videos & Photo Files.
• You can switch/toggle between these
two folders by pressing
VIDEO PLAY:
• Here you can choose to play your recorded videos directly on your camera.
You can also use this feature to view photos that you took with this
OPTIONS: Video Play ONE, Video Play ALL, Video Repeat ONE, Video
Repeat ALL
DELETE FILES:
• Here you can also delete Single Video/Photo File or delete all Files.
OPTIONS: Delete This File, Delete ALL Files.
25
USER MANUAL
26
B. SYSTEM SETTINGS:
LANGUAGE SETTING:
• Here you can choose the language of your choice.
German, Polish
DRIVER ID SETTING:
•
be stamped on the videos. (9 characters or numbers).
OPTIONS: e.g. ABCD12345
TIME SETUP:
•
OPTIONS: YYYY/MM/DD HR:MIN
TIME ZONE SET:
•
is connected.
•
OPTIONS: ON, OFF OPTIONS: -12 to +12
STAMP SETTING:
•
OPTIONS: Date, Time, Driver ID
FORMAT:
• Here you can format the currently inserted card into the camera.
• IMPORTANT: Make sure the "me zone set" is turned to "ON" on far right side.
You can access this by pressing mode -> UP/Down Buon -> OK buon.
Please visit "hps://greenwichmeanme.com/me-zone/usa/" to
find out your correct GMT me zone seng.
CAUTION:
OPTIONS: Format Card?; Choose “√” or “X”

DEFAULT SETTING:
• Here you can restore all rmware sengs to the factory default sengs.
OPTIONS: Choose “√” or “X” (if choose “√”, It will require reboot of system)
AUTO POWER OFF:
• When ROVE Dash-Cam is not recording video and is in standby/idle, it will
turn o camera automacally aer desired seng me.
OPTIONS: OFF, 1-min, 3-min, 5-min
CARD VOLUME:
• Here you can check the Micro SD memory card total size in MB,
used space and reserved (free) space.
OPTIONS: Total Card Volume, Used Space, Reserved Space
BEEP SOUND SETTING:
• Here you can choose if you like to hear beep sound for every buon you
press to conrm selecon audibly.
OPTIONS: ON, OFF
BACK LIGHT OFF SETTING (LCD Auto OFF):
• By selecng conguraon of 1-min, 3-min or 5-min will allow your LCD
to be auto turn OFF aer camera is turned on and started recording to
save power or from night/day me distracon. Choosing OFF will keep LCD
ON connuously.
OPTIONS: OFF, 1-min, 3-min, 5-min
OVER SPEED WARNING SETTING:
• Here you can dene your desired driving speed. If GPS is plugged in then
camera will calculate your current driving speed and give your audible
warning if you are driving over the speed limit of your desired choice.
OPTIONS: OFF, 70Km, 80Km, 90Km, 100Km, 110Km, 120Km, 140Km
VIRSION INFO (Firmware Version):
• Here you can nd the current version of the rmware in your camera. You
may need this informaon when you are trying to upgrade the camera to a
later rmware.
27
USER MANUAL
Chipset / Sensor Ambarella A12-A55 / OV4689 - 4MP CMOS
Indicator LED Light LED is Flashing RED when recording, Flashing
Blue/Purple when recording and charging, Solid
Blue when charging, Solid Red when standby.
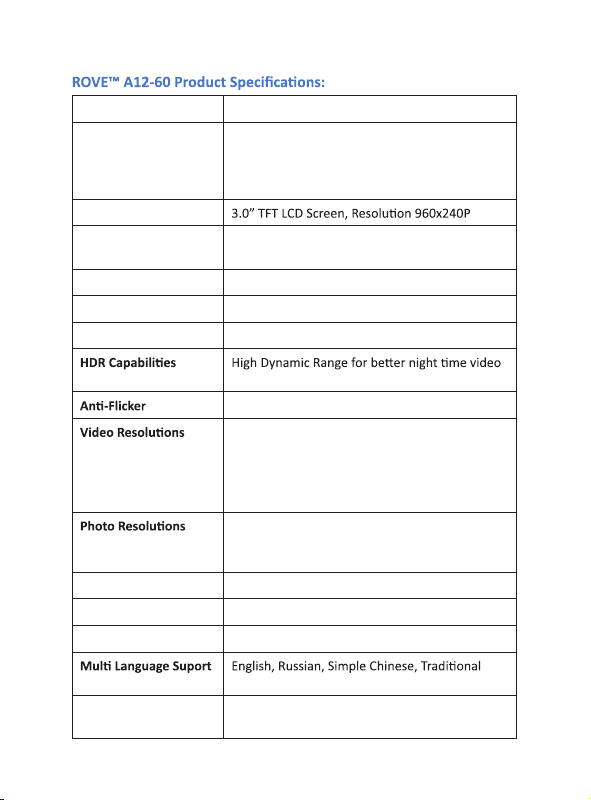
LCD Screen
Lens Angle 6 Layers Glass with HDR, 170° Ultra Wide A+
Viewing Angle
Lens Aperture F2.0
Focal Distance F=2.8mm
Decode Format H.264
recording.
60Hz, 50Hz
Six Modes:
2560x1440(30fps-16:9); 2560x1440(30fps-16:9)
HDR; 2304x1296(30fps-16:9);
1920x1080(60fps-16:9); 1920x1080(30fps-16:9);
1920x1080(30fps-16:9) HDR
Four Modes: S1= 4M (2688x1512 16:9); S2= 8M
(3264x2448 4:3); S3= 14M (4384x3288 4:3); S4=
16M (4608X3456 4:3) JPEG / MP4
Photo/ Video Format JPEG / MP4
AV Interface / TV mode Mini HDMI OUT / NTSC or PAL
Memory card TF (Support Max 512GB)
Chinese, German, Polish
G-Sensor 3-Axis Impact Sensor to protect and lock current
video
28
Moon Detecon Support
Park Mode Support
Year/Month/Day/
Hour/Minute
Support
MIC / Speaker Built-in Mic for Audio / Built-in speaker for video
playback
GPS GEO-Tagging Support, GEO Tagging Device Included
ADAS Funcon LDWS, FCWS
Mini USB Funcon 1: Storage 2: Charging
Power Interface 5V 1.5A
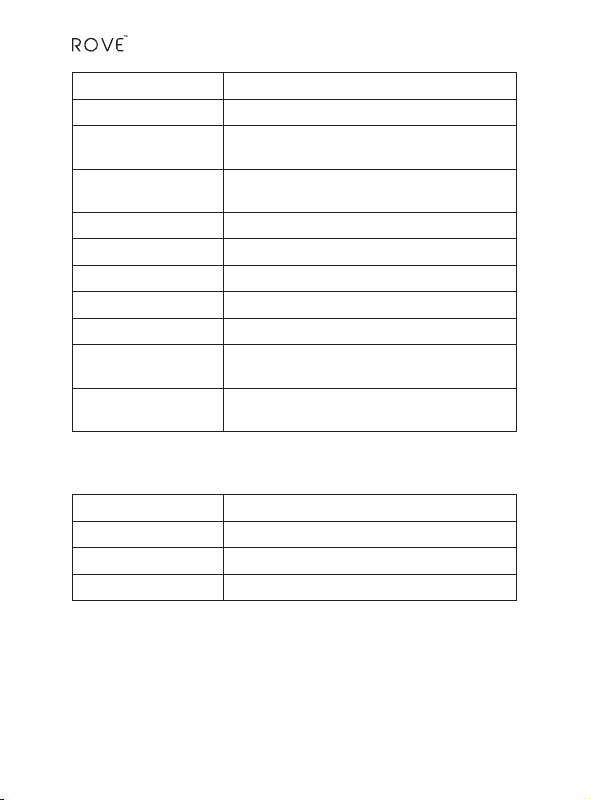
Baery Built in Li-ion Baery, 3.7V - 240mAh, 0.888Wh
Temperature Guideline Operang Temp. -22°F ~ 176°F; Storage: -4°F ~
158°F; Working Humidity: 10 ~ 90%
Operang System
Supported
Windows 2000/XP/Vista/7/8/10; MAC OS 10+
Solid Red System ON / Standby
Blinking Red Recording & Internal Baery Fully Charged
Solid Blue Charging
Blinking Blue / Purple Recording & Internal Baery Charging
LED Status Light Indicator
29
USER MANUAL
Temperature:
•
• StorageTemprature: -4°F (-20°C) ~ 158°F (70°C)
• Standard Working Humidity: 10 ~ 90%
•
• Do not expose this camera to extreme high heat, direct sunlight,
• Do not use in humid, wet and/or corrosive environment.
•
responsibility to operate it correctly.
•
properly.
30
This Product contains Lithium-ion inbuilt baery. With a full charge baery
should last upto 8 minutes. Internal baery is NOT meant to last long me.
The higher the video resoluon you choose the more power it will consume,
hence it will last short duraon, and the lower video resoluon you choose
the less power it will consume, hence it will last longer.The purpose of
in-built baery is to save the last video file safely without any data loss and
turn off the camera when power gets disconnected e.g. when you turn off
your car. Another purpose is parking mode. When your car vibrates by
impact and vibraon acvates G-sensor seng range then camera will turn
on and start recording on baery for 1-minute, lock video file and then auto
turn off automacally.
Following are approximate internal baery lasng me when it is fully
charged.:
Video Resoluon Approximate Time
1440P @ 30fps 2 - 3 minutes
1080P @ 30fps 4 - 5 minutes
720P @ 60fps 7 - 8 minutes
• Before viewing your video with GPS trace, Please install Car DVD Player
For most current Player or Soware Please visit www.rovedashcam.com to
download CAR DV PLAYER for PC or MAC.
•
to computer USB by provided mini-USB data cable. Camera LCD displays
separate added external drives (e.g. drive “F” & “G”, depending on how
many other drives already preinstalled on your computer, drive names
can vary). One of the Drive here, e.g. “G” will have folder named “PLAYER”.
•
video also.
31
USER MANUAL
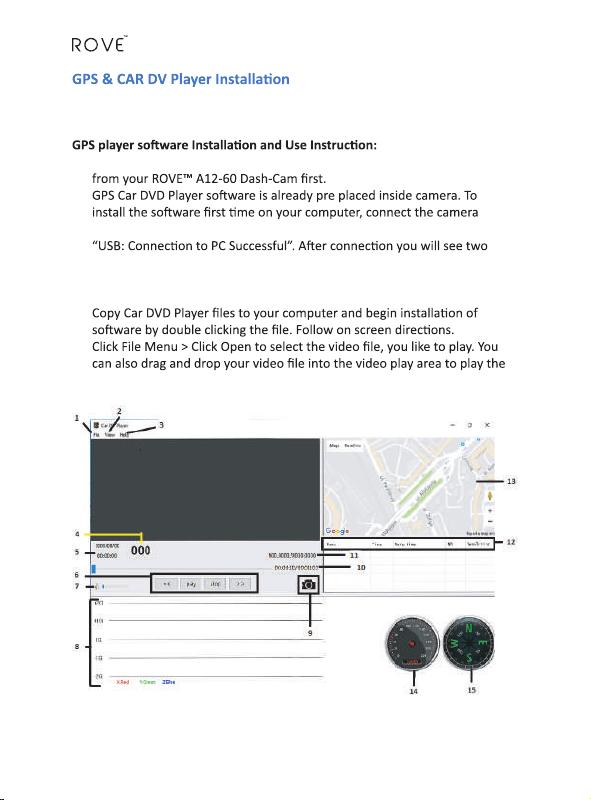
1 FILE
Click to open desired video le to be played.
2 VIEW
Congure: Language, Maps & Speed Units
3 HELP
About. Contains soware version & copyright date.
4 Driving Speed
This is where your driving speed will be displayed.
5 Date & Time
Shows Date & Time of video was recorded
6 Playback Controls
• Reverse
• Play
• Stop
• Fast Forward
7 Volume Control
Slide Right or Le to Increase or Decrease Volume
8 G-Sensor Indicator
This is where you can measure camera movement that is caused and recorded
by G-sensor force. I.e. when vehicle hits pot-hole or bump you can see it here.
9 Snap Shot
• Here you can Pause the Video, then click Camera/Snap Shot buon to take
a snap shot.
• To View the snap shot please go to, C: / USERS / PUBLIC / PICTURES / S
NAPSHOTS
• Click on Snapshots to view your snap shot.
32
10 Playback Time
This is where your video play back me is shown.
11 GPS Coordinates
These are your coordinates longitude and latude recorded by GPS Geo
Tagging Device.
12 Past Viewed Files
These are you previously viewed les. Click on it to view them again.
13 Map Locaon
Maps showing vehicle’s driving route recorded by GPS Geo
Tagging Device based on coordinates.
14 Vehicle Speed
Speed of vehicle recorded at specic point of me.
15 Vehicle Direcon
Direcon at vehicle was driving at specic point of me.
33

USER MANUAL
One Year Limited Warranty:
We at ROVE™ would like to provide One (1) full year of limited warranty for
your product from the date of purchase to be free from defects in materials
and crasmanship.
IMPORTANT: Please save your warranty/serial number card as an evidence.
Proof of original purchase is required for any warranty service. (Online order
receipt is also accepted)
Warranty Terms Condions:
1. The warranty is conned to the rst purchaser of the product and is not
transferable.
2. Service / Repairs during warranty period shall be carried out by company
authorized personal only.
3. It is the responsibility of the purchaser to bring the product to the
authorized service center at purchaser’s cost and risk.
4. The company will not be liable for any hardware and / or data loss
arising from the use of any third party soware whether downloaded or
otherwise.
5. In the event of repairs and / or replacement of any part(s) of the product
this warranty will remain in force only for the unexpired period of the
warranty.
6. In case of any physical damage to the product and / or misuse detected
by the Authorized service center personal, the warranty be void
and service / repairs will be done on chargeable basis only and subject to
availability of parts.
7. The company’s obligaon under this warranty shall be limited to repair or
providing replacement of part(s) only. The maximum claim(s) if entertained
by the company will be subject to the maximum retail price of the product
purchased or the purchase price, whichever is lower and on producon of
original proof of purchase.
8. During the warranty period in the event of any unforeseen circumstances
where spares not available a commercial soluon in lieu of repairs will be
calculated based on company’s prevailing depreciaon rules and the same
will be binding on the purchaser.
34

9. Product specicaons are subject to change without noce.
All trademarks, logos, brands and product names are properes
of their respecve owners. All product features specied are as per ideal
test condions. No claims / damages shall arise directly or indirectly for
nonperformance / under performance of one or more features specied.
MRP is subject to change from me to me due to various factors.
LIMITATIONS / DISCLAIMER OF WARRANTY / LIABILITY:
1 Company shall not be liable/responsible directly or indirectly for any
claim for compensaons, damages, any losses etc. under this “Limited
Warranty” due to inconvenience, loss of me, loss of prots, loss of business
opportunity, loss of data, loss of goodwill, work stoppage, any personal and
/ or commercial loss, compensaon for mental agony, anxiety etc. resulng
from the use of the product(s) or any direct or indirect loss of any nature
whatsoever (incl. any personal injury or death).
2 Except for the warranes set forth herein, company disclaims all other
warranes, expressed or implied or statutory, including but not limited to the
implied warranes of merchantability or tness for a parcular purpose.
3 The maximum liability of company under any circumstances shall be limited
to an amount equal to the invoice amount paid by the purchaser to company
or a company authorized reseller for the Product(s).
4 Company shall not be liable directly or indirectly for any claim for
compensaon if the Product has been exposed to moisture and / or dampness
and / or extreme thermal and / or extreme environmental condions or to
rapid changes in such condions, to corrosion, to oxidaon, to spillage of food
or liquid or to inuence from external chemical products.
ROVE™ (hereinaer referred to as “the company”) guarantees to the
purchaser that this product carries a warranty for the period menoned
above, commencing from the date of purchase.
35
USER MANUAL
Safety & Legal Aspects:
prohibited. ROVE™ reserves the right to add, modify or delete, any of the
refer www.rovedashcam.com
• Please check your local or state laws before using in car recording device.
It is user’s responsibility to comply with all local and state laws.
•
obstruct your view while driving.
•
•
Alwasys use your own judgement in making decision while driving.
36
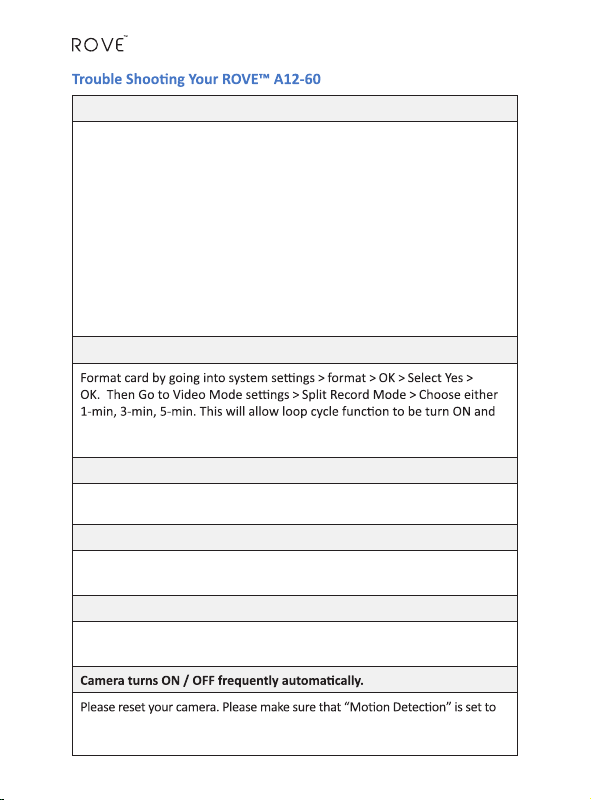
Camera does not turn ON
Error/Message “Card Full”
it will keep recording over and over. See Page 24, SPLIT RECORD MODE for
more details.
Camera Freezing/Lagging or Crashing.
Please make sure you are only using class 10 or above microSD memory card.
Insert paper clip into reset. Restart with another microSD card and try again.
Video is fuzzy
Please make sure the lens of camera is clean and there is no dirt on
windshield also.
Camera gets HOT
It is normal for your camera to run slightly hot. Please see temperature
guidelines on page 30.
OFF. Also Please make sure “Parking Mode” is also set to OFF. Please see page
23 for more details.
37
Please try following steps.
1. Please plug in the power cable
2. Use a paper clip to reset the camera. Insert a paper clip into reset slot,
then press and hold it for 10 seconds.
3. Remove memory card by pressing inwards, which clicks and then pops out.
You can also use a paper clip to press memory card inwards since it is small.
4. Remove power cable, press reset once more.
5. Insert memory card by align it correctly and press inwards unl it clicks.
6. Now insert power cable. This should turn on the camera and start recording.
(Please do not plug in with data cable on computer USB) instead, use your
iPhone or other USB to connect to the power. Or plug the cable from
your the car's 12V outlet.
USER MANUAL
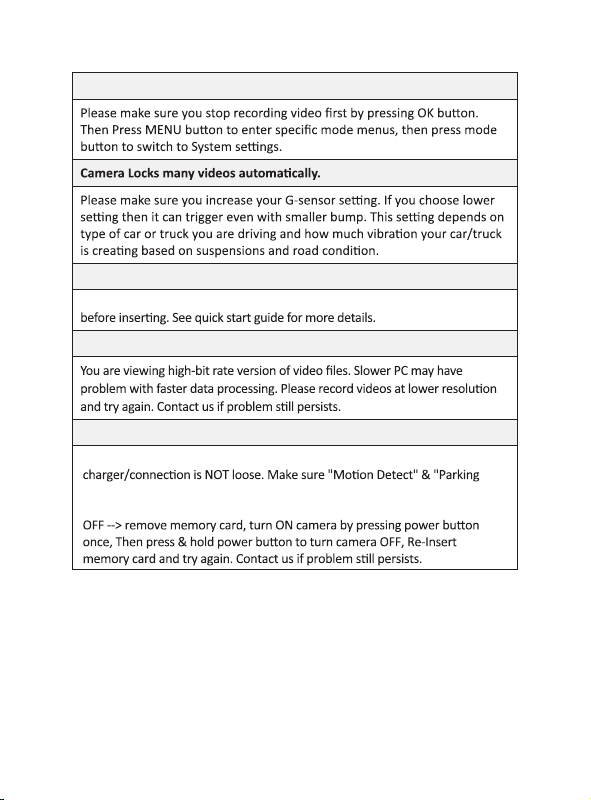
I am unable to access MENU
Micro SD Card is crooked or not going in slot easy
maPlease ke sure you align microSD card correctly as symbol drawn above slot
My Video playback on PC is lagging.
38
different length of videos
Mode" is set to OFF.
Reset camera white camera is ON, While camera is turned
Camera turns OFF itself in the middle of recording or it records
Please make sure the power supply or DC cigaree

Please feel free to contact our world class support at help@rovedashcam.com.
Most e-mails are typically replied within 4-6 hours. However all quesitons
39
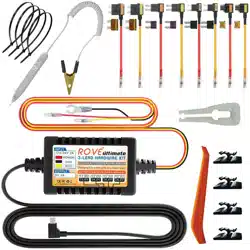
Box Contents:
1 x ROVE
TM
Dash Cam
1 x Dual USB Car Charger
1 x Long Car charging cable
1 x Mini USB Data Cable
1 x Mini HDMI Cable
1 x GPS Geo Tagging Device
1 x User Manual
1 x Quick Start Guide
One Year Warranty
1 x 360 Rotang Car Mount

USER MANUAL
A BIG THANK YOU!!
Thank you for purchasing your new ROVE™ A12-60 Dash Cam. We hope you
rovedashcam.com. 99% of all setup problems can easily be resolved and
In the unlikely event that we can’t help, we’re always happy to provide full,
hassle-free refund. We just want our customer to be happy and proud to use
ROVE™ Dash Cam!
There is no perfect product, however we will always do our best to provide
perfect customer service to you.
40
A Great care was taken while creang this user manual.
It is possible that there may be minor mistakes or there may be some typos.
We apologize in advance for that.Please visit our website for latest and updated
user manual if available. We also frequently update other great contents that is
very useful to our customers.
TRUTH BE TOLD
www.rovedashcam.com
help@rovedashcam.com
Printed in China