Copyright (C) 2023, All Rights Reserved.
USER MANUAL
USER MANUAL
www.rovedashcam.com
Please Read
Please Read
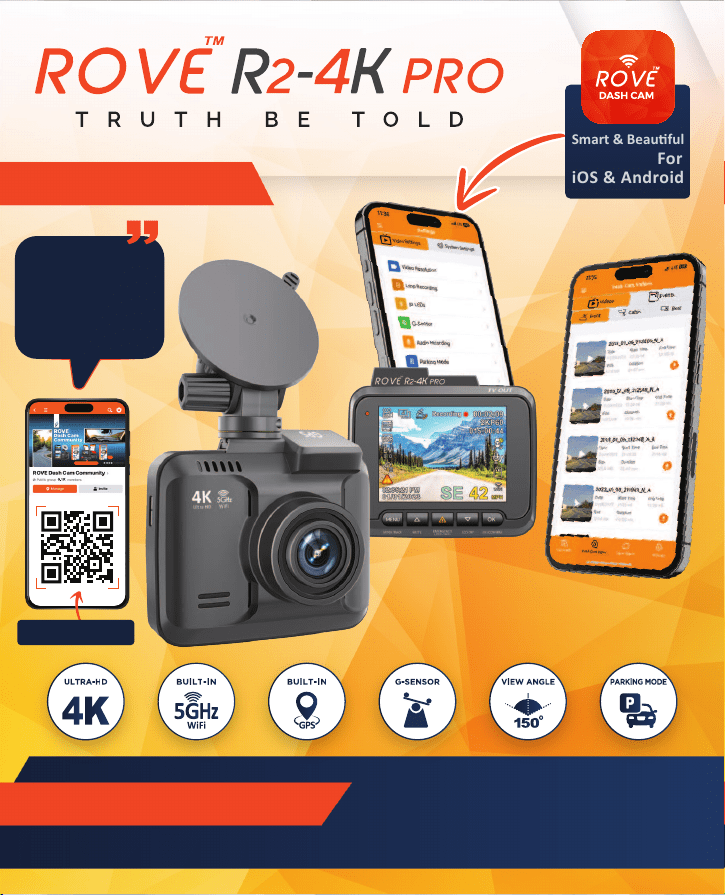
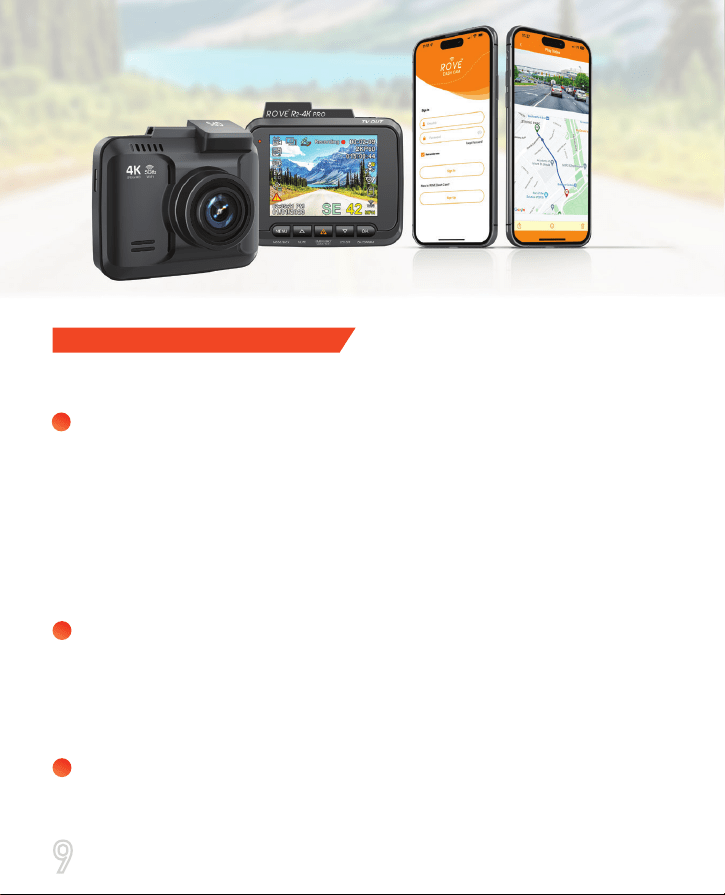
Smart & Beau�ful
ROVE APP For
iOS & Android
NEW! Limited Time Launch Offer
NEW
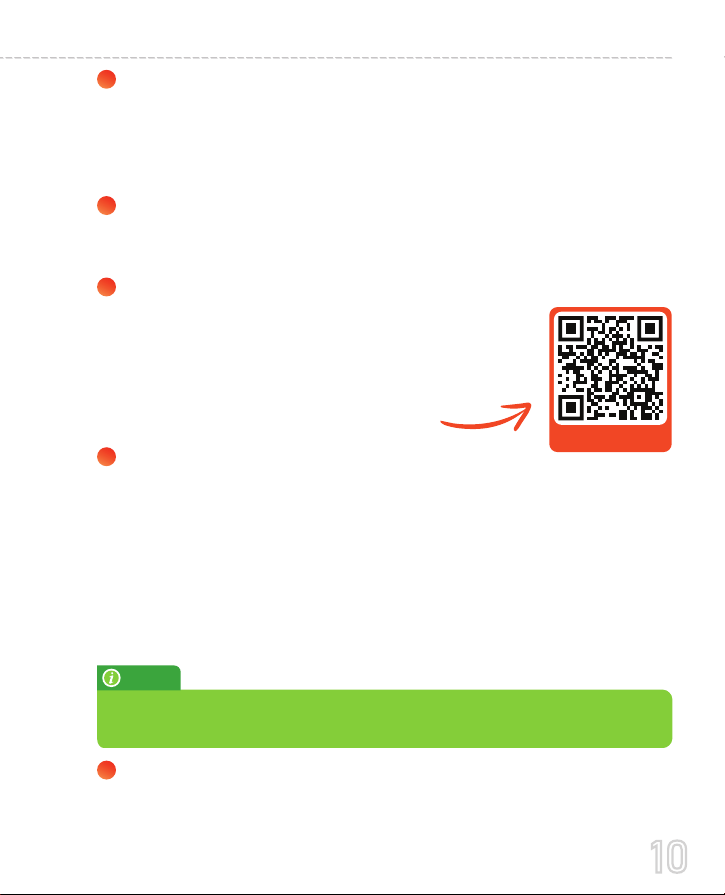
SCAN to join ROVE Dash Cam
Community on Facebook
Join the vibrant ROVE Dash
Cam Community on FB.
Ask ques�ons, share your
dash cam videos or just
hangout directly with us.
Wanna meet
other ROVERS (ROVE Owners)?

Just Scan the QR Code with your iPhone or Android’s
Camera to get in touch with us.
Scan the QR Code to Email US Scan the QR Code to Text US
Item NOT as described?
Damaged or defective?
Missing items?
Any issues what so ever?
STOP
WE WILL HELP YOU RESOLVE ANY ISSUES ASAP.
CONTACT US BEFORE RETURNING THE ITEM
CUSTOMER SERVICE
EXPERIENCING
PROBLEMS
Hours: Mon - Fri 9am-5pm PST
EMAIL US
TEXT US
Response in just 6 hours
For faster response text us
1 (401) 484-ROVE(7683)
HOW TO VIDEOS
Visit our website
www.rovedashcam.com/pages/videos
Understanding ROVE R2-4K PRO
Watch HOW-TO VIDEOS to learn & understand all the
features so you can get the maximum benefit out of it.
WATCH

5
5
6
7
7
7
9
11
12
13
14
15
16
20
21
23
24
25
28
30
31
32
33
37
39
45
45
59
62
63
70
71
73
75
78
81
Introduc�on
Product Overview
Features
User Agreement
Precau�ons
Warnings
Ge�ng Started
Camera Specifica�ons
Firmware Update
Package Contents
Unit Structure Appearance & Bu�ons
Shortcuts & Understanding Bu�ons
Installa�on
Turning Your Camera ON / OFF
About Supercapacitor
Home Screen
LED Status Light Indicator
Which Memory Card Should I Get?
Inser�ng/ Removing Memory Card
Forma�ng Memory Card
Time-Zone Se�ng
Using WiFi Feature
Pairing your R2-4K PRO with your Smart Phone using WiFi
Understanding 3 – Camera Modes
Playback Your Recorded Videos
Understanding Camera Se�ngs
Video Se�ngs
Photo Se�ngs
Playback Se�ngs
System Se�ngs
Rese�ng The Camera
GPS Player Installa�on
One year Limited Warranty
Safety & Legal Aspects
Troubleshoo�ng Your ROVE R2-4K PRO
A Big Thank You
..............................................................................................................................
.................................................................................................................
........................................................................................................................................
....................................................................................................................
...............................................................................................................................
.....................................................................................................................................
.......................................................................................................................
......................................................................................................
.................................................................................................................
................................................................................................................
...............................................................
...................................................................
..................................................................................................................................
...............................................................................
........................................................................................................
.............................................................................................................................
.............................................................................................
.......................................................................
.......................................................................
...............................................................................................
.................................................................................................................
...............................................................................................................
...........
........................................................................
...............................................................................
..............................................................................
...........................................................................................................................
..........................................................................................................................
...................................................................................................................
.......................................................................................................................
.......................................................................................................
.....................................................................................................
..........................................................................................
.....................................................................................................
...........................................................
......................................................................................................................
4
USER MANUAL

INTRODUCTION
Thank you for purchasing ROVE
TM
R2-4K PRO Digital Vehicle
Dash Cam (Automobile Black Box). This product provides
high-quality image capture and irrefutable evidence for what
goes on from the perspective of your dashboard. ROVE Dash
Cam is a very elegant, convenient, and durable multi-vehicle
driving recorder.
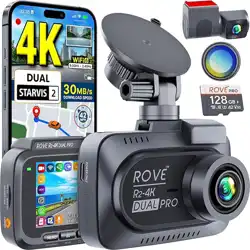
PRODUCT OVERVIEW
This Product is a leading Ultra HD Digital Vehicle Black Box
Recorder. Equipped with ULTRA-HD 3840P @30fps with SONY
IMX335 Sensor for excellent low light sensitivity and high
dynamic range which allows you to record continuous
high-quality video playbacks and brings phenomenal 4K
Ultra-HD resolution videos even at night without the need for
infrared sensors. It has superior night vision technology which
captures superb video under all low-light conditions. It has
advanced built-in Wi-Fi, built-in GPS, G-Sensor, Emergency
Video lock button, Audio recording, Loop cycle recording, 180º
auto video rotation, Wide dynamic range, 24-HR Auto Trigger
Parking Mode and so much more. When compared to most dash
cameras, this exclusive product design provides an elegant
appearance, is packed with top-rated unique features, records
superb unbeatable videos, and is very easy to use.
5
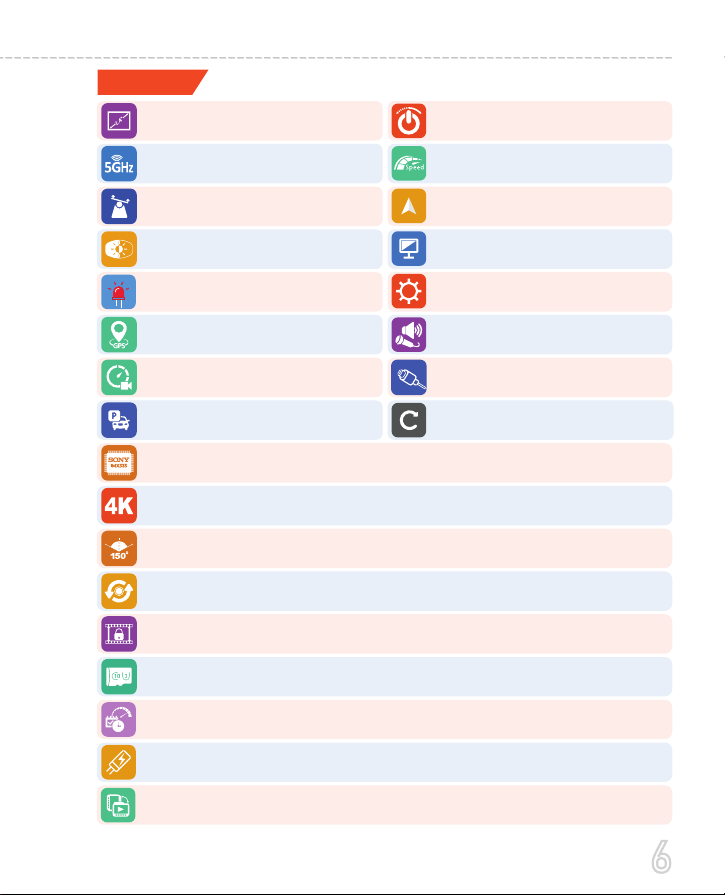
FEATURES
We recommend ROVE Ultimate microSD Cards
Auto Power OFF
Live Speed
Live Compass
LCD ON/OFF Setting
Screensaver
Built-In Speaker & Microphone
USB Type-C Input/Output
Remote Firmware Updates using
iOS/Android ROVE Dash Cam APP
24hr Auto Trigger Parking Mode
SONY IMX335 Sensor
4K Ultra-HD 3840x2160 30FPS
150° Ultra-wide A+ Viewing Angle
Loop Cycle and Split Recording Mode
Emergency Video Lock Button
Supports up to 512GB microSD Card
(Class 10, U3 Speed Only-Not Included)
Time, Date, Driver ID, Driving Speed, GPS stamp support
Supercapacitor
Video Rotate
2.4” IPS Display
Built-In Dual Band
5GHz & 2.4GHz WiFi
G-Sensor
WDR - Wide Dynamic Range
Status LED ON/OFF Indicator
Built-In GPS for Geo Tagging
Time Lapse Video
(ROVE USB Type-C HWK Required - Not Included)
6
USER MANUAL
USER AGREEMENT
By purchasing the ROVE Dash cam, it is assumed that by default
you agree with precautions, user warnings, and all the terms &
conditions of warranty. If for any reason you do not agree with
any of the terms mentioned in this manual, then you may return
the product in its original packaging unused within its return
window for a full refund.
Do not expose this product to rain, moisture, or water under any
circumstances or it will result in external or internal damage.
Do not put the unit in a damp environment. This device is not
designed to be damp-proof.
Do not try to open the cover or try to repair it yourself. If the
accessories for this device have any problem, please contact
the seller for assistance.
Don’t install it where it will block the driver’s view of the road
including mirrors or the deployment of airbags.
Do not place the camera loose on top of the dashboard or in
front of the airbags.
Do not mount the camera where it can be a distraction if it
Please read this manual very carefully before using the camera or
installation and keep it safe for future reference. It will be helpful
if you have any questions or encounter any operational problems.
PRECAUTIONS
WARNINGS
Failure to comply with safety warnings and regulations can
result in serious injury or death.
Please read and understand all instructions before using this
product. If any damage is caused by failure to follow the
instructions, the warranty will be voided.
7

became loose and falls off the windshield while driving.
Do not expose this device to excessive heat, fire, or dust or use
any chemical substance or cleaning solvent to clean this
device. Instead use soft moist cloth for cleaning.
Pay careful attention when cleaning the lens surface. Use a
soft, moist cloth to clean the lens to avoid scratches that may
compromise video quality.
Do not operate or install the camera while driving, or attempt
to change any settings, etc. Pull off the road first and only do
so when it is safe.
Do not drop, puncture, or disassemble this product.
Do not use the charger if the cord is broken or damaged. Keep
out of reach of children.
This is NOT a toy. Keep away from children.
For indoor use ONLY.
This camera is intended to use inside a
motor vehicle.
Memory Card: Before inserting the external memory card,
make sure to inspect for physical damage or cracks. Do NOT
use a memory card that shows the sign of physical damage or
cracks, as it can short-circuit the memory card.
Some countries or USA states prohibit drivers from mounting
anything on a windshield or prohibit mounting on certain areas of the
windshield. It is the owner/operator’s responsibility to mount or use of
this device in incompliance with local laws.
The company is NOT responsible for the loss of any data or your
content during operation or in any circumstance.
8
USER MANUAL
Make sure to always keep the camera plugged into the power
during its operation as ROVE R2-4K Pro uses Supercapacitor
(NOT an internal battery). You can plug the camera into your
home’s 110V outlet during set up. For the power, you can use
your cellphone’s USB charger and included USB Type-C Cable.
Just make sure that the USB charger has a 5V, 1.5 AMP
power output (Max 3.1 AMP), otherwise, the camera will not
work properly.
You will need to insert a memory card before you can start
recording. Please insert only a brand name Class-10, U3, or
higher speed microSD card up to 512 GB max for reliable
operation. (Memory card is NOT included in the packaging)
(We recommend ROVE Ultimate microSD Card up to 512 GB MAX.)
Before first time use, you MUST format the memory card in
the camera to prevent any errors and for smooth operation.
(See Page 30)
OUT OF THE BOX INSTRUCTIONS
Geing Started
1
2
3
Please read and understand warnings & safety instructions
before operating.
9
4
5
6
7
8
ROVE R2-4K Pro Car dash cam is programmed to turn ON
and START RECORDING automatically when it receives
power, and STOPS RECORDING, save the last video file, and
turns OFF automatically when power gets disconnected
within 1-2 seconds. (i.e., when you start /turn off your car)
Setting Date & Time: Please set the correct date and time
Based on your location under the TIME ZONE SETTING by
going to the camera’s system settings menu.
(See page 31 for details)
How to hide the power cable inside your car’s dashboard?
How to transfer videos to PC/MAC?
Insert memory cards directly into your PC/MAC to view or
download them.
You can also connect your camera to your PC/MAC with the
included short Type-C USB data cable. Then Select Connect as
a Flash Drive.
We recommend VLC Media Player to view your videos. You can
get it free at www.videolan.org
Wi-Fi: You can also connect ROVE R2-4K PRO Car Dashcam
to your smartphone directly by using the built-in Wi-Fi
feature.
(See Page 32)
Do NOT use Windows Media Player or QuickTime Player (Mac). They are
NOT made to play 4K videos hence, your video playback will lag.
Scan to visit the link
https://youtu.be/xwD8Ilk-MHU
Many people on YouTube already demonstrated
how and where to hide the power cable inside
your car. You can view one of the possible ways
on the link, this video is NOT recorded by us.
NOTE
10
USER MANUAL
60 Hz, 50 Hz
An� Flicker
Color
Color / B&W / Sepia
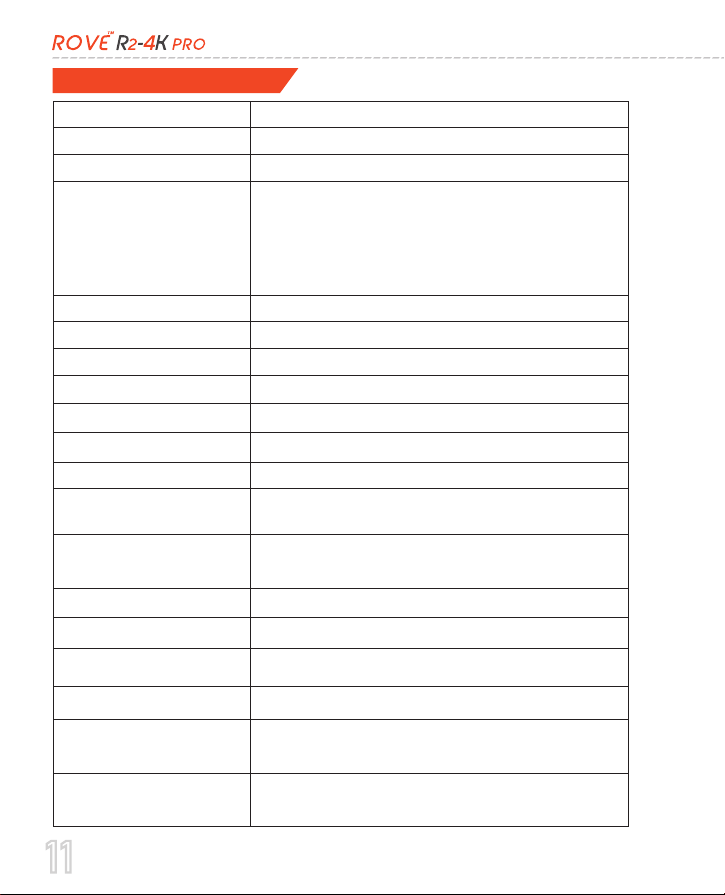
CAMERA SPECIFICATIONS
Image Sensor
SONY IMX335
Display
2.4 Inch IPS
Lens
150° A+ Ultra HD Wide Angle
Lens Aperture
F 1.5
GPS
Built-in GPS Geo-Tagging Support
WiFi
Supports 2.4GHz and 5GHz Dual-Band,
Photo / Video Format
JPEG / MP4
Compression Format
H.264 / H.265
AV Interface / TV Mode
AV Out, NTSC- PAL
TF Card Class 10, U3 Speed
(Max Support 512 GB, NOT Included)
Memory Card
G-Sensor
Built-in 3-Axis Impact Accelerometer Gravita�onal
Sensor to Lock & Protect Current Video.
4K 3840x2160 @30FPS
2K 2560x1440 @30FPS & 60FPS
1080P 1920x1080 @60FPS
1080P 1920x1080 @30FPS
Video Resolu�on
VGA, 2MHD, 3M, 4M, 5M, 8M, 10M, 12M
Photo Resolu�on
Video Rotate
180° Video Rotate Support
24hr Auto Trigger
Parking Mode
Support
(ROVE Ul�mate Type-C Hardwirekit Required, NOT Included)
Minute / Second
Year / Month / Day/Hour /
Support
Loop Recording
Support – Seamless Loop Recording
11
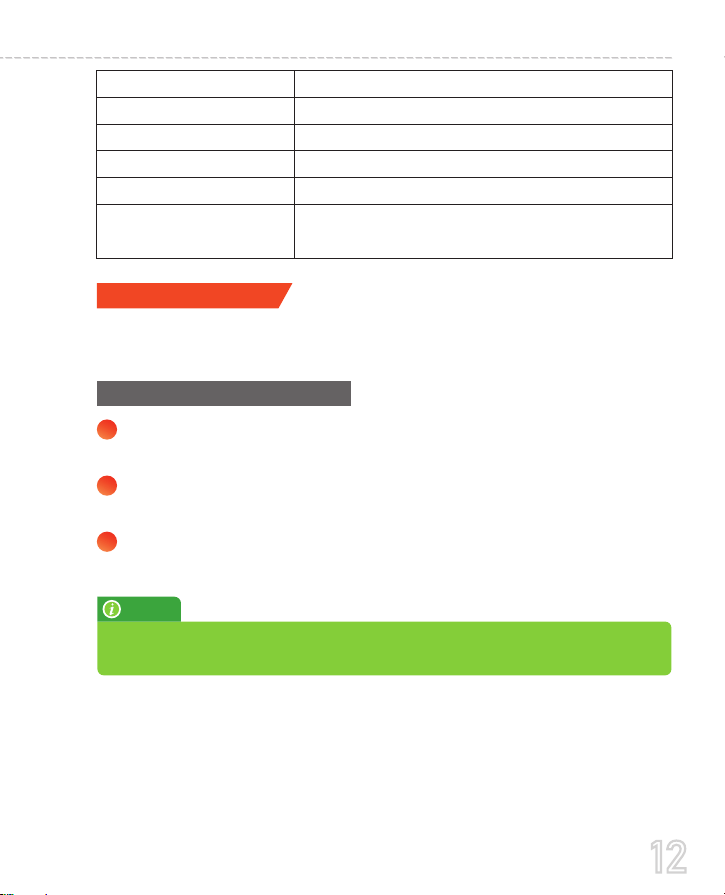
Mic / Speaker
Built-in Microphone & Speaker
1. Storage, 2. Charging
Type-C USB Func�on
Auto Power ON / OFF
Support
Power Interface
5V, 1.5A
Ba�ery / Supercapacitor
Supercapacitor
Temperature Guideline
Storage Temperature : -20°C (-4°F) 〜 60°C (140°F)
Working Temperature : -30°C (-22°F) 〜 + 70°C (158°F)
Firmware updates for R2-4K Pro are provided over the air/remotely
using the ROVE Dash Cam APP.
FIRMWARE UPDATE
1
2
3
Please connect your R2-4K Pro to the ROVE Dash Cam APP
using the WiFi Feature.
(See Page 32)
Click “Firmware Update” from the left navigation menu
while staying connected to R2-4K PRO using WiFi Feature.
Please follow on-screen directions to complete firmware
updates.
To Check/Update Firmware:
Please reach out to customer care if you are having trouble installing
firmware using the ROVE APP.
NOTE
12
USER MANUAL
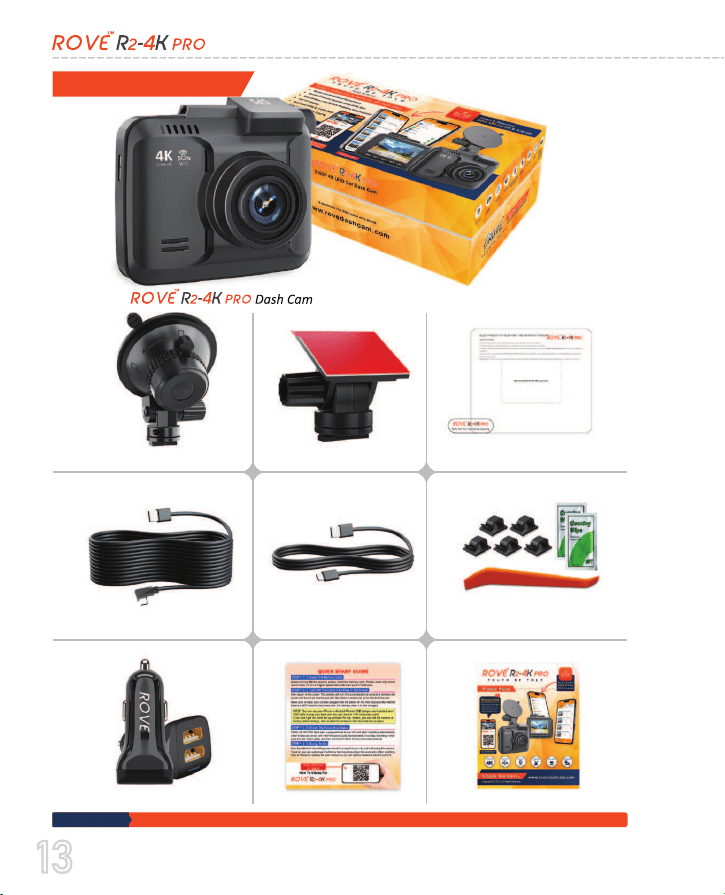
360
0
Rota�onal Suc�on Mount
360
0
Rota�onal 3M S�cky Mount
Electrosta�c Film
For 3M S�cky Mount
2.5FT Type-C USB Data Cable
ROVE Dual USB Car Charger
5X Cable Hiding Clip, 2x Wet
Cleaning Pads & Car Wire Trim Tool
Quick Start Guide
User Manual
12FT Type-C Car Charging Cable
PACKAGE CONTENTS
PLEASE NOTE: Memory Card Is NOT Included. We Recommend ROVE Ultimate Class 10, U3 Speed microSD Card, UP to 512GB
13
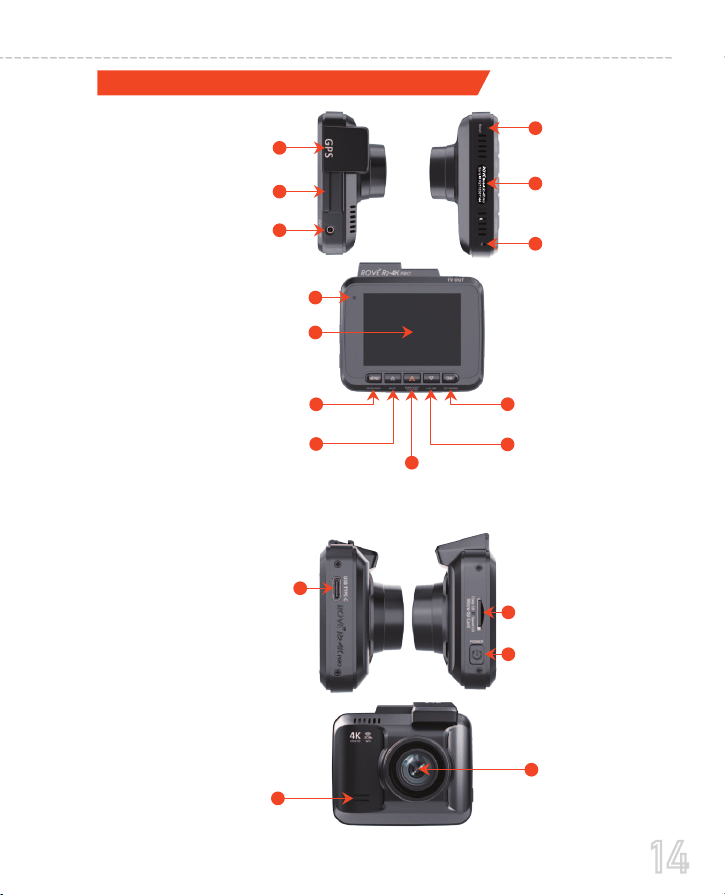
Built-In GPS
Windshield
Mount Latch
TV Out
2.4” IPS Display
Menu/Mode Bu�on
UP or Mute on/off Bu�on
Emergency Lock or
WiFi on/off Bu�on
Down or LCD
on/off Bu�on
Rec. On/Off, OK or
Confirm Bu�on
MIC
Reset
Speaker
LENS
1
2
3
microSD Card Slot
Power On/Off or
Photo Bu�on
15
16
8
LED Status Indicator
7
TYPE-C USB Power Input /
Data output slot
14
9
10
12
11
13
17
18
4
6
Serial Number
Label
5
UNIT STRUCTURE APPEARANCE & BUTTONS
14
USER MANUAL
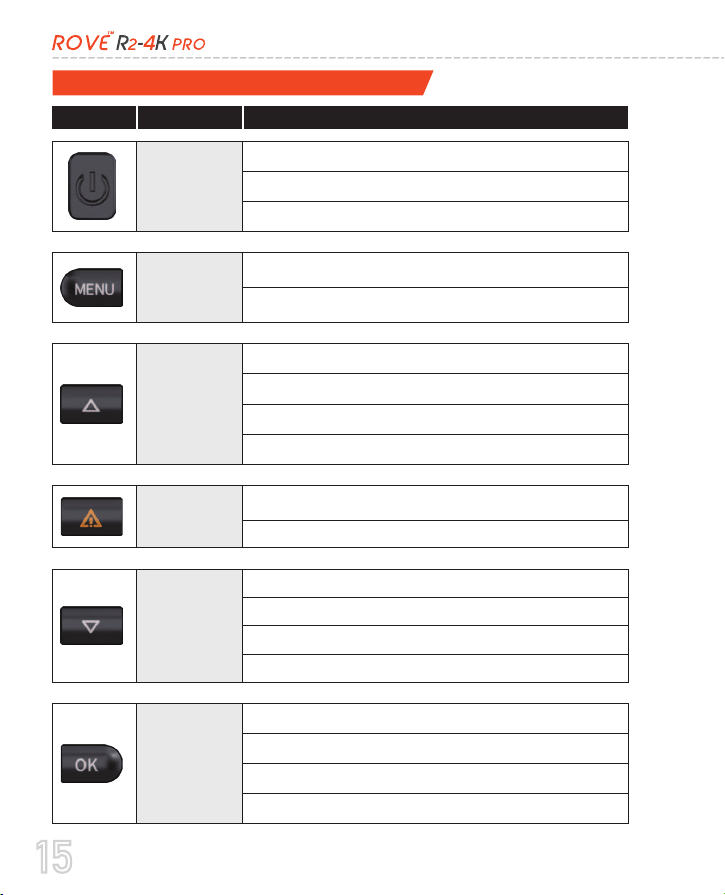
SHORTCUTS & UNDERSTANDING BUTTONS
BUTTON IMAGE BUTTON NAME SHORTCUTS / FUNCTIONS
Press Once - to enter/exit menu se�ngs
MENU / MODE
LONG PRESS for 2-Seconds - to Switch Modes
UP
Press Once - to Mute/UN-Mute Microphone while in Video Mode
Press Once - to Scroll UP while in Any Menu Se�ngs
Press Once - to Scroll to Previous Video Files while in Play Mode
Press Once - to Reverse Playback while video is being played in Play Mode
DOWN
Press Once - to Turn OFF/ON LCD while in Video Mode
Press Once - to Scroll DOWN while in Any Menu Se�ngs
Press Once - to Scroll to Next Video Files while in Play Mode
Press Once - to Fast Forward while video is being played in Play Mode
OK / CONFIRM
Press Once - to Start/Stop Video Recording
Press Once - to Take Snap-Shot while in Photo Mode
Press Once - to Play/Pause Current Video while in Play Mode
Press Once - to Enter / Confirm Specific Se�ngs while in Menu Se�ngs.
EMERGENCY
LOCK
Press Once - to Lock the Current Loop Cycle Video File while Video is
being recorded
LONG PRESS for 2-Seconds - to Turn ON/OFF WiFi
POWER
BUTTON
Press once while video is being recorded to take a quick snap shot.
To Turn OFF The Camera: Long press power bu�on for 3-seconds.
To Turn ON The Camera: Press power bu�on once.
15
The camera comes with the default settings which allows you to
start using your camera right out of the box without changing any
settings. Make sure to format the memory card before first-time use.
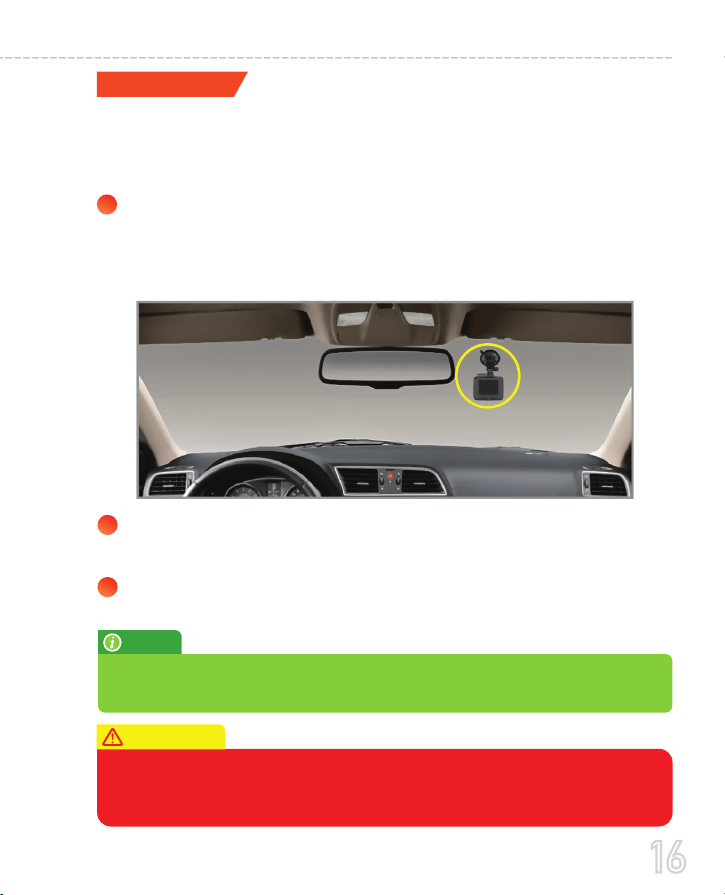
INSTALLATION
1
Installation Position: Most people will install their R2-4K PRO
next to the rear view mirror and opposite side of the driver.
First, Stop the engine where there is some light and in a safe
place, and then remove the key.
Make sure to clean your windshield from dust particles and
evaporated grease from the dashboard surface.
Attach the ROVE R2-4K PRO with the suction mount. Set the
camera lens to point forward to the center when installing it.
2
3
NOTE
Make sure that the camera’s view is not obstructed by any window �nt or
any other objects.
WARNING:
If your vehicle has side curtain airbags please be very careful when running
any cables along your vehicle windows. Ensure that you are not running a
cable past any of the airbags as this can prevent the airbags from deploying.
16
USER MANUAL
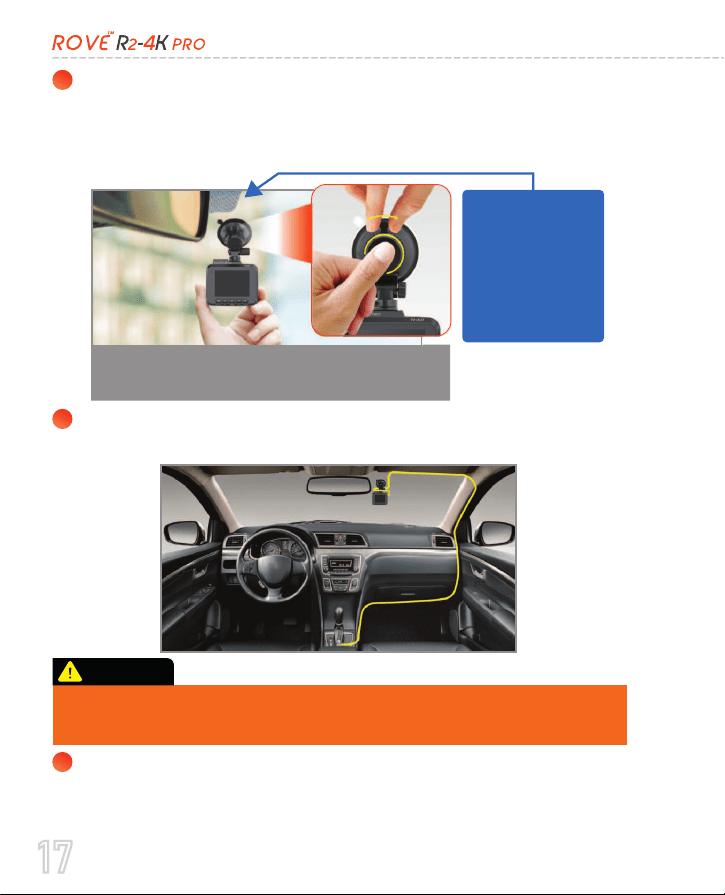
4
5
6
Use the power cord to connect the USB Port of the product to
the car's cigarette lighter socket.
Hide the cable inside the trim and use the included cable clips
for additional support to organize the cable if needed so it
does not interfere with the driver’s vision.
Press the suction mount against the windshield and
while pressing, turn the LOCKING Knob towards
the LOCK position to lock the mount in place.
To Lock The Suction Mount: Press & hold it tight towards the
windshield to remove any air between the suction mount and the
windshield. While pressing & holding towards the windshield,
turn the LOCKING Knob towards CLOCKWISE to LOCK in place.
Only use ROVE’s USB Car Charger, otherwise the camera may
frequently reboot or flicker LCD due to insufficient power.
CAUTION:
AVOID THIS
DOT-MATRIX
PATTERN, as suction
mount will NOT be
able to get a strong
suction, hence it will
fall down if you mount
on top of it.
17
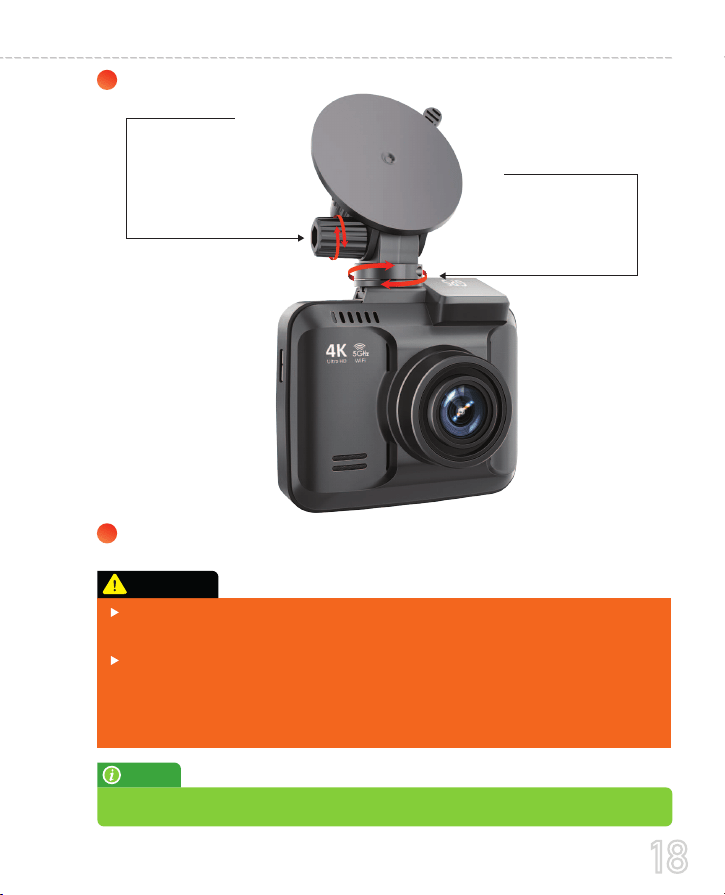
7
Adjust the lens angle of the camera.
8
Start the engine and check if the product works properly.
Make sure to remove the Plastic Lens Screen Protector from the lens before
recording videos. Otherwise, your videos will look blurry and blocked.
Do not remove the microSD card while the camera is turned ON.
Otherwise, it may cause the memory card to be write protected and
possible loss of data or damage your memory card. Remove/Insert the
memory card only when the camera is turned OFF.
A�er a test drive, check and make sure that all the videos are recorded correctly.
Simply rotate the
camera 360
o
to
record any direction
you prefer.
Loosen the screw
to adjust the
camera’s view/tilt
angle and then tighten
it to lock that angle.
NOTE
CAUTION:
18
USER MANUAL

The car charger connects to the car cigarette lighter socket.
The device will start up automatically and record as soon as
power is supplied, and the device will save the last video file
and power off automatically after cutting the power supply.
Only use the supplied charger to power and charge the ROVE
R2-4K PRO dash cam.
Charging
1
2
Car Cigarette
Lighter Plug
ROVE R2-4K PRO
Dash Cam
Car Cigarette
Lighter Socket
Wiring at a glance
12FT USB-C Charging Cable
You can use your iPhone or Android Phone’s USB Charger, and plug into
your home’s 110V wall outlet to power/charge the camera while in your
home. Just make sure it is NOT a super heavy-duty charger over 3.1 AMP.
Otherwise, it can damage the camera.
NOTE
19
TURNING YOUR CAMERA ON/OFF
AUTO POWER ON/OFF
Auto Power ON: ROVE R2-4K PRO Dash Cam is designed to
turn ON and start recording automatically when it receives
power. i.e. when the car engine is started.
Auto Power OFF: The camera is also pre-configured to turn itself
OFF automatically within a few seconds when the power gets
disconnected, i.e. when the car key is turned to LOCK position.
To manually turn ON: Press the power button once.
To manually turn OFF: Press and hold the power button for at
least 2-3 seconds
MANUAL POWER ON/OFF
Some trucks/car’s 12V cigarette outlet is always HOT, which means it
provides constant power even when the car is turned OFF and LOCKED.
If this is the case for your vehicle, then the auto ON/OFF feature will not
work. And If you leave the camera continuously recording when the car
is turned off, then it will drain your car/truck’s battery and you might
not have enough power to start your car for next time. To Remedy this
situation, you can do one of the two options.
Hardwire your dash cam to your car’s fuse box with ROVE’S 3-Lead
Auto Trigger Hardwire Kit.
Visit
www.rovedashcam.com to purchase one separately.
Change the connection in the fuse box for your 12V outlet to the socket which
only supplies power when the car key is turned to ACC or ON position.
(See this example-only video: https://youtu.be/F5VL-pUClnc)
Be sure to insert the Memory card before powering up the device. Do NOT
insert/remove the memory card while the camera is turned ON. Only do so
when it is turned OFF.
NOTE
CAUTION:
20
USER MANUAL

ABOUT SUPERCAPACITOR
First, understand that all dash cams, regardless of which brand
the user uses, they either have very small li-ion batteries (i.e.,
ROVE R2-4K) or built-in Supercapacitor (i.e., ROVE R1, R2-4K
PRO, R3) to save that last video file safely before shutting off the
dash cam, in case if the power gets disconnected due to accident
and also during daily turning off your vehicle.
Now, all dash cams must be plugged into the power at all times
for continuous recording, regardless of which brand you will
purchase.
ROVE R2-4K PRO uses a Supercapacitor instead of a small
internal battery.
Important Info
The main benefit of using a supercapacitor in a dash cam is that it
drastically increases the product’s life span compared to internal
battery dash cams, which are only good for as long as the internal
battery lasts. You can’t even replace the internal batteries easily as
they are built-in. Therefore super capacitor dash cams last for
years and they do not pose a risk of fire compared to li-ion battery
dash cams.
Main Benefit
The secondary benefits of a supercapacitor dash cam are as follows:
Supercapacitor is more reliable because it is more heat resistant
compared to li-ion batteries.
Supercapacitors don’t pose a risk of fire compared to li-ion
batteries.
•
•
21

•
•
•
How does Supercapacitor work?
A capacitor uses conductive plates with an insulating barrier
(dielectric) in between them. The dielectric stops the electrical
current entering the capacitor, and this builds up a charge
which is stored between the plates.
It charges faster than a battery. The amount of charge a capaci-
tor can hold depends upon its capacitance or the charge storage
capacity.
ROVE R2-4K PRO’s Supercapacitor will hold the charge for
about 2 seconds.
Why Supercapacitor?
ROVE R2-4K PRO dash cam uses a supercapacitor, making it a
unique, reliable dash cam on power consumption and safety.
Moreover, it is more resistant to heat, unlike batteries, and it
extends the overall product life span of the camera.
22
USER MANUAL
Time Lapse Video
Wide dynamic range (WDR)
Loop Recording ON +
Number Indicates your selection
Exposure Value
Video Mode
Photo Mode
Play Mode
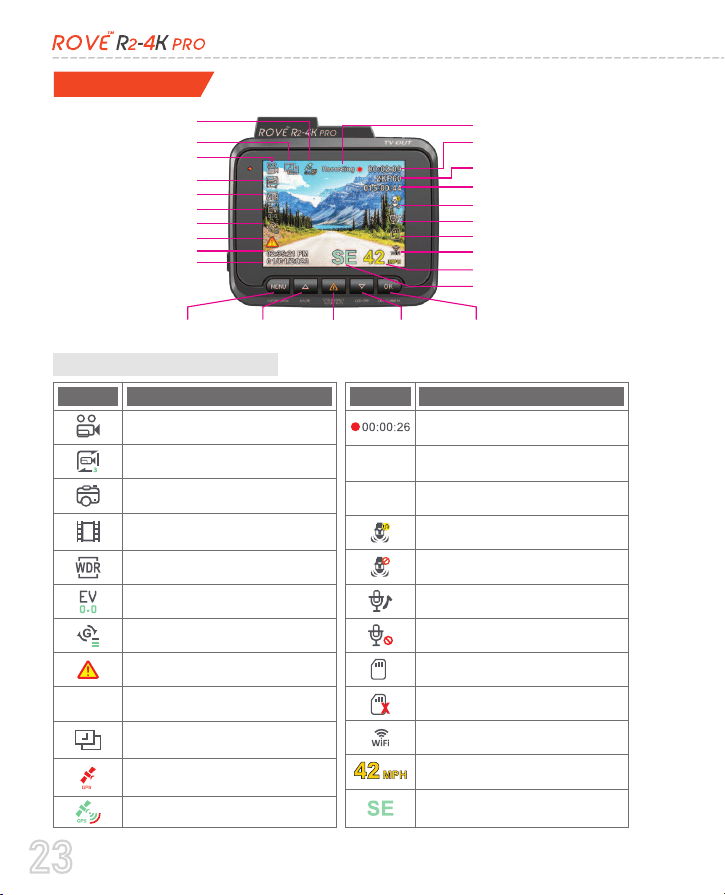
HOME SCREEN
GPS
Time Lapse Video
Video Mode
Loop Recording Timer
Recording Status
Total Trip Time
Video Resolution
Parking Mode Indicator
Microphone Indicator
Memory Card Indicator
WiFi On/Off Indicator
Live Speed
Compass Direction
Current Date
Current Time
Menu Up Down OK / ConfirmEmergency Lock
(Resets every loop)
(Resets at every restart)
Loop Recording
Wide Dynamic Range
Exposure Value
G-Sensor
ICONS WHAT DOES IT MEAN?
02:35:21 PM
01/01/2023
2KP60
Memory Card Installed
Memory Card NOT Installed
Memory Card Is Defective
Video Recording Started
Loop Recording Timer
G-Sensor
00:02:09
Emergency Video Lock
ICONS WHAT DOES IT MEAN?
24HR Auto Trigger Parking Mode
ON - 3-Lead Hardwire Connected
Parking Mode OFF
WiFi On/Off Indicator
Microphone ON
Microphone OFF
GPS - Now has Signal
Current Video Resolution
Current Time & Current Date
Compass Direction
Home Screen Status Icons
GPS - looking for signal
Live Speed
Emergency Video Lock
23
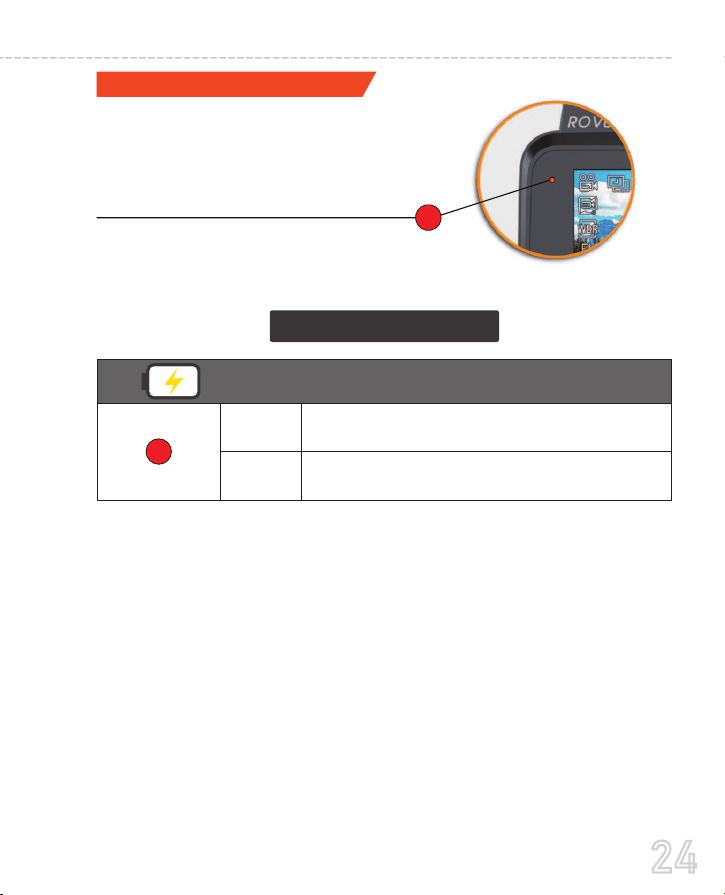
LED STATUS LIGHT INDICATOR
DIFFERENT SCENARIOS
BLINKING RED LED - Recording Video
SOLID
RED LED - Not Recording Video
NO
RED LED - Camera is Turned OFF
When Camera Is Plugged Into The POWER
Camera Idle
Camera Recording Video
Solid
Blinking
24
USER MANUAL
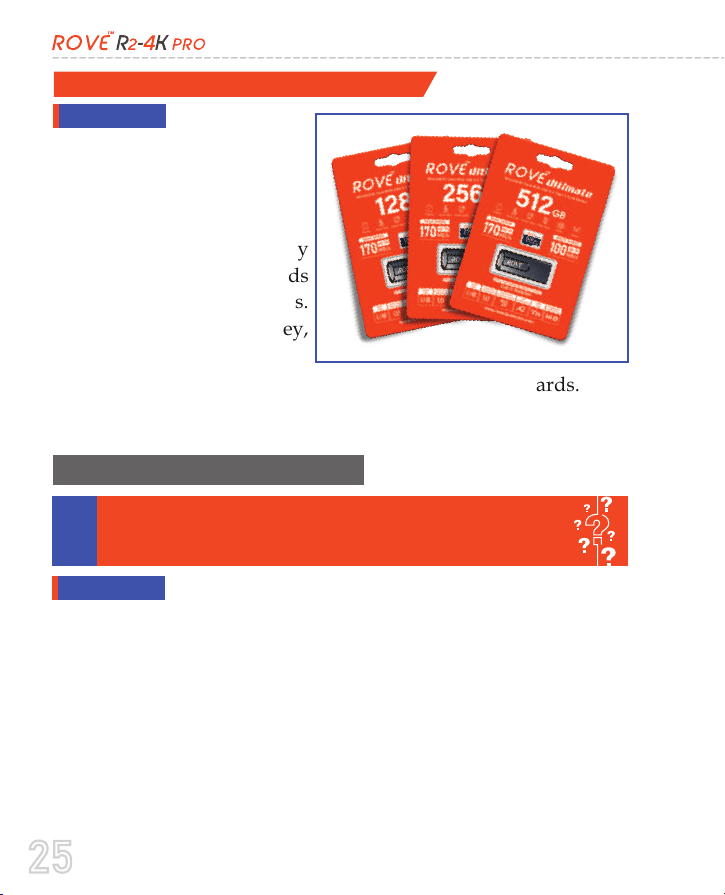
WHICH MEMORY CARD SHOULD I GET?
We strongly
recommend ROVE Ultimate
microSD Cards. At ROVE,
We have higher standards,
1-Year Hassle Free Warranty
and we have specifically
designed our memory cards
to work with our dash cams.
In order to save time, money,
and hassle in the long run,
Memory card is an important part of your dash cam setup. The
most important piece of evidence is collected in your memory
card which is the video evidence.
- Over the years of experience, we have recommended various
memory cards to our customers, because we thought a memory
card is a memory card, how bad it can be, especially from big
brand names. However, based on our experience since 2015, we
have learned that there are too many different types of memory
cards there in the market. Some are cheap, some are
we simply recommend our ROVE Ultimate microSD Cards.
See a few details below to understand why?
ANSWER:
FAQ ABOUT MEMORY CARDS:
WHY SHOULD I GET
ROVE ULTIMATE MEMORY CARD?
1
ANSWER:
25

NO, you can get any brand memory card as long as it is class 10,
U3 speed. We absolutely do NOT recommend Samsung or
SanDisk memory cards, based on our experience over the years
helping our customers with troubleshooting issues.
However, one thing to note is that if you get another brand card,
we can't say anything about its quality and how long it will last.
Generally, your return window closes within 30 days of purchase.
So, for example, if your other branded memory card becomes bad
after three months, etc., then you have to take the warranty with
them, and we can't promise how they will help with the
replacement process. Therefore, with that said, to save time,
money, and hassle on going back and forth fighting with which
card to get, we simply now recommend our ROVE Ultimate
expensive, some are fast, some are slow, some are good and some
are bad, some will last for long and some will last short duration.
There are too many factors to consider when it comes to memory
cards, sizes, types, and their quality and reliability.
- Every now and then a customer will reach out to us stating their
dash cam didn’t record the video of an event that they were
involved in. This happens when the memory card has failed too
soon and they didn’t check. What’s the point of having a good
dash cam but a cheap memory card will fail you? Then the whole
point of investing in a peace of mind dash cam is simply to fail.
That is why, to save time, money, and hassle in the long run, we
strongly recommend you to invest in a ROVE Ultimate microSD
Card.
SHOULD I ONLY GET THE
ROVE ULTIMATE MEMORY CARDS?
2
ANSWER:
26
USER MANUAL
microSD Card. At ROVE, we have higher standards. Because in
the long run, we all want the camera and memory card to just
work without any issues because we need peace of mind, and we
have better things to do in life than fight to find a simple memory
card.
Most likely it will work just fine. However here are the lessons
learned over the years from helping our customers.
- You might get missing videos after some months of usage of
other brand memory cards. Why?
- Because after a certain write cycle, depending on the type of
flash memory being used inside, the data cell may become bad
sectors. When that happens, the dash cam might freeze up or may
have missing videos. Which is something we don’t want. Your
dash cam may also give you an error related to your memory card
stating the memory card speed is too slow or defective memory
card etc.
We hope this was helpful and informative in choosing the right
memory card. Please feel free to reach out to us if you have any
questions or concerns.
WHAT COULD HAPPEN IF I USE
THIRD PARTY MEMORY CARD?
3
ANSWER:
27
Must use only Brand Name, Class-10, U3, or higher speed
microSD Card. Max supports 512GB.
We Recommend ROVE Ultimate Class 10, U3 Speed microSD
Card. You can purchase it from Amazon here:
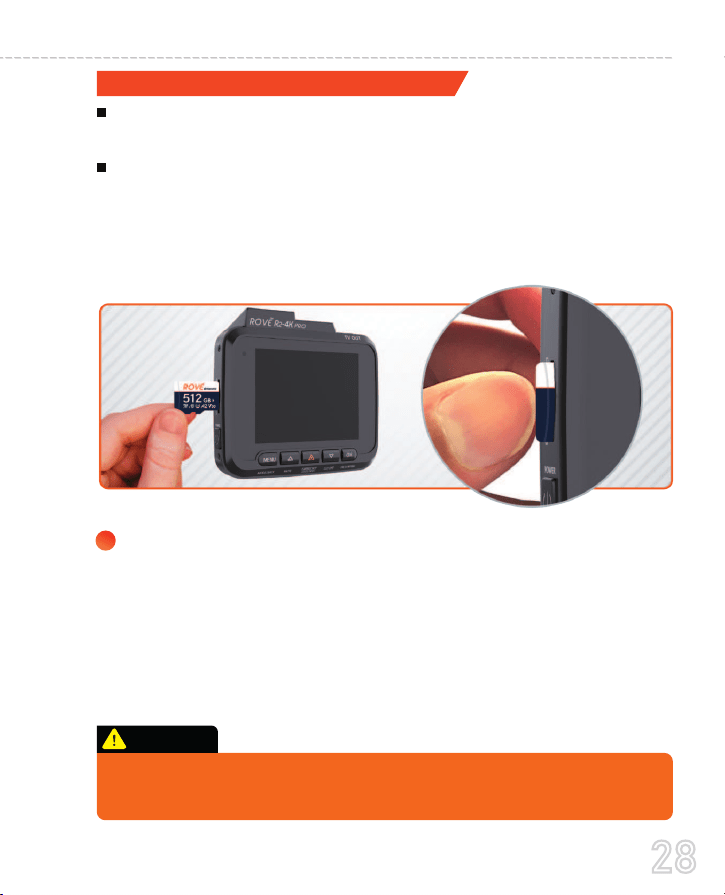
TO INSTALL
Make sure the camera is turned OFF First. Then align the
GOLD CONTACTS facing towards the front of the camera
(Lens Side). Then insert the memory card halfway in. Then
use the fingernail or a paper clip to push the card all the way
inward until it clicks and locks in place.
Search for “ROVE Ultimate microSD Card”
Or
Visit: www.amazon.com/dp/B0BGW1N9TD
INSERTING / REMOVING A microSD CARD
1
Do not insert/remove the microSD card while the camera is turned ON. Otherwise it
may cause memory card to be write protected and possible loss of data or damage
your memory card. Always remove/insert memory card while camera is turned OFF.
CAUTION:
28
USER MANUAL
If you experience camera FREEZING or LAGGING or STOPS Recording a�er few seconds.
Then It is the issue of the MEMORY CARD. (NOT THE CAMERA ISSUE) - Please Contact US.
ROVE R2-4K PRO Dash Camera is High Bit-Rate 4K Video recording device. Which
requires High Speed Ra�ng SPECIFIC microSD Cards.
Absolutely do NOT buy Sandisk or Samsung Cards. Do NOT Purchase it from third party
seller on eBay or any online place. Otherwise they may be a fake cards and will NOT work.
TO REMOVE
To remove the microSD card, gently push its edge inward until
it clicks, and once it pops out, simply pull it out of the slot.
2
NOTE
29
4
WiFi
WiFi Mode
Format
Format successful
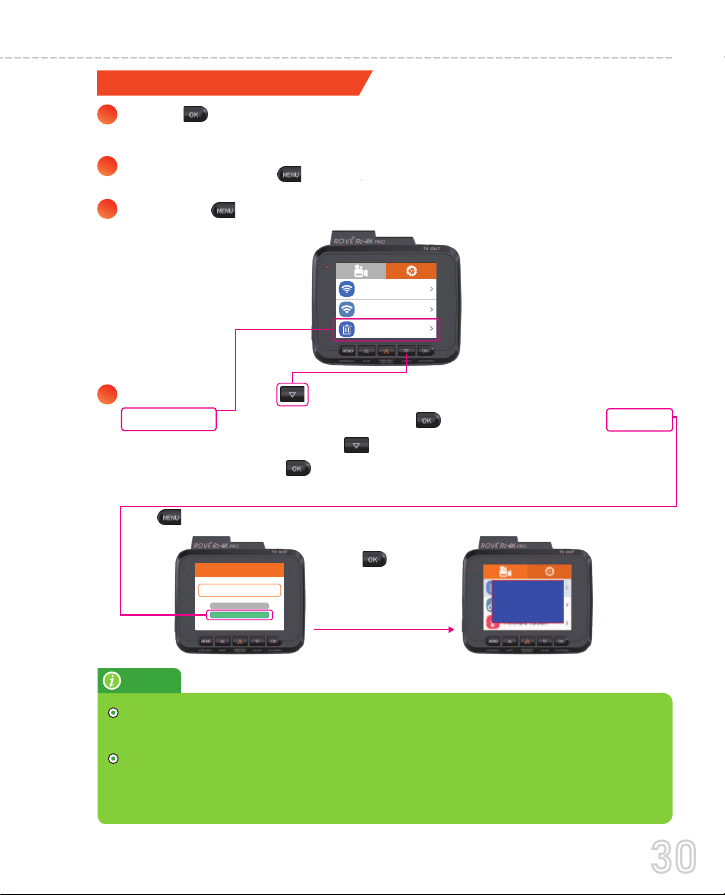
FORMAT
Format
Cancel
This feature will allow you to format inserted
memory card, all the data will be deleted.
Then press theDO button to scroll down until you see
FORMAT >> Then press the O button to enter format
submenu.>>thenpressDO button to highlight theFORMAT
>>Then press the O button to confirm to format the memory
card (The formatting process will be super quick.Now press
the M button to exit the settings).
Press OK button
to make sure your
Memory card is
formated.
We recommend that you format the memory card every 3 months to
keep it clean for smooth opera�on.
Please note that memory cards have their self life span, a�er so many
uses of wri�ng data over and over, eventually they will become
inoperable. When that happens, please replace your memory card.
1
2
3
FORMATTING MEMORY CARD
Press OK to STOP video recording first or to clear the error
message. If you have any on the screen.
Please press the button once to enter the video settings.
Press the M button again to switch to the System Settings.
NOTE
30
USER MANUAL
1
2
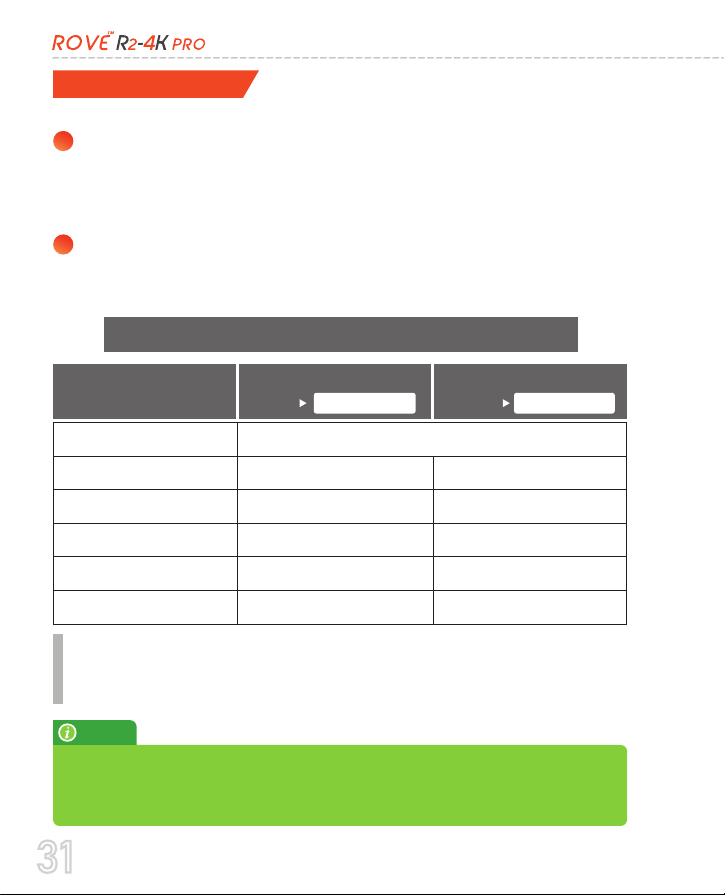
TIME-ZONE SETTING:
USA Time Zones - GMT (Greenwich Mean Time) Values
Hawaii
Alaska
Pacific Time Zone
Mountain Time Zone
Central Time Zone
Eastern Time Zone
GMT (-9:00)
GMT (-8:00)
GMT (-7:00)
GMT (-6:00)
GMT (-5:00)
GMT (-8:00)
GMT (-7:00)
GMT (-6:00)
GMT (-5:00)
GMT (-4:00)
Time Zones
You can choose the date and time of your choice manually, go
to System Settings > Date/Time and select the date and time
of your choice.
You can also set the GMT/UTC time-zone value instead, so the
camera will set the date and time based on the GMT/UTC value
selection when it receives the GPS signal lock automatically.
OR
To set the date & time, choose one of the following options below:
GMT (-10:00)
When DayLight Savings
Ends Nov - March
When DayLight Savings
Begins
March - Nov
Go to
https://greenwichmeantime.com/time-zone/abbreviations/
to find out your Correct GMT (Greenwich Mean Time) value
based on your location outside of the USA
The Time zone se�ng will not change �me automa�cally when driving
through different �me zones. It will only set the accurate date and �me
based on the selected GMT �mezone.
NOTE
31
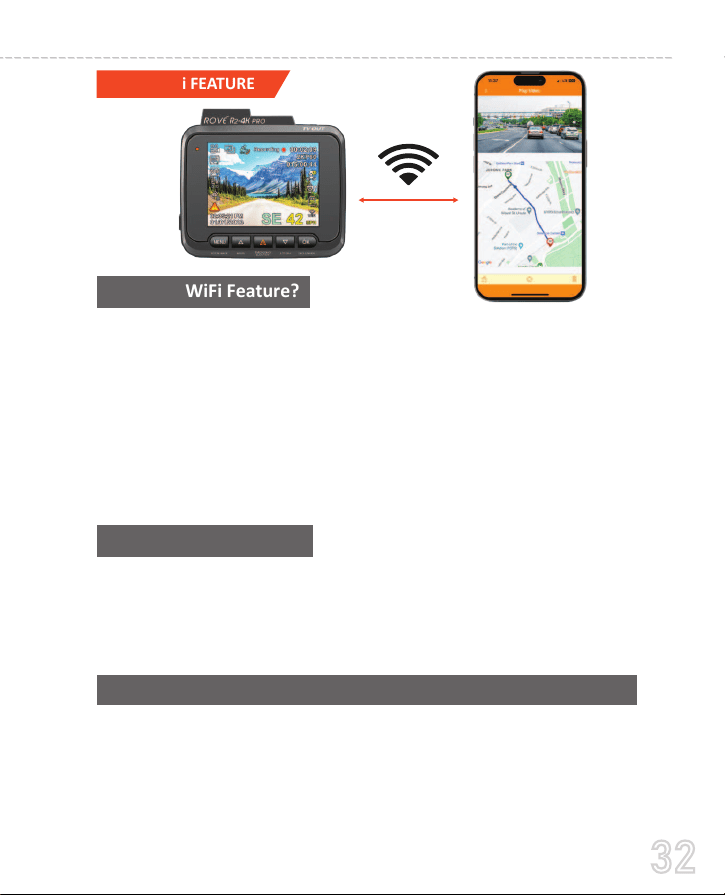
NO. ROVE R2-4K PRO dash cam is NOT made to broadcast
footage over the cloud or internet. It is NOT a cloud or an IP
camera and it is NOT meant to do that. You can get live video and
footage on ROVE R2-4K PRO’s APP as long as you stay within
the 10M range from the dash cam.
Can I watch the videos or surveillance around my car remotely?
The WiFi feature has been designed so you can pair your dash
camera wirelessly with your smartphone and access your
recording instantly from the dash cam. Here you can view,
download and share your videos easily with your friends and
family. Just like how you would connect your Bluetooth speaker
to your smartphone for wireless music play, the same way dash
cameras use a WiFi signal (instead of Bluetooth) to pair your
smartphone with ROVE R2-4K PRO.
USING WiFi FEATURE
What is a WiFi Feature?
The WiFi signal range is about 10M when there are NO
obstructions in the middle. Please NOTE that just like your home
WiFi network, you can't have a WiFi signal outside your home, in
the same way, the WiFi range is 10M from this small device.
What is the WiFi Range?
32
USER MANUAL
ROVE R2-4K PRO's WiFi Connec�on paring does NOT broadcast the
internet. The WiFi Connec�on to ROVE R2-4K PRO is meant to transfer the
data between your phone and the ROVE R2-4K PRO dash cam.
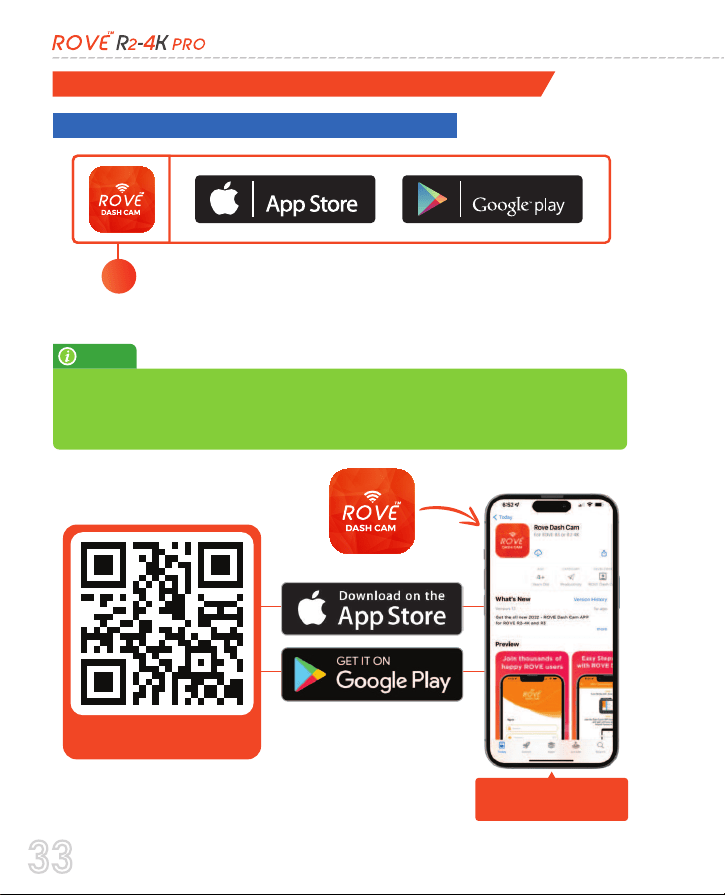
STEP 1: Search & Install the ROVE APP
Download on the ANDROID APP ON
Search for “ROVE” in App Store or
Google Play Store to find the App and then
download and install it on your phone.
1
Pairing your R2-4K PRO with your Smart Phone using WiFi
download the
ROVE Dash Cam APP.
Scan this QR Code
NOTE
33
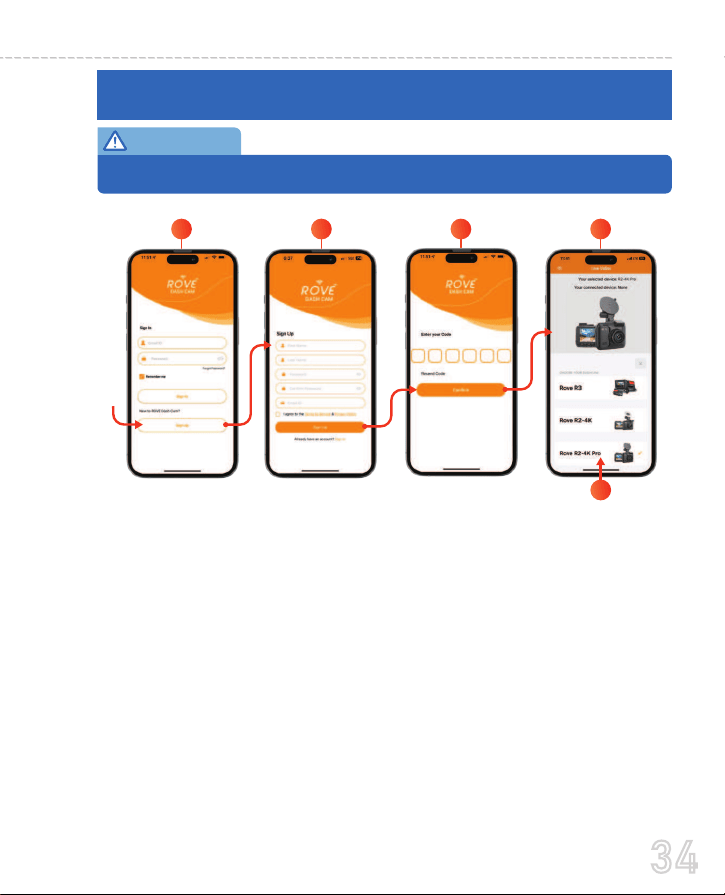
STEP 2: Sign Up (For First Time Users Only), Skip this step
if you already have an account.
FIRST-TIME USERS:
You will need to register and create a free account using ROVE
APP, so you can keep your videos and data secure on your
device. (To register - you will need internet access, so make sure
to stay connected to the internet using your home wifi or cellular
data while registering for the first time) - You will only need to do
this once. You should stay logged in to your ROVE account
mostly unless you get logged out.
If you ever need to sign back into your ROVE account again, then
you will need to be connected to the internet first, then login to
your account before pairing with ROVE R2-4K PRO’s WiFi.
Do NOT Connect your iOS/Android device to ROVE R2-4K PRO's WiFi yet.
1 2 3 4
2
5
First
Time
Users
IMPORTANT:
34
USER MANUAL
WiFi
WiFi Mode
Format
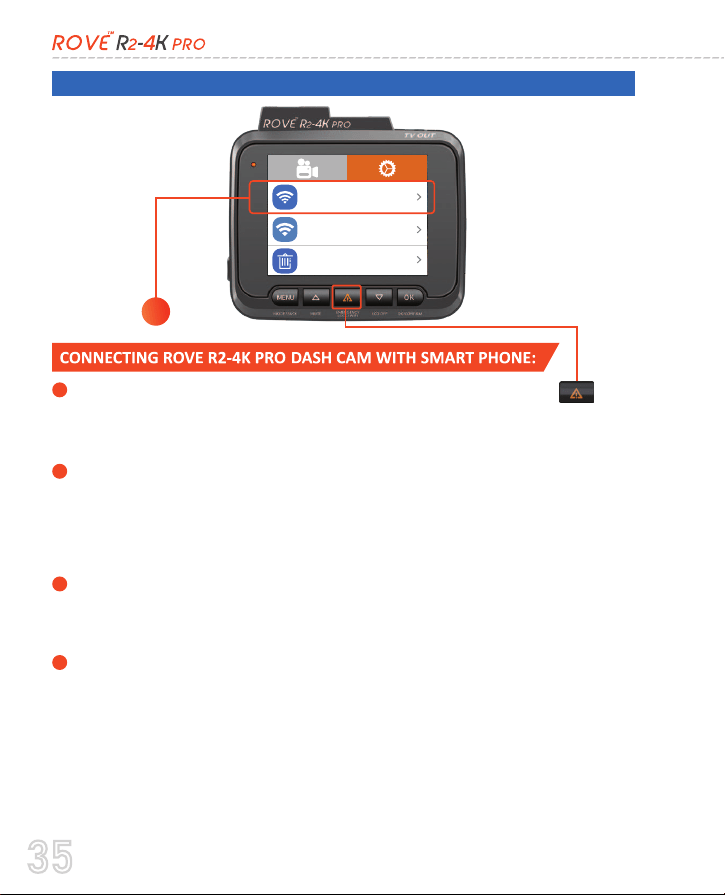
1
TURN ON WIFI FROM THE CAMERA: Long press the
Emergency LOCK BUTTON for 2 seconds or go to the camera's
SYSTEM SETTINGS to turn ON the WiFi feature.
Now open the ROVE app on your smartphone, and click on the
"Connect to ROVE Dash Cam WiFi" button.”
This will open up your smartphone’s WIFI setting now; look for
a WiFi network named “ROVE_R2-4K_PRO_*******”on the lists.
Join the “ROVE_R2-4K_PRO_*******” network using a default
password displayed on your dash camera’s screen. (Default
Password: 12345678)
Once your smartphone is connected to the ROVE Dash Cam
WiFi, go back to the ROVE APP and choose your dash cam
model, then click proceed to be connected. You should see the
live video feed from the camera on the main home screen of the
ROVE APP.
Now you are all set to access your recording from the ROVE app
and explore it further.
1
2
3
4
STEP 3: Turn the WiFi ON from the R2-4K PRO's Settings
35
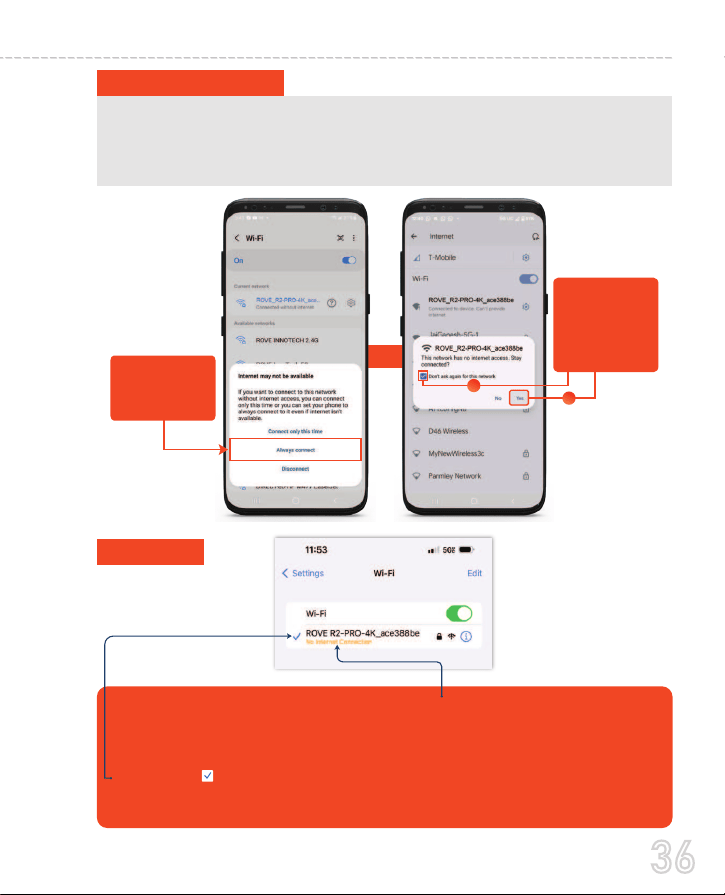
OR
If this pop up
show up, make
sure you select
“Don’t ask again”
and then select
“YES”
1
2
There is one extra step you will have to take for the first �me. Once you connect to ROVE
R2-4K PRO WiFi, it will say “No Internet”. Which is fine. Wait about 10-15 seconds un�l you
see the below pop up or no�fica�on. You just have to tap on the pop up no�fica�on that will
show up in few seconds to select that you s�ll want to stay connected even though there is NO
Internet. Once you select this OK, you are set to go. Please contact us if you need any help.
For Android phones:
For iPhone:
If this pop up
show up, make
sure to select
“Always Connect”
For iPhone, it will display or show "No Internet Connec�on", which is normal
and you can ignore this message. As ROVE R2-4K PRO does NOT provide the
internet, so the iPhone will show this message. You are only making a
connec�on between your iPhone and ROVE R2-4K Pro using the WiFi. Once
you see this o Blue Check Mark, you are connected to the ROVE R2-4K PRO'S
WiFi. You can simply proceed to open the ROVE Dash Cam APP at this point.
36
USER MANUAL
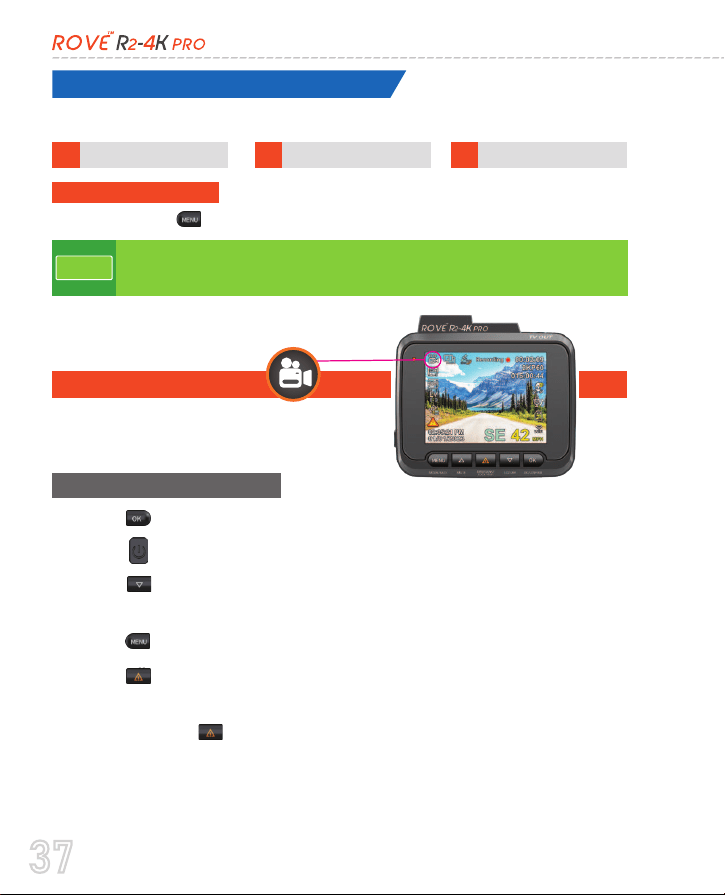
UNDERSTANDING 3 – CAMERA MODES
1.
VIDEO MODE
2.
PHOTO MODE
3.
PLAYBACK MODE
TO SWITCH MODE:
ROVE R2-4K PRO has 3 different camera modes:
Press & Hold
“M button for 2-seconds.
While in the Video Mode:
Press OKbutton to Start/Stop video recording manually.
Press Pw button Once to take a snapshot.
Video mode lets you record live videos and
store them on the installed microSD card.
•
•
•
•
•
•
Press MEbutton to enter Video Setting.
Press & Hold
“ ” to turn ON/OFF WiFi.
Press
DO button to Turn Off/On LCD. (Camera still stays ON
if you use this button - Red LED indicates camera is still ON)
Press ” while video is being recorded to manually lock the
video, so it will not get deleted by loop cycle function.
1. VIDEO MODE:
•
Each Mode has their own separated Menu settings.
•
System Settings are common between all three Modes.
NOTE
37
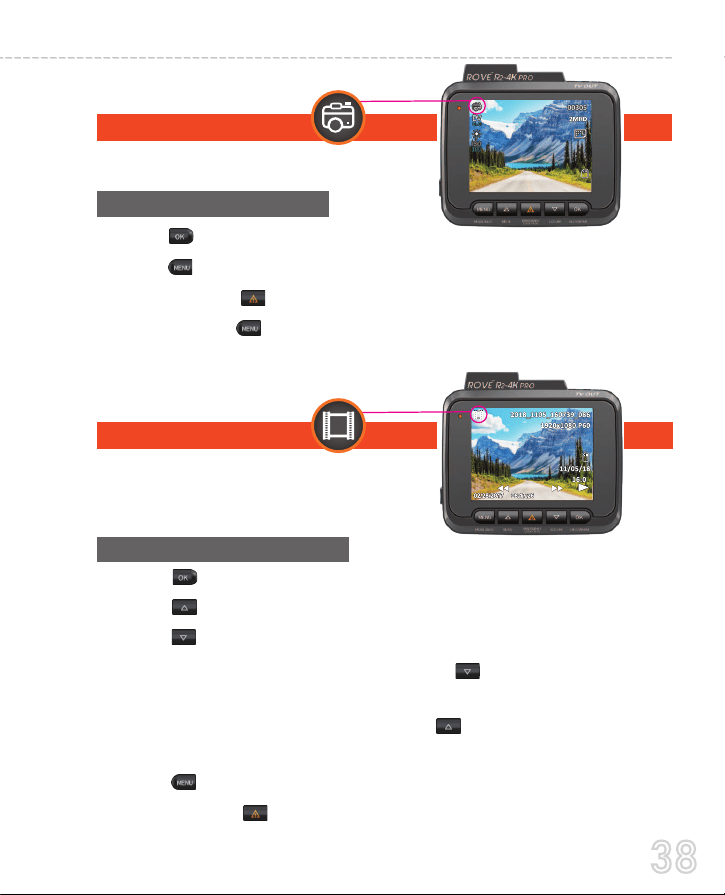
While in the Photo Mode:
•
•
•
•
Press
O button to take a snapshot
Press
MEbutton to enter Photo Mode’s Menu Settings
Press & Hold
“ ” to turn ON/OFF WiFi
Press & Hold button to switch to the Playback Mode
•
•
•
•
•
•
•
Playback mode lets you play your Video
file or photos. It can even let you delete
or lock any videos while viewing it.
Press
0K button to Play/Pause Video.
Press
0K button to scroll to Previous ( < ) video file.
Press
0K button to scroll to Next ( > ) video file.
While Video is being played, press
0K button to FF Video
playback up to 8x.
While Video is being played, Press
U button to REVERSE FF
Video playback up to -8x.
Press
Me button to enter Playback Setting Menu.
Press & Hold " " to turn ON/OFF WiFi.
3. PLAYBACK MODE:
Photo mode lets you take a snapshot.
While in the Playback Mode:
2. PHOTO MODE:
38
USER MANUAL
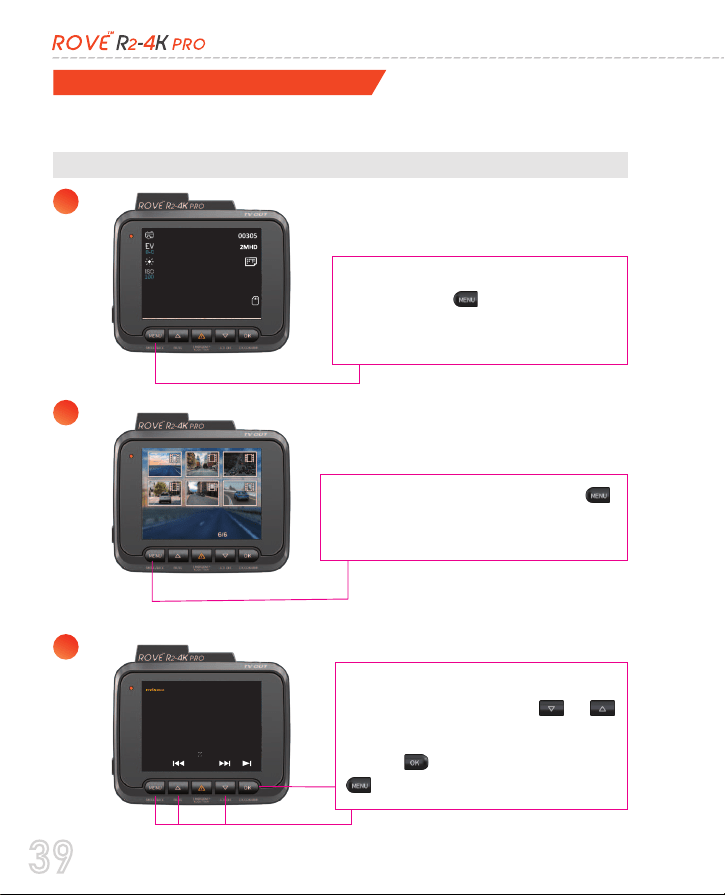
Then Press and hold the M’
button again to switch from
Photo mode to Playback mode
Use the on-screen navigation
button and use the
upd/wn
button to scroll your videos.
Press OK to play video. Press
-- to go back to video list.
00:00:0500:00:05
2023_0202_185411_0450
2023_0202_185411_0450
X1
X1
Playback Your Recorded Videos
A. Directly On The CAMERA by switching to the PLAYBACK MODE
There are 3 different ways you can access your videos.
1
2
3
You can do this by pressing and
holding the
M button for two
seconds so it will switch from
Video mode to Photo mode.
39
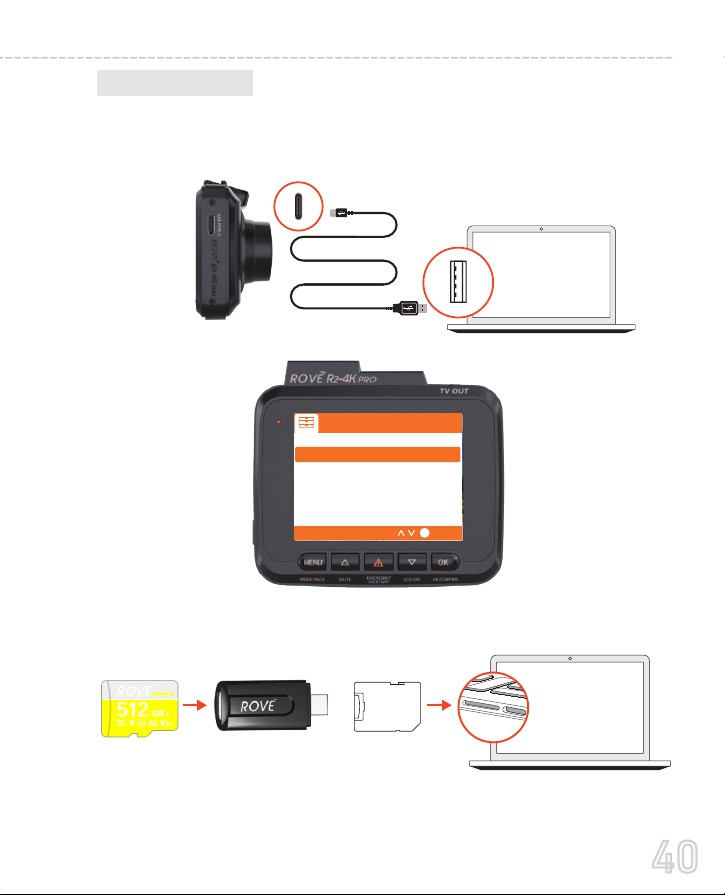
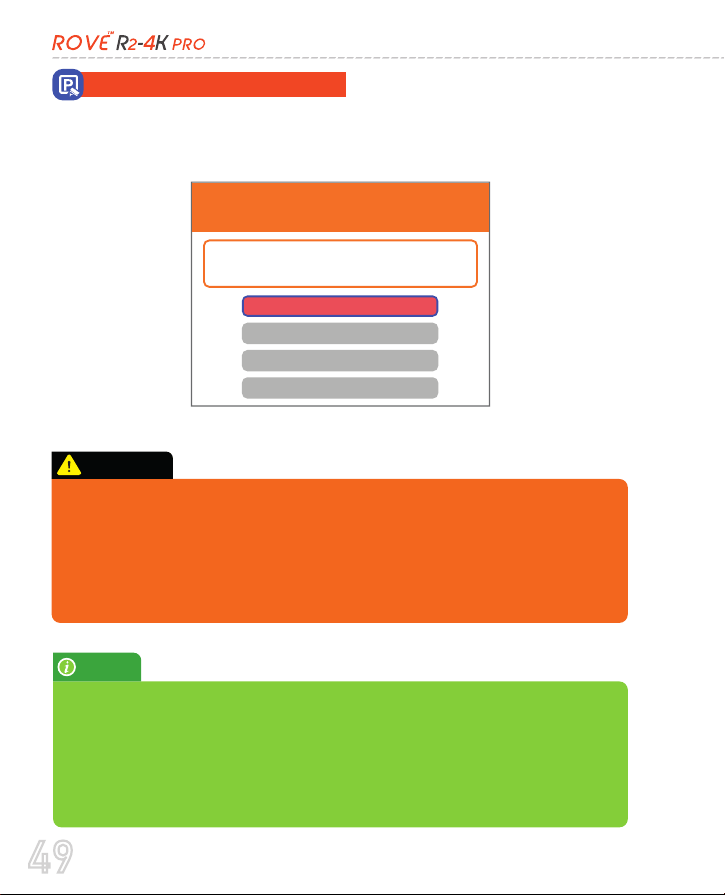
To play on your PC/Mac, simply connect the camera using
included short USB Type-C Data cable and choose the Connect as
USB Flash Drive on the camera when this message pops up.
B. On PC/MAC
Then find the added memory card drive on your computer and
then simply double-click on the video to play them.
Connect to PC/MAC
Connect as USB Flash Drive
Connect as PC/MAC Webcam
Operate Camera Normally
OK
You can simply remove the memory card from the camera and
insert it directly into your PC if you have a memory slot.
Or,
SD Card
Adaptor
OR
40
USER MANUAL
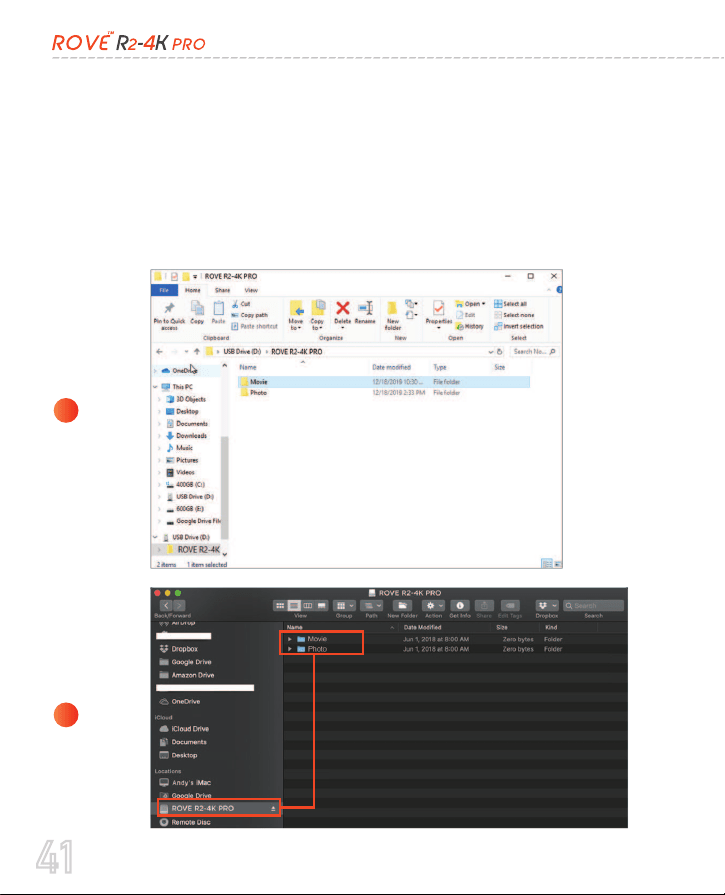
Then simply go to MY PC or Folder, then look for the added flash
drive. You should be able to see drive "D" or "E" or another name
depending on the pre-installed hard drives.
Once you find the added flash drive, double-click on it, then you will
see the R2-4K PRO folder where you will find your unlocked videos.
You will also see a folder named "EVENT" which means read-only,
where you will see your locked videos.
A
PC
B
MAC
41

Correct Video Player To Play 4K VIDEOS:
We recommend VLC Media player. You can get it free at
www.videolan.org .
You can also use our GPS Player from our website for free to view
the google maps from www.rovedashcam.com
42
USER MANUAL

C. On Smart Phone
To play on Smart Phone, simply turn on WiFi first from the
camera, then connect the ROVE R2-4K PRO WiFi by entering the
defalt password “12345678”
Once connected, simply open the correct ROVE APP for your
model. Please note that the ROVE R2-4K PRO model uses “ROVE
Dash Cam” App only. So make sure you are using the correct
App And make sure to select the correct model from the left
navigation menu within the APP.
(For more step-by-step instructions about the WiFi features see
page 32 for details)
43
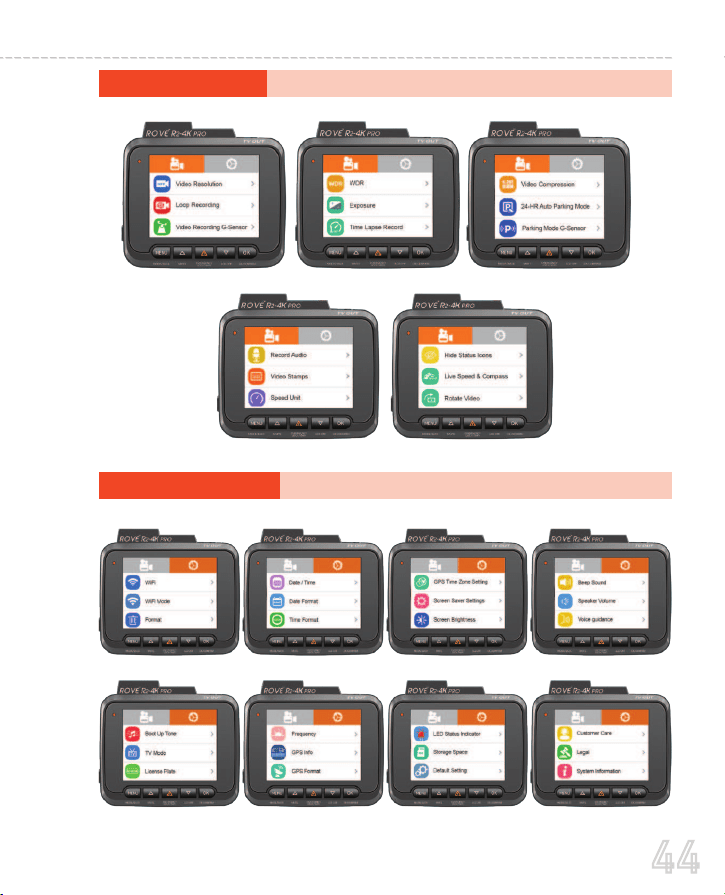
VIDEO SETTINGS
SYSTEM SETTINGS
44
USER MANUAL
UNDERSTANDING CAMERA SETTINGS
Short press Me Key to enter the setting interface after power on.
In this case, the video recording will be stopped and you get the
Settings Menu.
Attention: To EXIT the Settings Menu, Press the M button to go back.
VIDEO SETTINGS
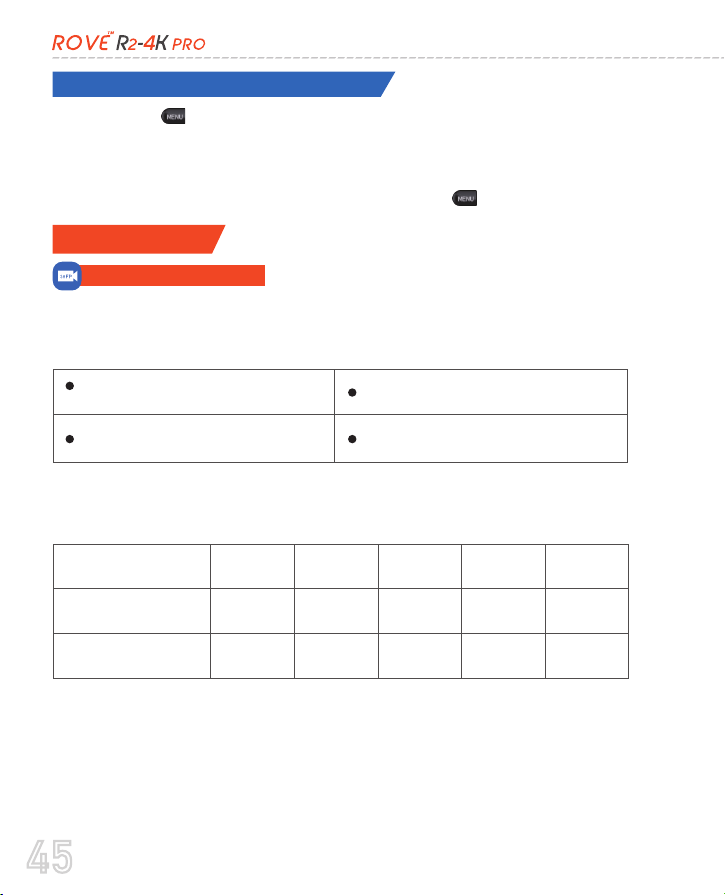
VIDEO RESOLUTION
You can choose the video resolution you like. Higher-resolution
videos will take up more storage space.
This is approximate but close, give or take a few mins depending
on the memory card. The lower the resolution, the more it will
hold, and the higher the resolution, the less it will hold.
4K 3840x2160 @30FPS
2K 2560x1440 @30FPS & 60FPS
1080P 1920x1080 @30FPS
1080P 1920x1080 @60FPS
Below are the estimations of how much time is stored on the
memory card in the loop feature:
Resolution
2160p @ 30fps
2 hrs
4 mins
5 hrs
4 mins
4 hrs
8 mins
10 hrs
9 mins
20 hrs
18 mins
40 hrs
36 mins
8 hrs
18 mins
16 hrs
36 mins
81 hrs
15 mins
33 hrs
10 mins
1080p @ 60fps
(Default)
32GB 64GB 128GB 256GB 512GB
(NOTE: Support with only H.265 Video Compression)
45

LOOP RECORDING
OFF- 4GB MAX 1-MIN (Default), 3-MIN, 5-MIN, 10-MIN
This feature allows the camera to continuously record loop by
loop so it can delete the oldest video files automatically when the
memory card becomes full so you don’t have to manually delete
them. This feature will split each video file to an appropriate
length based on your selection.
OFF: When you choose off, the camera will continue to record each
file 4GB in size until the memory card becomes full and then it will
give you a “Card Full” message. It will NOT record any further until
you either delete files to make room or format the memory card.
The logic for the loop recording feature is designed as follows:
Let’s say the total capacity of the memory card is 100%. When the normal
+ event videos reach > 90%, the dash cam will start the loop recording.
The pre-allocation of directory space for normal and event videos is as
follows:
Normal Videos = 60%, Event Videos = 30%
If the number of event files is less than 30%, then the normal video files
can occupy the unused space of the event allocation until it reaches 90%,
and then the loop recording begins.
When more event (Locked) video files are present, the space of the event
directory is reserved for a maximum of 30%.
If the event video files reach their max allocation of 30%, then the camera
will also delete your oldest locked video to add that new latest event video.
Therefore it is important to understand that you can’t lock unlimited
videos to your memory card. If you lock any videos files that are important,
please note that even lock videos will be deleted similarly to the loop cycle
function with the oldest file first so if an event occurs and if your locked
video allocation is exhausted, to ensure proper room for a new locked
event video in case of a real event. We recommend that you download any
locked video ASAP to prevent it from being deleted.
IMPORTANT:
46
USER MANUAL
VIDEO RECORDING G-SENSOR
While Video is Being Recorded:
In the event when G-Sensor is
triggered due to physical or gravitational impact force on the
camera, the current loop cycle length of the video file will be
locked so it will NOT be deleted by the normal loop cycle function.
G-Sensor is a 3-axis impact gravitational accelerometer which is
designed to detect physical and gravitational forces on the camera.
In the event of an accident please make sure you retrieve your
footage before using your camera again to prevent the loss of
important video files due to the loop cycle function, in case the
force was minor and did NOT trigger the G-Sensor to lock the
video file automatically. It is a best practice and recommended
to you to retrieve all necessary video footage after any event of
an accident before using your camera to prevent the loss of
vital video files.
CAUTION:
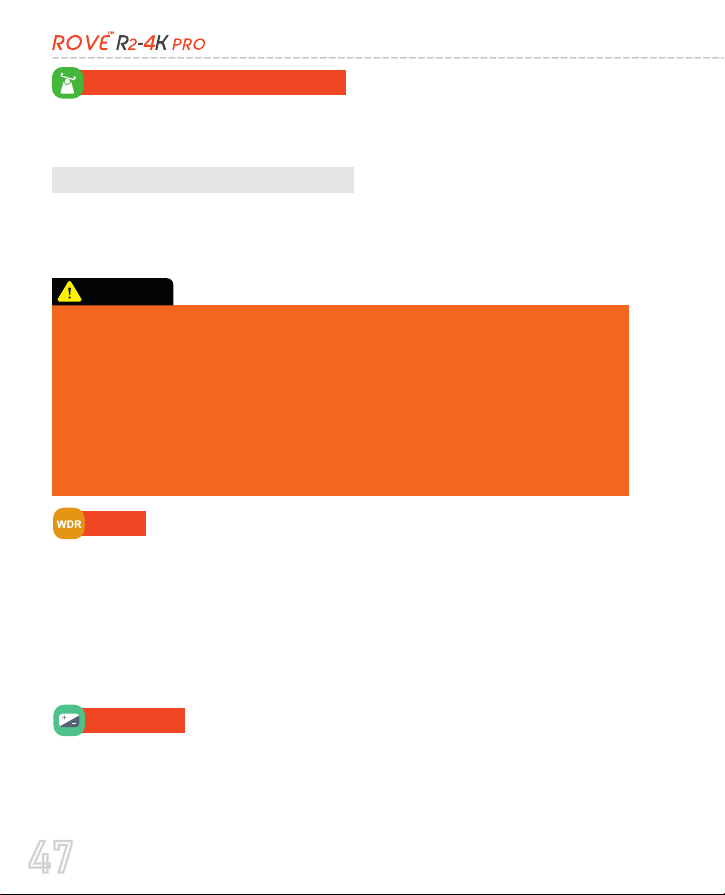
WDR
Wide Dynamic Range (WDR) improves the exposure by taking
the combinations of over-exposed and under-exposed images
into one robust wide range of lighting with higher depth images.
ON (Default)
OFF
•
•
0.0 (Default)
-2, -1.7, -1.3, -1.0, -0.7, -0.3, 0.0, +0.3, +0.7, +1.0, +1.3, +1.7, +2
•
•
EXPOSURE
This feature allows you to adjust the brightness of a captured image.
47

TIME-LAPSE RECORD
OFF
4 frame/second (Smoother)
2 frame/second (Smooth)
1 frame/second (Normal)
Time Lapse recording mode allows you to capture specific
images per second at a much lower rate. So when you combine
and play those images at the normal 30fps rate, everything seems
to be moving faster in time-lapse.
Enabling this feature will keep it ac�vated at all �mes, even a�er the
camera restarts, resul�ng in �me-lapse speed (faster playing) for your
videos. If you prefer regular speed playback, please ensure to turn this
feature OFF before powering off your camera.
WARNING:
H.265 playback can be laggy and might NOT play smoothly if your PC/MAC
or other devices are NOT compa�ble with H.265. So if you don’t have
advanced new devices, then keep this se�ng at H.264 (Default).
•
•
•
•
VIDEO COMPRESSION
H.265 HEVC = High-Efficiency Video Coding - This advanced
compression algorithm improves video quality with a smaller
file size compared to H.264.
H.264 (Default)
H.265
•
•
NOTE
48
USER MANUAL
24-HR AUTO PARKING MODE
Never connect the dash cam directly to your car’s 12/24V ba�ery by
modifying wires. The dash cam is not designed to handle direct current
from the ba�ery. It needs a step-down circuit in the middle (Hardwire Kit)
to adjust the current required by the dash cam. You must connect the dash
cam using the ROVE Ul�mate USB Type-C Hardwire Kit and connect it to
the car’s fuse box (NOT to ba�ery terminals directly).
CAUTION:
NOTE:
The camera has a built-in temperature sensor. During sunny a�ernoons
and direct sunlight with a locked car, the temperature inside the car turns
into a greenhouse effect, and depending on your geographical loca�on
the temperature can exceed the recommended guidelines for this
product. When this happens, the camera will automa�cally shut down to
prevent damage to the unit to ensure longer product life.
ROVE has custom-designed its parking monitor for the best user
experience and automation. Please see the details below.
Triggers automatically when you turn
OFF your car. (Hardwiring Kit Required)
NOTE: 3-Lead Hardwiring Kit is Required to Use
This Feature. Purchase separately from,
“www.rovedashcam.com”
Time-Lapse 1fps & G-Sensor
OFF
Motion Detection & G-Sensor
Collision Detection Only
49
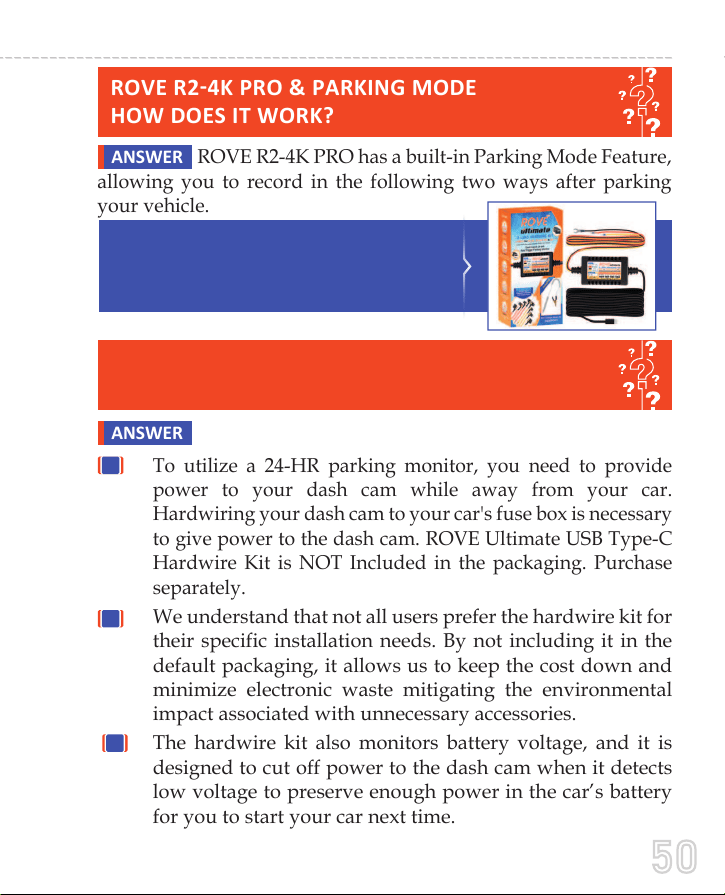
ROVE R2-4K PRO has a built-in Parking Mode Feature,
allowing you to record in the following two ways after parking
yourvehicle.
ANSWER
ROVE R2-4K PRO & PARKING MODE
HOW DOES IT WORK?
To utilize a 24-HR parking monitor, you need to provide
power to your dash cam while away from your car.
Hardwiring your dash cam to your car's fuse box is necessary
to give power to the dash cam. ROVE Ultimate USB Type-C
Hardwire Kit is NOT Included in the packaging. Purchase
separately.
We understand that not all users prefer the hardwire kit for
their specific installation needs. By not including it in the
default packaging, it allows us to keep the cost down and
minimize electronic waste mitigating the environmental
impact associated with unnecessary accessories.
The hardwire kit also monitors battery voltage, and it is
designed to cut off power to the dash cam when it detects
low voltage to preserve enough power in the car’s battery
for you to start your car next time.
ANSWER
Before we go into details, please NOTE that
the ROVE Ultimate USB Type-C Hardwire Kit
is required for the parking mode to work.
WHY DO I NEED TO PURCHASE
AN ADDITIONAL HARDWIRE KIT?
1
2
3
50
USER MANUAL
When this feature is set to ON and ROVE Ultimate USB
Type-C Hardwire Kit is installed properly.
Then, when you turn OFF the car’s engine and turn the key
to the lock position.
Then the camera will STOP the continuous video recording
and it will go into the timelapse 1fps recording mode
automatically.
Now while this timelapse is being recorded, If someone hits
your car and the impact reaches the set G-Sensor level, then
the camera will stop the timelapse video > then it will start to
record a 1-min continuous video, save & lock that video in the
EVENT folder > then return to recording the timelapse 1fps.
1
2
3
4
5
Now when you start your car for the next time, the camera
will automatically STOP the timelapse 1fps & G-Sensor
parking mode. Then it will go into normal video mode
automatically to start the continuous video recording.
(When the Parking Mode got ac�vated, the camera will give you a voice
alert sta�ng “Parking Mode got ac�vated while you were away” when you
turn ON your car the next �me. If you hear this, you should check the locked
videos to see what happened.)
NOTE
HOW DOES THE "TIME-LAPSE + G-SENSOR"
PARKING MODE WORK?
Time-Lapse 1fps & G-Sensor: (See how this feature works)
51
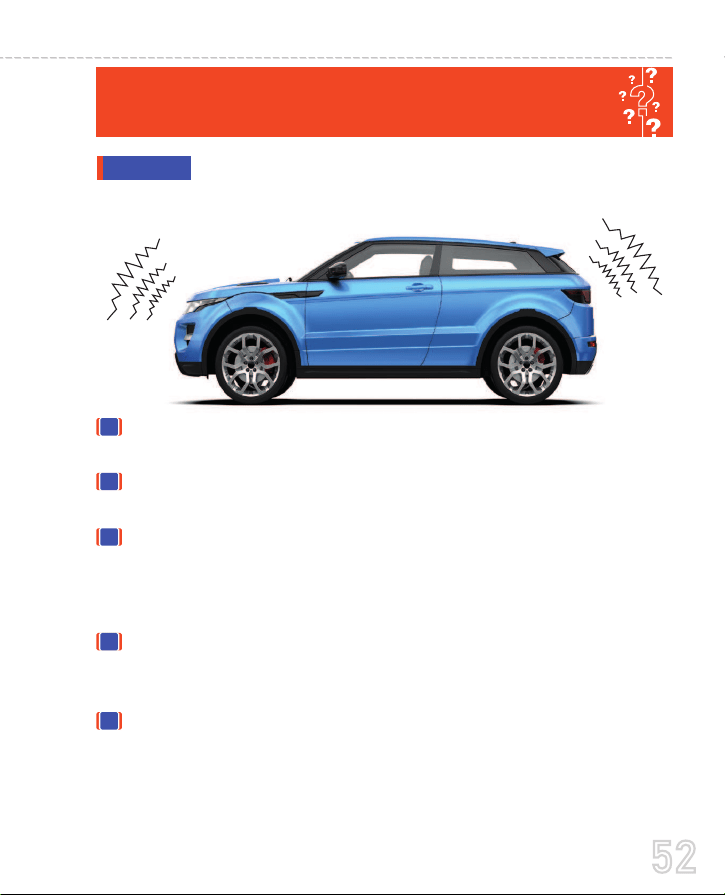
1
2
3
4
5
STOP the Continuous Recording from the normal video
mode.
Then the R2-4K PRO will turn OFF. However, it actively
senses any impact while the car is turned OFF.
Now, if someone hits your car & if the impact reaches the set
"Parking Mode G-Sensor" level, then >> the dash cam will
turn ON and START RECORDING 1-min video. Then it will
LOCK & SAVE that video in the events folder and turn OFF.
Then the dash cam will be actively sensing any impact until
someone hits your car again (which we hope you won't get hit
twice in one day - LOL) or until you start your car's engine.
When you start your car's engine for the next time, the dash
cam will give you an alert stating that the "Parking Mode Got
Activated While You Were Away" (You will hear an audible
alert & also an on-screen pop-up).
HOW DOES THE "COLLISION DETECTION ONLY"
PARKING MODE WORK?
When you turn OFF your car's engine, and if the
Hardwire Kit is installed properly > then the dash cam will -
ANSWER
52
USER MANUAL
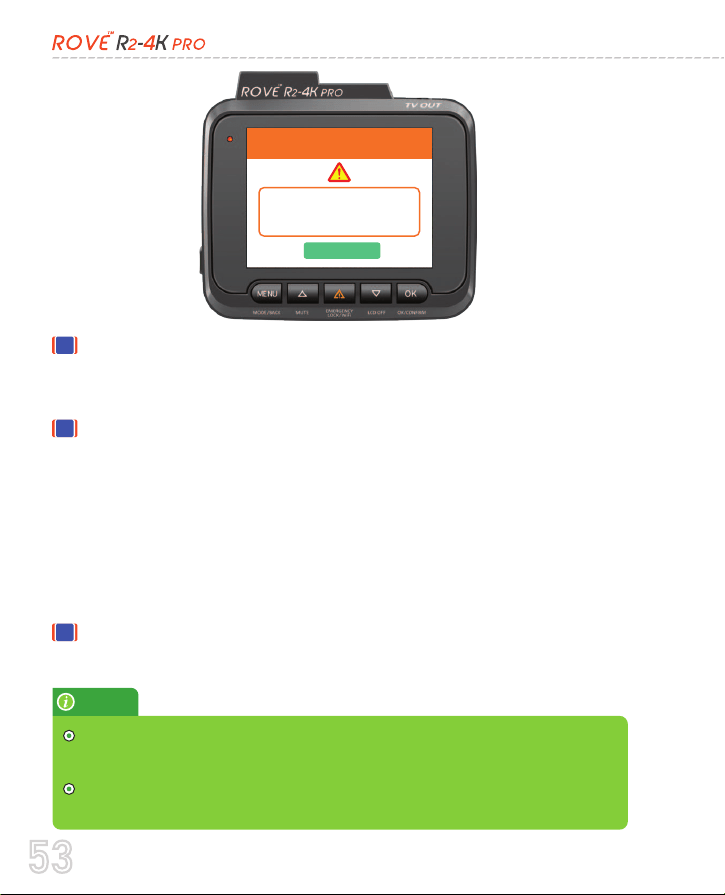
6
7
8
You will need to tap the OK button on the screen to
acknowledge that pop-up. Then you can check and see
what happened by going through the last event video.
However, let's say No One hits your car, and if the "Parking
Mode G-Sensor" didn't get activated, you will NOT get any
parking mode alert. >> In this case, when you start your
car's engine for the next time, the dash cam will switch to
the normal continuous recording mode, and it will say
"recording started" and the Parking + Timelapse icons will
disappear. This means that now your dash cam is in normal
continuous recording mode, which is what you want.
If you need to watch the activated parking mode videos,
you will find them under the Events folder.
NOTE:
The parking mode �me-lapse videos will NOT be saved under the events
folder. You can find them under normal video folders.
While in parking mode, the GPS and WiFi are designed to turn off
automa�cally to save power while in the parking mode.
OK
PARKING MODE GOT ACTIVATED!
The parking mode got activated
while you were away.
Check the LOCKED Video to see
what happened.
53

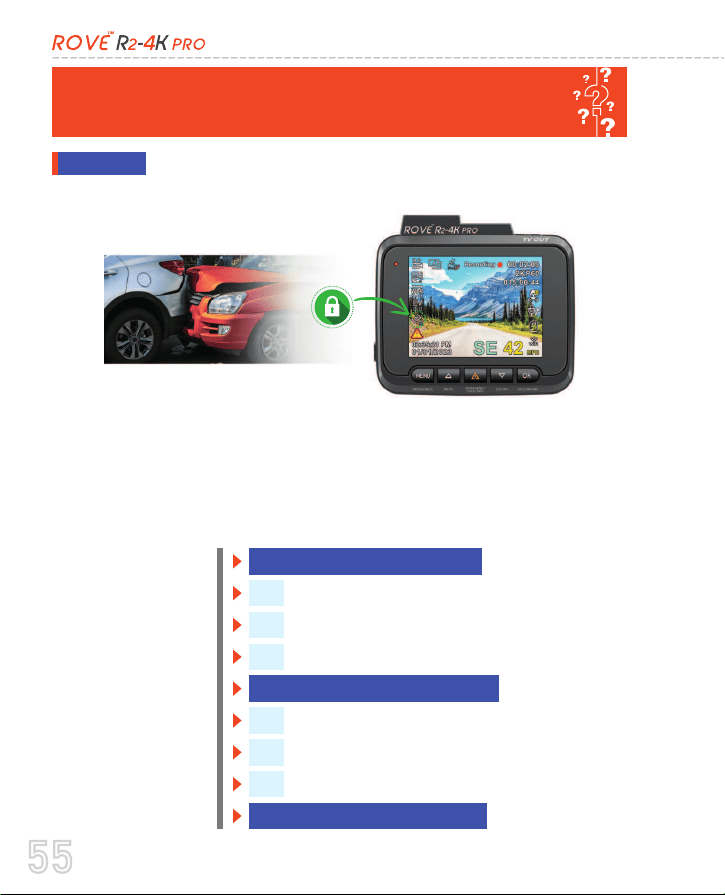
1
2
3
4
5
6
When this feature is set to ON and ROVE Ultimate USB
Type-C Hardwire Kit is installed properly.
Then, when you turn OFF the car’s engine and turn the key to
the lock position.
Then the camera will STOP the continuous video recording
and it will go into the motion detection mode and the camera
will stay ON and idle, but LCD will be off after some seconds.
Now the camera will only record video when it detects
motion in front of the FOV of the camera and then it will
record until there is no more motion is detected.
Now while the camera stays in Motion Detection mode, If
someone hits your car and the impact reaches the set
G-Sensor level, then the camera will stop the motion
detection mode > then it will start to record 1-min continuous
video, save & lock that video in EVENT folder > then return
back to the motion detection mode.
Now when you start your car for the next time, the camera
will automatically STOP the motion detection & G-Sensor
parking mode, and it will go back into normal video mode
automatically to start the continuous video recording.
(When the Parking Mode got ac�vated, the camera will give you a voice
alert sta�ng “Parking Mode got ac�vated while you were away” when you
turn ON your car the next �me. If you hear this, you should check the locked
videos to see what happened.)
NOTE
HOW DOES THE "MOTION DETECTION &
G-SENSOR" PARKING MODE WORK?
Motion Detection & G-Sensor: (See how this feature works)
54
USER MANUAL
This depends on your various factors and your
personal preference. We will discuss a few most common
scenarios to educate yourself.
For the Parking Mode G-Sensor setting, you can select between 1
to 9 different Gravitational Sensor (G-Sensor) levels.
Where 1 = Lowest (Smallest) Impact Detection and 9 = Higher
(Larger) Impact Detection.
ANSWER
WHAT LEVEL SHOULD I SET MY "PARKING
MODE G-SENSOR" SETTING AT?
1 = Triggers at Lower Impact
2
3
4
5 = Triggers at Medium Impact
6
7
8
9 = Triggers at Higher Impact
55

If you set your parking mode G-Sensor at 1, the dash cam
will be extremely sensitive. Even the lowest vibration, such
as hard tapping the LCD or Closing the Car's Door, will
activate the R2-4K Pro dash cam.
You would want this if you want your dash cam activated
with the slightest hit to the car.
However, there are downsides to this. Your dash cam will
activate even when you close the car's door while exiting
your vehicle. This will give you false parking mode got
activated alerts. However, the positive side of this is that
your car/dash cam is sensitive to minor bumps/hits to
your car.
If you set your parking mode G-sensor at just the right
setting, where it will NOT trigger the false alerts by closing
your car's door, you will NOT get false signals. Then when
you do get alerts, you know to check the last locked videos
to see what happened because you didn't anticipate the
false alerts.
However, the downside is that your dash cam is not extra
sensitive to more minor bumps/hits because you have set
your G-sensor to a higher level so that you may miss some
smaller bumps/hit events.
However, there is one more positive side; if you have used
time-lapse + collision detection, you should have your
parking mode time-lapse videos saved in normal folders.
So if you suspect someone might have hit your car or
something, then you can still always go look at the
time-lapse videos. We hoped this made sense and was
helpful.
1
2
56
USER MANUAL
This stamps menu allows you to choose your choice of stamps for
the bottom of the video. By default, they are all ON.
Date & Time
Speed
GPS Location
ROVE Logo
•
•
•
•
VIDEO STAMPS
By turning OFF Speed stamps the camera will NOT a�ach the
speed-embedded data with the video. So when you play your video on
GPS Player, you will NOT see any speed associated with the video.
By turning OFF GPS Loca�on the camera will NOT a�ach the GPS
Coordinates or the Driving Route Loca�on with the video. So when you
play your video on the GPS Player, you will NOT see any GPS tracker on
Google/Baidu maps.
1.
2.
NOTE
•
KM/H
•
MPH (Default)
You can choose desired speed option stamp to be displayed and
recorded on video stamp based on your selection.
SPEED UNIT
RECORD AUDIO
Rove r2-4k--
has a built-in microphone to record audio with
video. You can choose to record mute video by choosing OFF.
You can also press the UP button to mute/un-mute while the
video is being recorded.
•
OFF
•
ON (Default)
57

OFF (Default)
ON
This feature will allow you to flip your video 180° so you can still
have the correct side of the image when the camera is mounted
upside-down.
ROTATE VIDEO
Live Speed
Compass
This feature allows you to see LIVE SPEED & COMPASS
Direction on the HOME SCREEN.
•
•
LIVE SPEED & COMPASS
By turning off this feature, it does NOT turn OFF the Driving Speed or the
GPS metadata. To turn OFF speed stamps, see the " VIDEO STAMPS" menu.
NOTE
HIDE STATUS ICONS
OFF (Default)
1-minute
3-minutes
5-minutes
This feature allows you to hide all icons on the LCD screen of the
camera so you can have a full view of the image.
58
USER MANUAL
PHOTO SETTINGS
CAPTURE MODE
To Enter Photo Se�ng
RESOLUTION
Here you can choose to take a single shot snapshot or set the
self-timer according to your preference.
Single Shot (Default)
2-Second Self Timer
5-Second Self Timer
10-Second Self Timer
•
•
•
•
VGA 2MHD 3M 4M 5M 8M 10M 12M
Here you can choose your desired photo resolution. The higher the
resolution the better the pixel resolution for the captured image.
• • • •• • • •
Press & Hold "M"button to enter Photo Mode.
Press
" button ONCE to enter Photo Settings.
Press
"D" button to access photo settings.
Now use
" " or "D" buttons to scroll through > then press "0K"
button to enter particular setting > then press "O”button again
to confirm that setting and exit to photo setting's menu.
1.
2.
3.
4.
3F/SECOND BURST MODE
This feature allows you to take burst capture of 3-Frames/Sec with a
single press of a button.
OFF (Default) ON
• •
59
IMAGE QUALITY
IMAGE SHARPNESS
This feature allows you to choose the clarity of an image’s sharpness.
This feature allows you to set the quality level of an image
captured. Higher the image quality more space it will take on the
memory card.
Fine
Standard (Default)
Commonly
Strong Normal (Default)
Soft
PHOTO EFFECT
•
Color (Default)
•
Black & White
•
Sepia
This feature allows you to choose a color effect for the captured image.
WHITE BALANCE
Auto (Default)
Daylight
Cloudy
Tungsten
Fluorescent
This feature allows you to adjust the warmth of the light on an
image for various environments.
•
•
•
• • •
•
•
•
•
•
60
USER MANUAL
QUICK IMAGE PREVIEW
•
•
•
OFF (Default)
2-Seconds
5-Seconds
This feature will allow you to review each image immediately
after capturing the desired setting before taking the next image.
ISO
EXPOSURE
IMAGE STABILIZATION
This feature allows you to adjust the brightness of a captured image.
•
Auto (Default)
•
100
•
200
400
•
•
0.0 (Default)
•
-2, -1.7, -1.3, -1.0, -0.7, -0.3, 0.0, +0.3, +0.7, +1.0, +1.3, +1.7, +2
•
OFF
•
ON (Default)
This feature allows you to set the camera’s sensitivity to light when
taking photos. The higher the setting value the greater the sensitivity.
This feature allows the image stabilizer function to reduce
blurring of a captured image.
This feature is for camera's photo feature only and does not apply to videos
NOTE
61
To delete a locked or protected video, you need to unlock it first by going
to the Playback Se�ngs>Protect.
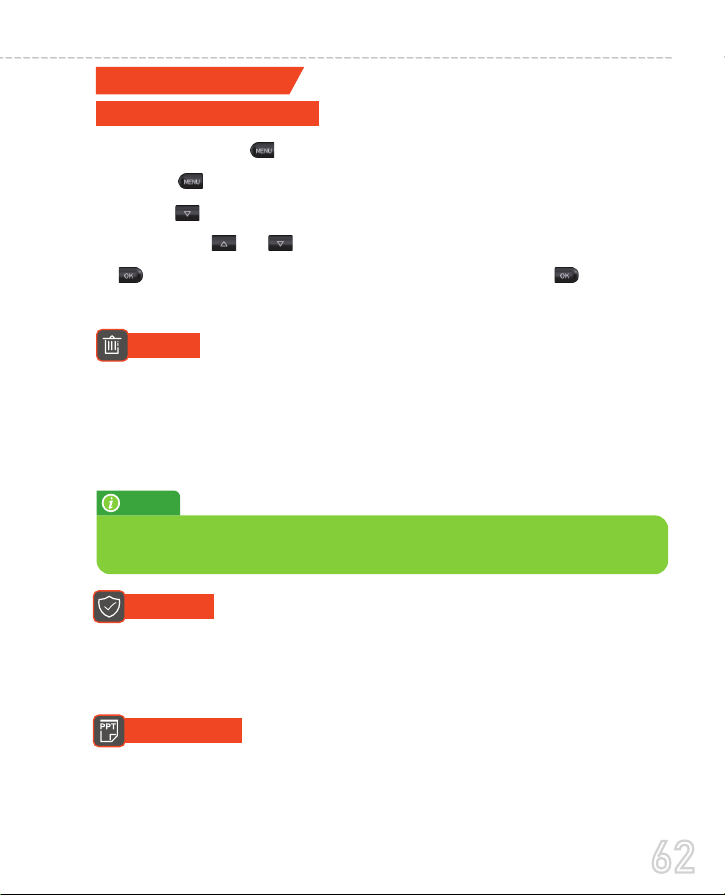
PLAYBACK SETTINGS
DELETE
To Enter Playback Se�ng
This menu will allow you to delete the current video or Delete All.
•
•
Delete Current (Delete current video file on LCD)
Delete All (CAUTION: This will Delete Entire Video & Photos
from memory card - Except the protected files)
1. Press & Hold "M" button two times to enter Playback Mode.
2. Press
"M" button ONCE to enter Play Settings.
3. Press
"D" button to access Play settings.
4. Now use
"U" or "D" buttons to scroll through > then press
" O" button to enter particular setting > then press "O" button
again to confirm that setting and exit to Play setting's menu.
•
Lock Current
•
Unlock Current
•
Lock All
•
Unlock All
PROTECT
This feature will allow you to make desired changes to saved
video & photo files on the memory card.
NOTE
SLIDE SHOW
•
2 Seconds
•
5 Seconds
•
8 Seconds
This feature allows you to view the slide show of your captured
photo images from the memory card.
62
USER MANUAL
(To View/Save Video Files to your Phone via WiFi See Page 32)
2.4GHz
5GHz
(Default)
•
•
SYSTEM SETTINGS
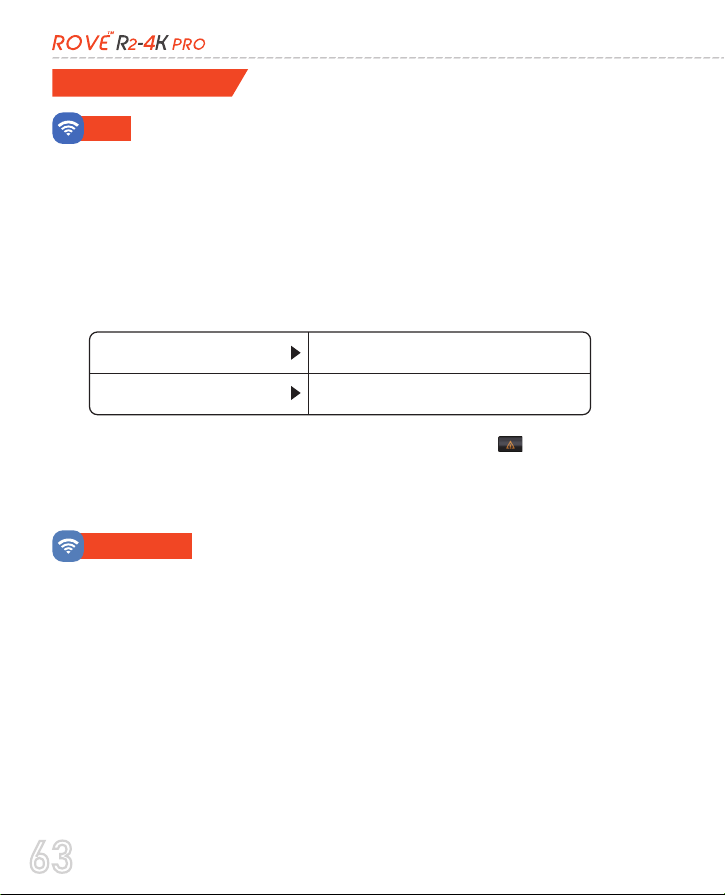
WIFI
This feature will allow you to turn the WiFi broadcast ON from
the camera so you can connect your phone with ROVE R2-4K
PRO Dash Cam to access videos, photos, and settings.
WiFi Name SSID
ROVE R2-4K-PRO-*********
Password
12345678
WIFI MODE
WiFi Mode allows you to choose the wifi band. The 2.4GHz band
provides coverage at a longer range but transmits data at a slower
speed. The 5GHz band provides less coverage but transmits data
at a faster speed. We suggest using a 5GHz band unless your
iOS/Android device is an older version and can only support
2.4GHz, which is very rare currently.
You can also turn WiFi ON by pressing & holding button for
2 seconds.
•
OFF (Default)
•
•
ON - Once (WiFi will turn off at restart)
Always On
(WiFi will always stay on even after restart in the background)
63

The GPS Time Zone will be automa�cally set to OFF if you manually set the
date and �me.
NOTE
GPS TIME ZONES SETTING
•
OFF (Default)
•
UTC/GMT -12:00 to UTC/GMT +12:00
Here you can choose your desired or local time zone setting based
on UTC/ GMT value. Please make sure to adjust the time zone
setting during standard vs. daylight savings time.
To find your correct UTC/GMT time zone setting, please visit :
(See page 31)
TIME FORMAT
This feature allows you to choose the clock time format to 12 or 24 hours.
12-Hours (Default)
24-Hours
•
•
DATE FORMAT
This feature allows you to select the date format.
DATE / TIME
•
MM/DD/YY (Default)
•
DD/MM/YY
•
YY/MM/DD
Here you can choose the date and time of your choice manually.
https://greenwichmeantime.com/time-zone/usa/
FORMAT
•
Cancel
•
Format
This feature will allow you to format an inserted memory card, all
the data will be deleted.
64
USER MANUAL
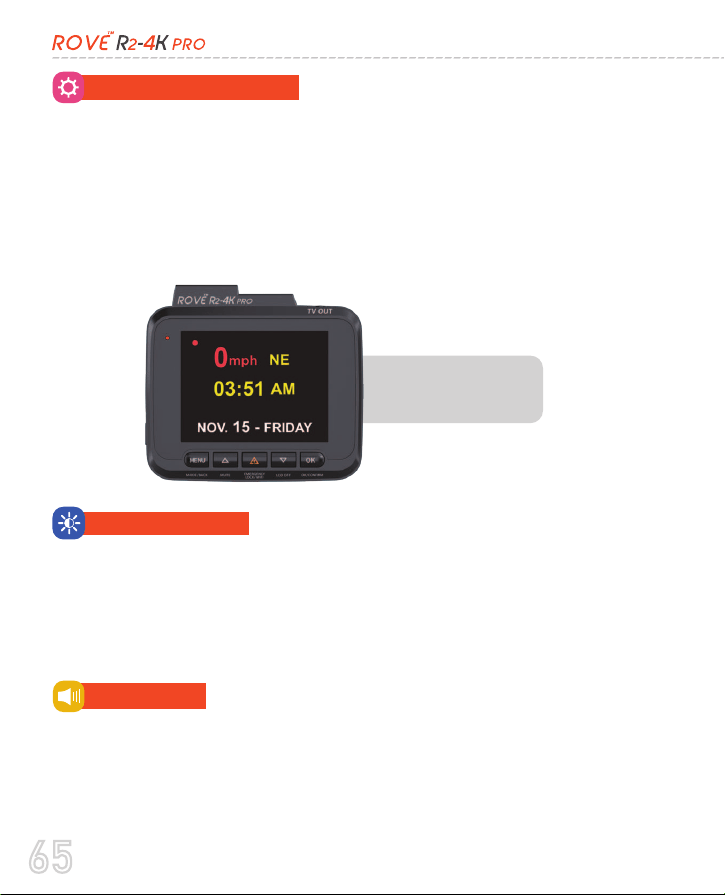
5.
SCREEN SAVER SETTINGS
Live Video Always ON: This will keep the video LCD ON all the time.
Screen Saver ON After 1-Min: This will turn ON the screen saver as
shown in the photo below after 1-min if NO button is pressed.
LCD OFF After 1-Min: This will only turn OFF the LCD after 1-min if
NO button is pressed (NOTE only the LCD Will turn OFF, the camera
still be operational)
SCREEN SAVER
This menu will allow you to set the screen brightness.
5.
SCREEN BRIGHTNESS
•
High (Default)
•
Medium
•
Low (Recommended to Prevent Heating)
BEEP SOUND
•
OFF
•
ON (Default)
This feature allows you to turn ON/OFF camera button’s beep
sound & any voice confirmation.
65

SPEAKER VOLUME
•
•
•
•
OFF
Low
Med
High (Default)
This feature allows you to set the volume level for the button’s beep
volume, playback video volume, and boot up chime volume through
the camera's internal built-in speaker.
BOOT UP TONE
•
•
OFF
ON (Default)
This feature allows you to choose the camera's boot-up chime to
be set to ON/OFF.
VOICE GUIDANCE
•
•
OFF
ON (Default)
Voice guidance is the female voice feedback you receive on your
camera. If you prefer to not receive voice feedback, you can set this
feature to OFF.
ROVE R2-4K Pro has an important failsafe voice feedback if the camera is
not recording the video when it is turned ON and si�ng idle. Therefore
the camera will remind you every 30 seconds that it is NOT recording the
video. If you hear this feedback, then you should check and inves�gate to
see why your camera is NOT recording the video. This prevents the missed
video on an accident when you need the most because your memory card
can fail a�er a certain life cycle and if you don’t check daily, you could
possibly not know that the camera was only turned ON but was not
recording the video. Therefore to avoid this failure, we strongly suggest
that you keep the Voice Guidance turned ON.
CAUTION:
66
USER MANUAL
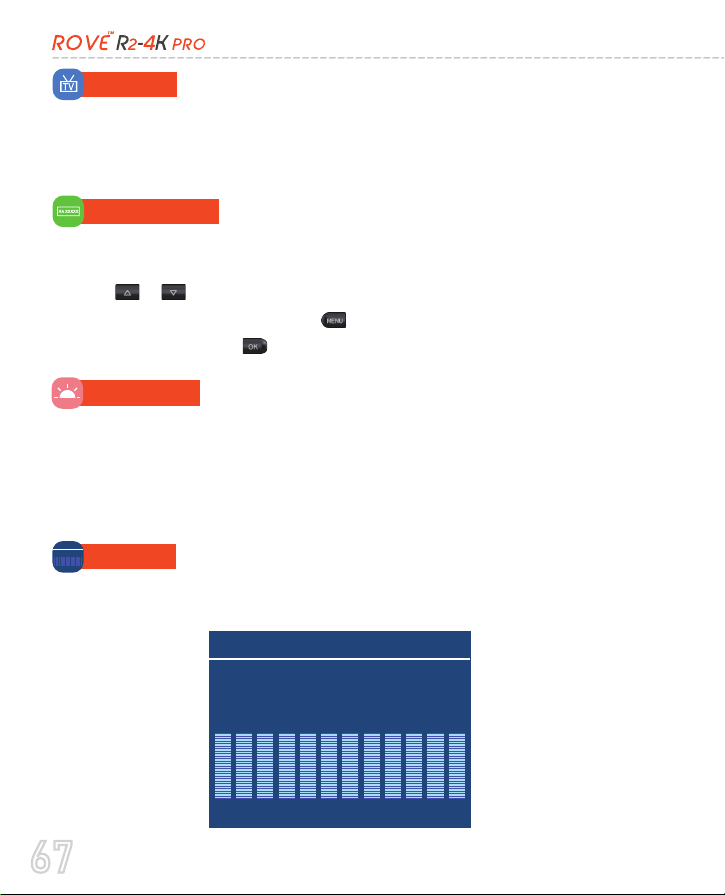
GPS INFO
This feature allows you to see your current geographical location
in Latitude & Longitude.
N42
o
50’ 15” W88
o
54’ 10”
Number Time 13:24:04
0.000
0.000
0
0
0
Logitude
Latitude
Speed
Direction
0 0 0 0 0 0 0 0 0 0 0 0
LICENSE PLATE
•
•
•
This feature will allow you to insert a custom vehicle ID or Driver
ID to be stamped on video.
Use
UP /D button to select desired character.
To add more characters' press "M"button to switch to next character.
When Done press OK button to confirm & exit.
TV MODE
•
NTSC (Default)
•
PAL
Here you can choose your TV mode based on your country’s TV setting.
FREQUENCY
•
60 Hz (USA – North America)
•
50 Hz (Europe – Most Asian Countries)
Here you should choose the frequency accordingly to your power
supply specification used in your country based on your
geographical location.
N42
o
50’ 15” W88
o
54’ 10”
Number Time 13:24:04
0.000
0.000
0
0
0
Logitude
Latitude
Speed
Direction
0 0 0 0 0 0 0 0 0 0 0 0
67

DEFAULT SETTING
•
Cancel
•
OK
Here you can restore all the settings to the factory default settings.
STORAGE SPACE
•
•
•
•
•
Total: (Memory Card Capacity)
Free: (Free Space in memory card)
Event: (Occupied space from Locked/Protected Video Files)
Movie: (Occupied space from normal video files)
Picture: (Occupied space from photo images)
This feature will allow you to check the storage of inserted
memory card into the camera.
LED STATUS INDICATOR
•
•
OFF
ON (Default)
This feature allows you to choose the camera's LED status
indicator to be set to ON/OFF.
GPS FORMAT
•
Decimal Degrees
•
Degrees, Minutes, Seconds
Here you can choose the GPS format as Decimal or Degrees,
Minutes, Seconds.
68
USER MANUAL
SYSTEM INFORMATION
Here you can check the current firmware version installed on
your camera. You will need this information in the future to check
if a newer version of firmware is available.
Please visit:
www.rovedashcam.com
For the latest firmware
upgrade instructions. Firmware updates are provided for R2-4K
PRO using iOS or Android APP.
(See page 12)
LEGAL
Copyright 2023, All rights are reserved by ROVE.
FCC ID: 2A3IW-R2-4KPRO
This device complies with part 15 of the FCC rules. Operation is
subject to the following two conditions.
This device may not cause harmful interference, and
This device must accept any interference received, including
interference that may cause undesired operation.
1
2
Hours: Mon - Fri 9am-5pm PST
EMAIL US
TEXT US
For faster response text us
1 (401) 484-ROVE(7683)
CUSTOMER SERVICE
CUSTOMER CARE
69

RESETTING THE CAMERA
1. Reset The Hardware/Camera:
Press the RESET Button at the bottom of the camera once. If the
camera is freezing or stuck where no buttons will respond, then
please press the RESET button only ONCE at the bottom of the
camera with a paper clip or tip of the pen while it is turned ON.
This will restart the camera.
2. Se�ng Firmware/Camera to the default se�ngs:
If you get stuck with any settings and if you would like the
camera's all settings to be set back to the factory default settings,
then simply go to System Settings > and then scroll down until
you see the DEFAULT settings then set them to default settings to
reset all the settings.
Resetting Hardware & Software are two different things.
70
USER MANUAL
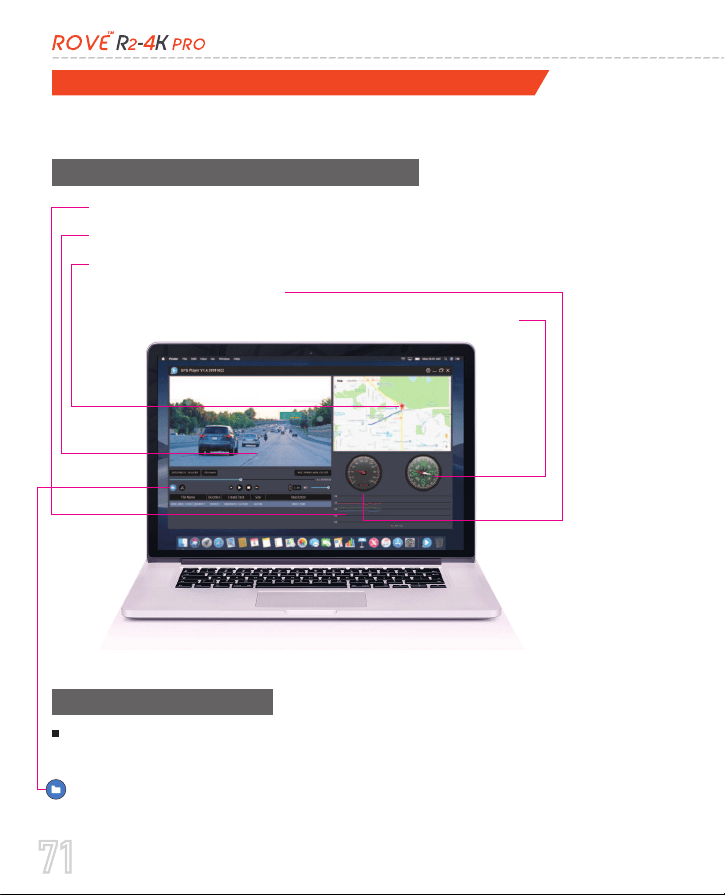
GPS player Software Installation (PC/MAC Only)
Using the GPS Player
To download FREE GPS Player, visit www.rovedashcam.com
(Only suitable for the units with GPS function)
Please open the customized video player and install it for the
first time use.
Click to browse on your added drive and select the video file
that you prefer to play in the player.
Check G-Sensor data
Play back your recorded videos
To see the Exact GPS route with the video on google maps
Check driving speed
Check driving direction (i.e. N, S, NW, SE, etc.)
Why GPS Player? What are the features?
71

1
2
3
5
6
Driving Speed
This is where your driving speed will be displayed.
Date & Time
Shows Date & Time of video was recorded
4 Playback Controls
•
Reverse
•
Play
•
Stop
•
Fast Forward
Slide Right or Le� to Increase or Decrease Volume
7 Volume Control
8 G-Sensor Indicator
This is where you can measure camera movement that is caused and recorded
by G-sensor force. I.e. when vehicle hits pot-hole or bump you can see it here.
9
10
11
Playback Time
GPS Coordinates
Tagging Device.
These are you coordinates longitude and la�tude recorded by GPS Geo
These are you previously viewed files. Click on to view them again.
Past Viewed Files
This is where your video play back �me is shown.
Direc�on at vehicle was driving at specific point of �me.
Speed of vehicle recorded at specific point of �me.
Vehicle Speed
Map Loca�on
Vechile Direc�on
Maps showing vehicle’s driving route recorded by GPS Geo
Tagging Device based on coordinates.
72
USER MANUAL

We at would like to provide One (1) full year of limited
warranty for your product from the date of purchase to be free
from defects in materials and craftsmanship.
ONE-YEAR LIMITED WARRANTY
Please save your warranty/serial number card as a
piece of evidence. Proof of original purchase is required for any
warranty service. (Online order receipt is also accepted)
IMPORTANT:
Warranty Terms Condi�ons
The warranty is confined to the first purchaser of the product and
is not transferable.
Service / Repairs during the warranty period shall be carried out
by company-authorized personal only.
It is the responsibility of the purchaser to bring the product to the
authorized service center at the purchaser's cost and risk.
The company will not be liable for any hardware and/or data loss
arising from the use of any third-party software whether
downloaded or otherwise.
In the event of repairs and/or replacement of any part(s) of the
product, this warranty will remain in force only for the unexpired
period of the warranty.
In case of any physical damage to the product and/or misuse
detected by the Authorized service center personal, the warranty
be void and service/repairs will be done on a chargeable basis
only and subject to the availability of parts.
The company's obligation under this warranty shall be limited to
repair or providing replacement of part(s) only. The maximum
claim(s) if entertained by the company will be subject to the
maximum retail price of the product purchased or the purchase price,
whichever is lower, and on production of original proof of purchase.
During the warranty period in the event of any unforeseen
circumstances where spares not available a commercial solution in
1.
2.
3.
4.
5.
6.
7.
73

LIMITATIONS / DISCLAIMER OF WARRANTY / LIABILITY
The company shall not be liable/responsible directly or indirectly
for any claim for compensations, damages, any losses, etc. Under
this "Limited Warranty" due to inconvenience, loss of time, loss of
profits, loss of business opportunity, loss of data, loss of goodwill,
work stoppage, any personal and/or commercial loss,
compensation for mental agony, anxiety, etc. Resulting from
the use of the product(s) or any direct or indirect loss of any
nature whatsoever (incl. any personal injury or death).
Except for the warranties set forth herein, of the company
disclaims all other warranties, expressed or implied or
statutory, including but not limited to the implied warranties
of merchantability or fitness for a particular purpose.
The maximum liability of the company under any circumstances
shall be limited to an amount equal to the invoice amount paid by
the purchaser to the company or a company-authorized reseller
for the Product(s).
lieu of repairs will be calculated based on company's prevailing
depreciation rules and the same will be binding on the purchaser.
The replacement unit will be either new or refurbished based on the
availability. We reserve the right to even upgrade you to the newest
version be it similar or not if we have discontinued the current model.
1.
2.
3.
4.
5.
Company shall not be liable directly or indirectly for any
claim for compensation if the Product has been exposed to
moisture and/or dampness and/or extreme thermal and/or
extreme environmental conditions or to rapid changes in such
conditions, to corrosion, to oxidation, to spillage of food or
liquid or to influence from external chemical products.
(hereinafter referred to as "the company") guarantees to
the purchaser that this product carries a warranty for the period
mentioned above, commencing from the date of purchase.
74
USER MANUAL

Please check your local or state laws before using in car recording
device. It is user's responsibility to comply with all local and state laws.
Dash Cam must be placed at proper location so
it does not obstruct your view while driving.
Do not use or manipulate any functions or any accessories of ROVE
Dash Cam while driving. Distraction is a leading cause of accidents.
The images and icons displayed in this user manual are intended for
illustrative purposes only. They are not real examples captured by
the ROVE dash cam. The purpose of these visuals is to provide a
visual representation of the features, functions, and user interface of
the product.
All rights are reserved. Duplication, transfer, distribution of the
contents herein in any manner without the prior written permission
of is prohibited. reserves the right to add, modify or
delete, any of the contents herein or withdraw this documents at any
time without prior notice and without assigning any reasons thereof.
For detailed terms and conditions refer
www.rovedashcam.com
SAFETY & LEGAL ASPECTS:
•
•
•
•
FCC ID: 2A3IW-R2-4KPRO
This device complies with part 15 of the FCC rules. Operation is
subject to the following two conditions.
This device many not cause harmful interference, and
This device must accept any interference received, including
interference that may cause undesired operation.
1
2
Copyright 2023, All rights are reserved by ROVE.
75

Reorient or relocate the receiving antenna.
Increase the separation between the equipment and receiver.
Connect the equipment into an outlet on a circuit different from that to
which the receiver is connected.
Consult the dealer or an experienced radio/TV technician for help.
This device complies with part 15 of the FCC Rules. Operation is
subject to the following two conditions:
This equipment has been tested and found to comply with the limits
for a Class B digital device, pursuant to part 15 of the FCC Rules.
These limits are designed to provide reasonable protection against
harmful interference in a residential installation. This equipment
generates, uses and can radiate radio frequency energy and, if not
installed and used in accordance with the instructions, may cause
harmful interference to radio communications. However, there is no
guarantee that interference will not occur in a particular installation.
If this equipment does cause harmful interference to radio or
television reception, which can be determined by turning the
equipment off and on, the user is encouraged to try to correct the
interference by one or more of the following measures:
FCC STATEMENT:
•
•
•
•
This device may not cause harmful interference, and
This device must accept any interference received, including
interference that may cause undesired operation.
1
2
Any changes or modifica�ons not expressly approved by the party responsible
for compliance could void the user's authority to operate the equipment. This
equipment complies with FCC radia�on exposure limits set forth for an
uncontrolled environm ent. This transmi�er must not be co-located or
opera�ng in conjunc�on with any other antenna or transmi�er.
CAUTION:
76
USER MANUAL

AGREEMENTS
By purchasing ROVE Dash Cam, you hereby agree with all the
terms and conditions of warranty, warnings and precautions. If
for any reason you do not agree with these terms, you may return
the product in its original packaging unused within its return
window for a full refund.
This device complies with Industry Canada’s licence‐exempt RSSs.
Operation is subject to the following two conditions:
Le présent appareil est conforme aux CNR d'Industrie Canada
applicables aux appareils radio exempts de licence. L'exploitation
est autorisée aux deux conditions suivantes :
(1) l'appareil ne doit
pas produire de brouillage, et (2) l'utilisateur de l'appareil doit
accepter tout brouillage radioélectrique subi, même si le brouillage
est susceptible d'en compromettre le fonctionnement.
IC STATEMENT:
This device may not cause interference; and
This device must accept any interference, including interfer-
ence that may cause undesired operation of the device.
1
2
77
Video is fuzzy
Please make sure the lens of the camera is clean and there is no dirt or grease
on the windshield also. If the lens is out of focus, we are extremely sorry in
advance. This can be a manufacturing defect. Please send us an email with a
screenshot or a sample video so we can get this resolved for you ASAP.
TROUBLESHOOTING YOUR ROVE™ R2-4K PRO
Camera does not turn ON
Error/Message “Card Full”
Camera Freezing/Lagging or Crashing.
Use the different Included USB Cable & your smart phone’s USB charger.
Now plug it into your home’s 110V wall outlet.
When you plug it in, the camera should turn ON. If NOT, then press the
Power Bu�on Once to see if it turns ON? If it s�ll does NOT turn ON, then
remove the memory card.
Keep the camera plugged in. Now Press the RESET bu�on (Located at the
bo�om) ONCE with a pen’s �p or a paper clip. Now the camera should turn
ON. If it s�ll doesn’t turn ON, then please CONTACT US.
Guys Please TRUST US on this. If your camera is freezing, lagging or does NOT
record video a�er some seconds etc. while opera�ng: Then it is the Memory
Card Issue. Either you are using the WRONG, FAKE or BAD Memory Card.
(Please be aware of the Fake Ones out there. If you have purchased your
memory card from eBay or any third party seller online then it is most likely a
fake one, even though it looks exactly real. Please trust us. We have sold
thousands of ROVE Dash Camera’s and they do NOT lag, we stand by our
prduct and we do extensive tes�ng. Some customers simply thinks the camera
is bad or not stable, but that is NOT the case here. It’s the Memory Card Issue.
Please CONTACT US and we are dedicated in resolving this for you ASAP.
Format card by going into system se�ngs > format > 0K > Select Format > 0K.
Then Go to Video Mode se�ngs > Loop Recording > Choose either I-min,
3-min, 5-min, 10-min. This will allow loop cycle func�on to be turn ON and it
will keep recording over and over.
Forma�ng will delete all the data from the memory card.
NOTE
1
2
3
78
USER MANUAL
microSD Card is crooked or not going in slot easy
My Video playback on PC is lagging.
Please change your G-Sensor Se�ng to higher se�ng. This se�ng depends
on type of car or truck you are driving and how much vibra�on your
car/truck is crea�ng based on suspensions and road condi�on.
Please make sure you align microSD card correctly with gold contacts facing
towards the Lens. (See Page 28)
Camera gets HOT
It is normal for your camera to run slightly hot. Please see temperature guidelines
on page 12.
Please reset your camera. Try upda�ng the firmware again to see if this fixes the
issue. If s�ll having issue, please reach out to customer care.
Camera turns ON / OFF frequently automa�cally.
My oldest video files are missing
Camera Locks many videos automa�cally.
Your ROVE Dash Cam has Loop Cycle Recording. When it is set to either 1, 3, 5 or
10-mins, it will delete oldest files and record newer files over and over when
the memory card is full.
To test again: Set the date and �me correctly, then FORMAT the memory card,
then do the con�nuous recording test again and check if all videos are present.
You are viewing high-bit rate version of video files. Slower PC may have problem
with faster data processing. Please record videos at lower resolu�on and try
again. Contact us if problem s�ll persists.
79

Camera showing "Memory Error" or "Please Insert microSD Card" even
though memory card is already installed into the camera.
Please make sure memory card is at least Class 10, U3 and purchased from
trusted vendor such as Walmart, target, best buy, Ship & Sold by Amazon" etc.
(there are many fake cards out there Online, remember if it's cheap, its fake.)
Now go to camera's system se�ngs and FORMAT your memory card.
(make sure to backup your videos first before forma�ng the memory
card.) A�er forma�ng memory card, please press and hold power bu�on
to turn the camera off. Now unplug power cable, and re-plug the power
cable, camera should now turn ON automa�cally and start recording.
If you s�ll ge�ng the same error, then let’s switch the camera mode to
PHOTO mode by pressing and holding the MENU bu�on. Once in the
PHOTO MODE, press OK bu�on to take the photo.
-> If you hear the shu�er sound > then your camera is fine. Replace your
memory card.
-> If you s�ll get the same memory card error message, then your camera’s
memory card assembly has become defec�ve. Please contact us.
My date and �me is not staying the same even a�er I set date and �me.
First, make sure to charge your camera for at least for 6 hours to have internal
ba�eries charged fully. Please go to camera's system se�ngs > Time Zone Se�ng
> Set your correct GMT value > 0K to confirm. Thats it. Now wait un�l you get GPS
signal LOCK and then every-�me you have GPS signal, you will always have correct
date and �me.
Please visit "
https://greenwichmeantime.com/time-zone/usa/
" to find
your correct GMT �me zone based on your loca�on. (See details on Page. 31)
Please feel free to contact our personalized support at
[email protected]. Most e-mails are typically replied
within 4-6 hours during normal business hours. However, all
questions are answered within 24 Hours. No Exceptions !! For
customer service PHONE SUPPORT number please visit:
https://www.rovedashcam.com
S�ll Need Help or Have Ques�ons?
1
3
2
80
USER MANUAL

Thank you for purchasing your new . Dash Cam.
We hope you find your new dash cam useful and fun to use.
If you are having difficulties setting it up, please email us at
[email protected]. 99% of all setup problems can easily be
resolved and should be able to get you up and running in no time.
In the unlikely event that we can't help, we're always happy to
provide full, hassle-free refund. We just want our customer to be
happy and proud to use Dash Cam!
There is no perfect product, however we will always do our best
to provide perfect customer service to you.
A Great care was taken while creating this user manual. It is
possible that there are minor typos are there. If you find any
mistakes or suggestions, please do let us know so we can correct
it. Please visit our website for latest and updated user manual if
available. We also frequently update other great contents that is
very useful to our customers.
Camera upgrades, firmware, box contents can be changed without
notice. Always see up to date information by visiting our website.
A BIG THANK YOU!!
81
Scan the QR Code to
CONTACT US
Response in just 6 hours
For faster response text us
1 (401) 484-ROVE(7683)
CUSTOMER SERVICE:
QUESTIONS
QUESTIONSQUESTIONS
Mon - Fri 9am-5pm PST
HOURS
Scan to Email US:
Scan to Text US:
1-401-484-7683
This device complies with part 15 of the FCC Rules. Operation is subject to the following two conditions. (1) This device may not cause harmful
interference, and (2) this device must accept any interference received, including interference that may cause undesired operation.
Apple logo, iPhone Model & App Store are trademarks of Apple Inc., Google logo and Google Play are trademarks of Google Inc.
FCC ID: 2A3IW-R2-4KPRO