www.rovedashcam.com
USER MANUAL
Copyright (C) 2019, All rights reserved
TRUTH BE TOLD
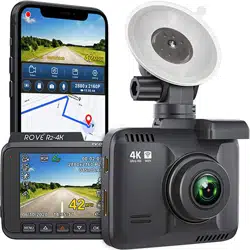
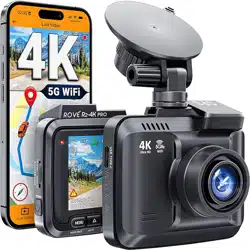
RESOLUTION
G SENSOR
Wi-Fi
APP SUPPORT
ULTRA WIDE
VIEWING ANGLE
SONY
IMX323
SENSOR
SUPER
CAPACITORCAPACITOR
LOOP
RECORDING
TM

GOT
QUESTIONS
Scan the QR Code to Email US
Email US: [email protected]
Scan the QR Code to Text US
Text US: 1-401-484-7683
Simply Scan the QR Code with your
iPhone or Android’s Camera to get in touch with us.
Response in just 6 hours
For faster response text us
1 (401) 484-ROVE(7683)
CUSOTMER SERVICE:

Content Guide
3
4
5
6
7
8
9
11
13
15
16
18
20
23
26
27
30
32
33
Introduction
Important Safety Instructions
Camera Specifications
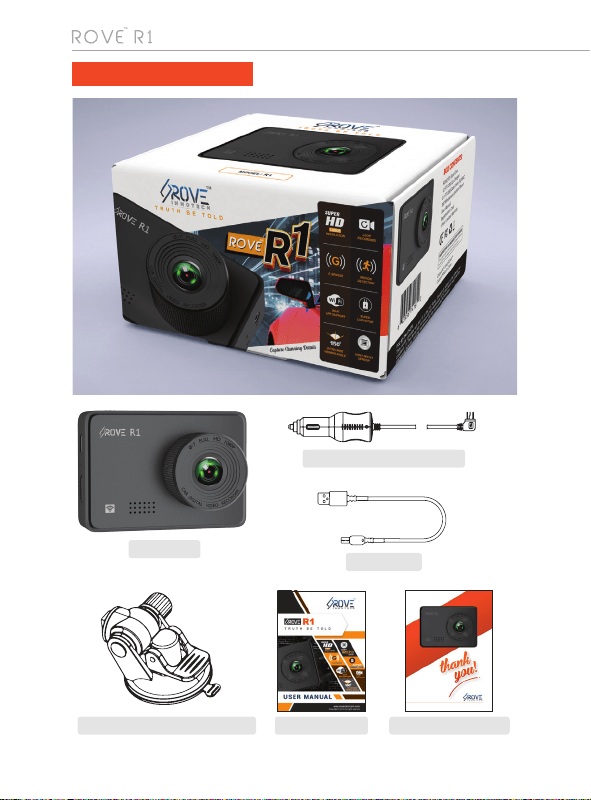
Package Contents
Out Of The Box Instructions
Inserting Memory Card
Installing Your Dashcam
Using Wi-fi Feature
Product Structure
Status Icons: Understanding Status
Understanding Buttons
Understanding 3 – Camera Modes:
Video Settings
Photo Settings
Playback Settings
System Settings
One Year Limited Warranty:
Safety Legal Aspects
Trouble Shooting Your Rove R1 Dash Cam

USER MANUAL
3
INTRODUCTION
Product Overview:
2.45" IPS Screen
Continuous Loop Recording
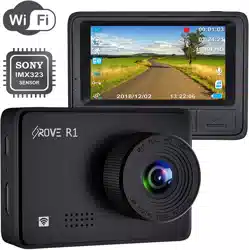
Full HD Camera (1080p@30fps)
Built-in Wi-Fi
Built-in G-Sensor
Built in Super Capacitor (replace of battery)
150° Wide Angle Lens
Motion Detection
Max Supports up to 128GB Class 10, U3 Speed Micro SD Card
Auto-Recording & Auto-Power Off Interface
Supports USB / AV Out
Supports Multi Language
Features
Thank you for purchasing ROVE R1 Wi-Fi enabled Full HD Digital Vehicle
Dash Cam (Automobile Black Box)... Besides seamless loop recording it
provides high quality image capture & irrefutable evidence for what goes on
from the perspective of your dashboard.
This Product is a leading Full HD Digital Vehicle Black Box Recorder.
Equipped with Super-HD 1080P @30fps with Sony IMX 323 Sensor for state
of the art low light sensitivity and high dynamic range which allows you to
record continuous high-quality video playbacks, it brings phenomenal Full HD
resolution videos even at night time without the need for infrared sensors. It
has superior night vision technology which captures super low light during
night time. It has advanced built-in Wi-Fi, G-Sensor, Emergency Video Lock,
Audio Recording, Loop Cycle Recording, Motion Detection, HDMI Output.
When compared to most dash cam, this exclusive product design provides an
elegant appearance, packed with top rated unique features, superb
unbeatable video recording and it is very easy to use.

4
WARNINGS/PRECAUTIONS: Important Safety Instructions
Failure to comply with safety warnings and regulations can result in
serious injury or death.
Do not put the unit in a damp environment. This device is not designed to be
water proof.
Do not try to open the cover or try to repair it yourself. If the accessories for this
device have any problem, please contact the seller for assistance.
This camera is intended to use inside motor vehicle. Don’t install it where it will
block the driver’s view of the road including mirrors or the deployment of airbags.
Do not place the camera loose on top of the dashboard or in-front of the air bags.
Do not mount the camera where it can be a distraction if it became loose and
fall off the windshield while driving.
Do not expose this device to an excessive heat, dust or use any chemical
substance or cleaning solvent to clean this device. Instead use soft moist cloth
for cleaning.
Pay careful attention when cleaning the lens surface. Use a soft, moist cloth to
clean the lens to avoid compromising video quality.
Removing the camera from the vehicle when not in use is recommended. This
prevents likelihood of theft or exposure to excessive heal to prevent damage
to unit.
Do not operate or install the camera while driving, or attempt to change any
setting etc. Pull off the road first and only do so when it is safe.
Do not drop, puncture or disassemble this product.
Do not use the charger if the cord is broken or damaged.
Keep out of reach of children.
Some countries or USA states prohibit drivers from mounting anything on
windshield or prohibit mounting on certain area of the windshield. It is
owner/operator’s responsibility to mount or use of this device incompliance
with local laws.
Do not leave the camera in the direct sunlight for a long period of time or where
temperature could go above 140°F (60°C).
The camera is designed to be used for normal daily commute recording. It is
not made to continuously record 24/7 365 days.
Please read and understand all instructions before using this product. If any damage
is caused by failure to follow the instructions, the warranty will be voided.
The company is NOT responsible for the loss of any data or your content during
operation or in any circumstance.
USER MANUAL
5
CAMERA SPECIFICATIONS
Specifications are subject to change without prior notice
Processor : NOVATEK NT96658 (Built-In 1GB DDR III)
Sensor : Sony Sensor IMX323 (1/2.9 Exmor CMOS)
Display : 2.45" IPS Screen
Camera lens : 150° Wide-Angle Lens (Lens: 6G + 1 IR)
Aperture : F2.0
G-Sensor : Triaxial Acceleration Sensor (DA380)
Operating Voltage : DC 5V 1.5A
Video Resolution : 1080 FHD (1920x1080), 720P (1280x720),
WVGA (848x480), VGA (640x480)
Video Format/Photo : MOV / JPEG
Battery : Super Capacitor Without Battery
Wi-Fi : Built-in (Default Password Is 12345678)
Operating temperature : -10°C (14°F) to 55°C (131°F)
Storage temperature : -20°C (-4°F) to 70°C (158°F)
Operating Humidity : 15% - 60%RH
Dimension : 49 x 72 x 35mm
Record audio : Yes
Frequency : 50 Hz / 60 Hz
Format : Micro-SD Card.
(Minimum Class 10, U1 Speed Required)
6
DashCAM
Windshield Suction Mount User Manual
Car Charger with Cable
Data Cable
PACKAGE CONTENTS
Registration Card

USER MANUAL
7
OUT OF THE BOX INSTRUCTIONS
1
2
3
4
5
6
7
8
GETTING STARTED
Make sure to always keep the camera plugged into the power source,
because ROVE R1 uses Super Capacitor (NOT an internal battery).
You will need to insert a memory card before you can start recording.
Please insert only SAMSUNG Class-10, U3 or higher speed Micro SD card
up to 128GB max for reliable operation. (NOT included in packaging)
Before first time use, we strongly recommend that you format your
memory card in the camera to prevent any errors and for smooth
operation. (See Page 8)
ROVE R1 dash cam is programmed to turn ON and START RECORDING
automatically when it receives the power, and STOPS RECORDING
automatically within 2-3 seconds when the power is disconnected. (i.e.
when you start /stop your car)
Set Date & Time: Please set the correct date and time by going into the
System Settings. (See Page 27)
How to hide power cable inside your car’s dash board?
There are many people has demonstrated on YouTube how and where
to hide power cable inside your car. You can view one of the ways
here, this video is NOT recorded by us.
https://youtu.be/xwD8Ilk-MHU
How to transfer videos to PC/MAC?
Insert memory card directly to your PC/MAC to view or download
them.
You can also connect your camera to your PC/MAC by included short
USB data cable. Select “Connect as USB Flash Drive.
We recommend VLC Media Player to view your videos. You can get it
free at www.videolan.org
Wi-Fi: You can also connect ROVE R1 Dashcam to your smart phone
directly by using built-in Wi-Fi feature. (See Page 13)
Please read and understand warnings & safety instructions first before
operating.
8
FORMATTING MEMORY CARD:
Must use only Brand Name, Class-10, U3 or higher speed Micro-SD Card.
Max support 128GB
We Recommend SAMSUNG Class 10, U3 Speed Micro-SD Card.
You can
purchase it from Amazon here: http://a.co/2tXJzIL
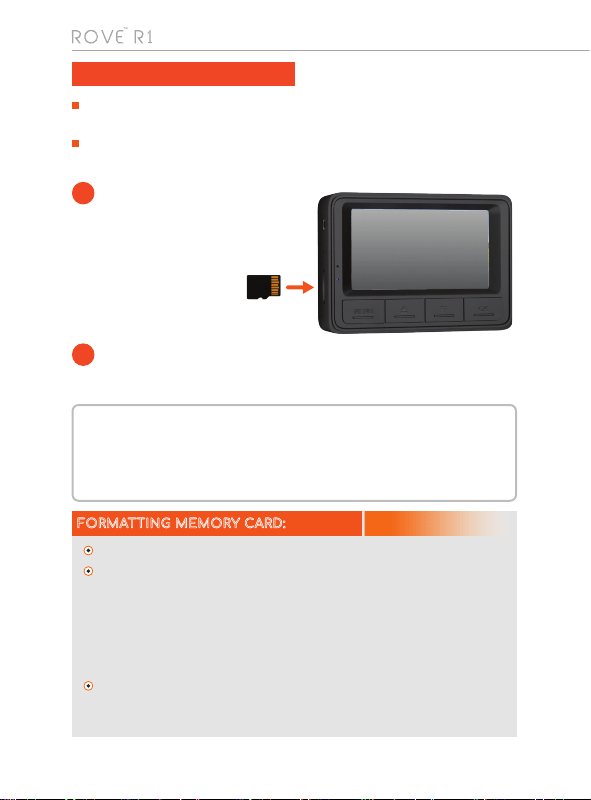
TO INSTALL:
Insert the MicroSD card
halfway in with the gold
contacts facing the LCD
side (back of the
camera). Now gently
push the card
inward until it clicks
and lock in place.
MOST IMPORTANT about Memory CARD: If you experience camera FREEZING or
LAGGING or STOPS Recording after few seconds. Then It is the issue of the MEMORY
CARD. (NOT THE CAMERA ISSUE) - Please Contact US.
Do not remove or insert MicroSD card when the camera is powered on which may
damage the memory card.
1
TO REMOVE:
To remove the MicroSD card, gently push its top edge inward until it
clicks, and then pops out, then simply pull it out of the slot.
2
Please press OK button to make sure the video is stopped recording first.
Then press the MENU button TWO times to go to the camera’s system
settings. > Then press the DOWN button to scroll down until you see format.
>> Then press the OK button to enter format submenu. >>> then press
DOWN button to highlight the FORMAT. >>>> Then press the OK button to
confirm to format the memory card (The formatting process will be super
quick. You will see pop up message “Please Wait” and once it is gone, which
means formatting is complete.).
After FORMATTING is complete, please restart the camera. (Long press
power button for 2-Seconds to turn OFF, and then press the power button
once to turn ON)
INSERTING MEMORY CARD
USER MANUAL
9
INSTALLING YOUR DASHCAM
The camera comes with the default setting which allows you to start using
your camera right out of the box without changing any settings. Make sure to
Format the memory card before first time use. Then, Simply – Follow the
Steps below:
Important Tips:
•
•
•
Before mounting the dash cam, please clean the windshield using alcohol and wipe it
clean with a dry cloth. Make sure not to touch suction surface of the mount. Finger
grease will prevent the mount from getting strong suction grip. The dash cam is NOT
suitable for Completely Vertical Glass. (Need at-least 20° Angle)
Adjust the lens viewing angle to ensure that it is aligned with the road ahead properly.
Hide the charger cable into the seams around the edge of the dashboard.
Insert the Memory Card
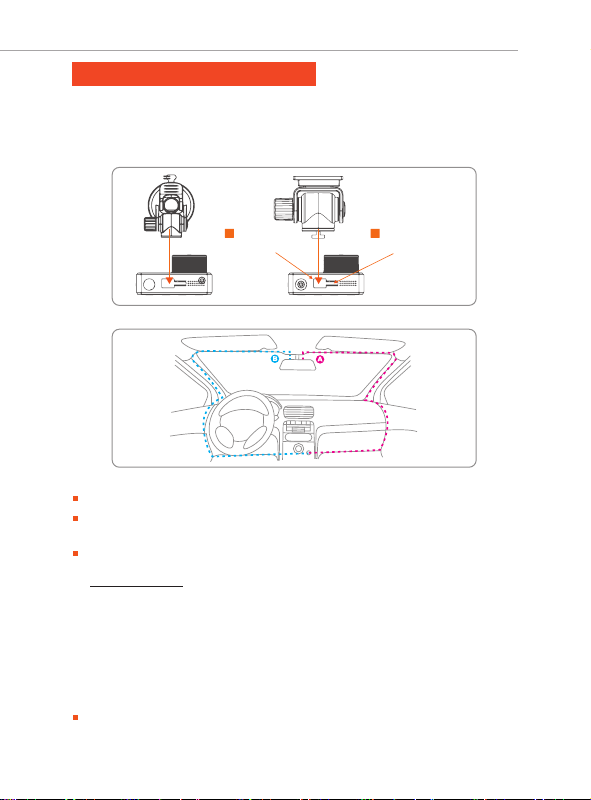
Align the suction mount and the camera into mounting assembly, then slide the mount
towards lock position until it is snug fit. (Image – 1)
Apply the suction mount onto the windshield (Recommended Area: Follow Image – 2)
Image - 1 : Applying Suction Cup
Align the
mount here
Image - 2 : A-B Windshield Area (Rear position of the mirror)
1
Then Slide to
Lock Position
2
Plug in the power cable. Turn ON The Car, SET & GO!
10
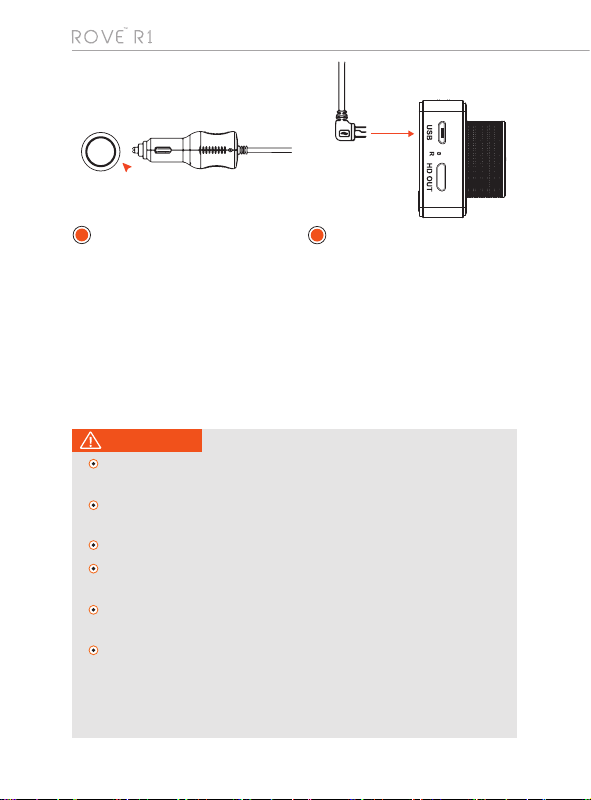
1
2
Charger Cable to Car’s 12V
Cigarette Lighter
Mini USB End to Dash Cam’s
USB Port
You must always connect the camera to a power source while operating the
camera.
Connect the larger end of the car charger cable to your car’s cigarette
lighter (12V DC power outlet).
Connect the other, mini-USB end to the mini-USB port on the camera.
Using incompatible cables or charger can cause serious health injury
or damage your device.
Be sure to only use ROVE approved car charger designed for your
device specifically.
Never install this product while driving.
Make sure that the lens is within the wiping range of the windshield
wiper to ensure a clear view even when it rains.
Do not touch the lens with your fingers. Finger grease may be left on
the lens and will result in unclear or blurry videos.
The mount is a suction mount. Make sure to clean the windshield area
with alcohol wipe to remove the evaporated dashboard grease from
windshield before applying the mount. This will get strong suction
grip. Also do not touch the suction surface of the mount. If its greasy,
then clean it with alcohol wipe before applying.
CAUTIONS
•
•
12V Cigarette
Outlet
USER MANUAL
11
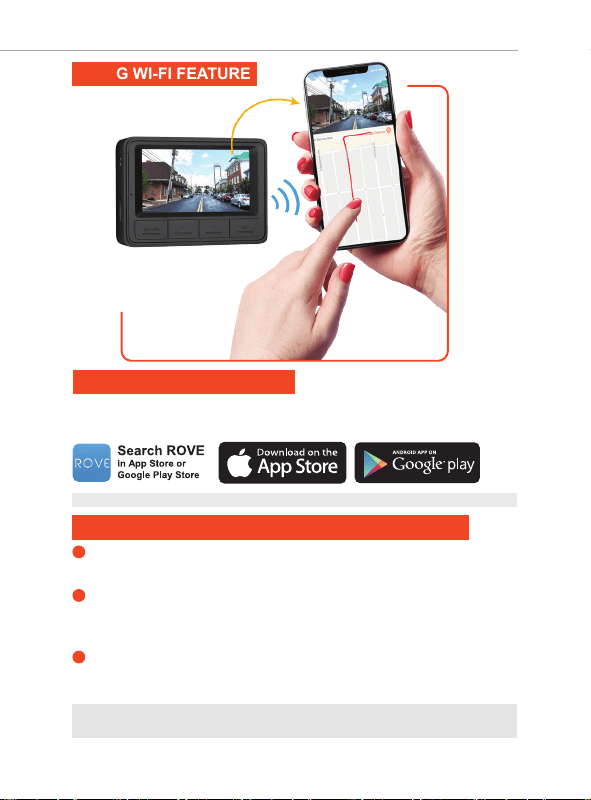
USING WI-FI FEATURE
DOWNLOADING ROVE APP
TURN ON WiFi FROM THE CAMERA: Long press OK Button For 3-Seconds to
turn the WiFi Mode On from the camera.
CONNECT WiFi: Now Simply join the ROVE R1 WiFi by going into your iPhone
or Android phone’s Settings > WiFi > ROVE R1 WiFi. Then Enter the default
password: 1 2 3 4 5 6 7 8
NOW OPEN THE ROVE APP: Once your camera is connected to ROVE WiFi
successfully and when you open the ROVE App, the camera will sync automati-
cally. You should see the live video feed from the camera on the ROVE APP.
Then keep exploring the APP from here on.
1
2
3
Connecting ROVE R1 Dash Cam With Smart Phone
Search for “ROVE” in App Store or Google Play Store to find
the App and then download and install it.
Note: Apple logo & App Store are trademarks of Apple Inc., Google logo and Google Play are trademarks of Google Inc.
NOTE: When wifi is ON, you can only operate the camera from the ROVE APP. If
you want to operate from camera side, then turn OFF the WiFi first.
12
Wi-Fi
On
ROVE R1_44334c9b77
Connected, no Internet
WorldT9875
BkIPMDFx58
ATT7b2V788
ATT9j998Q4
TheCombine
Saved
Saved
ROVE R1_44334c9b77
This network has no Internet access.
Stay connected?
Don’t ask again for this network
NO YES
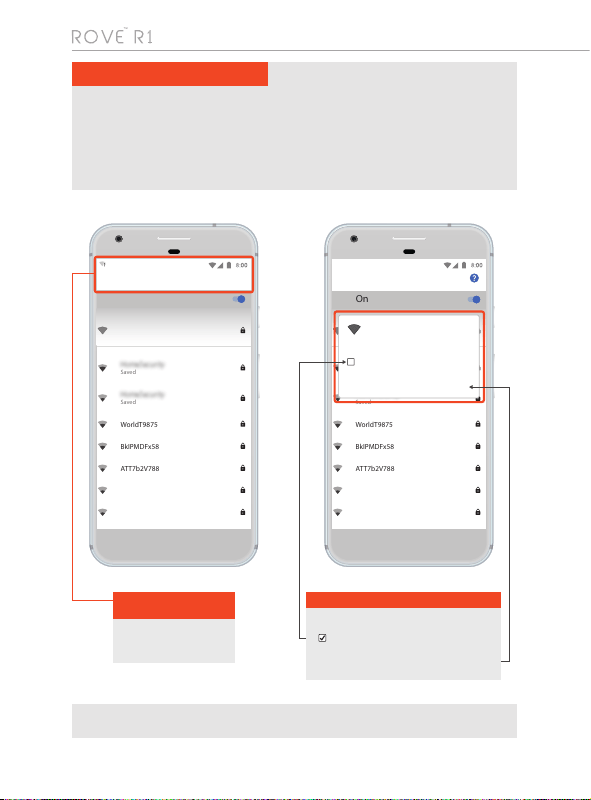
There is one extra step you will have to take. Once you connect to ROVE
R1 WiFi, it will say “No Internet”. Which is fine. You just have to tap on the
pop up notification that will show up in few seconds to select that you still
want to stay connected even though there is NO Internet. Once you select
this OK, you are set to go. Please contact us if you need any help.
Touch here as soon as you
see this notication
Once you enter the default
password for ROVE WiFi and
hit connect, you will see this
pop-up in few seconds.
Once you tap that notification from the LEFT
you will get this screen.
1. Check this box, so your phone
remembers this setting for next time.
2. Then touch YES to stay connected to this WiFi
and save this preference.
Touch here to CHECK this box
FOR ANDROID PHONES
NOTE: If you don’t get the above message, then Turn OFF your WiFi Calling,
Cellular Data and VPN if you are using it. Then try again and it should work.
WorldT9875
BkIPMDFx58
ATT7b2V788
ATT9j998Q4
TheCombine
Saved
Saved
Android System
Wi-Fi has no Internet access
Tap for options
On
ROVE R1_44334c9b77
Connected, no Internet
USER MANUAL
13
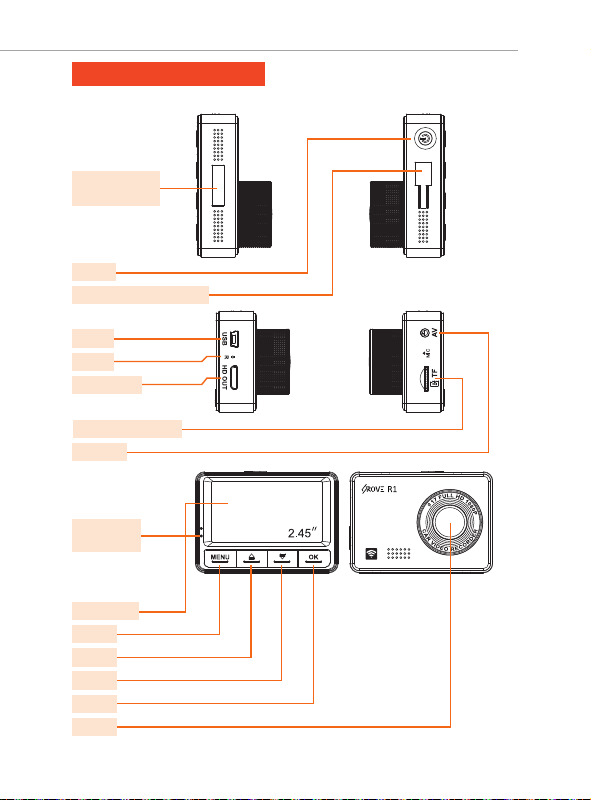
PRODUCT STRUCTURE
Memory Card Slot
Power
Mount Assembly Holder
USB
Reset
HDMI OUT
AV-OUT
Menu
Up
Down
Ok
Lens
IPS Screen
Recording
Status LED
Serial Number
Label
14
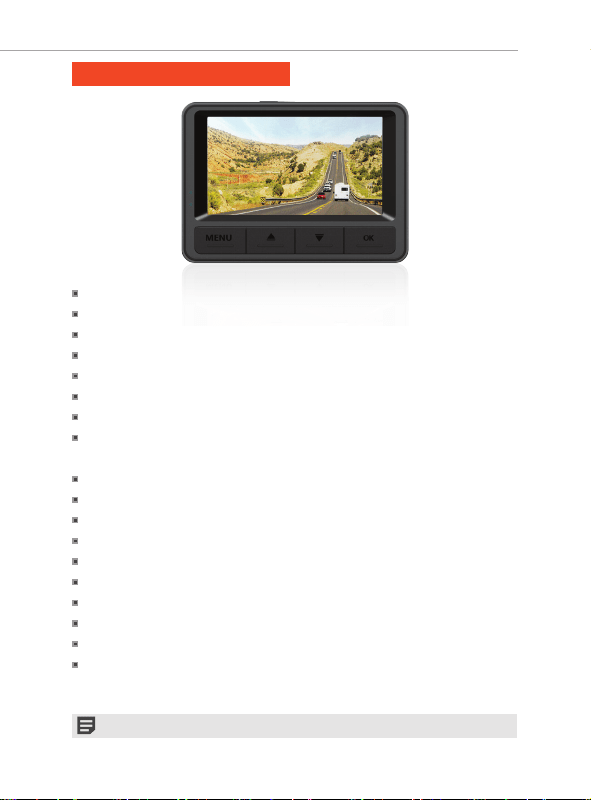
VIDEO SETTINGS
HOME SCREEN
SYSTEM SETTINGS
PHOTO SETTINGS
Still
Capture Mode
Resolution
Sequence
Compression
1
2
3
Still
Sharpness
White Balance
Colour
ISO
AWB
ISO
Still
Exposure
Anti-Shaking
Date Stamp
SYSTEM SETTINGS
WIFI
Date/Time
Time Mode
Auto Power On/Off
SYSTEM SETTINGS
Key Tone
Language
TV Mode
Car Plate
SYSTEM SETTINGS
Screen Saver
Frequency
Storage Space
Format
SYSTEM SETTINGS
Default Setting
Version
VIDEO SETTINGS
G-Sensor
Exposure
Motion Detection
Record Audio
VIDEO SETTINGS
Resolution
Loop Recording
WDR
TIMELAPSE_REC
WDR
FPS
VIDEO SETTINGS
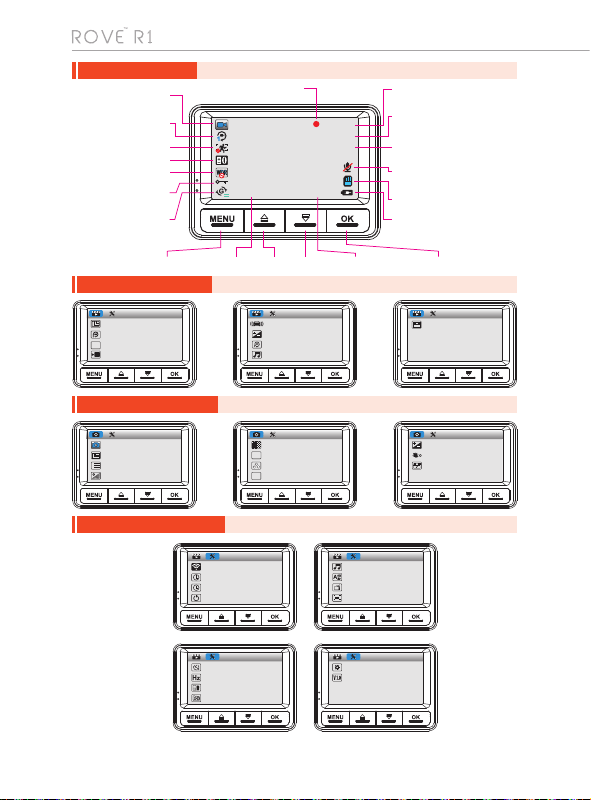
Date Stamp
JUL
20
00:01:03
01:24:21
1080FHD
2018/12/02
13:22:06
Menu Up Down Ok / Confirm
Loop Recording Timer
(Resets every loop)
Total Trip Timer
(Resets when camera/video restarts)
G-Sensor
Video Resolution
Loop Recording
Microphone Indicator
Memory Card Indicator
Power Indicator
Current Date Current Time
Current Video is
being Locked
Exposure Value
WDR
Motion Detection
Video Mode
Recording Status Indicator
(blinking red dot)
USER MANUAL
15
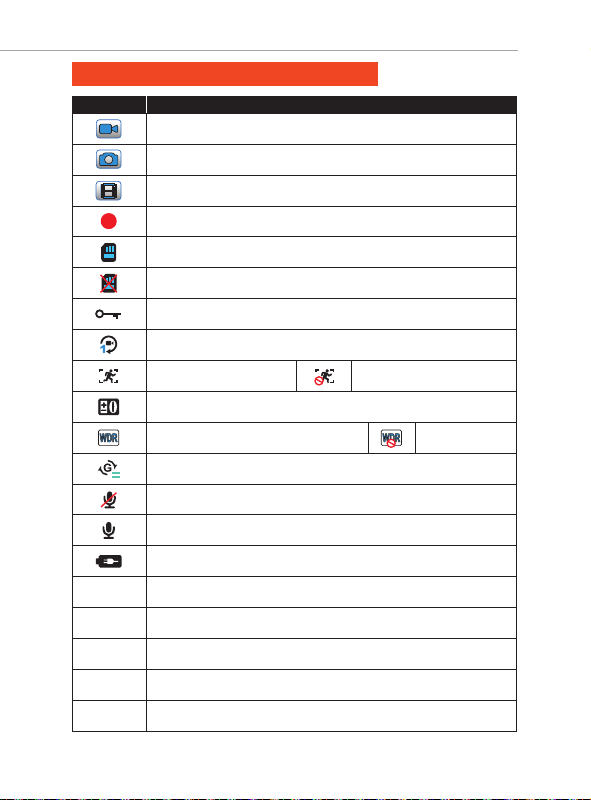
STATUS ICONS: Understanding Status
ICONS WHAT DOES IT MEAN?
Video Mode
Photo Mode
Playback Mode
Blinking Red Dot = Camera Is Recording Video
Micro SD Card Installed
NO Memory Card Installed or Bad Memory Card
Current Loop Video Is Being Locked
Loop Cycle Record Setting
Motion Detection ON
Exposure Setting
WDR = Wide Dynamic Range ON
G-Sensor Setting
Microphone OFF (Mute)
Microphone ON
Power Connected (Blinking)
Loop Timer (Resets Every Loop)
Total Trip Timer (Resets when camera / video restarts)
Video Resolution
Date
Current Time
00:00:00
07:01:02
1080FHD
2018/12/02
13:22:06
Motion Detection OFF
WDR OFF

16
Button Function
Press Once - to confirm a selection
Press Once - to Start/Stop Video recording in Video Mode.
Press Once - to take a snapshot in Photo Mode.
Long Press for 2-Seconds to turn WiFi ON/OFF
Press Once - to turn the camera ON
Long Press for 2-Seconds to turn the camera OFF
UNDERSTANDING BUTTONS
RESET:
Insert paper clip to press the RESET button ONCE to reset
the camera if the camera’s buttons are NOT responding.
R
Press Once - to LOCK the current LOOP Video File
while video is being recorded
Long Press for 2 - Seconds to switch Modes
Press Once - to enter MENU Settings, Press again to switch
to System Settings, then press again to exit the menu.
Press Once - to Scroll UP while in Settings Menu
Press Once - to Mute/Un-Mute Microphone while in Video Mode
Long Press for 3-Seconds to Zoom In while in Video Mode.
Press Once - to Scroll DOWN while in Settings Menu
Press Once - to Turn OFF/ON LCD while in Video Mode
Long Press for 3-Seconds to Zoom Out while in Video Mode
USER MANUAL
17
TURNING ON/OFF YOUR CAMERA
ABOUT SUPER CAPACITOR INFORMATION
AUTO POWER ON/OFF
Super Capacitor is used to generate electricity. Power of R1 Dash Cam is delivered
by a Super Capacitor which is a premium alternative to a lithium-ion battery. This
features an enhanced temperature resistance to hot and cold climates.
Auto Power ON: ROVE R1 Dash Cam is designed to turn ON and start recording
autometically when it receives power. i.e. when the car engine is started.
Auto Power OFF: The camera is also pre-configured to turn itself OFF automati-
cally within few seconds when the power gets disconnected, i.e. when the car
key is turned to LOCK position.
To manually turn ON: Press the power button once.
To manually turn OFF: Press and hold the power button for at least 2 seconds
A capacitor uses conductive plates with an insulating barrier (dielectric) in
between them. The dielectric stops the electrical current entering the capacitor
and this builds up a charge which is stored between the plates.
It charges faster than a battery. The amount of charge a capacitor can hold
depends upon its capacitance or the charge storage capacity.
ROVE R1’s Super Capacitor will hold the charge for about 2 seconds.
MANUAL POWER ON/OFF
How it works?
ROVE R1 dash cam uses a super capacitor which makes it a unique reliable
dash cam on power consumption and safety. Capacitors are more reliable due to
the fact that they are way more resistant to heat unlike batteries; they don’t pose
the risk of overheating and exploding. Super Capacitors extend the overall
product life span and it is built to last.
Why Super Capacitor?
NOTE: If your car’s 12V Outlet is always HOT even when your car is key is locked,
then this auto power on/off feature will not work. To remedy this situation please
contact us.
18
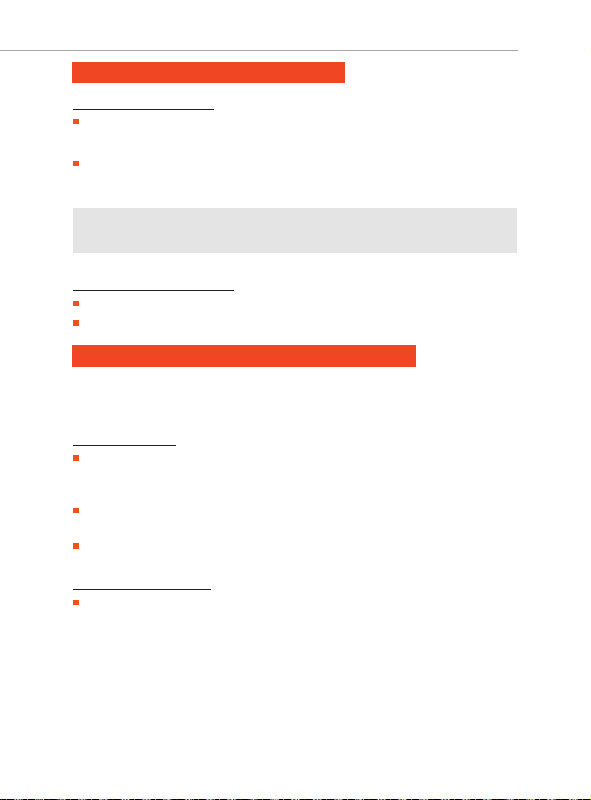
UNDERSTANDING 3 – CAMERA MODES:
1. VIDEO MODE
2. PHOTO MODE
3. PLAYBACK MODE
ROVE R1 has 3 different camera modes:
The “MENU” button will act as two functions. MENU button & MODE button.
MENU Button : Pressing Once (Short) will act as MENU button.
MODE Button : LONG PRESS MENU button for 2-Seconds will act as a MODE Button.
NOTE:
• Each Mode has its own separate Menu Settings.
• System Settings are common between all three Modes.
Lets you take live videos and store
them in the installed Micro SD Card.
VIDEO MODE
00:00:00
1080FHD
2018/12/02
13:22:06
You can’t change any settings from the Menu or Switch Mode while
video is being recorded. Press OK button to STOP Video Recording first if you
prefer to go to MENU or Switch MODES.
TO SWITCH MODE: Long Press the "MENU" button for 2-seconds.
While Under Video Mode:
Dash cam will always start in the video mode every time camera restarts.
Short Press ‘OK’ button to START / STOP video recording manually
(A red dot blinking on top right of screen shows the video recording status)
Short Press UP button to MUTE ON/OFF audio recording with video
Short Press DOWN button to turn the LCD OFF/ON
LONG PRESS and hold UP button for 3-Seconds to Zoom In up to 4X
LONG PRESS and hold DOWN button for 3-seconds to Zoom Out.
•
•
•
•
•
•
USER MANUAL
19
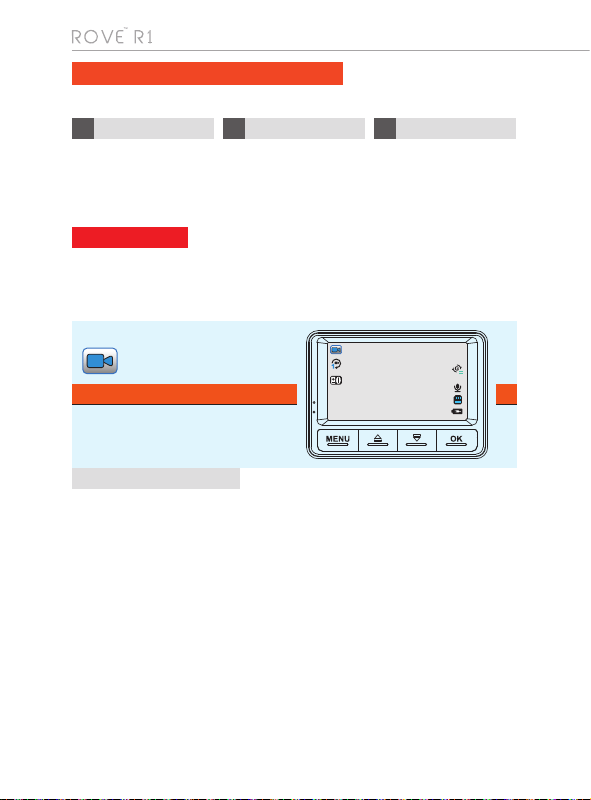
Photo mode lets you take a snapshot.
PHOTO MODE
•
Press OK button to take a SNAPSHOT.
•
Press UP button to ZOOM IN.
•
Press DOWN button to ZOOM OUT.
•
Press Menu Button to enter Photo Settings.
•
Long Press UP button for 2-second to change exposure.
•
Long Press ‘MENU’ Button to switch to playback mode
While Under Photo Mode:
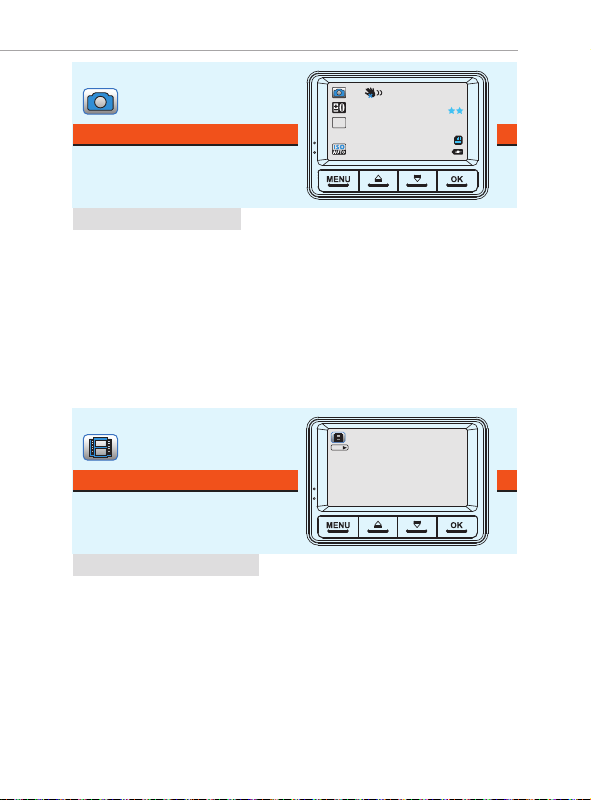
Lets you play your video file or photos.
It can even let you Delete or unlock
any videos while viewing it.
PLAYBACK MODE (Video/Photo)
While Under Playback Mode:
• Press ‘OK’ button to Play/Pause Video.
• Short Press ‘Up’ button to increase speaker volume.
• Short Press ‘Down’ button to lower speaker volume.
• Short Press the ‘MENU’ Button to enter the Playback settings, here you can Delete,
Protect (Unlock/Lock) or Slide Show the files.
• Long Press DOWN button for - 2 Seconds to FF video playback up to 8x
• Long Press UP button for - 2 Seconds to REVERSE FF video playback up to -8x
00000
12M
AW B
OK:
2018_0917_002556_020
1080FHD
09/17/18
00:26
20
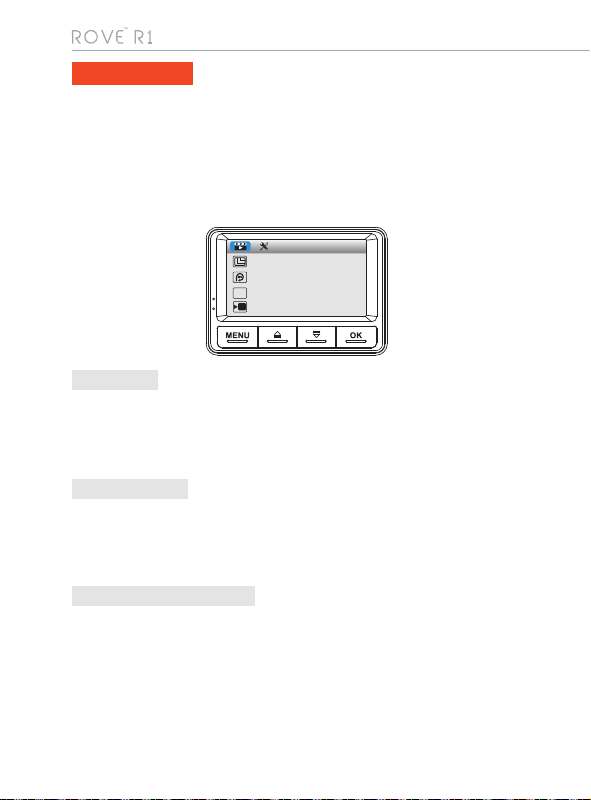
VIDEO SETTINGS
To Enter Video Setting:
•> Make sure you are under Video Mode
•> Press "MENU" button ONCE to enter Video Settings
•> Press "DOWN" button to access video settings.
•>
WDR improves the exposure by taking the combinations of over exposed and under
exposed image into one robust wide range of lighting with Higher depth image.
• 1920 x 1080p FHD (Default)
• 1280 x 720p HD
• 848 x 480p WVGA
• 640 x 480p VGA
• Off
• 1 Minute
• 3 Minutes (Default)
• 5 Minutes
Now use "UP" or "DOWN" buttons to scroll through > then press "OK" button to
enter particular setting > then select the setting you prefer to set > then press
"OK" button again to confirm that setting and go back to video settings menu
1. Resolution
2. Loop Recording
• ON
• OFF (Default)
3. WDR (Wide dynamic Range)
VIDEO SETTINGS
Resolution
Loop Recording
WDR
TIMELAPSE_REC
WDR
FPS
USER MANUAL
21
Adjust video exposure setting for either brighter or darker video according to your
preference.
• 0.0 (Default) Camera will set exposure automatically.
• -2,-1.7,-1.3, -1.0, -0.7, -0.3, 0.0, +0.3, +0.7, +1.0, +1.3, +1.7, +2
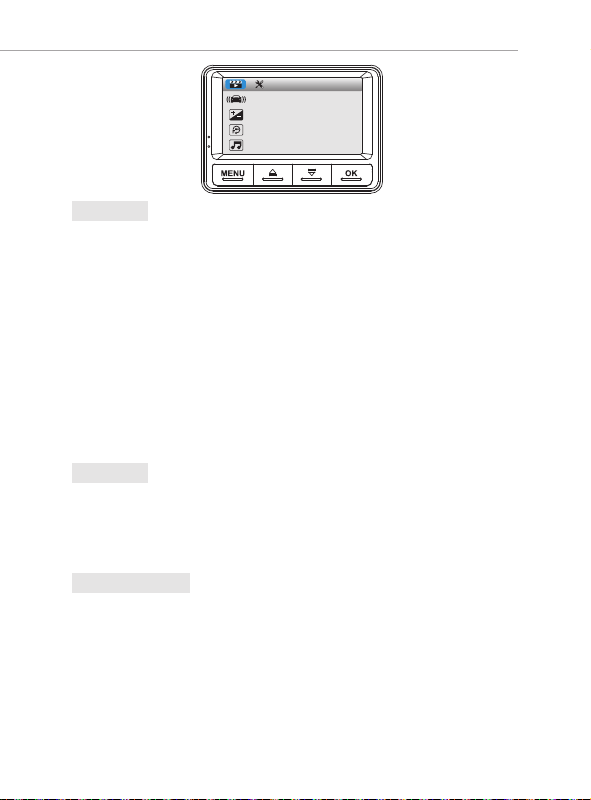
5. Exposure
CAUTION: Motion detection is designed to work only when you are parked and
camera/car is NOT moving continuously. NEVER have this feature (Motion
Detection) Turned ON during driving. Otherwise you will have missing video seconds.
It is NOT designed to work while driving or commuting.
Motion Detection is designed to create surveillance in front of your car while you are
away.
6. Motion Detection
Off / Low / Medium / High
Default is ‘Medium’
G-Sensor is a 3-axis impact gravitational accelerometer which is designed to detect
physical and gravitational forces on the camera.
While Video is Being Recorded: In the event when G-Sensor is triggered due to
physical or gravitational impact force on the camera, the current Loop cycle length of
video file will be locked so it will NOT be deleted by Loop cycle function.
CAUTION: In the event of an accident please make sure you retrieve your footage
before using your camera again to prevent the loss of important Video file due to the
loop cycle function, in case the force was minor which did NOT trigger G-Sensor to
lock video file automatically. It is best practice and recommended for you to retrieve
all necessary video footage after any event of accident before using your camera to
prevent loss of vital video file.
4. G-Sensor
VIDEO SETTINGS
G-Sensor
Exposure
Motion Detection
Record Audio
• OFF (Default)
• ON
22
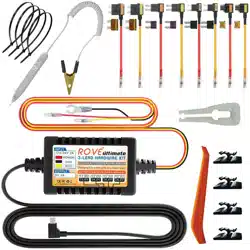
To use this feature, you will need to HARD-WIRE your dash cam with your car’s fuse
box, and connect it to to the socket that provides continuous power even when your
car is turned OFF & LOCKED. A separate purchase of “Mini-USB Hard Wire Kit with
Battery Voltage Meter” is required. You can purchase this from Amazon for about
$10-$15.
By hard wiring your dash cam to always hot power connection, your camera will NO
longer turn on and start recording & off automatically as before. Because now the
camera will always have power supply so this auto turn on/off feature will not work.
You will need to turn ON/OFF camera manually by utilizing the power button.
When you prefer to turn ON Motion Detection: Make sure you are not driving and
parked. Then make sure “Auto Power On/Off& Screen Saver” feature under the
system settings is set to OFF. It is also recommended to keep “LCD ON/OFF
Setting” set to 1-min” so your camera’s LCD will stay off during motion detection to
conserve car’s battery. Now go to video settings and turn ON motion detection.
Please note that camera will stay on the whole time and it will only record when
motion is detected in front of the camera in close proximity, and it will stop recording
automatically when there is no more.
IMPORTANT: Now before you start driving again, please make sure to turn OFF the
motion detection first, then Press OK button to START recording video, so you will
have continuous video recording while you are on the road.
Then repeat the step #4 and step #5 as you want to utilize the motion detection.
ROVE R1 has built in microphone to record audio with video. You can choose to
record mute video by choosing OFF. You can also press UP Button to mute/un-mute
while video is being recorded.
• OFF
• ON (Default)
7. Record audio
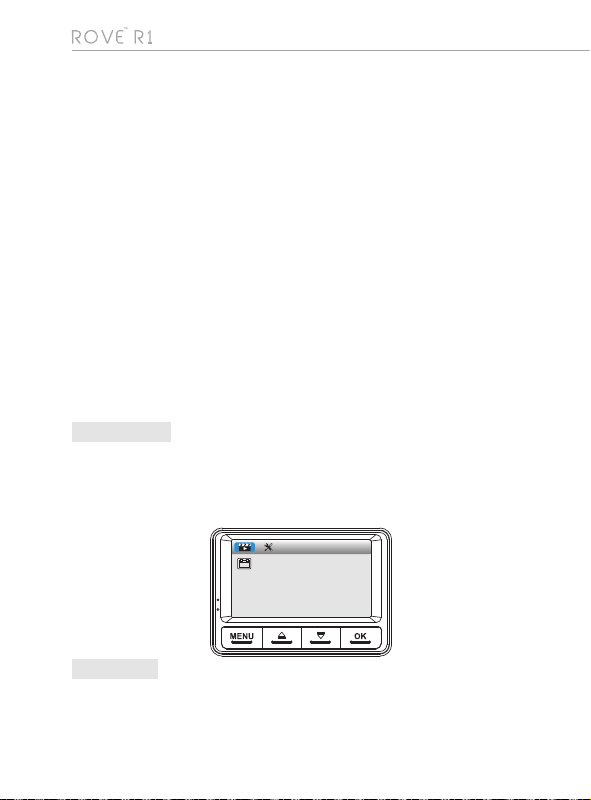
This option allows you to turn ON/OFF the Date Stamp on the bottom of the video.
• OFF
• ON (Default)
8. Date stamp
VIDEO SETTINGS
Date Stamp
JUL
20
If you prefer to use Motion Detection feature, please note the following.
1)
2)
3)
4)
5)
6)

USER MANUAL
23
PHOTO SETTINGS
To Enter Photo Setting:
•> Press & Hold “MENU” button to enter Photo Mode.
•> Press “MENU” button ONCE to enter Photo Settings.
•> Press “DOWN” button to access photo settings.
•>
Now use "UP" or "DOWN" buttons to scroll through > then press "OK" button to
enter particular setting > then select the setting you prefer to set > then press
"OK" button again to confirm that setting and go back to photo settings menu.
Here you can choose take single shot snapshot or set self timer according to your
preference.
1. Capture Mode
Here you can choose your desired photo resolution. Higher the resolution Better the
pixel resolution for captured image.
• 12M 4032 x 3024 (Default)
• 10M 3648 x 2736
• 8M 3264 x 2448
• 5M 2592 x 1944
• 3M 2048 x 1536
• 2M HD 1920 x 1080
• 1.3M 1280 x 960
• VGA 640 x 480
This feature will allow you to review each image immediately after capture for desired
setting before taking next image.
• OFF (Default)
• 2-Seconds
• 5-Seconds
2. Resolution
3. Sequence

24
This feature allows you to choose the clarity of an image sharpness.
• Strong
• Normal (Default)
• Soft
This feature allows you to choose color effect for captured image.
• Color (Default)
• Black & White
• Sepia
This feature allows the image stabilizer function to reduce blur of a captured image.
• OFF
• ON (Default)
This feature allows you to adjust the warmth of a light on an image for various
environments.
• Auto (Default)
• Daylight
• Cloudy
• Tungsten
• Fluorescent
5. Sharpness
This feature allows you to set the camera's sensitivity to light when taking photos.
The higher the setting value the greater the sensitivity.
• Auto (Default)
• 100
• 200
• 400
8. ISO
4. Compression
6. White Balance
7. Color

USER MANUAL
25
This feature enables the image stabilizer function to reduce blur of captured images
• Fine (Default)
• Standard
• Commonly
This feature allows you to adjust the brightness of a captured image.
• 0.0 (Default)
• 2,-1.7,-1.3, -1.0, -0.7, -0.3, 0.0, +0.3, +0.7,+1.0, +1.3,+1.7, +2
This feature will automatically apply a date and/or time stamp to captured images.
• OFF
• ON (Default)
9. Exposure
10. Anti-Shaking
11. Date Stamp

26
PLAYBACK SETTINGS
To Enter Playback Setting:
•> Press & Hold "MENU" button two times to enter Playback Mode.
•> Press "MENU" button ONCE to enter Play Settings.
•> Press "DOWN" button to access Play settings.
•>
Now use "UP" or "DOWN" buttons to scroll through > then press "OK" button to
enter particular setting > then press "OK" button again to confirm that setting and
exit to playback settings menu.
This menu will allow you to delete current video or Delete All.
• Delete Current
(Delete current video file on LCD)
• Delete All
CAUTION: These will Delete Entire Video & Photos from Memory card-Except the protected files.
1. Delete
This feature will allow you make desired changes to saved video & photo files on
memory card.
• Lock Current
• Unlock Current
• Lock All
• Unlock All
2. Protect
This feature allows you to view slide show of your captured photo images from
memory card.
• 2 Seconds
• 5 Seconds
• 8 Seconds
3. Slide Show
USER MANUAL
27
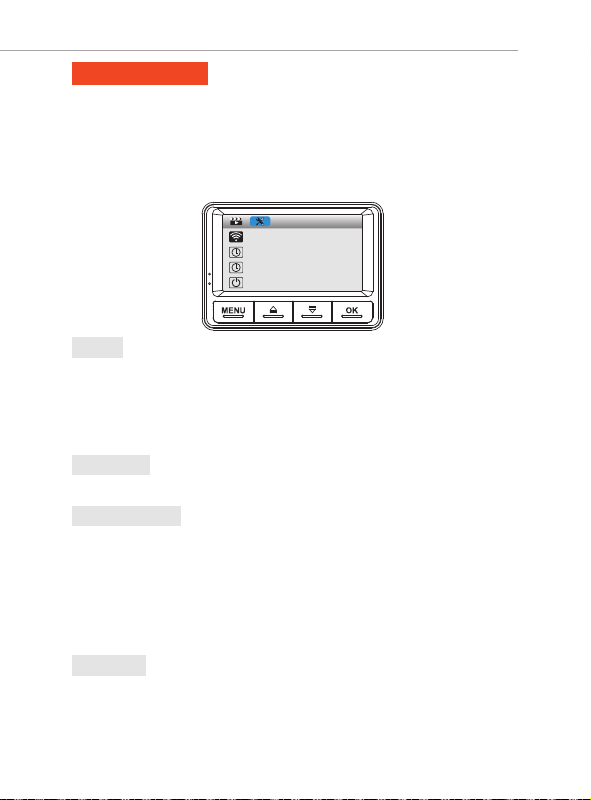
SYSTEM SETTINGS
WIFI
Date/Time
Time Mode
Auto Power On/Off
SYSTEM SETTINGS
To Enter Playback Setting:
•> Press "MENU" button two times to enter System Settings.
•> Press "DOWN" button to access System Settings.
•>
Now use "UP" or "DOWN" buttons to scroll through > then press "OK" button to
enter particular setting > then select the setting you prefer > then press "OK"
button again to confirm that setting and go back to System Settings menu.
This feature will allow you to turn Wi-Fi broadcast ON.
Shortcut: Long Press OK button for 2-Seconds to turn wifi ON/OFF
Default Password = 12345678
• ON
• Off (Default)
1. Wi-Fi
This feature allows the device to be turned OFF automatically based on desired
settings below, when video is not being recorded and camera is idle for that amount
of time.
• OFF (Default)
• 03- Minutes
• 05- Minutes
• 10- Minutes
3. Auto Power Off
This feature allows you to turn ON/OFF camera button's beep sound
• OFF
• ON (Default)
4. Key Tone
Tap to adjust the value >> tap to next option >> tap to save
2. Date/Time
28
SYSTEM SETTINGS
Key Tone
Language
TV Mode
Car Plate
This setting allows you to choose your desired language setting for camera
• English (Default)
• French
• Spanish
• Portuguese
• Deutsch
• Italian
• Simplified Chinese
• Traditional Chinese
• Russian
• Japanese
• Thai
• Polish
5. Language
Here you can choose your TV mode based on your country's AV setting
• PAL (Default)
• NTSC
6. AV Out
By turning ON this feature, the camera will automatically turn the display screen off.
• Off (Default)
• 1 Minute
• 3 Minutes
• 5 Minutes
7. LCD ON / OFF Setting
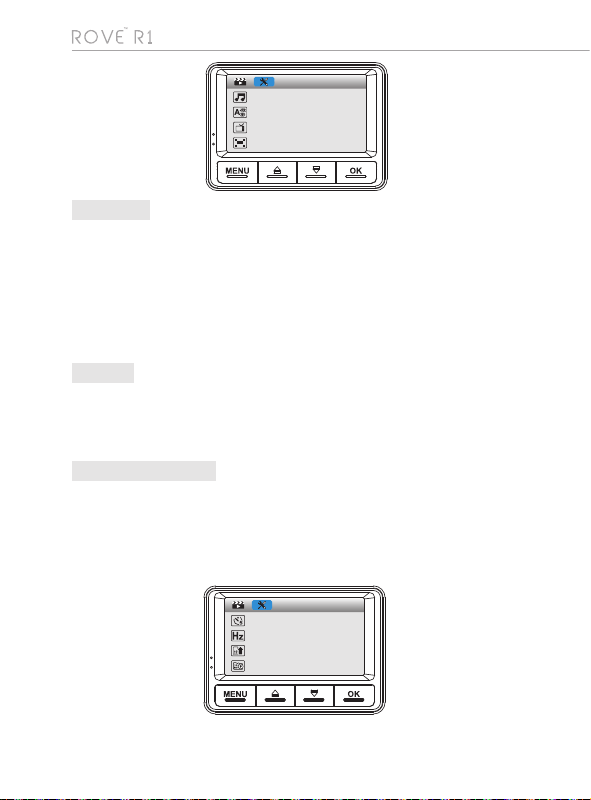
SYSTEM SETTINGS
Screen Saver
Frequency
Storage Space
Format
USER MANUAL
29
Here you should choose the frequency accordingly to your power supply specifica-
tion used in your country based on your geographical location.
• 60 Hz - USA-North America
• 50 Hz - Europe- Most Asian Countries (Default)
8. Frequency
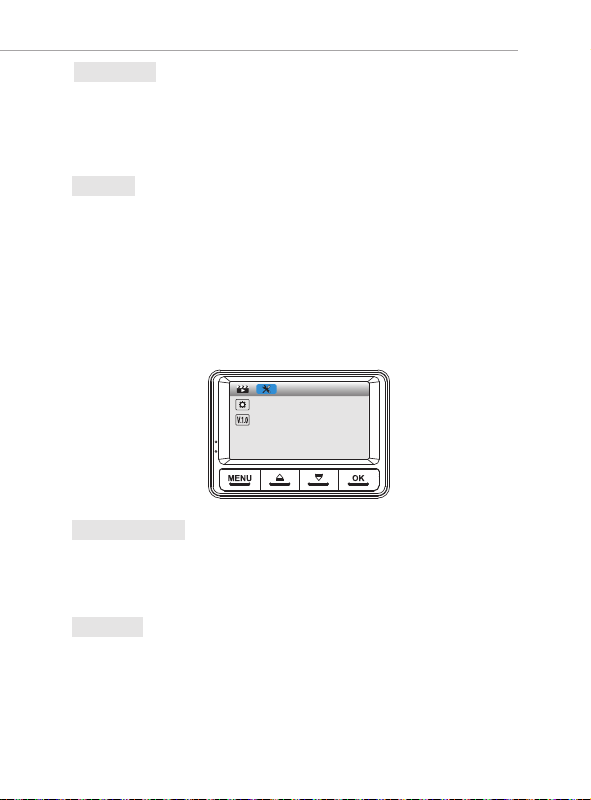
Here you can restore all the settings to factory default settings.
ROVE-R1-01012019 (First Original Firmware)
Performing this operation will format the memory card, deleting all the data. (NOT
Retrivable)
It is recommended that you keep an eye on your memory card periodically to make
sure recording optimally.
We recommend you format the memory card every 3 months to keep it clean and for
smooth operation.
Please note that memory cards have their life span, after so many user of over writing
data they will become in operable. When that happens, please replace your memory
card.
• Cancel
• OK
10. Default Setting
9. Format
10. Version
SYSTEM SETTINGS
Default Setting
Version
30
ONE YEAR LIMITED WARRANTY:
IMPORTANT:
1.
2.
3.
4.
5.
6.
7.
8.
We at ROVE Innotech would like to provide One (1) full year of limited warranty for
your product from the date of purchase to be free from defects in materials and
craftsmanship.
Please save your warranty/serial number card as an evidence. Proof of original
purchase is required for any warranty service. (Online order receipt is also
accepted)
The warranty is confined to the first purchaser of the product and is not
transferable.
Service / Repairs during warranty period shall be carried out by company
authorized personnel only.
It is the responsibility of the purchaser to bring the product to the
authorized service center at purchaser’s cost and risk.
The company will not be liable for any hardware and / or data loss arising
from the use of any third party soware whether downloaded or
otherwise.
In the event of repairs and / or replacement of any part(s) of the product
this warranty will remain in force only for the unexpired period of the
warranty.
In case of any physical damage to the product and / or misuse detected by
the Authorized service center personnel, the warranty will be void and
service / repairs will be done on chargeable basis only and subject to
availability of parts.
The company’s obligaon under this warranty shall be limited to repair or
providing replacement of part(s) only. The maximum claim(s) if entertained
by the company will be subject to the maximum retail price of the product
purchased or the purchase price, whichever is lower and on producon of
original proof of purchase.
During the warranty period in the event of any unforeseen circumstances
where spares not available a commercial soluon in lieu of repairs will be
calculated based on company’s providing depreciaon rules and the same
will be applicable for the purchaser.

USER MANUAL
31
LIMITATIONS / DISCLAIMER OF WARRANTY / LIABILITY:
9.
10.
1.
2.
3.
4.
The replacement unit will be either new or refurbished based on the
availability. We reserve the right to even upgrade you to the newest
version be it similar or not if we have disconnued the current model.
Product specificaons are subject to change without prior noce. All
trademarks, logos, brands and product names are properes of their
respecve owners. All product features specified are as per ideal test
condions. No claims / damages shall arise directly or indirectly for
nonperforrnance / under performance of one or more features specified.
MRP is subject to change from me to me due to various factors.
Company shall not be liable/responsible directly or indirectly for any claim
for compensaons, damages, any losses etc. under this “Limited Warran-
ty” due to inconvenience, loss of me, loss of profits, loss of business
opportunity, loss of data, loss of goodwill, work stoppage, any personal
and / or commercial loss, compensaon for mental agony, anxiety etc.
resulng from the use of the product(s) or any direct or indirect loss of any
nature whatsoever (incl. any personal injury or death).
Except for the warranes set forth herein, company disclaims all other
warranes, expressed or implied or statutory, including but not limited to
the implied warranes of merchantability or fitness for a parcular
purpose.
The maximum liability of company under any circumstances shall be
limited to an amount equal to the invoice amount paid by the purchaser to
company or a company authorized reseller for the Product(s).
Company shall not be liable directly or indirectly for any claim for compen-
saon if the Product has been exposed to moisture and / or dampness and
/ or extreme thermal and / or extreme environmental condions or to
rapid changes in such condions, to corrosion, to oxidaon, to spillage of
food or liquid or to influence from external chemical products.
ROVE Innotech (here in aer referred to as “the company”) guarantees to the
purchaser that this product carries a warranty for the period menoned above,
commencing from the date of purchase.

32
AGREEMENTS:
SAFETY LEGAL ASPECTS
•>
•>
•>
Please check your local or state laws before using in car recording device.
It is user's responsibility to comply with all local and state laws.
ROVE R1 Dash Cam must be placed at proper location so it does not
obstruct your view whiie driving.
Do not use or manipulate any functions or any accessories of ROVE Dash
Cam while driving. Distraction is a leading cause of accidents.
Ail rights are reserved. reproduction, transfer, distribution of the contents
herein in any manner without the prior written permission of ROVE
Innotech is prohibited. ROVE Innotech reserves the right to add, modify
or delete, any of the contents herein or withdraw this documents at any
time without prior notice and without assigning any reasons thereof. For
detailed terms and conditions refer www.rovedashcam.com
By purchasing ROVE Dash carn, it is assumed that by default you agree
with all the terms and conditions of warranty, warnings and precautions.
If for any reason you do not agree with these terms, you may return the
product in its original packaging unused within its return window for a full
refund.
USER MANUAL
33
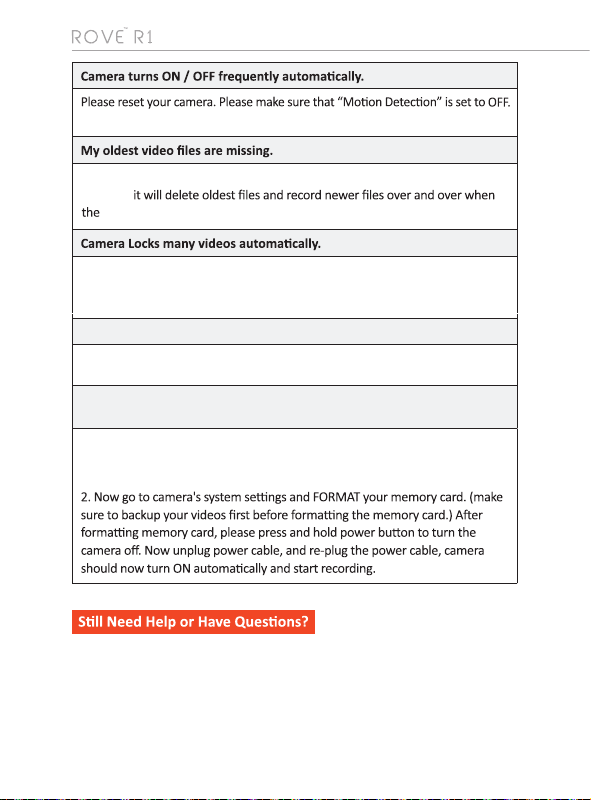
Camera gets HOT
It is normal for your camera to run slightly hot. Please see temperature
guidelines.
TROUBLE SHOOTING YOUR ROVE R1 DASH CAM
Camera does not turn ON
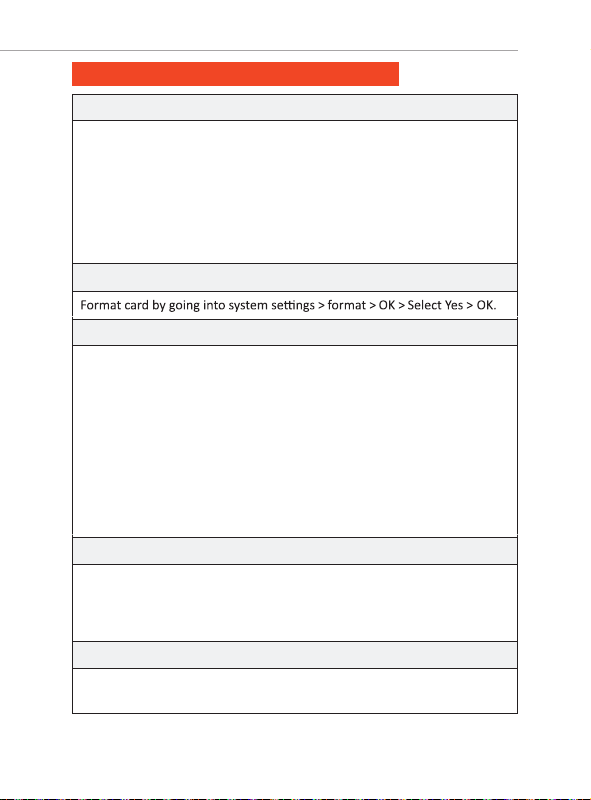
Error/Message “Card Full”
Camera Freezing/Lagging or Crashing.
Video is fuzzy
1. Use Included USB Cable & your smart phone’s charger. Now plug it into
your home’s wall outlet.
2. When you plug it in, the camera should turn ON. If NOT, then press the
Power Buon Once to see if it turns ON. If it sll does NOT turn ON, then
remove the memory card.
3. Keep the camera plugged in. Now Press the RESET buon ONCE with a
pen’s p or a paper clip. Now the camera should turn ON. If it sll doesn’t
turn ON, then please CONTACT US.
Guys Please TRUST US on this. If your camera is freezing, lagging or does
NOT record video aer some seconds etc. while operang: Then it is the
Memory Card Issue. Either you are using the WRONG, FAKE or BAD
Memory Card. (Please be aware of the Fake Ones out there. If you have
purchased your memory card from eBay or any third party seller online
then it is most likely a fake one, even though it looks exactly real. Please
trust us. We have sold thousands of ROVE Dash Camera’s and they do NOT
lag, we stand by our prduct and we do extensive tesng. Some customers
simply thinks the camera is bad or not stable, but that is NOT the case
here. It’s the Memory Card Issue. Please CONTACT US and we are
dedicated in resolving this for you ASAP.
Please make sure the lens of camera is clean and there is no dirt on windshield
also. If the lens is out of focus, we are extremely sorry in advance. This can be a
manufacturing defect. Please send us an email with a screenshot or a sample
video so we can get this resolved for you ASAP.
34
Micro SD Card is crooked or not going in slot easy
Camera showing "Memory Error" or "Please Insert Micro SD Card" even
though memory card is already installed into the camera.
1. Please make sure memory card is at least Class 10, U3 and purchased from
trusted vendor such as Walmart, target, best buy, Ship & Sold by Amazon" etc.
(there are many fake cards out there Online, remember if it's cheap, its fake.
Please change your G-Sensor Seng to higher seng. This seng depends
on type of car or truck you are driving and how much vibraon your
car/truck is creang based on suspensions and road condion.
Please make sure you align microSD card correctly with gold contacts facing
towards the Lens.
Your ROVE Dash Cam has Loop Cycle Recording. When it is set to either 1, 3, 5 or
10-mins,
memory card is full.
Most e-mails are typically replied within 4-6 hours. However all quesitons are
answered within 24 Hours. No Excepons
For faster response, we recommend
that you please text us at 1-401-484-ROVE (7683).
Please visit http://www.rovedascam.com
USER MANUAL
35
A BIG THANK YOU....!!
Thank you for purchasing your new ROVE R1 Dash Cam. We hope you find your new
dash cam useful and fun to use.
If you are having difficulties setting it up, please email us at [email protected].
99% of all setup problems can easily be resolved and should be able to get you up
and running in no time.
In the unlikely event that we can’t help, we’re always happy to provide full, hassle-free
refund. We just want our customer to be happy and proud to use ROVE Dash Cam!
There is no perfect product, however we will always do our best to provide perfect
customer service to you.
A great care was taken while creating this user manual. It is possible that there are minor
typos are there. Please visit our website for latest and updated user manual if available. We
also frequently update other great contents that is very useful to our customers.
Camera upgrades, firmware, box contents can be changed without notice. Always see up to
date information by visiting our website.
This is the very first version of this user manual we wrote for ROVE R1 As we are dedicated
in keep improving this model by firmware updates and more features adition. Therefore it is
possible that some things are not included or not matching.
We will update our manual very soon. However if you have any questions please do not
hasitate to reach out to us. We are always happy to help.
This product complies with the radio interface requirements of the European
Community.
This symbol means the product must not be discarded as household waste, and
should be delivered to an appropriate and recycling helps protect natural resources,
human health and the environment. For more information on disposal and recycling of
this product, contact your local municipality, disposal service, or the shop where you
bought this product.
This device complies with part 15 of the FCC Rules. Operation is subject to the
following two conditions: (1) This device may not cause harmful interference, and (2)
This device must accept any interference received, including interference that may
cause undesired operation
NOTICE:
USER MANUAL DESCLAIMER:
•>
•>
•>
•>
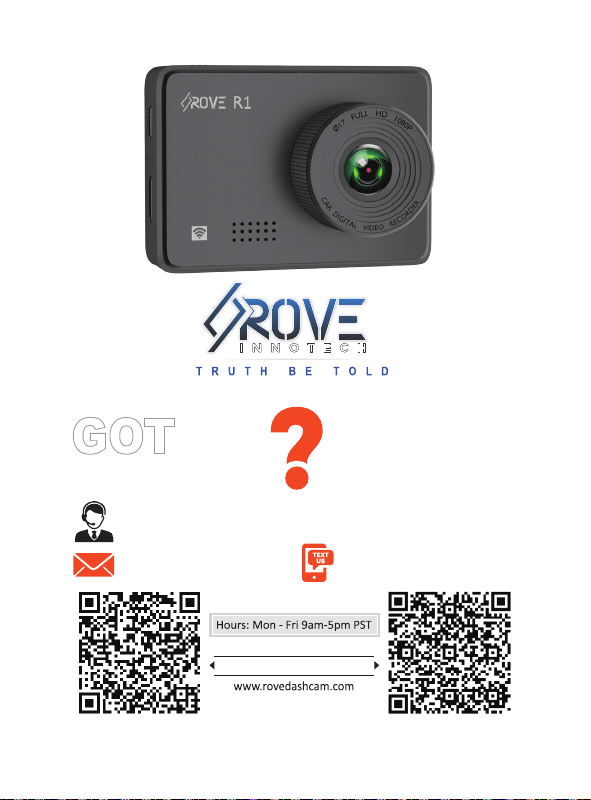
Scan to Email US:
help@rovedashcam.com
Scan to Text US:
1-401-484-7683
Scan the QR Code to CONTACT US
GOT
QUESTIONS
Response in just 6 hours
For faster response text us
1 (401) 484-ROVE(7683)
CUSOTMER SERVICE: