Loading ...
Loading ...
Loading ...
9
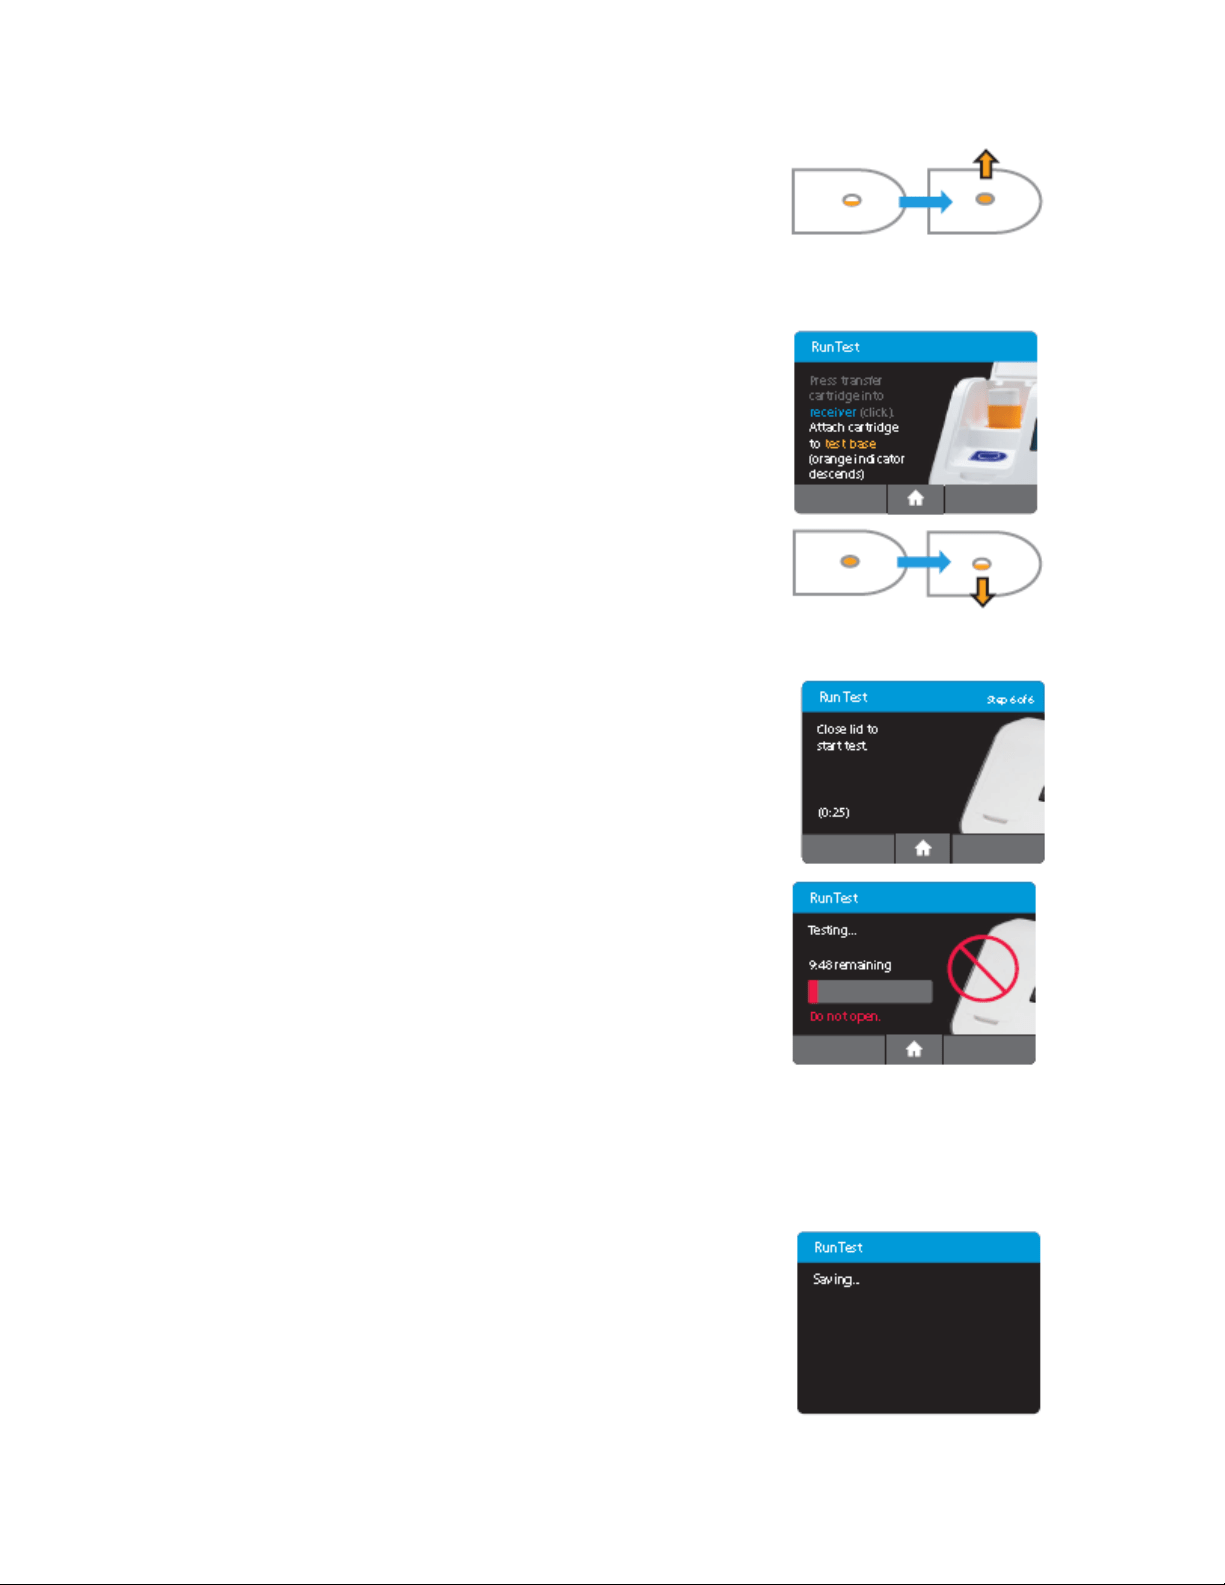
Cartridge will rise. If the orange indicator does not rise,
continue pushing onto the Sample Receiver until it does.
Caution: The orange indicator should be observed
closely. If the orange indicator does not fully rise,
the Transfer Cartridge may not collect enough
sample.
Step 5b
Lift and then connect the Transfer Cartridge to the
Test Base
When the Transfer Cartridge is properly attached to the Test
Base, the orange indicator on the Transfer Cartridge will
descend. If the orange indicator does not descend, continue
pushing onto the Test Base until it does.
Caution: If the orange indicator does not fully
descend, not enough sample will be dispensed.
This may potentially result in invalid or false test
results.
Step 6
Close the Lid.
DO NOT OPEN THE LID until the Test Complete
message appears on the screen.
Note: The test will be cancelled if the lid is opened.
Caution: This screen will be displayed for up to 30
seconds once the Transfer Cartridge is detected. If
the instrument does not detect that the lid has been
closed by then, it will time out and all test pieces
(Sample Receiver, Test Base, and Transfer
Cartridge) must be removed and discarded. The
instrument will proceed to the Home screen.
Collect a new sample from the patient. Press Run
Test and restart the test using a new Test Base and
Sample Receiver.
Caution: DO NOT OPEN THE LID. The test will be
cancelled and all test pieces (Sample Receiver, Test
Base, and Transfer Cartridge) must be removed and
discarded. A test result will not be reported or saved
in the instrument memory.
When amplification and detection is complete, the
instrument will automatically save the data before
advancing to the re sults screen.
Caution: The test is not saved until the completed
result is displayed. Do not open the lid until the
results are displayed.
Loading ...
Loading ...
Loading ...